Creamy Garlic Tuscan Salmon Rich and Flavorful Meal

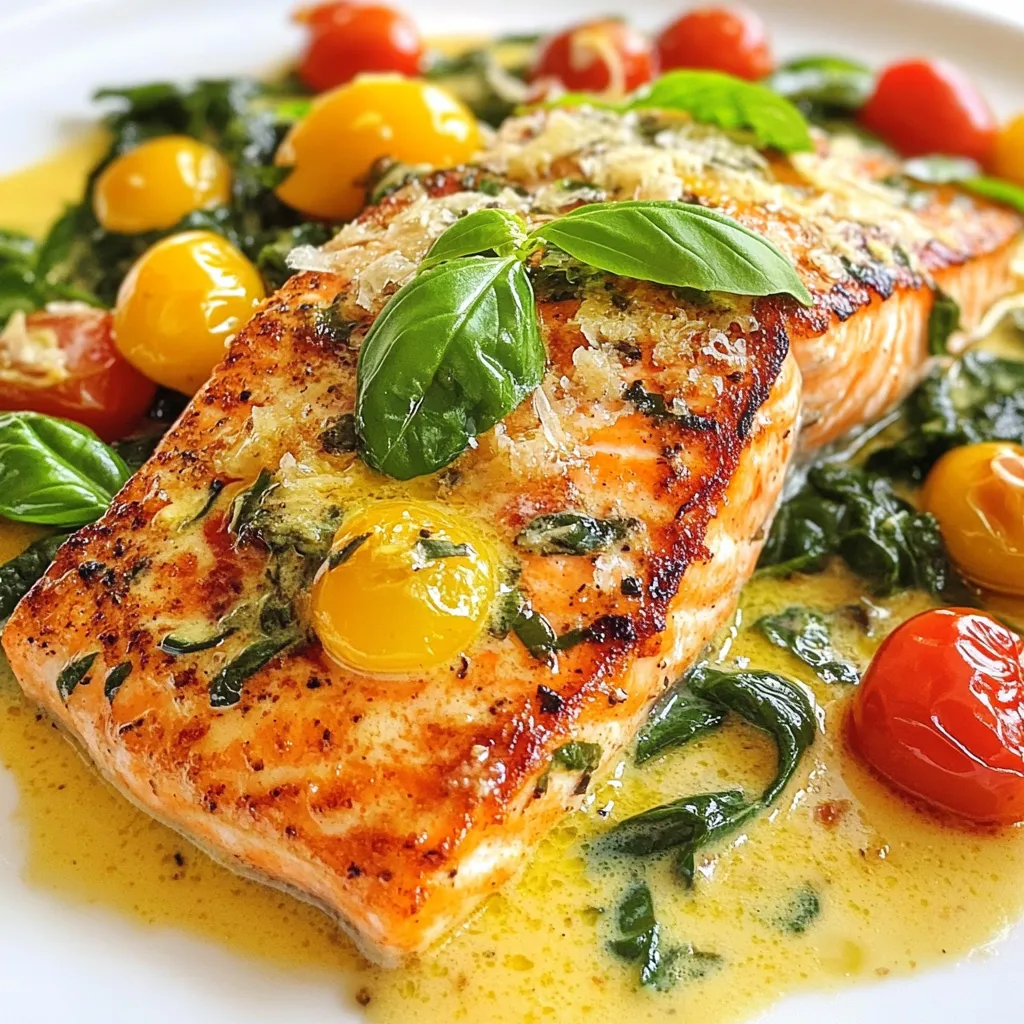
Looking for a rich and flavorful meal? You’ll love this Creamy Garlic Tuscan Salmon! With tender salmon fillets, creamy sauce, and bright cherry tomatoes, it bursts with taste. This dish is not just easy to make; it also impresses anyone at your table. In this article, I’ll guide you step-by-step to create a meal that’s sure to become a favorite. Let’s dive into these delicious flavors!
Why I Love This Recipe
- Deliciously Creamy: The rich heavy cream combined with garlic and tomatoes creates a luxurious sauce that perfectly complements the salmon.
- Quick and Easy: This recipe can be prepared in just 25 minutes, making it perfect for a weeknight dinner without sacrificing flavor.
- Colorful Presentation: The vibrant colors of the cherry tomatoes and fresh spinach make this dish as visually appealing as it is tasty.
- Customizable Spice: With optional red pepper flakes, you can easily adjust the heat level to suit your taste preferences.
Ingredients
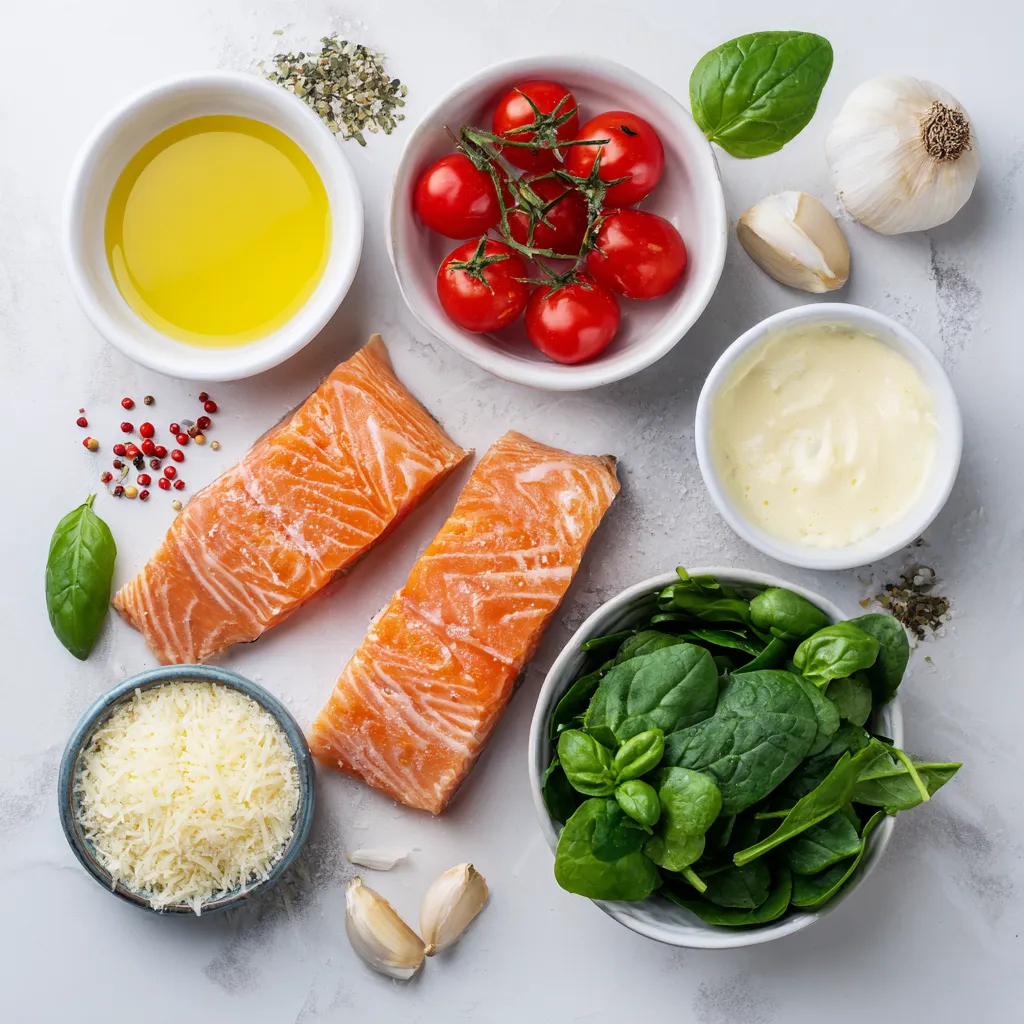
To create the rich and flavorful Creamy Garlic Tuscan Salmon, you need some simple yet fresh ingredients. Here’s what you will gather:
- 4 salmon fillets (skin on, about 6 ounces each)
- 2 tablespoons extra virgin olive oil
- 4 cloves garlic, finely minced
- 1 cup cherry tomatoes, halved for a burst of color
- 1 cup fresh baby spinach
- 1 cup heavy cream for richness
- 1/2 teaspoon dried Italian seasoning
- 1/4 teaspoon red pepper flakes (optional for a hint of spice)
- Salt and freshly ground black pepper to taste
- Fresh basil leaves for a fragrant garnish
- Grated Parmesan cheese, for a savory finish (optional)
These ingredients work together to create a creamy sauce that enhances the salmon’s natural flavors. The garlic and tomatoes bring a lovely taste, while the spinach adds a fresh touch. Using quality ingredients makes a big difference, so choose fresh salmon and ripe tomatoes for the best results.

Step-by-Step Instructions
Cooking the Salmon
Preparing the skillet
Start by heating 2 tablespoons of olive oil in a large skillet over medium heat. This oil helps cook the salmon and adds flavor.
Seasoning the salmon
While the oil heats, season both sides of the 4 salmon fillets with salt and pepper. This simple step boosts the flavor of the fish.
Flipping for perfect crispiness
Once the oil shimmers, place the salmon skin-side down in the skillet. Cook for 4-5 minutes until the skin is crispy. Then, gently flip the fillets and cook for another 3-4 minutes. The salmon should look opaque and flake easily when done. Remove the salmon and set it aside.
Making the Sauce
Sautéing garlic and tomatoes
In the same skillet, add 4 minced garlic cloves. Sauté them for about 30 seconds until fragrant. Be careful not to let the garlic burn, as it can taste bitter. Next, add 1 cup of halved cherry tomatoes, stirring them for 2-3 minutes until they soften.
Adding cream and seasonings
Pour in 1 cup of heavy cream, stirring well. Add 1/2 teaspoon of dried Italian seasoning and 1/4 teaspoon of red pepper flakes for a slight kick, if you like. Season with salt and pepper to taste. Let the sauce simmer for 2-3 minutes until it thickens just a bit.
Incorporating spinach
Fold in 1 cup of fresh baby spinach. Stir until the spinach wilts, which takes about 1 minute.
Final Assembly
Melding flavors with salmon
Return the cooked salmon to the skillet, placing it among the sauce. Spoon the creamy sauce over each fillet. Let it simmer for one more minute to blend the flavors.
Serving suggestions
Serve the dish hot on warmed plates. Make it look nice by adding fresh basil leaves and a sprinkle of grated Parmesan cheese on top. This dish pairs well with crusty bread or a side of pasta to soak up the creamy sauce. Enjoy!
Tips & Tricks
Achieving the Perfect Cook on Salmon
- Time and temperature guidelines: Cook the salmon at medium heat. It takes 4-5 minutes skin-side down. Flip and cook for another 3-4 minutes. The salmon should be opaque and flake easily.
- Checking for doneness: Use a fork to gently pull apart the thickest part. If it flakes, it’s done. If it looks shiny and wet, give it more time.
Enhancing the Flavor
- Using fresh herbs: Fresh basil adds a bright, aromatic touch. You can also try parsley or dill for a twist.
- Adding brightness with lemon juice: A squeeze of lemon juice before serving brightens the dish. It balances the cream and adds zest.
Presentation Tips
- Plating suggestions: Serve each salmon fillet on a warm plate. Spoon the creamy sauce over it. Add a few extra basil leaves for a fresh look.
- Ideal side dishes for pairing: Pair this dish with crusty bread or pasta. They soak up the creamy sauce and make the meal feel complete.
Pro Tips
- Choose the Right Salmon: Opt for wild-caught salmon for a firmer texture and richer flavor, though farmed salmon will work well too.
- Don’t Overcook the Salmon: Salmon is best when it’s slightly undercooked in the center. It will continue to cook in the residual heat once removed from the skillet.
- Customize Your Vegetables: Feel free to add other vegetables like zucchini or bell peppers to the dish for additional flavors and textures.
- Make It Ahead: This dish can be made ahead of time. Just reheat gently on low heat and add fresh spinach just before serving for the best results.

Variations
Customizing Ingredients
You can switch up the fish in this recipe. Salmon is great, but try using cod or trout for a different taste. Both fish provide a mild flavor, which works well with the creamy sauce.
For veggies, feel free to get creative. You can use zucchini, bell peppers, or asparagus. Each veggie adds its own unique flavor and texture. Just make sure to adjust the cooking time so they become tender but not mushy.
Adjusting Spice Levels
Do you prefer a mild dish? Skip the red pepper flakes. This keeps the meal creamy and rich without the heat. If you want a kick, add more flakes or some diced jalapeños. This will give the dish a nice spicy twist. Adjust the spice to suit your taste.
Dairy-Free Options
If you want a dairy-free version, you can substitute the heavy cream. Use coconut milk or cashew cream instead. Both options add a creamy texture without dairy. They also bring a unique flavor that can enhance the dish. Just make sure to simmer them long enough to blend well with the sauce.
Storage Info
How to Store Leftovers
To keep your Creamy Garlic Tuscan Salmon fresh, store it in an airtight container. Make sure it cools down before sealing. Place it in the fridge within two hours of cooking. This helps avoid bacteria growth. Properly stored, it lasts for about 2-3 days.
Reheating Instructions
When you reheat the salmon, aim to keep it moist. Use a skillet over low heat for best results. Add a splash of water or broth to the pan. Cover it to trap steam, which helps keep the salmon juicy. Heat it for about 5-7 minutes. Check the center to ensure it’s warm all the way through.
Freezing Guidelines
If you need to freeze the salmon, do so before reheating. Wrap each fillet tightly in plastic wrap. Then, place them in a freezer bag. This helps prevent freezer burn. The salmon can stay frozen for up to 3 months. To thaw, place it in the fridge overnight. This keeps the texture nice when you cook it again.
FAQs
Can I use frozen salmon fillets?
Yes, you can use frozen salmon fillets. Just make sure to thaw them in the fridge overnight. You can cook them directly from frozen too. Just add a few extra minutes to the cooking time. This will help keep the salmon moist and tender.
How can I make this recipe gluten-free?
To make this recipe gluten-free, ensure all ingredients are gluten-free. Most salmon and seasonings are safe. Use gluten-free pasta or serve with rice. Always check labels on sauces or seasonings for hidden gluten.
What sides pair well with Creamy Garlic Tuscan Salmon?
- Suggestions for side dishes:
- Steamed asparagus for a crisp texture.
- Garlic mashed potatoes to soak up the sauce.
- A fresh garden salad for a light crunch.
- Complementary flavors to consider:
- Lemon zest adds a bright touch.
- Crusty bread is great for dipping in the sauce.
- A side of roasted vegetables enhances the meal’s richness.
You have explored a tasty Creamy Garlic Tuscan Salmon dish. We covered ingredients like salmon, garlic, and cherry tomatoes. You learned how to cook salmon to crispy perfection, make a rich sauce, and creatively plate your meal.
Remember, you can customize the recipe with different fish or veggies. Store leftovers properly, and adjust spices to fit your taste. With these tips, you can enjoy a delightful meal any time. Get cooking and savor the flavor

Creamy Garlic Tuscan Salmon
Ingredients
- 4 fillets salmon (skin on, about 6 ounces each)
- 2 tablespoons extra virgin olive oil
- 4 cloves garlic, finely minced
- 1 cup cherry tomatoes, halved
- 1 cup fresh baby spinach
- 1 cup heavy cream
- 1 teaspoon dried Italian seasoning
- 1 4 teaspoon red pepper flakes (optional)
- to taste salt
- to taste freshly ground black pepper
- for garnish fresh basil leaves
- for serving grated Parmesan cheese (optional)
Instructions
- Heat the olive oil in a large skillet over medium heat. While the oil heats, season both sides of the salmon fillets generously with salt and pepper.
- Once the oil is shimmering (but not smoking), carefully place the salmon fillets skin-side down in the skillet. Cook for approximately 4-5 minutes, or until the skin becomes crispy and the salmon is visibly cooked halfway up the sides. Using a spatula, gently flip the fillets and continue cooking for 3-4 more minutes, or until the salmon is opaque and flakes easily with a fork. Once done, remove the salmon from the skillet and set it aside on a plate.
- In the same skillet, add the minced garlic. Sauté for about 30 seconds until fragrant, being cautious not to allow it to burn as this can create a bitter taste.
- Add the halved cherry tomatoes to the skillet, stirring to combine. Cook for about 2-3 minutes, or until the tomatoes start to soften and release their juices, creating a colorful base for the sauce.
- Gently pour in the heavy cream, stirring to blend with the tomato and garlic mixture. Next, sprinkle in the Italian seasoning, red pepper flakes (if using), and season with salt and pepper to taste. Allow the sauce to simmer for 2-3 minutes, stirring occasionally, until it thickens just slightly.
- Fold in the fresh baby spinach, stirring until it wilts into the sauce, which should take about 1 minute.
- Return the cooked salmon fillets to the skillet, nestling them amongst the sauce. Spoon the creamy sauce over the top of each fillet, then simmer for an additional minute to heat through and meld the flavors.
- Serve the dish hot, garnished with fresh basil leaves for an aromatic touch and a sprinkle of grated Parmesan cheese on top for an extra layer of flavor if desired.


![- 4 chicken thighs (bone-in, skin-on) - 2 tablespoons jerk seasoning - 1 tablespoon olive oil - Salt and pepper to taste - 1 ripe pineapple, peeled and diced into small cubes - 1 red bell pepper, diced into small pieces - 1 small red onion, finely chopped - 1 jalapeño, deseeded and minced (adjust for spice preference) - Juice of 1 fresh lime - Fresh cilantro, chopped (for garnish) For this jerk chicken with pineapple salsa recipe, use chicken thighs for their rich flavor. The jerk seasoning adds a spicy and smoky kick. The pineapple and vegetables bring freshness and sweetness to the dish. - Adjust spice levels: If you want less heat, skip the jalapeño or use less jerk seasoning. - Additional garnishes: Lime wedges and extra cilantro make great toppings. You can also add avocado for creaminess. Feel free to customize these ingredients according to your taste. The key is to balance heat, sweetness, and freshness. For the full recipe, check out the [Full Recipe]. Start by mixing the chicken thighs with jerk seasoning, olive oil, salt, and pepper. Use your hands to coat each piece well. This step is key for flavor. Cover the bowl with plastic wrap and place it in the fridge. Marinate for at least 1 hour, but overnight gives the best taste. In a clean bowl, combine diced pineapple, red bell pepper, red onion, and jalapeño. Squeeze the juice of one lime over it and add a pinch of salt. Stir gently to mix. Let this salsa rest for at least 15 minutes. This resting time allows the flavors to blend nicely. Heat your grill or grill pan to medium-high. Take the chicken out of the marinade and let any extra drip off. Grill the chicken for about 6-8 minutes on each side. Use a meat thermometer to check that it reaches 165°F (75°C). This ensures it is fully cooked and safe to eat. Arrange the grilled jerk chicken on a platter. Spoon the bright pineapple salsa over the top. For a finishing touch, sprinkle fresh cilantro on the dish. You can also serve it on a rustic wooden board with lime wedges and extra pineapple chunks. This adds a fun, tropical vibe to your meal. For the full recipe, check out the [Full Recipe]. The key to great jerk chicken is marinating well. Many people rush this step, but a good marinating time is essential. Aim for at least one hour, or overnight if you can. This allows the chicken to soak up the flavors deeply. Common mistakes to avoid: - Skipping the marinade: This makes the chicken bland. - Using too much heat: Jerk seasoning has a kick. Balance it with other flavors. - Not resting the chicken: Skipping this step makes the meat dry. Flavor enhancements: - Add some lime zest to your marinade for extra tang. - Try a bit of honey for a hint of sweetness. - Use smoked paprika for a deeper, richer flavor. The salsa adds brightness to the dish. Choosing ripe pineapples is key to great flavor. Tips for selecting ripe pineapples: - Look for pineapples with a sweet smell at the base. - The skin should be golden and slightly firm. - Press gently; it should give just a little. Variations for additional flavor: - Add diced mango for extra sweetness. - Mix in some chopped mint for a fresh twist. - Try a dash of cumin for a warm, earthy note. These tips will help you create a jerk chicken dish that shines. Don't forget to check out the Full Recipe for more details! {{image_4}} You can swap chicken for other meats. Try pork or turkey. Both soak up jerk flavor well. If you prefer seafood, shrimp or fish works too. Just keep an eye on cooking times. Seafood cooks quickly, so grill it for just a few minutes. Feel free to play with the vegetables. You can use different peppers like green or yellow. Red onions are great, but sweet onions add a nice touch too. Want to mix it up? Add diced mango or avocado to the salsa. Fresh herbs like mint or basil can add fun flavors too. For gluten-free options, check your jerk seasoning. Make sure it has no gluten. You can enjoy jerk chicken without any worries. If you're looking for low-carb choices, skip the sugar in the salsa. You can also serve the chicken with a salad instead of rice. This keeps it fresh and light. To store leftovers, place the jerk chicken in an airtight container. Let it cool to room temperature before sealing. This helps keep it fresh longer. Jerk chicken can stay in the fridge for up to three days. When you are ready to eat, reheat it in the oven or on the grill. Heat it to 165°F (75°C) for safe eating. Avoid reheating in the microwave if you want crispy skin. Yes, you can freeze jerk chicken. Wrap it tightly in plastic wrap and then place it in a freezer-safe bag. It can last up to three months in the freezer. For thawing, move the chicken to the fridge overnight. If you need it fast, you can also use the microwave on the defrost setting. After thawing, make sure to heat it well before serving. This keeps it tasty and safe to eat. For the full recipe, visit the [Full Recipe]. I suggest marinating the chicken for at least one hour. For the best flavor, try to marinate overnight. This allows the jerk seasoning to soak in deeply, making the chicken tasty and juicy. Jerk chicken pairs well with a variety of sides. Some great options are: - Rice and peas - Grilled vegetables - Coleslaw - Fried plantains - Cornbread These sides balance the rich flavors of the chicken. Yes, you can make the salsa ahead of time. I recommend preparing it a few hours before serving. This gives the salsa time to rest. The flavors will mix better, making it even more delicious. Jerk seasoning has a unique and bold flavor. It combines heat from peppers, sweetness from spices, and a hint of smokiness. Common ingredients include allspice, thyme, and garlic. This mix creates a savory and vibrant taste. The spice level of jerk chicken can vary. It depends on the amount of jalapeño you use. If you want less heat, remove the seeds. For more spice, add extra jalapeño or a hotter pepper. Adjusting the seasoning lets you enjoy the dish at your preferred heat level. You learned about making jerk chicken with easy steps and key ingredients. Focus on marinating the chicken and crafting the pineapple salsa for the best flavor. Enjoy grilling techniques to get that perfect char. Remember to avoid common mistakes while cooking. You can also try different proteins and flavor swaps for variety. Store leftovers properly to enjoy later. Your jerk chicken can impress anyone at the table. Now, it’s time to put this knowledge to use and enjoy your delicious creation!](https://dishtreats.com/wp-content/uploads/2025/06/27cc5104-89a5-4e73-8f97-3d018bc709fa-768x768.webp)

![- 2 cups cooked chicken, shredded - 4 cups mixed salad greens - 1 cup cherry tomatoes - 1 cup corn - 1 ripe avocado - 1/2 cup red onion - 1 cup shredded cheddar cheese - 1/2 cup ranch dressing - BBQ sauce - Salt and freshly ground black pepper - Crispy tortilla strips, fresh cilantro leaves When making BBQ Ranch Chicken Salad, start with fresh, quality ingredients. The chicken brings protein and heartiness. I love using shredded chicken that is moist and flavorful. Mixed salad greens add crunch and color. You can choose your favorites like romaine, arugula, or baby spinach. Cherry tomatoes bring sweetness. Always cut them in half to make them easy to eat. Corn adds a pop of sweetness too, and you can use canned or fresh. I prefer fresh corn when it’s in season for the best taste. The avocado adds creaminess. A ripe avocado makes the salad smooth and rich. Red onion gives a nice bite. Keep it thinly sliced so it does not overpower. Shredded cheddar cheese adds a delightful sharpness, making each bite even tastier. The ranch dressing is creamy and tangy, tying everything together. Pair it with BBQ sauce for a smoky flavor boost. This combo is truly delicious. For seasoning, use salt and freshly ground black pepper. These simple touches really enhance the flavors. Lastly, crispy tortilla strips add a fun crunch. Fresh cilantro leaves not only look great but also add a fresh taste. You can find the full recipe [Full Recipe]. Enjoy mixing these ingredients for a vibrant, tasty salad! - Combine shredded chicken with BBQ sauce. - Use a large bowl for easy mixing. - Season with salt and black pepper to taste. - Mix until the chicken is fully coated. This step is key. The BBQ sauce gives the chicken a sweet and smoky flavor. It makes the salad pop with taste. - Create the salad base with mixed greens. - Spread the greens evenly in a large bowl. - Layer fresh ingredients: tomatoes, corn, avocado, and onion. - Arrange each ingredient for a colorful look. The vibrant colors make the salad appealing. Each bite brings a different taste, making it fun to eat! - Top with BBQ chicken and cheddar cheese. - Spoon the chicken evenly over the fresh veggies. - Drizzle with ranch dressing, adjusting to your liking. - Toss gently with clean hands or tongs to mix. This salad is now ready to impress! The creamy ranch dressing and savory chicken blend perfectly. Check the [Full Recipe] for more tips! To make your BBQ Ranch Chicken Salad shine, adjust the ranch dressing to your taste. If you love creamy flavors, add more dressing. For a lighter touch, use less. This lets you control how rich the salad feels. Make sure all ingredients mix well. This way, each bite has a bit of everything. An even spread of chicken, veggies, and cheese creates balance. For a lovely presentation, serve the salad in individual bowls or on a large platter. This makes it easy for everyone to take their share. Add some cilantro leaves and crispy tortilla strips on top. These toppings not only look great but also add flavor and crunch. A colorful display of greens and toppings makes the salad more appealing. Feel free to experiment with different seasonings. A dash of chili powder can add a nice kick. You might also try garlic powder or smoked paprika for depth. Also, think about adding extra ingredients for more variety. Black beans, diced peppers, or even fresh corn can bring new tastes. Each addition offers a chance to create your perfect salad blend. For more details on making this delicious salad, check out the Full Recipe. {{image_4}} You can easily change the protein in this salad. If you want a different taste, use pulled pork or tofu instead of chicken. Both options add great flavor. For a seafood twist, grilled shrimp works well. The shrimp adds a nice, light touch to the salad. While ranch dressing is a favorite, you can swap it out. Blue cheese dressing gives a strong flavor. A vinaigrette adds a tangy kick that brightens the salad. You can also make your own dressing blends. Mix yogurt with herbs for a fresh taste. Don't be afraid to add more veggies. Bell peppers, cucumbers, and radishes give a nice crunch. You can also roast vegetables like zucchini or carrots. Roasting adds a warm, rich taste that contrasts nicely with the cool salad. For a full recipe, check out the BBQ Ranch Chicken Salad with a Crunchy Twist. Store your BBQ Ranch Chicken Salad in an airtight container. This keeps it fresh and tasty. For best results, eat it within 2-3 days. The longer it sits, the soggier it may get. If you want to freeze some, consider freezing the chicken separately. This helps keep the chicken tasty when you eat it later. Avoid freezing the salad with dressing. The dressing makes the greens soggy, and nobody likes that! To refresh your leftovers, toss them with fresh greens. This adds crunch and makes it feel new again. If you want to reheat the BBQ chicken, do it separately. This keeps it warm without making the salad wilt. To make BBQ Ranch Chicken Salad, follow these simple steps: 1. Prepare the BBQ Chicken: Mix shredded chicken with BBQ sauce in a big bowl. Add salt and black pepper. Stir until the chicken is well coated. 2. Build the Salad Base: In another large bowl, spread the mixed greens evenly. This is your salad's base. 3. Layer Fresh Ingredients: Add halved cherry tomatoes, corn, diced avocado, and sliced red onion on top of the greens. This creates a colorful layer. 4. Top with BBQ Chicken: Spoon the BBQ chicken evenly over the fresh layers. This ensures every bite has flavor. 5. Add Creamy Cheese: Sprinkle shredded cheddar cheese over the salad. Let it melt slightly into the warm chicken. 6. Drizzle with Dressing: Pour ranch dressing over the salad. Adjust the amount to fit your taste. 7. Toss Gently: Use clean hands or tongs to mix everything. Make sure the ranch dressing coats all the ingredients. 8. Taste Test: Before serving, taste the salad. Add more salt or black pepper if needed. 9. Add Crunch and Garnish: Top with crispy tortilla strips and fresh cilantro for a nice finish. This process makes a delicious and colorful salad. For the complete recipe, check the Full Recipe above. Yes, you can prep this salad ahead of time. Here are some tips: - Cook the Chicken: You can cook and shred the chicken a day in advance. Store it in the fridge with BBQ sauce. - Chop Veggies: Cut the vegetables, like tomatoes and onions, a few hours before serving. Keep them in airtight containers. - Store Dressing Separately: Keep the ranch dressing separate until serving. This keeps the greens fresh and crisp. - Combine Before Serving: Mix everything together just before you eat. This keeps your salad from becoming soggy. This BBQ Ranch Chicken Salad goes great with several side dishes. Here are some ideas: - Crusty Bread: A nice loaf of bread pairs well and adds a hearty touch. - Chips: Tortilla chips or potato chips add crunch and fun. - Fruit Salad: A fresh fruit salad adds sweetness and a refreshing taste. - Grilled Veggies: Grilled vegetables complement the salad's flavors. - Coleslaw: A crunchy coleslaw gives a nice contrast to the salad. These sides enhance your BBQ Ranch Chicken Salad experience. Enjoy! We explored a tasty BBQ Ranch Chicken Salad. You learned about the main and optional ingredients, along with step-by-step instructions for making it. You also picked up tips for perfecting the salad and ideas for variations. Don’t forget to check the storage info for leftovers. This salad is easy to adjust, making it a fun dish for everyone. Enjoy this recipe and make it your own!](https://dishtreats.com/wp-content/uploads/2025/07/4c564630-ecab-497d-8bae-b951c19ef4f1-768x768.webp)