Creamy Garlic Shrimp Risotto Simple and Savory Dish

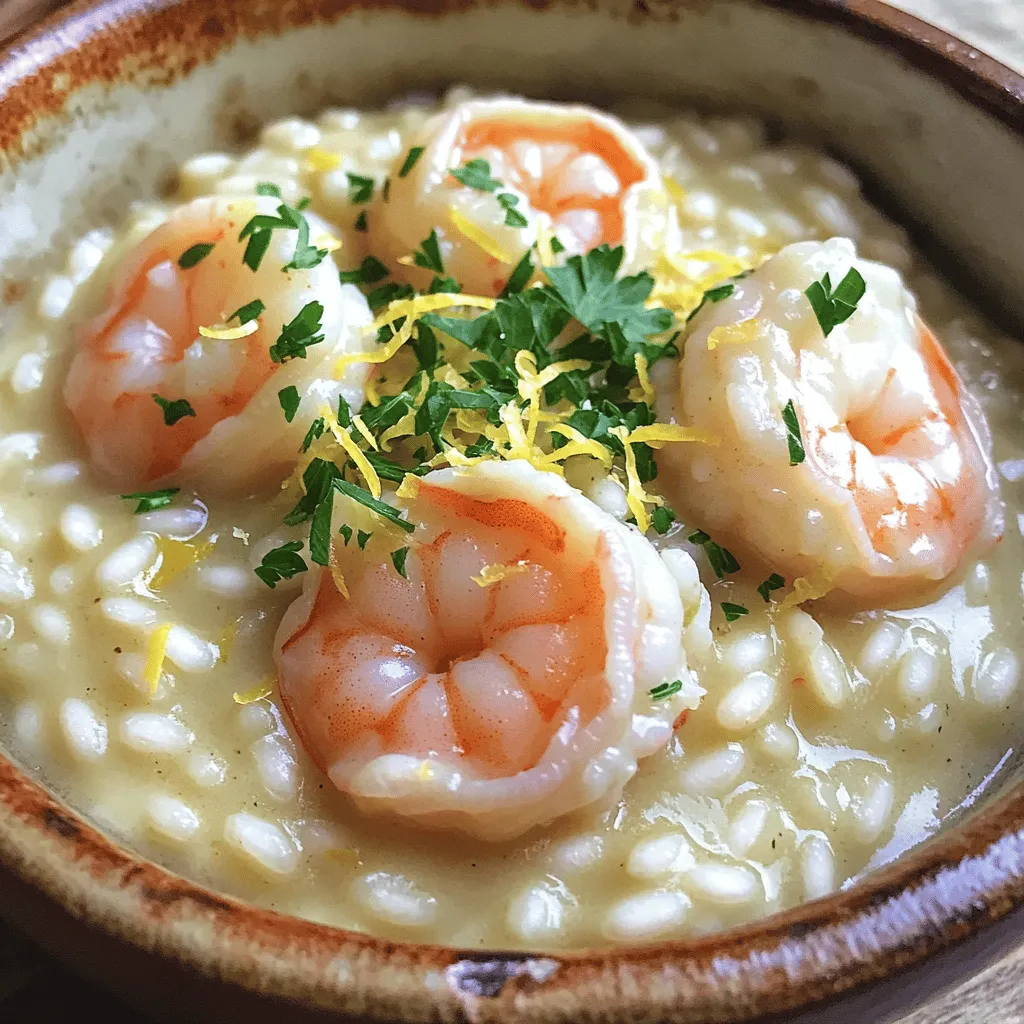
If you crave a dish that’s simple yet bursting with flavor, Creamy Garlic Shrimp Risotto is your answer. This delightful recipe blends tender shrimp with rich, creamy rice, making it perfect for a cozy dinner. I’ll guide you step-by-step, from choosing the right ingredients to tips for achieving that ideal texture. Whether you’re a beginner or an experienced cook, you’ll love how easy and satisfying this dish can be. Ready to dive in?
Ingredients
Main Ingredients for Creamy Garlic Shrimp Risotto
To make your creamy garlic shrimp risotto, gather these key ingredients:
- 1 cup Arborio rice
- 1 lb shrimp, peeled and deveined
- 4 cups vegetable broth
- 1 small onion, finely chopped
- 4 cloves garlic, minced
- 1 cup heavy cream
- 1 cup grated Parmesan cheese
- 2 tablespoons olive oil
- 2 tablespoons butter
- 1 teaspoon lemon zest
- Salt and black pepper to taste
- Fresh parsley, chopped for garnish
These ingredients work together to create an amazing flavor. Arborio rice gives the risotto its creamy texture. The shrimp adds protein and a taste of the sea. Garlic and onion offer a savory base, while heavy cream and Parmesan boost the richness.
Optional Garnishes and Seasonings
You can add some extra touches to enhance your dish:
- Lemon wedges for a zesty kick
- Extra Parmesan cheese for creaminess
- Red pepper flakes for a bit of heat
- Fresh basil or chives for a pop of color
These garnishes can brighten up your risotto. They also let you customize flavors to your liking. A squeeze of lemon can balance the richness perfectly.
Recommended Tools and Equipment
To make cooking easier, use these tools:
- Large skillet for cooking the risotto
- Saucepan for warming the broth
- Wooden spoon for stirring the risotto
- Ladle for adding broth easily
- Measuring cups for precise ingredients
Having the right tools makes the cooking process smooth and fun. A large skillet helps with even cooking. A wooden spoon ensures you don’t scratch your pan while stirring.
Step-by-Step Instructions
Preparation of Ingredients
First, gather all your ingredients. You will need:
- 1 cup Arborio rice
- 1 lb shrimp, peeled and deveined
- 4 cups vegetable broth
- 1 small onion, finely chopped
- 4 cloves garlic, minced
- 1 cup heavy cream
- 1 cup grated Parmesan cheese
- 2 tablespoons olive oil
- 2 tablespoons butter
- 1 teaspoon lemon zest
- Salt and black pepper to taste
- Fresh parsley, chopped for garnish
Next, warm the vegetable broth in a saucepan. Keep it on low heat. This helps the rice cook evenly.
Cooking the Risotto
In a large skillet, heat 1 tablespoon of olive oil and 1 tablespoon of butter over medium heat. When the butter melts, add the chopped onion. Cook for about 3-4 minutes until the onion is soft and clear.
Now, add the minced garlic. Cook it for 1-2 minutes until it smells great but does not brown. Pour in the Arborio rice next. Stir well to coat each grain. Toast the rice for 1-2 minutes. This step brings out its flavor.
Now, add the warm vegetable broth one ladle at a time. Stir the rice often. Let it soak up most of the liquid before adding more. This takes about 18-20 minutes. The rice should be creamy and slightly firm when done.
Sautéing the Shrimp
While the risotto cooks, heat the remaining tablespoon of olive oil and tablespoon of butter in another pan over medium-high heat. Add the shrimp and season with salt and pepper. Cook the shrimp for 2-3 minutes on each side. They should turn pink and be fully cooked. Remove them from heat and set aside.
When the risotto reaches a creamy texture, stir in the heavy cream, grated Parmesan, and lemon zest. Mix until everything is combined. Gently fold in the sautéed shrimp. Taste and adjust the seasoning with salt and pepper.
Serve the risotto hot. Top it with fresh parsley for color and flavor. Enjoy your delicious Creamy Garlic Shrimp Risotto!
Tips & Tricks
How to Achieve the Creamy Texture
To make risotto creamy, use Arborio rice. This rice has a high starch content. Start with warm vegetable broth; it helps the rice cook evenly. Add the broth slowly, one ladle at a time. Stir often, allowing the rice to absorb the liquid. After about 18-20 minutes, the rice will be creamy and tender. Mixing in heavy cream and Parmesan at the end boosts the creaminess too.
Best Practices for Cooking Shrimp
When cooking shrimp, start with a hot pan. Use a mix of olive oil and butter for flavor. Season the shrimp with salt and pepper before cooking. Cook them for just 2-3 minutes on each side. They should turn pink and opaque, indicating they are done. Avoid overcooking, as shrimp can become rubbery. Set the shrimp aside until the risotto is ready, then fold them in gently.
Adjusting Flavors and Seasoning
Taste your risotto before serving. You may want to add more salt or pepper. Fresh lemon zest gives a bright flavor, so don’t skip it! If you prefer a stronger taste, add more garlic. Fresh herbs, like parsley, not only add flavor but also color. Feel free to adjust based on your palate. Cooking is all about finding the right balance for you.

Variations
Vegetarian Option: Substitutions for Shrimp
If you want a vegetarian risotto, you can swap shrimp for mushrooms. Use hearty types like portobello or shiitake. They add great flavor and texture. You can also use firm tofu, cut into cubes, for protein. Make sure to sauté them well so they soak in the flavors.
Different Seafood Variants
You can change up the seafood in this risotto too. Try scallops or lobster for a special treat. They cook quickly and add luxury to your dish. If you prefer a mix, combine different seafood. Just adjust cooking times to ensure everything is tender and juicy.
Adding Vegetables or Herbs
Adding veggies is an easy way to boost nutrition. Peas, spinach, or asparagus work well. They add color and flavor. You can mix them in during the last few minutes of cooking. Fresh herbs like basil or chives can also brighten the dish. Stir in chopped herbs just before serving for a fresh taste.
Storage Info
How to Store Leftover Risotto
To store leftover risotto, first let it cool to room temperature. Place it in an airtight container. Make sure to cover it well to keep it fresh. Store the container in the fridge. It will stay good for about 3 days.
Reheating Techniques
When you’re ready to eat the leftover risotto, use a pan for the best results. Add a splash of broth or water to the risotto. Heat it over medium heat and stir often. This helps it stay creamy. You can also use the microwave. Place the risotto in a microwave-safe bowl. Add a little liquid, cover it with a damp paper towel, and heat in short bursts. Stir in between to avoid hot spots.
Freezing Instructions
If you want to freeze risotto, place it in a freezer-safe container. Leave some space at the top, as it may expand. It can last up to 2 months in the freezer. When you’re ready to eat, let it thaw in the fridge overnight. Then, reheat it as described above. This way, you can enjoy this tasty dish later!
FAQs
What type of rice is best for risotto?
The best rice for risotto is Arborio rice. Arborio rice has a high starch content. This starch helps create the creamy texture that risotto is known for. Other types like Carnaroli and Vialone Nano also work well. These varieties absorb liquid well, giving you that perfect bite.
Can I make risotto in advance?
You can make risotto in advance, but it won’t have the same fresh taste. If you do, store it in the fridge. To reheat, add a bit of broth or water. This will help bring back the creamy texture. Keep in mind, fresh is best for risotto.
How can I make risotto dairy-free or vegan?
To make risotto dairy-free or vegan, swap the heavy cream and cheese. Use coconut cream or cashew cream instead. Nutritional yeast is a great cheese substitute. It adds a nice cheesy flavor. Make sure to check your vegetable broth for dairy ingredients.
What wine pairs well with shrimp risotto?
A crisp white wine pairs well with shrimp risotto. Options like Sauvignon Blanc or Pinot Grigio work great. These wines have acidity that cuts through the creaminess. They enhance the shrimp’s flavor without overpowering the dish. Serve a glass alongside your meal for a perfect match.
I’ve shared how to make creamy garlic shrimp risotto, from the key ingredients to cooking steps. You learned about tools, tips, and even variations for different tastes. Remember, achieving that creamy texture is key. You can explore options like vegetarian or seafood twists. And don’t forget about proper storage for leftovers! With these tips, you can make a delicious risotto every time. Enjoy the process and impress your friends with your cooking skills!


![To make a tasty avocado corn salad, gather these ingredients: - 2 ripe avocados, diced into bite-sized cubes - 1 cup sweet corn (freshly grilled or canned, drained) - 1 cup cherry tomatoes, halved for a juicy burst - 1 red bell pepper, diced finely for crunch - 1/4 cup red onion, finely chopped for sharpness - 1/4 cup fresh cilantro, chopped for herbal freshness - Juice of 2 limes for tanginess - 2 tablespoons extra virgin olive oil for richness - 1 teaspoon ground cumin for warmth - Salt and freshly cracked pepper to taste Using good-quality ingredients makes a big difference. Choose ripe avocados that yield slightly when pressed. This means they are soft and ready to eat. Fresh corn adds a sweet touch. If you use canned corn, drain it well to keep the salad fresh. Opt for vibrant cherry tomatoes and a crunchy red bell pepper, both of which enhance the salad's look and taste. Fresh cilantro can elevate the flavor, so use it if you like its taste. If you have allergies or preferences, you can easily swap some ingredients. Try using lime juice from one lemon instead. For those with onion allergies, you can skip the red onion or use green onions. If you are not a fan of cilantro, parsley works well too. For a creamier texture, consider adding a bit of Greek yogurt. This makes the salad rich while keeping it fresh. For the complete recipe, check out the [Full Recipe]. To make the avocado corn salad, start by gathering all your ingredients. You need ripe avocados, sweet corn, cherry tomatoes, red bell pepper, red onion, cilantro, lime juice, olive oil, cumin, salt, and pepper. First, take a large bowl. Add the diced avocados and the corn. If you use canned corn, drain it well. Mix these two gently to spread the sweetness of the corn. Next, add the halved cherry tomatoes, diced red bell pepper, and finely chopped red onion. These ingredients give your salad a bright look and a tasty crunch. After that, sprinkle the chopped cilantro over everything. This adds a fresh flavor that brightens the dish. Now, grab a small bowl. Whisk the lime juice, olive oil, cumin, and a pinch of salt and pepper together. This dressing will tie all the flavors in the salad. Pour the dressing over the salad mixture. Use a spatula or wooden spoon to mix everything gently. Be careful not to mash the avocados. Finally, taste your salad. You might want to add more salt or lime juice based on your taste. When mixing, go slow. You want to keep the avocados intact. Over-mixing can turn them mushy. Use a light hand and fold the ingredients together. This keeps your salad looking fresh and colorful. If you notice some pieces are not coated well, you can add a bit more dressing. Just drizzle it slowly and mix again. This helps every bite to burst with flavor. For the best taste, let your salad sit for about 10 minutes at room temperature. This allows the flavors to blend. If you serve it right away, the tastes might not be as strong. After resting, your salad will be ready to eat. Enjoy it fresh for lunch or as a side with dinner. For the full recipe, click here. To select ripe avocados, look for a dark green color. Gently squeeze the avocado; it should feel firm but yield slightly. Avoid any that feel mushy. A ripe avocado should have a smooth skin without dark spots. If you find unripe avocados, leave them at room temperature for a few days. Once ripe, use them within a day or two for best taste. Grilling fresh corn adds a smoky flavor that enhances your salad. Start by husking the corn and removing all silk. Brush the kernels with oil to prevent sticking. Place the corn directly on a hot grill for about 10 minutes. Turn it every few minutes until it’s tender and has grill marks. This method caramelizes the sugars, making the corn sweeter and more delicious. To enhance your salad's flavor, adjust the seasonings to your taste. Start with lime juice and olive oil, then add cumin for warmth. If you prefer a kick, include a pinch of chili powder or chopped jalapeños. Fresh herbs can also brighten the dish. Always taste and adjust as you go. Remember, a little salt can go a long way in bringing out flavors. For more detailed instructions, check the Full Recipe. {{image_4}} You can boost the protein in your avocado corn salad easily. Adding chicken or shrimp makes it more filling. Grilled chicken breast works well; just chop it into bite-sized pieces. For shrimp, try sautéing or grilling them until they are pink. Both options blend nicely with the salad's flavors. You can also use canned chickpeas for a plant-based choice. Just rinse and add them directly for a hearty twist. The dressing can change the whole taste of your salad. A simple lime vinaigrette adds a refreshing zing. Just whisk lime juice, olive oil, salt, and pepper together. For a creamy dressing, mix yogurt with lime juice and cumin. This gives a nice tang and creaminess. You could also try a cilantro-lime dressing for extra flavor. Feel free to experiment with different dressings to find your favorite. Using seasonal ingredients makes your salad even better. In summer, fresh peaches or strawberries add a sweet touch. In fall, diced apples or pears give crunch and sweetness. You can also swap the corn for roasted butternut squash in winter. This keeps your salad fresh and exciting all year. Think about what’s in season for tasty swaps that match the flavors of your dish. For the complete recipe, check out the [Full Recipe]. To store leftover avocado corn salad, use an airtight container. This keeps the air out and helps avoid spoilage. Place the salad in the fridge right after serving. It tastes better cold and stays fresh longer. If you have extra dressing, store it separately to keep the salad crisp. The salad will last about 2 days in the fridge. The avocados may brown, but the taste remains good. Corn and tomatoes hold well for a bit longer. If you used canned corn, it can stay fresh for 3 to 4 days. Always check for any off smells before eating leftovers. To keep avocados fresh, store them whole until you're ready to use them. If you've cut an avocado, squeeze some lime juice on it. The acid helps slow browning. Cover it tightly with plastic wrap or place it in an airtight container. This way, you can enjoy your avocado longer without losing its bright color. To stop avocados from browning, use lime juice. The acid slows down oxidation. You can also store cut avocados with the pit in. Cover them tightly with plastic wrap. This keeps air out and helps maintain their color. Yes, you can prepare the salad in advance. However, add the avocados right before serving. This keeps them fresh and green. If you store it for later, put plastic wrap directly on the surface. This minimizes air exposure and keeps the salad tasty. Look for fresh corn with bright green husks. The kernels should feel plump and firm. If using canned corn, choose a brand with low sodium. Drain and rinse it well to remove extra salt. This will help the corn taste fresh and sweet in your salad. Enjoy the crunch and sweetness! For the complete recipe, check out the Avocado Corn Salad Delight. In this blog post, we covered how to make a delicious avocado corn salad. We explored the best ingredients, tips for preparation, and ways to enhance flavor. You can mix and match based on your taste and needs. Remember to store leftovers properly to keep them fresh. With easy swaps and answers to common questions, you’ll create a great dish every time. Now, you have everything you need to impress your family and friends with your new salad skills. Enjoy making your own special version!](https://dishtreats.com/wp-content/uploads/2025/07/333f1f81-7d50-4cc6-bd3d-a33e08904fb9-768x768.webp)

 link for all details! Asian Chicken Lettuce Wraps are fun, tasty, and easy to make. We covered key ingredients, step-by-step cooking, and helpful tips. You can mix things up with different proteins and veggies. Storing leftovers is simple, too. This dish is perfect for quick meals or impressing guests. Use the recipe and ideas to create your own version. Enjoy every bite, and share your creations!](https://dishtreats.com/wp-content/uploads/2025/07/cde1ffe3-32d5-41af-a230-f4c5c520fc8a-768x768.webp)

![- 4 boneless, skinless chicken breasts - 1 cup finely grated Parmesan cheese - 1 cup panko breadcrumbs - 2 teaspoons garlic powder - 1 teaspoon onion powder - 1 teaspoon dried Italian herbs - Salt and pepper to taste - 2 large eggs - 2 tablespoons olive oil - 1 tablespoon fresh parsley (for garnish) This dish starts with simple, fresh ingredients. The chicken breasts are the star, offering lean protein. The Parmesan cheese gives a rich, savory flavor. I love panko breadcrumbs for their crunch. They make the crust crispy and delightful. For seasoning, I use garlic and onion powders. They add depth to the chicken. Dried Italian herbs bring a nice touch of flavor. Don't forget salt and pepper for balance. The breading mixture includes eggs and olive oil. The eggs help the coating stick well. Olive oil adds richness. Fresh parsley is for garnish. It brightens up the dish and adds color. You can find the full recipe in the article for more details. Each ingredient plays an important role in making this dish a winner. - Preheat your oven to 400°F (200°C). - Line a baking sheet with parchment paper or grease it with olive oil. - Combine 1 cup of finely grated Parmesan cheese, 1 cup of panko breadcrumbs, and the seasonings. You can use 2 teaspoons of garlic powder, 1 teaspoon of onion powder, and 1 teaspoon of dried Italian herbs. Add salt and pepper to taste. Mix everything well in a bowl and set aside. - Take 4 boneless, skinless chicken breasts. Dip each breast into the egg mixture, then coat it in the breadcrumb mix. Make sure to cover it completely. Arrange the coated chicken on the baking sheet, leaving space between each piece. - Drizzle olive oil (2 tablespoons) over the coated chicken for added flavor and crispiness. - Bake the chicken for 25-30 minutes. It is ready when it turns golden and reaches an internal temperature of 165°F (75°C). You can find the full recipe to follow along while you cook. To get that amazing crispiness, you need an even coating. Make sure to press the breadcrumb mixture onto the chicken well. This helps the crust stick. Drizzle a little extra olive oil on top before baking. This oil adds a great crunch and helps the chicken brown nicely. Want to kick up the taste? Try adding different spices to the breadcrumb mix. You can mix in paprika for a smoky flavor or some crushed black pepper for a bit of heat. Fresh herbs like thyme or rosemary can also add a nice touch. Experiment until you find your favorite blend! This dish pairs well with lemon wedges. Squeeze some lemon juice over the chicken for brightness. A fresh salad is also a great side. It balances the meal and adds crunch. Try a simple green salad with a light vinaigrette to round out your plate! For the full recipe, check out the [Full Recipe]. {{image_4}} You can make this dish even more delicious by adding cheese. Try mixing in shredded mozzarella for a cheesy twist. This extra layer of gooey goodness makes every bite special. You can also use different types of cheese. Parmesan pairs well with cheddar, gouda, or even pepper jack. Each choice brings a new flavor to the table. For those who like a kick, add crushed red pepper flakes to the breadcrumb mix. This small change can bring big heat. Adjust the amount to suit your taste. Just a pinch can make your chicken sing with flavor. If you want a low-carb version, swap panko for almond flour. Almond flour gives you a nice crunch without the carbs. This option is great for anyone watching their carbs. It keeps the dish light while still being tasty. For the Full Recipe, you’ll find all the details you need to make this meal shine. Store leftovers in an airtight container in the fridge for up to 3 days. This keeps the chicken fresh and safe to eat. When ready to enjoy, just take it out and reheat. You can freeze the breaded chicken before baking for up to 2 months. This option is great for meal prep. Just coat the chicken and place it in a freezer-safe container. When you are ready to cook, bake it straight from the freezer. Reheat in the oven to maintain crispiness rather than using the microwave. Preheat your oven to 350°F (175°C) and bake for about 10-15 minutes. This way, your chicken will stay crunchy and delicious. Enjoy it as if it was freshly made! Yes, chicken thighs can be used for more flavor and moisture. Chicken thighs are juicier than breasts. They provide a rich taste that pairs well with the crispy coating. You can follow the same steps in the recipe. Just adjust the baking time if needed. Serve with pasta, steamed vegetables, or a simple green salad. Pasta with olive oil and garlic makes a great side. Steamed broccoli or green beans add color and nutrients. A light salad with lemon dressing balances the meal perfectly. These options make dinner fun and flavorful! Reduce ingredient quantities accordingly while maintaining ratios. For example, if you need two servings, simply cut the chicken and other ingredients in half. This keeps the flavors balanced and the dish just as tasty. You can easily scale it up or down based on your needs. This post outlined how to make Baked Parmesan Crusted Chicken, from ingredients to storage tips. We covered key steps, including creating a crispy coating and baking methods. To achieve perfect results, remember to coat evenly and explore flavor options. Enjoy this dish with sides like pasta or salad. With easy adjustments for servings, this recipe fits any table. Try it out and savor every bite!](https://dishtreats.com/wp-content/uploads/2025/07/ab4c9608-7523-42b9-8dc2-3e25f574410b-768x768.webp)