Creamy Corn Chowder Simple and Satisfying Recipe

If you’re craving a warm, tasty meal, look no further than my creamy corn chowder. This simple recipe blends fresh corn and rich flavors for comfort in every bite. Whether you’re using leftover corn or fresh ears, you’ll love how easy it is. Join me as we explore the best ingredients, tips for perfect texture, and delicious variations. Get ready to impress your family with this satisfying dish!
Ingredients
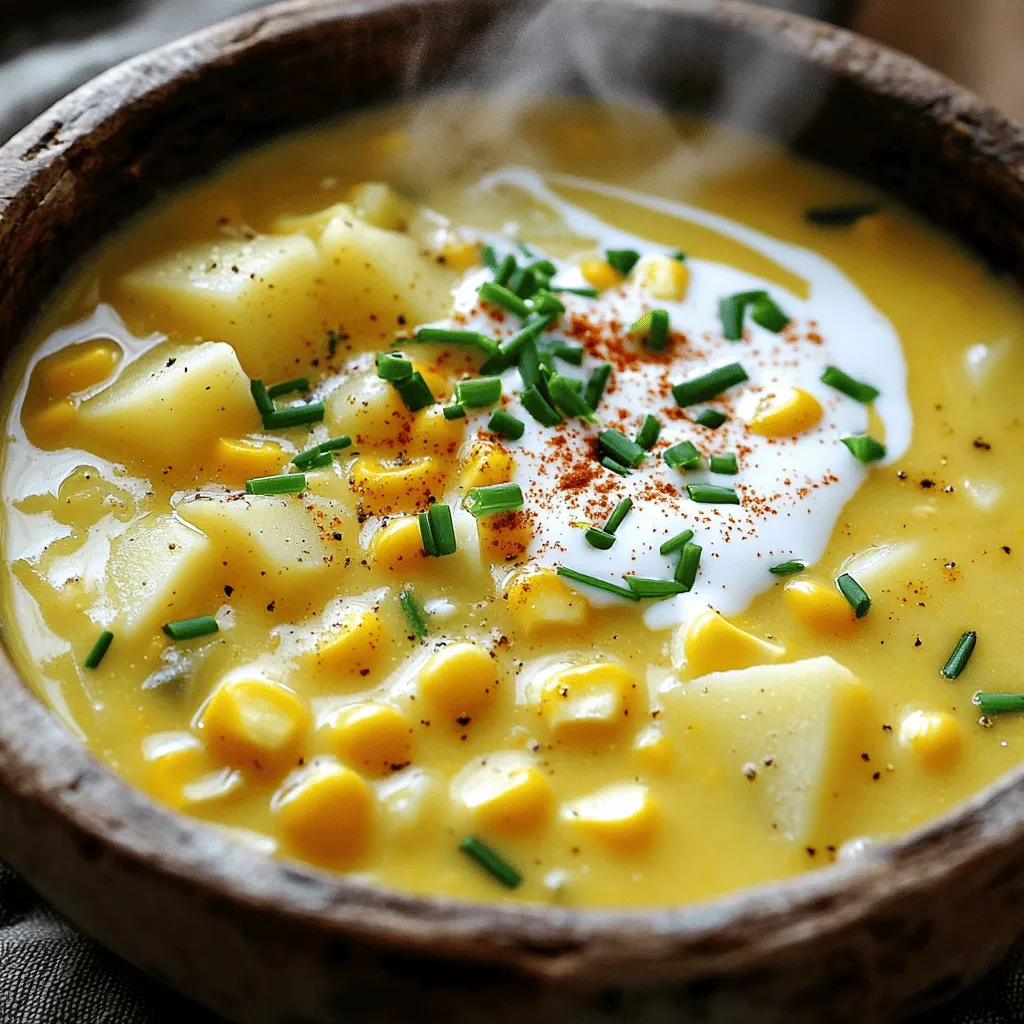
Main Ingredients for Creamy Corn Chowder
To make creamy corn chowder, you need a few key ingredients. Here’s what you’ll need:
- 4 cups fresh corn kernels (or 3 cups frozen corn if fresh isn’t available)
- 1 medium onion, finely diced
- 2 cloves garlic, minced
- 2 medium potatoes, peeled and cut into small cubes
- 3 cups vegetable broth
- 1 cup heavy cream (substitute with coconut milk for a lighter alternative)
- 2 tablespoons olive oil
- 1 teaspoon smoked paprika
- Salt and freshly cracked black pepper, to taste
- Fresh chives, chopped for garnish
These ingredients come together to create a warm and comforting dish that’s perfect for any meal.
Optional Herbs and Seasonings
You can play with the flavors by adding some herbs and seasonings. Here are some great options:
- Thyme adds a nice earthy flavor.
- Bay leaves can deepen the taste.
- A pinch of cayenne pepper gives a spicy kick.
- Fresh parsley offers a bright, fresh note.
Feel free to mix and match according to your taste.
Suggested Substitutes for a Custom Recipe
If you want to change things up, there are easy substitutes you can use:
- Use chicken broth instead of vegetable broth for more depth.
- Swap potatoes with sweet potatoes for a sweeter chowder.
- Coconut cream can replace heavy cream for a dairy-free option.
- If you don’t have corn, try using diced carrots or peas.
These substitutes help you make the chowder your own while keeping it delicious.
Step-by-Step Instructions
Preparation Steps Overview
First, gather all your ingredients. You need corn, onion, garlic, potatoes, vegetable broth, cream, olive oil, smoked paprika, salt, and pepper. This setup makes your cooking time smooth and easy.
Detailed Cooking Method
1. Heat olive oil in a big pot over medium heat.
2. Add diced onion. Sauté for 4-5 minutes until soft and clear.
3. Stir in minced garlic. Cook for 1-2 minutes, letting the aroma fill the air.
4. Add diced potatoes and corn. Mix well to combine all ingredients.
5. Pour in vegetable broth. Bring it to a boil, then reduce to a simmer.
6. Cook for about 15 minutes. Check that the potatoes are tender when poked with a fork.
7. Use an immersion blender to puree part of the soup. This gives it a creamy touch while keeping some chunks. If you lack an immersion blender, blend half in a regular blender and return it to the pot.
8. Stir in heavy cream and smoked paprika. Let it simmer for 5 more minutes.
9. Taste the chowder. Add salt and pepper to your liking.
10. Serve hot in bowls, garnished with chopped chives for a fresh look.
How to Blend for the Perfect Texture
The key is to blend only part of the chowder. This keeps some pieces of corn and potato. If you want a creamier soup, blend more. Just make sure to leave some texture for the best experience.
Tips & Tricks
Secrets to the Best Creamy Corn Chowder
To make the best creamy corn chowder, use fresh corn when possible. Fresh corn adds sweetness and flavor. If you can’t find fresh corn, frozen corn works well. You can also mix in some smoked paprika for a nice depth. It adds a warm, smoky flavor that complements the corn. Remember to taste as you go. Adjust seasoning with salt and pepper to bring out the flavors.
Common Mistakes to Avoid
One common mistake is overcooking the potatoes. They should be tender but not mushy. If they fall apart, your chowder may not have the right texture. Another mistake is not blending enough. A good balance of smooth and chunky is key for a satisfying chowder. Lastly, avoid adding cream too early. This can curdle the cream and ruin the chowder.
Time-Saving Techniques
To save time, prep all your ingredients before you start cooking. Chop the onion, garlic, and potatoes ahead of time. This helps the cooking process flow smoothly. You can also use a food processor for quick chopping. If you’re short on time, consider using a pre-made vegetable broth. It cuts down on prep time and still gives great flavor. Lastly, using an immersion blender allows you to blend directly in the pot, saving on cleanup.

Variations
Vegan Creamy Corn Chowder Recipe
You can easily make a vegan version of this chowder. Simply swap the heavy cream for coconut milk. This change keeps the soup rich and creamy. You will also use vegetable broth as your base. The other ingredients remain the same. This version is full of flavor and is plant-based.
Gluten-Free Options
If you need a gluten-free chowder, feel free to enjoy this recipe as is. All the ingredients listed are naturally gluten-free. Just check the labels on your vegetable broth and spices. Some brands may add gluten. With careful selection, you can enjoy a delicious gluten-free creamy corn chowder.
Flavor Enhancements and Add-Ins
Looking to jazz up your chowder? Consider adding these ingredients:
- Fresh herbs: Try thyme or basil for added aroma.
- Spices: A pinch of cayenne or chili powder can spice things up.
- Vegetables: Bell peppers or carrots can add color and flavor.
- Proteins: For a heartier dish, add cooked bacon or shredded chicken.
These enhancements let you create a chowder that suits your taste. Play around with different combinations to find what you love best.
Storage Info
How to Store Leftover Creamy Corn Chowder
To store leftover creamy corn chowder, let it cool first. Once it cools, pour it into an airtight container. Seal it tightly to keep out air. Place it in the fridge. It will stay fresh for about 3 to 4 days. When you are ready to eat, just take it out and heat it up.
Freezing Tips for Long-Term Storage
You can freeze creamy corn chowder for longer storage. Use a freezer-safe container or a heavy-duty freezer bag. Leave some space at the top because it may expand. Label it with the date. The chowder can last in the freezer for up to 3 months. When you want to eat it again, just thaw it in the fridge overnight.
Reheating Instructions for Best Results
Reheat creamy corn chowder on the stove for the best taste. Pour it into a pot over low heat. Stir it often to avoid sticking. You might need to add a splash of broth or cream to bring back its creamy texture. If you use a microwave, heat it in short bursts. Stir in between to ensure even heating. Enjoy your delicious chowder!
FAQs
How to make creamy corn chowder thicker?
To thicken your creamy corn chowder, you have a few options. You can add more potatoes, as they will break down and create a nice creamy texture. Another choice is to blend a portion of the soup, which helps thicken it without losing flavor. Lastly, you can mix in a cornstarch slurry. Just combine equal parts cornstarch and cold water, stir it into the chowder, and let it simmer until it thickens.
Can I use canned corn instead of fresh?
Yes, you can use canned corn if fresh corn is not on hand. Canned corn is convenient and still tasty. Just make sure to drain it well before adding it to your chowder. This will help keep the soup from getting too watery. The flavor may be slightly different, but it will still be yummy.
What to serve with creamy corn chowder?
Creamy corn chowder pairs well with many sides. I love to serve it with crusty bread for dipping. A fresh green salad also adds a nice crunch and balances the chowder’s creaminess. For a heartier meal, consider grilled cheese sandwiches or a simple quesadilla. These options will make your meal feel complete and satisfying.Check it out for more tips!
This article covered how to make creamy corn chowder from scratch. You learned about key ingredients, easy steps, and tips for success. We discussed variations to fit your diet and how to store leftovers for later use. Remember, you can customize this chowder to match your taste. I hope you feel ready to try this comforting recipe in your kitchen. Enjoy making it and share your own spin with friends!


. Yes, you can use fresh black beans. - Preparation: You must soak the beans overnight. This helps them cook evenly. - Cooking Time: Fresh beans take longer to cook. Boil them for about 1-1.5 hours before adding to the chili. Using fresh beans gives a great texture and taste, but it requires more time. To add spice, try these methods: - Chili Powder: Increase the amount of chili powder. - Jalapeños: Add diced jalapeños when you sauté the vegetables. - Hot Sauce: Drizzle hot sauce on top before serving. Feel free to adjust the spice level to fit your taste! This chili is packed with nutrients: - Sweet Potatoes: High in vitamins A and C. Great for your immune system. - Black Beans: A good source of protein and fiber. They help keep you full. - Vegetables: Onions and peppers add vitamins and minerals without many calories. Enjoying this chili means you get a tasty meal that’s also good for you. Yes, you can make this chili ahead of time. - Meal Prep: Cook the chili and let it cool. Store in a container. - Best Practices: Refrigerate for up to 3 days. For longer storage, freeze it in portions. Reheat in the microwave or on the stove before serving. Making it in advance saves time and enhances flavors! This blog post covered everything you need for Sweet Potato Black Bean Chili. We explored the main and optional ingredients, provided step-by-step instructions, and shared useful tips. Remember, using fresh ingredients boosts flavor and health benefits. Feel free to adjust spices or try different variations to make it your own. Enjoy this comforting dish, whether you serve it plain or dressed with toppings! Happy cooking!](https://dishtreats.com/wp-content/uploads/2025/06/d8445fbe-e2a0-4bb7-bab4-282b1fdf418c-768x768.webp)
![- 2 cups cooked chicken, shredded - 1 can (10 oz) red enchilada sauce - 1 can (15 oz) black beans, rinsed and drained - 1 cup corn kernels (fresh, frozen, or canned) - 1 small onion, finely chopped - 2 cloves garlic, minced - 2 cups shredded Mexican cheese blend - 8 small corn tortillas, cut into quarters - 1 teaspoon ground cumin - 1 teaspoon chili powder - ½ teaspoon salt - ¼ teaspoon black pepper - 1 cup sour cream (for serving) - Fresh cilantro, chopped (for garnish) When I make Chicken Enchilada Casserole, I love using fresh, simple ingredients. Each item adds flavor and texture. You can use rotisserie chicken for a quick option. It saves time and keeps the dish tasty. The red enchilada sauce gives it that signature kick. I prefer black beans for added protein. They blend well with the other flavors. Corn adds sweetness and a nice crunch. I often choose fresh corn when it's in season, but frozen works great too. Onions and garlic bring an aromatic base. They make the kitchen smell amazing while cooking. The cheese is essential. I like a Mexican cheese blend because it melts beautifully. Corn tortillas are the heart of this dish, creating layers of goodness. The spices, like cumin and chili powder, enhance the flavors without overwhelming them. Finally, a dollop of sour cream and fresh cilantro on top makes it perfect. This combination of ingredients creates a hearty meal your family will love. For the complete recipe, check the Full Recipe section. 1. Preheat the oven to 350°F (175°C). This helps cook the casserole just right. 2. In a large skillet, heat a little oil over medium heat. Add the chopped onion. Sauté for 3-4 minutes. Wait until the onion turns soft and clear. 3. Next, add minced garlic to the skillet. Cook for 1 more minute. This will fill your kitchen with a lovely smell. 4. Stir in the shredded chicken and red enchilada sauce. Add the rinsed black beans, corn, cumin, chili powder, salt, and pepper. Mix well and cook for 5-7 minutes. Make sure everything is hot and well combined. 1. Grease a 9x13 inch baking dish with a little oil or butter. This prevents sticking. 2. Take half of the tortilla quarters and place them at the bottom of the dish. Overlap them slightly to cover the bottom. 3. Spoon half of the chicken mixture over the tortillas. Spread it out evenly. Then, sprinkle 1 cup of shredded cheese on top. 4. Repeat with the remaining tortilla quarters and chicken mixture. Top with the rest of the cheese for a cheesy crust. 1. Cover the casserole tightly with aluminum foil. Bake for 20 minutes. This allows the flavors to mix well. 2. After 20 minutes, remove the foil. Bake uncovered for an extra 10-15 minutes. Wait until the cheese is bubbly and golden. 3. When done, take the casserole out of the oven. Let it cool for about 5 minutes before serving. This makes it easier to cut and serve. Enjoy this savory chicken enchilada casserole with your family! For the full recipe, check out the details above. - Use rotisserie chicken for time-saving: Rotisserie chicken is great for busy days. It saves time and adds flavor. Just shred it and mix it into your casserole. You get tasty results without a lot of work. - How to properly layer for even cooking: Start with tortilla quarters at the bottom. This helps soak up the sauce and keeps the bottom from getting soggy. Spread the chicken mixture evenly over the tortillas. Repeat this process. Finish with cheese on top for a bubbly crust. - Adjusting spice levels: If you like heat, add more chili powder or some diced jalapeños. For milder flavors, reduce the chili powder. Taste as you go to find your perfect balance. - Additional toppings and garnishes ideas: Try adding sliced avocado, diced tomatoes, or pickled red onions. These bright toppings add color and flavor. A sprinkle of fresh cilantro also makes your dish pop! - Best side dishes to serve with casserole: Serve with a simple green salad or Mexican rice. These sides add freshness and balance the rich casserole. You can also offer tortilla chips for crunch. - How to present for a family meal: Cut the casserole into squares for easy serving. Use a large spoon to add a dollop of sour cream on top. Finish with a sprinkle of cilantro for a beautiful presentation. Enjoy this meal around the table! {{image_4}} You can easily swap ingredients in your Chicken Enchilada Casserole. If you want a different meat, use turkey or beef instead of chicken. Both options taste great and keep the dish hearty. For a vegetarian version, try using black beans and colorful veggies like bell peppers or zucchini. These swaps keep the casserole flavorful and filling. If you need gluten-free options, use corn tortillas instead of flour ones. They work perfectly in this casserole and add a nice flavor. For those who want a dairy-free meal, look for plant-based cheese and sour cream. These substitutes will still give you the creamy texture you love without the dairy. To change the flavor profile, add some spice! For a Mexican-inspired twist, mix in jalapeños or your favorite salsa. This will add a kick and extra layers of flavor. If you prefer a Southwestern style, try adding more spices like smoked paprika or cayenne pepper. This will give the casserole a warm, smoky taste that everyone will enjoy. For the full recipe, check out [Full Recipe]. Store leftover Chicken Enchilada Casserole in an airtight container. This keeps it fresh. Make sure it cools down before sealing. It lasts about 3-4 days in the fridge. If you notice any odd smell or color, it's best to toss it. You can freeze the casserole both before and after baking. If you freeze it before baking, wrap it tightly in plastic wrap. Bake it straight from the freezer. This usually takes about 45-60 minutes at 350°F. If you freeze it after baking, let it cool first. Cover it with foil or plastic wrap. To reheat, bake at 350°F for about 30 minutes, or until hot. You can make this casserole ahead for busy weeknights. Simply prepare it a day in advance and store it in the fridge. Portion it into individual servings for quick meals. This way, you can just grab and heat it when needed. It makes weeknight dinners simple and stress-free. Can I make Chicken Enchilada Casserole in advance? Yes, you can make this dish ahead of time. Prepare it up to the baking step. Cover it and store it in the fridge. When ready, bake it straight from the fridge. This saves time on busy nights. What can I substitute for black beans? You can use pinto beans, kidney beans, or chickpeas. Each option adds a unique flavor. Just rinse and drain them before adding. How do I reheat leftovers without drying out the dish? To reheat, cover the casserole with foil. Heat it in a 350°F oven for about 20 minutes. This keeps it moist and warm. You can also microwave individual portions with a damp paper towel. What size baking dish should I use? I recommend a 9x13 inch baking dish. This size holds all the layers well. It helps the casserole cook evenly. How do I know when the casserole is completely done? The casserole is done when the cheese is golden and bubbly. Insert a knife in the center; it should be hot. The layers should look set and not runny. Can I adjust the spice level of the casserole? Yes, you can make it spicier or milder. Add more chili powder for heat. For milder flavor, reduce the spices or choose mild enchilada sauce. What are the best toppings to add for extra flavor? You can add sliced jalapeños, diced avocado, or fresh lime juice. Chopped green onions and extra cilantro also give a nice touch. These toppings enhance the dish's taste and look. This Chicken Enchilada Casserole is easy and fun to make, with great flavors. You learned about ingredients, step-by-step instructions, and tips for better cooking. Don’t forget to try different variations, depending on your taste or needs. Storing leftovers is simple, making this dish great for meal prep. This recipe is perfect for family meals or gatherings. Enjoy the warmth and comfort it brings to your table. Now, grab your ingredients and start cooking!](https://dishtreats.com/wp-content/uploads/2025/07/f6c231a9-1b86-4c94-be4f-d7e13d8c3061-768x768.webp)


