Creamy Cilantro Lime Dip Fresh and Flavorful Recipe

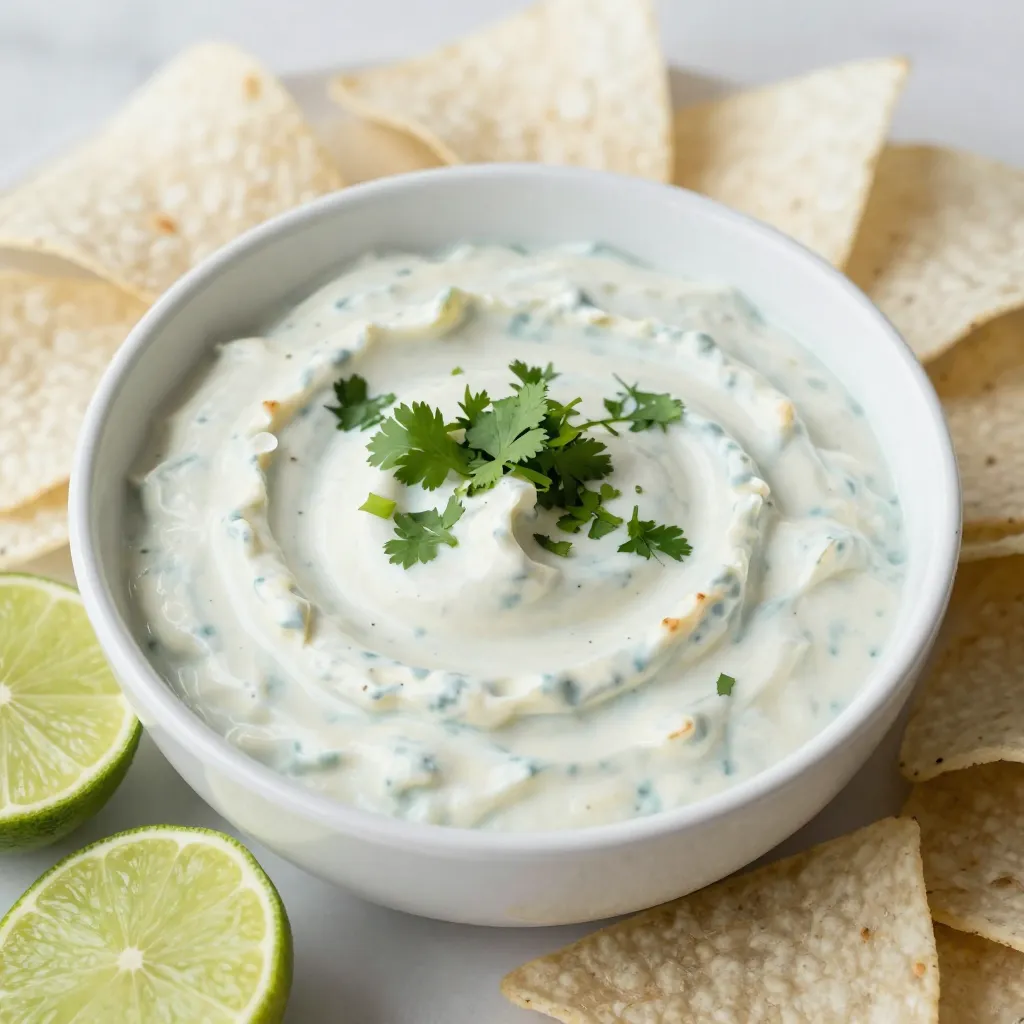
Are you ready to elevate your snack game? This Creamy Cilantro Lime Dip is fresh, flavorful, and perfect for any gathering. With just a handful of ingredients, you can whip up a zesty dip that pairs well with chips, veggies, or even grilled meats. I’ll guide you through easy steps to make this crowd-pleaser, along with tips for tasty variations and storage. Let’s dive in and create a dip that your taste buds will love!
Why I Love This Recipe
- Fresh Flavor: This dip is bursting with fresh cilantro and zesty lime, making it a perfect complement to any dish.
- Versatile Use: Whether as a dip for chips, a topping for tacos, or a spread for sandwiches, this dip fits many occasions.
- Healthy Ingredients: With yogurt and sour cream, it’s a creamy yet lighter option packed with flavor.
- Quick to Make: In just 10 minutes, you can whip up this delicious dip, making it a great last-minute party addition.
Ingredients
Main Ingredients for Creamy Cilantro Lime Dip
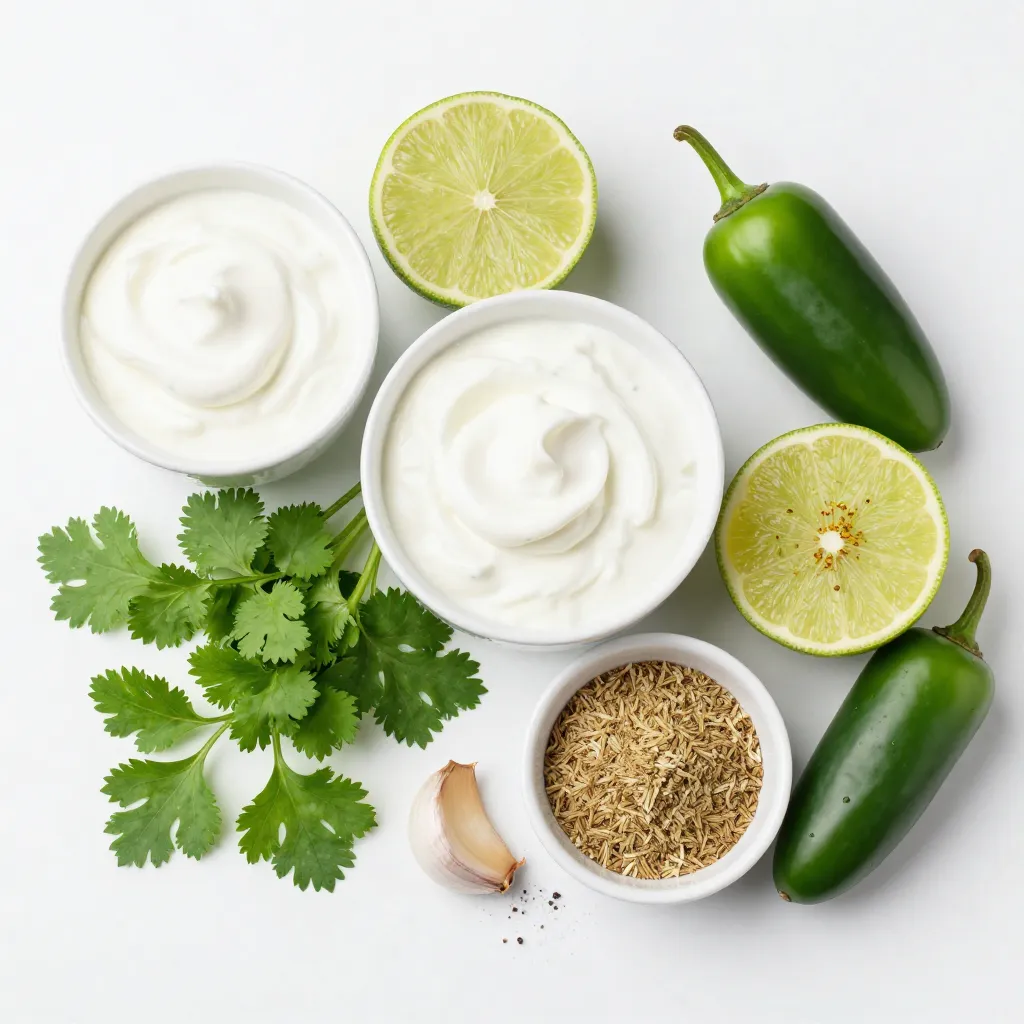
To create this delicious dip, gather these key ingredients:
- 1 cup sour cream
- 1/2 cup thick Greek yogurt
- 1/4 cup fresh cilantro, finely chopped
- 2 tablespoons freshly squeezed lime juice
- 1 clove garlic, finely minced
- 1/2 teaspoon ground cumin
- Salt and freshly cracked black pepper, to taste
These main ingredients work together to make your dip creamy, tangy, and full of flavor.
Optional Ingredients for a Spicy Kick
If you want to add some heat, consider this optional ingredient:
- 1/2 jalapeño, seeded and finely minced
This jalapeño will give your dip a lively kick. Adjust the amount based on your taste.
Recommended Serving Accompaniments
Pair your creamy cilantro lime dip with these tasty options:
- Crispy tortilla chips
- Crunchy veggie sticks
- Stuffed mini sweet peppers
These accompaniments enhance the eating experience. They bring out the dip’s fresh flavors and create a fun snack.

Step-by-Step Instructions
Preparing the Base Mixture
Start with a medium mixing bowl. Add 1 cup of sour cream and 1/2 cup of thick Greek yogurt. Use a whisk or spatula to blend them well. Mix until the texture is smooth and creamy. This base gives your dip a rich flavor.
Incorporating the Flavorful Additions
Next, add 1/4 cup of finely chopped fresh cilantro. Then, squeeze in 2 tablespoons of freshly squeezed lime juice. Don’t forget to add 1 clove of finely minced garlic and 1/2 teaspoon of ground cumin. Stir gently to combine everything. You want the dip to be thick and creamy.
Final Touches and Serving Suggestions
Taste your dip and season it with salt and freshly cracked black pepper. If you like heat, fold in 1/2 minced jalapeño. Cover the bowl tightly with plastic wrap or place the dip in an airtight container. Refrigerate for at least 30 minutes. This helps the flavors blend well. Before serving, stir the dip again. Adjust seasoning if needed. Serve it in a bright bowl, topped with more cilantro. Pair it with tortilla chips or veggie sticks for a tasty snack!
Tips & Tricks
Enhancing Flavor Profiles
To make your creamy cilantro lime dip even better, think about adding more herbs. Fresh parsley or mint can give it a fresh twist. You can also try different spices like chili powder or smoked paprika for extra depth. If you love citrus, consider adding more lime juice or even some lemon zest for brightness. These small tweaks can really make your dip pop!
Substitutions for Dietary Needs
If you have dietary restrictions, there are easy swaps. For a dairy-free option, use coconut yogurt instead of sour cream or Greek yogurt. You can also use avocado to create a creamy base. If you need a lower-fat option, try using low-fat yogurt. Always make sure to check labels for allergens if you are cooking for others.
Timing and Temperature Considerations
Timing is key for the best flavor. Chill your dip for at least 30 minutes before serving. This allows the flavors to blend well. If you are in a hurry, even 15 minutes can help. Serve your dip cold for a refreshing taste. Keep it in the fridge if you aren’t serving it right away. This way, it stays fresh and creamy!
Pro Tips
- Fresh Ingredients: Always use fresh cilantro and lime juice for the brightest flavors in your dip.
- Chill Time: Allow the dip to chill for at least 30 minutes before serving; this helps the flavors meld together beautifully.
- Adjusting Spice: If you like it spicier, start with a small amount of jalapeño and increase to your taste.
- Serving Suggestions: Pair the dip with a variety of dippers like tortilla chips, veggie sticks, or pita bread for a colorful presentation.
Variations
Adding Different Herbs
You can change the flavor of your creamy cilantro lime dip by using other herbs. For a fresh twist, try adding parsley or basil. These herbs bring unique tastes that can brighten up your dip. If you want a more earthy flavor, consider adding dill or chives. Each herb adds its own flair, so feel free to experiment!
Creamy Avocado Cilantro Lime Dip
Transform your classic dip into a creamy avocado cilantro lime dip. Simply mash one ripe avocado and mix it with the original ingredients. The avocado adds a rich, buttery texture. It also gives a beautiful green color that makes your dip pop. This version is perfect for avocado lovers and is a great way to sneak in some extra nutrients.
Vegan Version of Cilantro Lime Dip
To make a vegan version of the dip, swap out the sour cream and Greek yogurt. Use coconut yogurt or cashew cream instead. This keeps the dip creamy while making it plant-based. You can also add a splash of nutritional yeast for a cheesy flavor. This way, everyone can enjoy the dip, no matter their diet!
Storage Info
Best Practices for Refrigeration
To keep your creamy cilantro lime dip fresh, always store it in an airtight container. This prevents air from getting in and helps maintain its creamy texture. Place the container in the fridge right after you finish eating. The dip stays best in the coldest part of your fridge, usually at the back. Make sure to cover the dip tightly if you use plastic wrap. This keeps the flavors strong and prevents the dip from absorbing other odors.
Freezing Guidelines
You can freeze this dip, but it’s best to enjoy it fresh. If you want to freeze it, place the dip in a freezer-safe container. Leave some space at the top for expansion. Use it within one month for the best taste. When ready to use, thaw the dip in the fridge overnight. Stir it well after thawing to bring back its smooth texture. Keep in mind that freezing may change the dip’s consistency slightly.
Shelf Life of Creamy Cilantro Lime Dip
When stored properly, creamy cilantro lime dip lasts about 3-4 days in the fridge. Always check for any off smells or changes in texture before using. If you see any mold or if it smells funny, it’s best to throw it away. For frozen dip, it can last up to one month but may lose some flavor and texture over time. If you plan to make a big batch, consider how quickly you’ll use it to keep it fresh and tasty!
FAQs
Can I make this dip ahead of time?
Yes, you can make this dip ahead of time. I often prepare it a few hours before serving. This allows the flavors to mix well. Just store it in the fridge. Make sure to cover it tightly. The dip stays fresh and tasty this way.
What can I use instead of sour cream?
If you need a substitute, use plain Greek yogurt. It gives a similar creamy texture. You can also try cottage cheese for a lower-fat option. Both choices work well in this dip.
How do I make the dip spicier?
To add heat, mix in minced jalapeño. Start with half a jalapeño for a mild kick. You can add more if you like it hotter. Another option is to sprinkle in some cayenne pepper. This will also bring some spice.
Is this dip suitable for specific diets?
This dip can fit many diets. It’s vegetarian and can be made gluten-free. If you use Greek yogurt, it can be lower in fat. For vegan options, swap sour cream with plant-based yogurt. Just check the labels to stay within dietary needs.
This creamy cilantro lime dip is simple and versatile. We explored its main ingredients, optional spicy add-ins, and perfect pairings. I shared easy steps to prepare it, along with tips for flavor and substitutions. You discovered fun variations and how to store it for later use.
In the end, this dip is great for any occasion, whether a party or a quiet night in. Enjoy making it your ow

Creamy Cilantro Lime Dip
Ingredients
- 1 cup sour cream
- 1/2 cup thick Greek yogurt
- 1/4 cup fresh cilantro, finely chopped
- 2 tablespoons freshly squeezed lime juice
- 1 clove garlic, finely minced
- 1/2 teaspoon ground cumin
- to taste salt and freshly cracked black pepper
- 1/2 jalapeño seeded and finely minced (optional)
Instructions
- In a medium mixing bowl, combine the sour cream and Greek yogurt. Use a whisk or spatula to blend them together until the mixture is smooth and creamy.
- Incorporate the finely chopped cilantro, freshly squeezed lime juice, minced garlic, and ground cumin into the bowl with the yogurt mixture.
- Gently stir all the ingredients together until they are well combined and the dip becomes thick and creamy.
- Taste your dip and season it with salt and freshly cracked black pepper according to your preference. If you enjoy a bit of heat, fold in the minced jalapeño for an extra punch.
- Cover the bowl tightly with plastic wrap or transfer the dip to an airtight container and refrigerate for at least 30 minutes. This allows the flavors to blend beautifully and enhances the overall taste.
- Before serving, give the dip a thorough stir to ensure all ingredients are evenly distributed. Taste again and adjust the seasoning, adding more salt or pepper if necessary.


![- 2 medium zucchinis - 1 cup cherry tomatoes - 1 cup fresh mozzarella balls - 1/4 cup fresh basil leaves - 2 tablespoons balsamic vinegar - 1 tablespoon extra virgin olive oil - Sea salt and freshly cracked black pepper - 1 tablespoon basil pesto (optional) When making Zucchini Noodle Caprese Salad, you want the freshest ingredients. Start with the zucchinis. I like using medium-sized ones, as they spiralize well. Spiralizing turns them into fun noodles. Next, grab a cup of cherry tomatoes. Halve them to release their juicy flavor. Fresh mozzarella balls add creamy texture. Halve these too for easy bites. You can't forget the fresh basil! I suggest tearing the leaves for a fragrant touch. Now, for the dressing, grab balsamic vinegar and extra virgin olive oil. These will bring brightness to your salad. Don't skip on sea salt and cracked black pepper. They enhance the flavors. If you're feeling adventurous, add basil pesto for an extra kick. For the full recipe, check out the details in the complete guide. Enjoy the fresh taste and vibrant colors of this simple dish! To start, you need to spiralize the zucchinis. Use a spiralizer or a vegetable peeler. Aim for long, noodle-like strands. This will give your salad a fun texture. After spiralizing, transfer the noodles to a large mixing bowl. Make sure they are separate from the other ingredients. Next, it's time to add the other ingredients. Toss in the halved cherry tomatoes and fresh mozzarella balls. Be careful not to crush the mozzarella. It adds creaminess to the salad. Now, take the fresh basil leaves. Tear them by hand and scatter them over the salad. This adds a bright aroma. In a small bowl, whisk together balsamic vinegar and extra virgin olive oil. Add a pinch of sea salt and freshly cracked black pepper. Whisk until the mixture is smooth. This vinaigrette will bring all the flavors together. Now it’s time to combine everything. Drizzle the vinaigrette over the salad. Use tongs to gently mix the ingredients. Aim to coat every strand of zucchini without breaking them. If you want extra flavor, you can add basil pesto on top before serving. Enjoy your salad right away for the best taste. For a deeper flavor, let it sit for 10-15 minutes. You can find the Full Recipe above for detailed instructions. To make great zucchini noodles, use a good spiralizer. A handheld spiralizer works well, but a countertop version is even better. This tool gives you long, even noodles. After spiralizing, place the noodles in a colander. This helps drain excess water. Zucchini holds a lot of moisture, so this step is key. If your noodles are too wet, they can make your salad soggy. Adjusting seasoning is easy. Start with sea salt and black pepper. Taste the salad as you mix. If you want more flavor, add a bit more salt or pepper. Fresh herbs bring your salad to life. I love using torn basil leaves. They add a lovely aroma and taste. You can also try parsley or mint for a twist. Serve your salad in wide, shallow bowls. This makes it look beautiful and inviting. For a gourmet touch, drizzle balsamic reduction on top. It adds a nice shine and flavor. Finally, garnish with extra torn basil. This not only looks good but adds freshness too. Enjoy your meal that is as pretty as it is tasty. For the full recipe, be sure to follow my detailed steps! {{image_4}} You can easily swap out the zucchini for other vegetables. Carrots, cucumber, or even sweet potatoes can add crunch and color. Each veggie brings its own taste and texture. If you want to change the cheese, try feta or goat cheese. These options add a tangy twist to your salad. You can explore different vinaigrettes to change the flavor. A lemon vinaigrette can give a bright, fresh taste. You can also try a garlic-infused dressing. This adds depth and makes each bite exciting. Don't be afraid to mix and match! Pair this salad with proteins to make it a full meal. Grilled chicken or shrimp works well. You can also enjoy it as a side dish with steak or fish. Add some crusty bread, and you have a lovely dinner. Enjoy it at a picnic or a barbecue for a fun twist! To keep your Zucchini Noodle Caprese Salad fresh, store it in an airtight container. This helps keep moisture out. If possible, separate the dressing from the salad. This keeps the zucchini from getting soggy. You can mix it just before serving. For the best taste, use the salad within two days. If you plan to enjoy leftovers, consider adding fresh basil and mozzarella right before eating. This keeps the flavors bright and vibrant. In the fridge, this salad lasts about two days. After that, the zucchini may lose its crunch. Check for any off smells or slimy textures. These are signs that the salad has gone bad. If you notice them, it’s time to toss it out. Enjoy your fresh salad while it’s at its best! For the full recipe, click here: [Full Recipe]. Yes, you can prepare parts of the salad ahead of time. Spiralize the zucchinis and store them in an airtight container. Keep them in the fridge. You can also chop the tomatoes and mozzarella and store them separately. Assemble the salad just before serving. This keeps the flavors fresh and bright. Zucchini noodles are very healthy. They are low in calories and high in water content. This makes them great for hydration. Zucchini is full of vitamins A and C, which boost your immune system. They are also a good source of fiber, which promotes good digestion. If you don’t like mozzarella, try using feta cheese or goat cheese. Both options add a nice tangy flavor. You can also use avocado for creaminess if you want a dairy-free choice. Each option adds its own twist to the salad. Yes, you can use many herbs instead of basil. Fresh parsley, cilantro, or mint can add unique flavors. Oregano is another great option. Feel free to mix and match to create your own version. This keeps the salad exciting and fresh. To avoid soggy noodles, salt the zucchini first. Let them sit for about 10 minutes. This draws out excess moisture. After that, pat them dry with a paper towel. This helps keep your salad crisp and enjoyable. This salad combines fresh zucchini noodles, tomatoes, and mozzarella for a tasty dish. You learned how to prepare the ingredients, mix flavors, and present it beautifully. Customizing the salad with unique flavors or proteins can make it your own. Always store leftovers properly to keep them fresh. With these tips, you can enjoy a delicious and healthy meal anytime. Embrace creativity and have fun in the kitchen!](https://dishtreats.com/wp-content/uploads/2025/06/9c06bc60-1dc6-4324-8b6b-f347b8231277-768x768.webp)


![- 1 large zucchini, sliced into thick rounds - 1 red bell pepper, cut into 1-inch squares - 1 yellow bell pepper, cut into 1-inch squares - 1 red onion, cut into large chunks - 8 cherry tomatoes, whole - 1 cup mushrooms, halved - 3 tablespoons extra virgin olive oil - 2 teaspoons dried oregano - 1 teaspoon garlic powder - Salt and black pepper to taste - Fresh parsley, finely chopped (for garnish) - 8 skewers (if using wooden skewers, soak in water for 30 minutes prior to use) Choosing the right ingredients is key to making these grilled Mediterranean veggie skewers shine. Fresh, colorful vegetables not only taste better but also look great on the plate. I love using seasonal veggies for the best flavor. You can mix and match as you like. The extra virgin olive oil adds richness and helps the spices stick. Dried oregano gives that classic Mediterranean taste. Garlic powder adds depth without the hassle of fresh garlic. Don't forget to season with salt and black pepper. This simple step makes a big difference in flavor. Fresh parsley as a garnish not only adds color but also a fresh taste that brightens up the dish. When preparing the skewers, remember to soak wooden skewers in water first. This prevents them from burning on the grill. If you use metal skewers, you can skip this step. For the full recipe, check out the details above. Enjoy preparing these delicious veggie skewers! - Preheat grill to medium-high heat. - In a bowl, combine the vegetables: zucchini, bell peppers, onion, tomatoes, and mushrooms. - In a small bowl, mix olive oil, oregano, garlic powder, salt, and pepper. - Drizzle the marinade over the veggies. Toss until all pieces are coated. - Thread the marinated vegetables onto skewers. Alternate colors for a bright look. - Place the skewers on the hot grill. Grill for 10-12 minutes. - Turn the skewers occasionally. This helps them cook evenly. - Remove skewers from the grill and let them cool slightly. - Just before serving, sprinkle fresh parsley on top for a nice finish. For the complete details, check the [Full Recipe]. For the best grilled Mediterranean veggie skewers, pick seasonal vegetables. Fresh veggies taste better and add more flavor. Look for zucchini, bell peppers, and red onions. They offer great colors and textures. When you shop, choose firm, bright vegetables. Avoid any that feel soft or look dull. You can spice up your marinade. Try adding fresh herbs like basil or thyme. They add a nice touch. You can also use lemon juice for a zesty flavor. For oils, consider using avocado or sesame oil. Each type brings a unique taste to the skewers. To get those perfect grill marks, heat your grill well. A hot grill helps sear the veggies. Place the skewers at an angle for better marks. Turn them every few minutes. This promotes even cooking and prevents burning. To stop veggies from sticking, oil the grill grates lightly. You can also brush oil on the skewers before grilling. For the full recipe, check the details above! {{image_4}} You can mix up your veggie skewers with many different vegetables. Try adding eggplant, asparagus, or zucchini for a tasty twist. Each vegetable brings its unique flavor and texture. Think about color too! Using red, yellow, green, and purple veggies makes your skewers look bright and fun. This also helps to attract kids and picky eaters. More colors usually mean more vitamins and minerals, too! Want to add protein? Try tofu or tempeh for a plant-based option. Marinate them just like the veggies for great flavor. If you prefer meat, chicken or shrimp works well. Marinate your choice of meat in olive oil, herbs, and spices. This adds depth to your skewers. It’s an easy way to make a filling meal. Don’t be afraid to play with flavors! Try different marinades. A simple lemon juice and herb mix can brighten the dish. You can also use spicy sauces for a kick. Before serving, drizzle some fresh dressing on top. This adds a burst of flavor and makes the dish even more appealing. For the full recipe, check out the complete guide. To store leftover skewers, let them cool down first. Place them in an airtight container. You can use glass or plastic containers. Make sure the lid seals well to keep the flavors fresh. For freezing skewers safely, wrap each skewer in plastic wrap. Then, place them in a freezer bag. This keeps them from getting freezer burn. When you reheat, take them out and thaw in the fridge overnight. To warm them up, place them on a grill or in the oven. Heat them until they are hot, about 5 to 10 minutes. These skewers can last up to 4 days in the refrigerator. After that, they may start to lose flavor and texture. Watch for signs that the skewers have gone bad. If they smell off or look slimy, it’s best to toss them. Always trust your senses when it comes to food safety. For the full recipe, check the section above. Yes, you can prep these skewers in advance. Start by cutting the vegetables. Place them in a bowl. Drizzle with olive oil and spices. Toss until coated. Cover the bowl and refrigerate. This keeps them fresh and ready to grill. I recommend marinating for at least 30 minutes. This allows the flavors to soak in well. Grill these skewers on medium-high heat. This ensures even cooking. Aim for a temperature of about 400°F (200°C). Grill for 10-12 minutes. Turn the skewers every few minutes. This will give you nice grill marks. Check the veggies for tenderness. They should be soft but still slightly firm. You can use wooden, metal, or bamboo skewers. Each has its benefits. Wooden skewers need soaking in water for 30 minutes. This prevents burning on the grill. Metal skewers are reusable and sturdy. They can handle heavy vegetables well. Bamboo skewers are lightweight and easy to find. Choose what works best for you! For the full recipe, refer to the earlier section. In this blog post, I shared a simple way to make tasty vegetable skewers. We covered the ingredients, preparation steps, and grilling techniques. You learned tips to choose fresh veggies, add flavors, and create fun variations. Remember, you can customize skewers to suit your taste. Enjoy the grilling process and share your creations with friends and family. Happy grilling!](https://dishtreats.com/wp-content/uploads/2025/07/4b70700e-9f85-4317-b9e4-a855a04e592b-768x768.webp)
![- 1 cup rolled oats - 2 cups almond milk (or your preferred milk) - 1 medium sweet apple, diced (suggestions: Fuji or Gala) - 1 teaspoon ground cinnamon - 2 tablespoons maple syrup (or honey if you prefer) - 1/2 teaspoon vanilla extract - 1/4 cup plain Greek yogurt (optional) - Pinch of salt - Chopped nuts for topping - Extra apple slices and cinnamon for garnish Apple cinnamon overnight oats are easy to make and full of flavor. The oats soak overnight, making them creamy and delicious. You can customize this recipe based on your taste. For the base, I use rolled oats and almond milk, but feel free to pick any milk you like. The diced apple brings sweetness and crunch. I suggest using Fuji or Gala apples since they are sweet and juicy. Ground cinnamon adds warmth and a cozy touch. Maple syrup gives the oats a natural sweetness. If you want a little creaminess, add Greek yogurt. Don’t forget the pinch of salt; it enhances all the flavors. Chopped nuts add a nice crunch on top. You can use walnuts, pecans, or any nuts you enjoy. Finally, garnish with extra apple slices and a dusting of cinnamon for a pretty finish. - Different types of milk (coconut, oat, etc.) - Sweeteners (agave syrup, stevia, etc.) - Additional fruit (berries, bananas, etc.) If you want to try something different, there are many options. Swap almond milk for coconut or oat milk if you prefer. You can change sweeteners too; agave syrup or stevia work well. Add in more fruits like berries or sliced bananas for extra flavor. This makes each serving unique and fun. The best part? You can make it just how you like it! For the full recipe, check out Apple Cinnamon Overnight Oats Delight. - Step 1: Combine rolled oats with milk and yogurt. In a large bowl, mix 1 cup of rolled oats with 2 cups of almond milk. If you like, add 1/4 cup of Greek yogurt for creaminess. Stir until mixed well. - Step 2: Add apples, cinnamon, sweetener, vanilla, and salt. Fold in 1 diced apple, 1 teaspoon of ground cinnamon, and 2 tablespoons of maple syrup. Add 1/2 teaspoon of vanilla extract and a pinch of salt. Mix until everything is evenly distributed. - Step 3: Transfer mixture into jars and refrigerate. Spoon the oat mix into jars. Make sure each jar has some apple pieces. Close the lids and place them in the fridge overnight. - Evenly distribute diced apples among jars. This ensures each jar has the same amount of apple flavor. - Layer ingredients for visual appeal. Create a pretty look by layering oats and apples. This makes your breakfast even more inviting. - Stir before serving and adjust consistency. When you take the jars out, give them a good stir. If they feel too thick, add a splash of milk. - Top with nuts and additional apple slices. Finish with a sprinkle of chopped nuts and a few apple slices for crunch. A dash of cinnamon adds warmth and flavor. For full details, check the [Full Recipe]. To get the best texture, always use rolled oats. They soak up the liquid well. Steel-cut oats take longer to soften. You might want to avoid them for overnight oats. Adjust the sweetness by adding more or less maple syrup. Taste as you mix to find your perfect balance. Make a big batch of oats for quick breakfasts. You can prepare up to five jars at once. Store them in the refrigerator for up to five days. This way, you’ll have a quick meal ready on busy mornings. Feel free to experiment with spices like nutmeg or cardamom. Just a pinch can add a warm kick. You can also add seeds like chia or flaxseed. These add fiber and make your oats even better for you. {{image_4}} You can easily make apple cinnamon overnight oats vegan. Just swap the Greek yogurt for a plant-based yogurt. Use almond, coconut, or oat milk for a creamy base. These changes keep the flavor rich and tasty while being dairy-free. If you need gluten-free options, choose certified gluten-free oats. Many brands offer oats that are safe for those with gluten sensitivities. This way, you can enjoy your oats without worry. You can mix in other fruits to change the taste. Try berries like strawberries or blueberries for a fresh twist. Bananas also work well, adding sweetness and creaminess. For toppings, nuts and seeds add crunch. Chopped almonds, walnuts, or sunflower seeds all taste great. You can also sprinkle chia seeds for extra fiber and health benefits. In fall, add pumpkin spice to your oats for a cozy taste. Just mix in a teaspoon or two for that warm, spiced flavor. It pairs perfectly with apples. In summer, think about fresh fruits like peaches or mangoes. These fruits add a bright, juicy flavor. You can mix them in or use them as a topping for a colorful and tasty breakfast. For the complete recipe, check out the [Full Recipe]. To keep your apple cinnamon overnight oats fresh, use jars or airtight containers. Glass jars work great. They seal well and let you see the yummy layers. Make sure to refrigerate them right after you prepare them. This keeps the oats safe to eat. You can freeze individual servings of overnight oats. First, pour the oats into freezer-safe containers or jars. Leave some space at the top, as they will expand. To enjoy later, thaw them in the fridge overnight. Once thawed, stir well. You might want to add a splash of milk to make them creamy again. Apple cinnamon overnight oats can stay fresh in the fridge for up to five days. Check for any signs of spoilage before eating. If the oats smell sour or have a strange color, throw them away. Always trust your nose and eyes! For the best taste, enjoy them within the first few days. Apple cinnamon overnight oats are a tasty breakfast. They combine oats, milk, apples, and cinnamon. The mixture sits in the fridge overnight. This soaking makes the oats soft and creamy. You get a nice blend of flavors. It’s a quick way to enjoy a healthy meal. Yes, you can use quick oats. However, they have a different texture. Quick oats cook faster and become mushy. If you use them, soak for less time. Rolled oats keep a firmer bite and work better for overnight oats. Overnight oats last about 5 days in the fridge. Store them in airtight jars or containers. Check for bad smells or changes in texture. If they look or smell off, toss them out. Yes, kids love apple cinnamon overnight oats! They are sweet and fun to eat. Serve in small jars for a cute look. You can also add toppings like nuts or more fruit for variety. This makes it a family-friendly dish everyone can enjoy. Apple cinnamon overnight oats offer a delightful and easy breakfast option. You can prepare them quickly with just a few simple steps. This meal not only fills you up but also lets you customize flavors to your taste. Experiment with different fruits, sweeteners, and spices to keep it fun. Remember to store your oats correctly for freshness. Enjoy this nutritious dish throughout the week! Your mornings can be bright and delicious with this recipe.](https://dishtreats.com/wp-content/uploads/2025/06/6eb7544b-1d16-4ecc-8a32-decb7f29ee21-768x768.webp)
