Creamy Avocado Toast Simple and Healthy Delight
![To make creamy avocado toast, you need these fresh ingredients: - 4 ripe avocados - 8 slices of whole grain bread - 1 tablespoon fresh lemon juice - ½ teaspoon garlic powder - ½ teaspoon smoked paprika - Salt and black pepper, to taste - 1 cup cherry tomatoes, halved - Fresh basil leaves for garnish These ingredients come together to create a bright and tasty dish. The avocados provide creaminess, while the lemon juice adds a zing. Garlic powder and smoked paprika give the avocado spread a delicious depth. You can customize your toast with these optional toppings: - Crumbled feta cheese - Red chili flakes - A drizzle of balsamic glaze These extras let you explore different flavors. Feta adds a salty kick, while red chili flakes bring heat. Balsamic glaze offers a sweet contrast. Feel free to mix and match to suit your taste! Avocados are not just tasty; they also pack a punch in nutrition. They are rich in healthy fats, which can help lower bad cholesterol. They also contain fiber, which aids digestion. Plus, avocados are high in vitamins C, E, and K, supporting your immune system and skin health. Eating avocados promotes heart health and keeps you feeling full longer. This creamy avocado toast is not only a simple delight but a smart choice for your meals. For the full recipe, check out the detailed instructions! To make creamy avocado toast, start by toasting your bread. Use a toaster or a skillet. Aim for a golden brown color. This creates a firm base for your toppings. While the bread toasts, cut the ripe avocados in half. Remove the pits carefully. Use a spoon to scoop the soft flesh into a bowl. Next, add fresh lemon juice, garlic powder, smoked paprika, salt, and black pepper. Mix these into the avocado. Use a fork to mash it until creamy. It should still have some small chunks for texture. Taste it and adjust the seasoning if needed. Once the bread is ready, spread the avocado mix generously over each slice. Make sure to cover the bread completely. For the best toast, choose whole grain bread. It adds flavor and nutrition. Toasting in a skillet gives a nice crispness. Preheat the skillet over medium heat. Add a bit of olive oil for extra flavor. If using a toaster, toast twice for extra crunch. Keep an eye on the bread to avoid burning. Perfect toast should be firm and golden. To achieve the best creaminess, use ripe avocados. They should yield slightly when pressed. Start mashing with a fork in a bowl. Press down firmly to break it up. Mix in your other ingredients as you mash. This helps blend the flavors well. You want a creamy texture, but some chunks are great for bite. Don’t over-mash; keep it fun and textured. For the full recipe, you can check out the [Full Recipe]. When choosing avocados, look for ones that feel slightly soft when you gently squeeze them. A ripe avocado should give a little but not feel mushy. Check the skin color too; darker skin often means it's ripe. If you find hard avocados, leave them at room temperature for a few days to ripen. You can speed this up by placing them in a paper bag with a banana. If you have leftover avocado mixture, store it in an airtight container. To keep it fresh, add a layer of plastic wrap on top, pressing it directly against the surface. This prevents air from causing browning. You can also add a little extra lemon juice for added protection. Serve your creamy avocado toast with fresh toppings for added flavor and fun. Consider adding sliced radishes for crunch, or a poached egg for protein. You can also try smoked salmon or a sprinkle of nuts for extra texture. Customize each slice to create a unique bite every time. For the full recipe, check out the detailed steps and enjoy this simple dish! {{image_4}} Let’s get creative with your creamy avocado toast! You can mix and match toppings to make each bite special. Here are some ideas: - Crumbled feta cheese: This adds a salty kick. - Red chili flakes: For a spicy touch, sprinkle these on top. - Balsamic glaze: Drizzle it for a sweet and tangy flavor. - Radish slices: These add crunch and a peppery note. - Sliced boiled eggs: They provide extra protein and creaminess. You can change the whole vibe of your toast with different flavors. Here are some tasty combos: - Spicy: Mash in jalapeños or add hot sauce for heat. - Mediterranean: Mix in olives, sun-dried tomatoes, and a bit of oregano. - Mexican: Top with black beans, corn, and a squeeze of lime. - Asian: Add sesame seeds, soy sauce, and sliced green onions. Avocado toast is great for everyone! Here are some easy swaps: - Vegan bread: Choose gluten-free bread to keep it vegan and gluten-free. - Nutritional yeast: Use this instead of cheese for a cheesy flavor. - Chickpeas: Mash these into the avocado for added protein and flavor. - Hummus: Spread a layer of hummus under the avocado for extra creaminess. Feel free to explore these variations and make this dish your own. For the full recipe, check the recipe section above. If you have leftover toast, store it in an airtight container. This keeps it from getting soggy. You can also wrap it in foil or plastic wrap. Toast is best eaten fresh, but you can enjoy it later. Just reheat it in a toaster or oven to bring back its crunch. To keep avocados fresh, sprinkle lemon juice on the cut side. The acid slows browning. Cover the avocado tightly with plastic wrap. You can also store it in an airtight container. Place the pit back in the unused half to help it stay fresh longer. If you prepare avocado toast but can't eat it right away, store it carefully. Place the toast in a container with a lid. Avoid stacking to prevent sogginess. When ready to eat, reheat it for a few minutes in an oven. This brings back the crispy texture. For the best taste, enjoy it fresh if you can. Check out the Full Recipe for more tips! To make creamy avocado toast, you need ripe avocados, whole grain bread, and a few spices. Start by toasting the slices of bread until golden brown. Next, cut the avocados in half, remove the pits, and scoop the flesh into a bowl. Add lemon juice, garlic powder, smoked paprika, salt, and pepper. Mash the mixture until creamy but slightly chunky. Spread it on the toast, top with cherry tomatoes, and finish with fresh basil. For full details, check out the Full Recipe. Avocados are packed with good fats. They are rich in fiber, which helps digestion. They also contain vitamins like C, E, K, and B6. These nutrients support heart health and skin. Eating avocados can also boost your mood and give you energy. Plus, they can help lower cholesterol! You can prepare the avocado mixture ahead of time. Store it in an airtight container with lemon juice to prevent browning. However, I advise against toasting the bread too early. Toasted bread tastes best fresh and crunchy. Assemble your avocado toast right before serving for the best flavor and texture. Whole grain bread is my go-to choice. It adds a nice nutty flavor and fiber. Sourdough is also excellent for a tangy twist. Gluten-free bread works well too. Choose a bread that you enjoy, as it will make your toast even better! Creamy avocado toast is simple and delicious. You learned the key ingredients, from ripe avocados to tasty toppings. Following the steps ensures the perfect texture and creaminess. Remember to choose ripe avocados and store them right. You can explore unique flavor combos for a fun twist. This dish offers great health benefits and endless variations. Enjoy making this tasty treat!](https://dishtreats.com/wp-content/uploads/2025/06/dc41bef5-23d5-41ad-b579-59fa0f16c9c9.webp)
Are you ready to elevate your breakfast game? Creamy avocado toast is your answer! It’s simple, tasty, and packed with nutrients. In this post, I’ll share the perfect ingredients, easy steps, and clever tips for crafting a delicious toast that keeps you full and healthy. Whether you want it spicy, savory, or sweet, I’ve got variations for everyone. Let’s dive in and make your mornings a delicious delight!
Ingredients
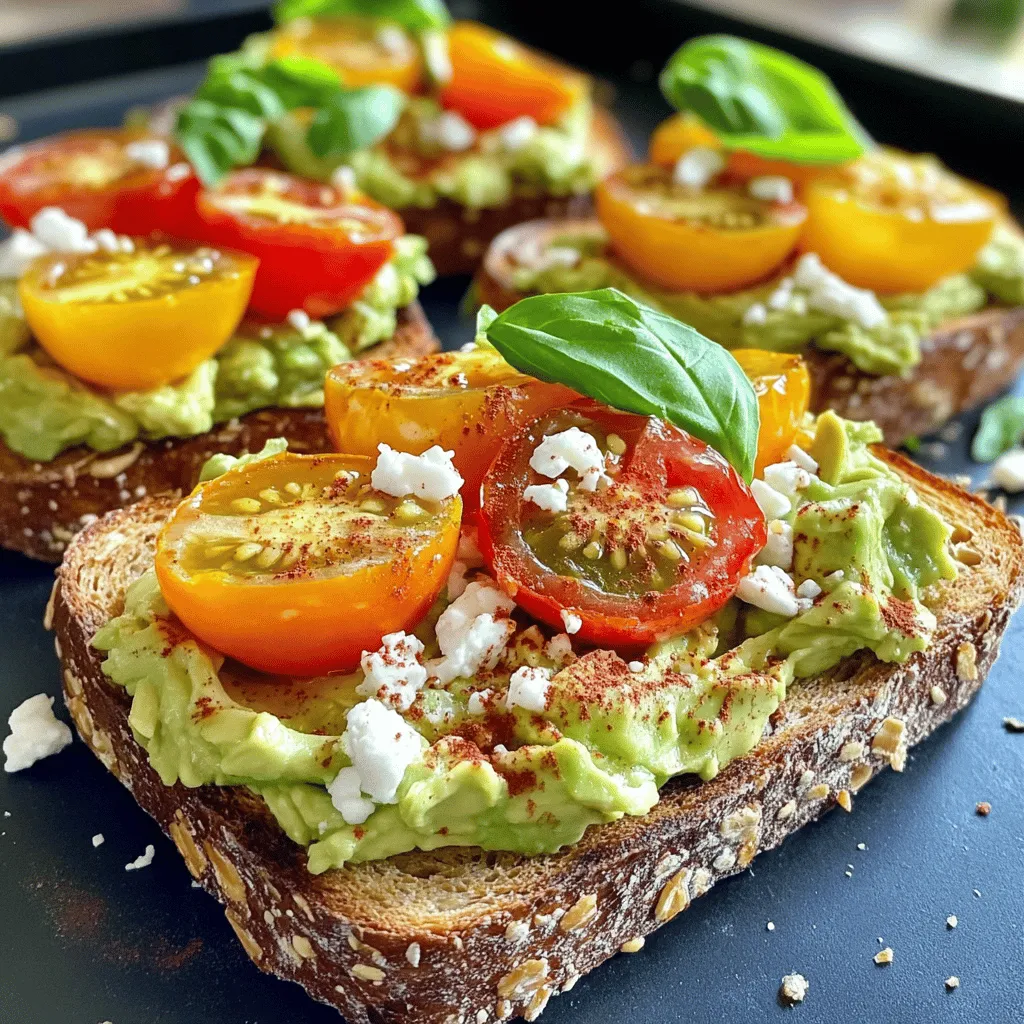
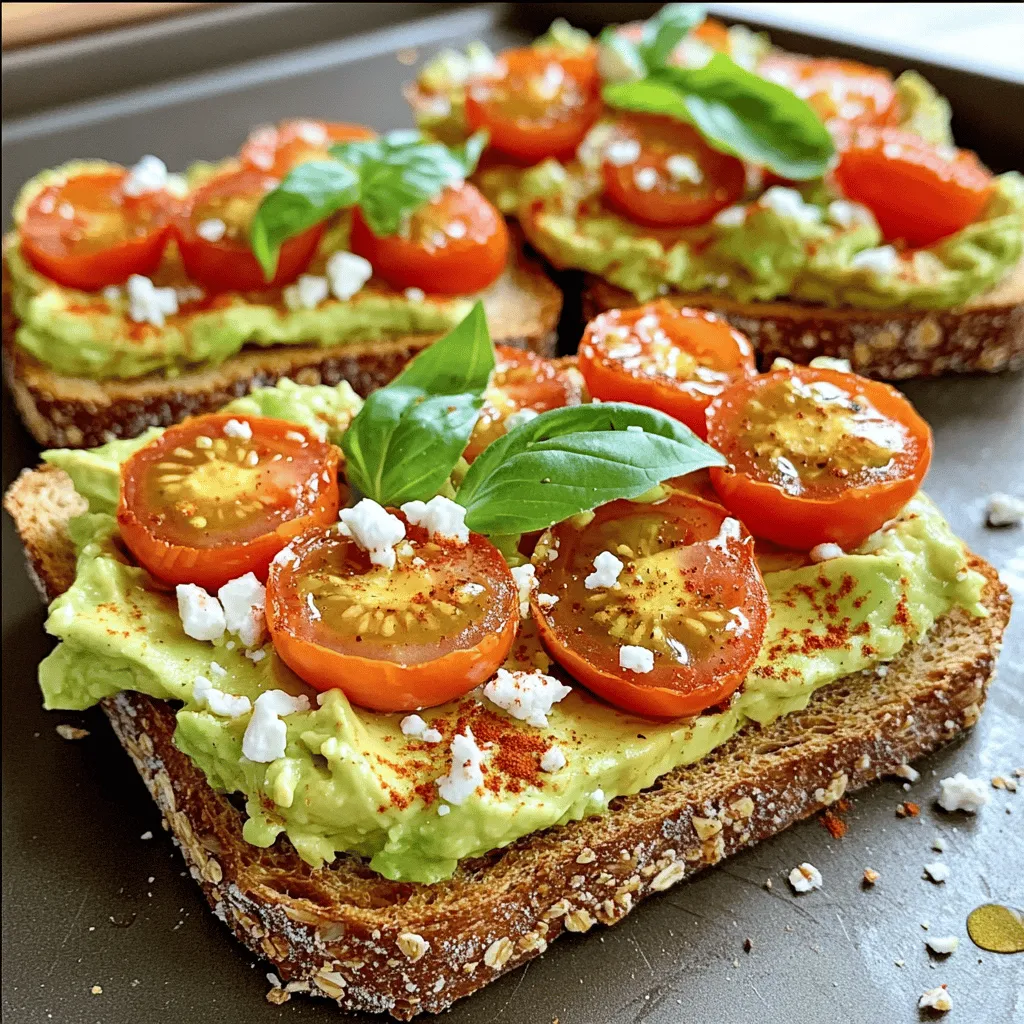
Main Ingredients for Creamy Avocado Toast
To make creamy avocado toast, you need these fresh ingredients:
- 4 ripe avocados
- 8 slices of whole grain bread
- 1 tablespoon fresh lemon juice
- ½ teaspoon garlic powder
- ½ teaspoon smoked paprika
- Salt and black pepper, to taste
- 1 cup cherry tomatoes, halved
- Fresh basil leaves for garnish
These ingredients come together to create a bright and tasty dish. The avocados provide creaminess, while the lemon juice adds a zing. Garlic powder and smoked paprika give the avocado spread a delicious depth.
Optional Toppings and Variations
You can customize your toast with these optional toppings:
- Crumbled feta cheese
- Red chili flakes
- A drizzle of balsamic glaze
These extras let you explore different flavors. Feta adds a salty kick, while red chili flakes bring heat. Balsamic glaze offers a sweet contrast. Feel free to mix and match to suit your taste!
Health Benefits of Avocados
Avocados are not just tasty; they also pack a punch in nutrition. They are rich in healthy fats, which can help lower bad cholesterol. They also contain fiber, which aids digestion. Plus, avocados are high in vitamins C, E, and K, supporting your immune system and skin health. Eating avocados promotes heart health and keeps you feeling full longer. This creamy avocado toast is not only a simple delight but a smart choice for your meals.
Step-by-Step Instructions
Detailed Preparation Steps
To make creamy avocado toast, start by toasting your bread. Use a toaster or a skillet. Aim for a golden brown color. This creates a firm base for your toppings. While the bread toasts, cut the ripe avocados in half. Remove the pits carefully. Use a spoon to scoop the soft flesh into a bowl. Next, add fresh lemon juice, garlic powder, smoked paprika, salt, and black pepper. Mix these into the avocado. Use a fork to mash it until creamy. It should still have some small chunks for texture. Taste it and adjust the seasoning if needed. Once the bread is ready, spread the avocado mix generously over each slice. Make sure to cover the bread completely.
Tips for Toasting Bread for Perfect Texture
For the best toast, choose whole grain bread. It adds flavor and nutrition. Toasting in a skillet gives a nice crispness. Preheat the skillet over medium heat. Add a bit of olive oil for extra flavor. If using a toaster, toast twice for extra crunch. Keep an eye on the bread to avoid burning. Perfect toast should be firm and golden.
How to Mash Avocado for Optimal Creaminess
To achieve the best creaminess, use ripe avocados. They should yield slightly when pressed. Start mashing with a fork in a bowl. Press down firmly to break it up. Mix in your other ingredients as you mash. This helps blend the flavors well. You want a creamy texture, but some chunks are great for bite. Don’t over-mash; keep it fun and textured.
Tips & Tricks
Best Practices for Selecting Ripe Avocados
When choosing avocados, look for ones that feel slightly soft when you gently squeeze them. A ripe avocado should give a little but not feel mushy. Check the skin color too; darker skin often means it’s ripe. If you find hard avocados, leave them at room temperature for a few days to ripen. You can speed this up by placing them in a paper bag with a banana.
How to Store Leftover Avocado Mixture
If you have leftover avocado mixture, store it in an airtight container. To keep it fresh, add a layer of plastic wrap on top, pressing it directly against the surface. This prevents air from causing browning. You can also add a little extra lemon juice for added protection.
Serving Suggestions for Your Toast
Serve your creamy avocado toast with fresh toppings for added flavor and fun. Consider adding sliced radishes for crunch, or a poached egg for protein. You can also try smoked salmon or a sprinkle of nuts for extra texture. Customize each slice to create a unique bite every time.

Variations
Unique Topping Ideas for Creamy Avocado Toast
Let’s get creative with your creamy avocado toast! You can mix and match toppings to make each bite special. Here are some ideas:
- Crumbled feta cheese: This adds a salty kick.
- Red chili flakes: For a spicy touch, sprinkle these on top.
- Balsamic glaze: Drizzle it for a sweet and tangy flavor.
- Radish slices: These add crunch and a peppery note.
- Sliced boiled eggs: They provide extra protein and creaminess.
Creative Flavor Combinations (Spicy, Mediterranean, etc.)
You can change the whole vibe of your toast with different flavors. Here are some tasty combos:
- Spicy: Mash in jalapeños or add hot sauce for heat.
- Mediterranean: Mix in olives, sun-dried tomatoes, and a bit of oregano.
- Mexican: Top with black beans, corn, and a squeeze of lime.
- Asian: Add sesame seeds, soy sauce, and sliced green onions.
Vegan and Gluten-Free Options
Avocado toast is great for everyone! Here are some easy swaps:
- Vegan bread: Choose gluten-free bread to keep it vegan and gluten-free.
- Nutritional yeast: Use this instead of cheese for a cheesy flavor.
- Chickpeas: Mash these into the avocado for added protein and flavor.
- Hummus: Spread a layer of hummus under the avocado for extra creaminess.
Feel free to explore these variations and make this dish your own.
Storage Info
How to Properly Store Toast for Later
If you have leftover toast, store it in an airtight container. This keeps it from getting soggy. You can also wrap it in foil or plastic wrap. Toast is best eaten fresh, but you can enjoy it later. Just reheat it in a toaster or oven to bring back its crunch.
Keeping Avocados Fresh After Cutting
To keep avocados fresh, sprinkle lemon juice on the cut side. The acid slows browning. Cover the avocado tightly with plastic wrap. You can also store it in an airtight container. Place the pit back in the unused half to help it stay fresh longer.
Best Storage Practices for Prepared Toast
If you prepare avocado toast but can’t eat it right away, store it carefully. Place the toast in a container with a lid. Avoid stacking to prevent sogginess. When ready to eat, reheat it for a few minutes in an oven. This brings back the crispy texture. For the best taste, enjoy it fresh if you can.
FAQs
How to make creamy avocado toast?
To make creamy avocado toast, you need ripe avocados, whole grain bread, and a few spices. Start by toasting the slices of bread until golden brown. Next, cut the avocados in half, remove the pits, and scoop the flesh into a bowl. Add lemon juice, garlic powder, smoked paprika, salt, and pepper. Mash the mixture until creamy but slightly chunky. Spread it on the toast, top with cherry tomatoes, and finish with fresh basil.
What are the benefits of avocado?
Avocados are packed with good fats. They are rich in fiber, which helps digestion. They also contain vitamins like C, E, K, and B6. These nutrients support heart health and skin. Eating avocados can also boost your mood and give you energy. Plus, they can help lower cholesterol!
Can I make avocado toast ahead of time?
You can prepare the avocado mixture ahead of time. Store it in an airtight container with lemon juice to prevent browning. However, I advise against toasting the bread too early. Toasted bread tastes best fresh and crunchy. Assemble your avocado toast right before serving for the best flavor and texture.
What bread is best for avocado toast?
Whole grain bread is my go-to choice. It adds a nice nutty flavor and fiber. Sourdough is also excellent for a tangy twist. Gluten-free bread works well too. Choose a bread that you enjoy, as it will make your toast even better!
Creamy avocado toast is simple and delicious. You learned the key ingredients, from ripe avocados to tasty toppings. Following the steps ensures the perfect texture and creaminess. Remember to choose ripe avocados and store them right. You can explore unique flavor combos for a fun twist. This dish offers great health benefits and endless variations. Enjoy making this tasty treat!
![To make creamy avocado toast, you need these fresh ingredients: - 4 ripe avocados - 8 slices of whole grain bread - 1 tablespoon fresh lemon juice - ½ teaspoon garlic powder - ½ teaspoon smoked paprika - Salt and black pepper, to taste - 1 cup cherry tomatoes, halved - Fresh basil leaves for garnish These ingredients come together to create a bright and tasty dish. The avocados provide creaminess, while the lemon juice adds a zing. Garlic powder and smoked paprika give the avocado spread a delicious depth. You can customize your toast with these optional toppings: - Crumbled feta cheese - Red chili flakes - A drizzle of balsamic glaze These extras let you explore different flavors. Feta adds a salty kick, while red chili flakes bring heat. Balsamic glaze offers a sweet contrast. Feel free to mix and match to suit your taste! Avocados are not just tasty; they also pack a punch in nutrition. They are rich in healthy fats, which can help lower bad cholesterol. They also contain fiber, which aids digestion. Plus, avocados are high in vitamins C, E, and K, supporting your immune system and skin health. Eating avocados promotes heart health and keeps you feeling full longer. This creamy avocado toast is not only a simple delight but a smart choice for your meals. For the full recipe, check out the detailed instructions! To make creamy avocado toast, start by toasting your bread. Use a toaster or a skillet. Aim for a golden brown color. This creates a firm base for your toppings. While the bread toasts, cut the ripe avocados in half. Remove the pits carefully. Use a spoon to scoop the soft flesh into a bowl. Next, add fresh lemon juice, garlic powder, smoked paprika, salt, and black pepper. Mix these into the avocado. Use a fork to mash it until creamy. It should still have some small chunks for texture. Taste it and adjust the seasoning if needed. Once the bread is ready, spread the avocado mix generously over each slice. Make sure to cover the bread completely. For the best toast, choose whole grain bread. It adds flavor and nutrition. Toasting in a skillet gives a nice crispness. Preheat the skillet over medium heat. Add a bit of olive oil for extra flavor. If using a toaster, toast twice for extra crunch. Keep an eye on the bread to avoid burning. Perfect toast should be firm and golden. To achieve the best creaminess, use ripe avocados. They should yield slightly when pressed. Start mashing with a fork in a bowl. Press down firmly to break it up. Mix in your other ingredients as you mash. This helps blend the flavors well. You want a creamy texture, but some chunks are great for bite. Don’t over-mash; keep it fun and textured. For the full recipe, you can check out the [Full Recipe]. When choosing avocados, look for ones that feel slightly soft when you gently squeeze them. A ripe avocado should give a little but not feel mushy. Check the skin color too; darker skin often means it's ripe. If you find hard avocados, leave them at room temperature for a few days to ripen. You can speed this up by placing them in a paper bag with a banana. If you have leftover avocado mixture, store it in an airtight container. To keep it fresh, add a layer of plastic wrap on top, pressing it directly against the surface. This prevents air from causing browning. You can also add a little extra lemon juice for added protection. Serve your creamy avocado toast with fresh toppings for added flavor and fun. Consider adding sliced radishes for crunch, or a poached egg for protein. You can also try smoked salmon or a sprinkle of nuts for extra texture. Customize each slice to create a unique bite every time. For the full recipe, check out the detailed steps and enjoy this simple dish! {{image_4}} Let’s get creative with your creamy avocado toast! You can mix and match toppings to make each bite special. Here are some ideas: - Crumbled feta cheese: This adds a salty kick. - Red chili flakes: For a spicy touch, sprinkle these on top. - Balsamic glaze: Drizzle it for a sweet and tangy flavor. - Radish slices: These add crunch and a peppery note. - Sliced boiled eggs: They provide extra protein and creaminess. You can change the whole vibe of your toast with different flavors. Here are some tasty combos: - Spicy: Mash in jalapeños or add hot sauce for heat. - Mediterranean: Mix in olives, sun-dried tomatoes, and a bit of oregano. - Mexican: Top with black beans, corn, and a squeeze of lime. - Asian: Add sesame seeds, soy sauce, and sliced green onions. Avocado toast is great for everyone! Here are some easy swaps: - Vegan bread: Choose gluten-free bread to keep it vegan and gluten-free. - Nutritional yeast: Use this instead of cheese for a cheesy flavor. - Chickpeas: Mash these into the avocado for added protein and flavor. - Hummus: Spread a layer of hummus under the avocado for extra creaminess. Feel free to explore these variations and make this dish your own. For the full recipe, check the recipe section above. If you have leftover toast, store it in an airtight container. This keeps it from getting soggy. You can also wrap it in foil or plastic wrap. Toast is best eaten fresh, but you can enjoy it later. Just reheat it in a toaster or oven to bring back its crunch. To keep avocados fresh, sprinkle lemon juice on the cut side. The acid slows browning. Cover the avocado tightly with plastic wrap. You can also store it in an airtight container. Place the pit back in the unused half to help it stay fresh longer. If you prepare avocado toast but can't eat it right away, store it carefully. Place the toast in a container with a lid. Avoid stacking to prevent sogginess. When ready to eat, reheat it for a few minutes in an oven. This brings back the crispy texture. For the best taste, enjoy it fresh if you can. Check out the Full Recipe for more tips! To make creamy avocado toast, you need ripe avocados, whole grain bread, and a few spices. Start by toasting the slices of bread until golden brown. Next, cut the avocados in half, remove the pits, and scoop the flesh into a bowl. Add lemon juice, garlic powder, smoked paprika, salt, and pepper. Mash the mixture until creamy but slightly chunky. Spread it on the toast, top with cherry tomatoes, and finish with fresh basil. For full details, check out the Full Recipe. Avocados are packed with good fats. They are rich in fiber, which helps digestion. They also contain vitamins like C, E, K, and B6. These nutrients support heart health and skin. Eating avocados can also boost your mood and give you energy. Plus, they can help lower cholesterol! You can prepare the avocado mixture ahead of time. Store it in an airtight container with lemon juice to prevent browning. However, I advise against toasting the bread too early. Toasted bread tastes best fresh and crunchy. Assemble your avocado toast right before serving for the best flavor and texture. Whole grain bread is my go-to choice. It adds a nice nutty flavor and fiber. Sourdough is also excellent for a tangy twist. Gluten-free bread works well too. Choose a bread that you enjoy, as it will make your toast even better! Creamy avocado toast is simple and delicious. You learned the key ingredients, from ripe avocados to tasty toppings. Following the steps ensures the perfect texture and creaminess. Remember to choose ripe avocados and store them right. You can explore unique flavor combos for a fun twist. This dish offers great health benefits and endless variations. Enjoy making this tasty treat!](https://dishtreats.com/wp-content/uploads/2025/06/dc41bef5-23d5-41ad-b579-59fa0f16c9c9-300x300.webp)


![- 2 cups cooked chicken, shredded - 1 cup shredded cheddar cheese - 1 cup shredded Monterey Jack cheese - 4 large flour tortillas - 1 small onion, diced - 1 bell pepper, diced - 2 tablespoons olive oil - 1 teaspoon ground cumin - 1 teaspoon smoked paprika - ½ teaspoon garlic powder - Salt and black pepper to taste - Fresh cilantro, chopped - Sour cream - Salsa To make the Chicken and Cheese Quesadilla Skillet, gather these simple ingredients. The chicken gives it a hearty base. Cheese adds that melty goodness we all love. Using flour tortillas helps hold everything together. You can pick your favorite bell pepper color to add a pop of brightness. The spices elevate the flavor. Ground cumin offers a warm, earthy taste. Smoked paprika adds a hint of smokiness. Garlic powder gives a nice kick. Don’t forget the salt and black pepper to enhance all the flavors. Finally, for garnishes, fresh cilantro provides a burst of freshness. Serving it with sour cream and salsa makes each bite even better. You can find the full recipe at the beginning of this article. Enjoy your cooking! - Heat the skillet with olive oil - Add diced onion and bell pepper First, grab a large skillet and set it over medium heat. Pour in two tablespoons of olive oil and let it warm up. You want the oil to shimmer, which shows it's ready. Next, toss in the diced onion and bell pepper. Sauté them for about five minutes. Stir occasionally until they are soft and fragrant. This step builds a great flavor base for your quesadilla. - Mix in shredded chicken - Season with spices and cook until heated Now it's time to add the star of our dish: shredded chicken. Stir it in with the veggies. Sprinkle in one teaspoon of ground cumin, one teaspoon of smoked paprika, and half a teaspoon of garlic powder. Add salt and black pepper to taste. This mix brings out all the flavors. Cook everything for another three to five minutes. You want the chicken to heat up and soak in those tasty spices. - Distribute cheese and layer tortillas - Cover and cook until golden brown, flipping carefully Next, lower the heat to a gentle simmer. Grab half of your shredded cheddar and Monterey Jack cheese. Spread it evenly over the chicken and veggies. Place two tortillas on top, pushing them down gently. Now, add the rest of the cheese, followed by the other two tortillas. Cover the skillet with a lid and let it cook for four to five minutes. This will make the bottom crispy and let the cheese melt. When the bottom turns golden brown, carefully flip the quesadilla with a spatula. Cook for another four to five minutes until the second side is also golden and the cheese is gooey. For the complete recipe, check out the Full Recipe section! To get crispy tortillas, heat your skillet well. Use medium heat and add enough olive oil. Let the oil shimmer before adding your tortillas. Cook until golden brown on each side, about 4-5 minutes. For gooey cheese, use a mix of cheddar and Monterey Jack. These cheeses melt nicely together. Layer the cheese between tortillas and cover the skillet. This helps the cheese melt evenly and creates a delicious pull when you slice. To boost flavors, add spices like chili powder or cayenne pepper. These spices add a nice kick. You can also mix in fresh herbs, such as cilantro or parsley, for freshness. Pair your quesadilla with sides like guacamole or pico de gallo. These add extra flavor and texture. A squeeze of lime juice brightens up the dish too. For the best results, use a non-stick skillet. This helps avoid sticking and makes flipping easier. Cast iron skillets are also great for even heat. Use a wide spatula for flipping the quesadilla. This helps keep it intact. A pizza cutter is perfect for slicing your quesadilla into wedges. For the full recipe, check out the detailed instructions above. {{image_4}} You can easily change up the protein in your quesadilla. If you want beef, use ground beef or steak strips. For a seafood twist, shrimp works great too. If you're feeling vegetarian, try black beans or mushrooms. These options keep the dish fresh and fun. Want more heat? Add sliced jalapeños or diced green chilies to bring spice. You can also change the cheese for different flavors. Try pepper jack for a kick or gouda for a smokier taste. Mixing cheeses adds depth and makes every bite exciting. You can serve quesadillas in stacks or as traditional wedges. Stacking them makes a fun dinner party dish. For dips, consider guacamole, ranch, or a zesty salsa. These enhance the meal and let everyone personalize their bites. Enjoy exploring these variations while making your own Chicken and Cheese Quesadilla Skillet Delight! For the full recipe, check out the [Full Recipe]. To store leftovers, let your quesadilla cool first. Then, wrap each piece tightly in plastic wrap. This keeps them fresh. Place the wrapped quesadillas in an airtight container. I recommend using glass or BPA-free plastic containers for safety. They can last in the fridge for about three days. For reheating quesadillas, the best method is using a skillet. Heat your skillet over medium heat. Place the quesadilla in the skillet and cover it with a lid. This will help the cheese melt evenly. You can also use an oven at 350°F (175°C) for about 10 minutes. This keeps the tortilla crispy. Avoid using a microwave, as it can make the quesadilla soggy. To freeze leftovers, wrap each quesadilla in plastic wrap. Then, place them in a freezer-safe bag or container. Make sure to remove as much air as possible. They can stay frozen for up to three months. When you are ready to eat, thaw them in the fridge overnight. Reheat as mentioned before to enjoy a tasty meal again. Making a Chicken and Cheese Quesadilla Skillet is quick and easy. It takes about 10 minutes to prep and around 20 minutes to cook. In total, you can enjoy this dish in about 30 minutes. Yes, you can make this dish gluten-free. Simply swap the flour tortillas for corn tortillas or gluten-free tortillas. Both options work well and keep the flavors intact. For sides, I suggest fresh guacamole, a light salad, or refried beans. These add a nice touch to your meal. For drinks, a cold lemonade or a light beer works well with the flavors. You could also try a refreshing iced tea. This blog post covered everything you need for a tasty Chicken and Cheese Quesadilla Skillet. I shared the key ingredients, step-by-step cooking tips, and even fun variations. Remember to store leftovers well and try reheating them for that crunch. With these tips, you can enjoy a delicious meal anytime. Experiment and make it your own! Make cooking fun and tasty with these simple ideas. Enjoy your next quesadilla adventure!](https://dishtreats.com/wp-content/uploads/2025/06/644c33a7-6eb8-49b0-b6be-df01f2332de8-768x768.webp)
![- 1 lb large shrimp, peeled and deveined - 4 cloves garlic, minced - 3 tablespoons olive oil - 1 teaspoon red pepper flakes (adjust to taste) - 1 tablespoon fresh lemon juice - 1 tablespoon fresh parsley, finely chopped - Salt and freshly ground black pepper to taste - Lemon wedges for serving For this easy garlic shrimp dish, you need just a few fresh ingredients. The shrimp should be large, peeled, and deveined. This helps them cook evenly and taste great. Fresh garlic is key. It gives the dish a strong flavor. Olive oil adds richness. Red pepper flakes bring heat, but you can adjust this to fit your taste. Adding lemon juice brightens the dish. Fresh parsley adds color and a hint of earthiness. Salt and black pepper finish the flavor. Serve with lemon wedges for that extra zing. You can find the complete recipe [Full Recipe]. This meal is quick to make and perfect for any night! - Rinse and dry shrimp - Mince garlic - Prepare lemon and parsley Start by rinsing the shrimp under cold water. Make sure to remove any dirt. Once rinsed, use paper towels to dry the shrimp. This helps achieve a nice sear later. Next, mince the garlic into small pieces. This adds flavor to the dish. Finally, cut the lemon in half and chop the parsley finely. Set these aside for later. - Heat olive oil - Sauté garlic - Cook shrimp In a large skillet, pour in the olive oil. Heat it over medium-high heat. Wait until the oil shimmers but does not smoke. Then, add the minced garlic. Sauté it for about 30 seconds. Stir it often to avoid burning. You will smell a great aroma when it’s ready. Now, add the shrimp in a single layer. Sprinkle red pepper flakes, salt, and black pepper on top. Cook the shrimp for 2-3 minutes on each side. They should turn pink and opaque. - Add lemon juice - Garnish with parsley - Serve with lemon wedges When the shrimp are done, take the skillet off the heat. Squeeze lemon juice over the shrimp and toss them gently. This adds a bright flavor. Next, sprinkle the chopped parsley on top for color. Lastly, transfer the shrimp to a serving plate and arrange lemon wedges around them. This makes the dish look nice and inviting. For the full recipe, check the detailed instructions above. Drying shrimp is key. It ensures a nice sear and prevents steaming. After rinsing, pat them dry with paper towels. This simple step makes a big difference in texture. Adjusting spice levels is easy. If you like heat, add more red pepper flakes. For a milder dish, reduce the amount. You control the flavor profile, making it your own. For presentation, use a large shallow dish. Arrange the shrimp and garnish with lemon wedges and parsley. This makes your meal look inviting and fresh. Pair this dish with crusty bread. It’s perfect for soaking up the flavorful garlic oil. A crisp salad or rice also works well. For drinks, try a chilled white wine. It complements the shrimp beautifully. You can find the full recipe in the earlier sections of this article. {{image_4}} You can change the flavor of your easy garlic shrimp by adding fresh herbs. Basil and cilantro bring a bright taste. Just chop them finely and sprinkle them in at the end. You can also mix in vegetables. Bell peppers add crunch and color. Spinach wilts down and adds nutrients. You can sauté these with the garlic to infuse their flavors into the shrimp. Grilling shrimp is fun and gives a smoky flavor. To grill, thread the shrimp on skewers and brush them with olive oil and seasoning. Grill them for about 2-3 minutes on each side until they are pink. If you prefer oven-baking, preheat your oven to 400°F. Place the shrimp in a single layer on a baking sheet. Drizzle with olive oil and season them. Bake for about 8-10 minutes. They will turn pink and cook through. Both methods keep the dish simple and delicious. For the full recipe, check out the Sizzling Garlic Shrimp Delight 🦐. To keep your garlic shrimp fresh, use airtight containers. Glass or plastic containers work well. Make sure they seal tightly to lock in flavor. Store the shrimp in the fridge. They will last for up to two days. After that, the quality may drop. When reheating, use low heat to keep the shrimp tender. A skillet is great for this. Add a splash of olive oil to help restore moisture. Stir gently to avoid overcooking. If you prefer the microwave, use a microwave-safe dish. Heat for short bursts, checking often. This way, you keep that tasty garlic flavor intact. Yes, you can use frozen shrimp. Just remember to thaw them first. To thaw shrimp properly, place them in the fridge overnight or run them under cold water for about 10-15 minutes. Make sure to dry them well with paper towels. This step ensures they cook evenly. To adjust the spice level, you can add or reduce red pepper flakes. For a milder dish, use less than a teaspoon. You can also add more garlic for flavor without heat. If you want more spice, add extra red pepper flakes or some sliced jalapeños while cooking. Garlic shrimp pairs well with many sides. Here are a few options: - Steamed rice or quinoa for a filling meal - Crusty bread to soak up the garlic oil - A fresh green salad for crunch and color - Roasted vegetables for extra flavor and nutrition These sides will enhance your garlic shrimp and make it a complete meal. For the full recipe, check out the section above. This blog post shared a simple and tasty garlic shrimp recipe. We covered key ingredients, easy steps, and useful tips. You learned how to cook shrimp perfectly and adjust flavors to your liking. We also explored variations and storage tips. Now you can enjoy this dish and impress friends at dinner. With your new skills, shrimp night will be a hit! Get creative and have fun with the recipe. Enjoy cooking and delighting your taste buds!](https://dishtreats.com/wp-content/uploads/2025/06/4ce86a88-9fc6-4710-ba94-882bfeda746c-768x768.webp)