
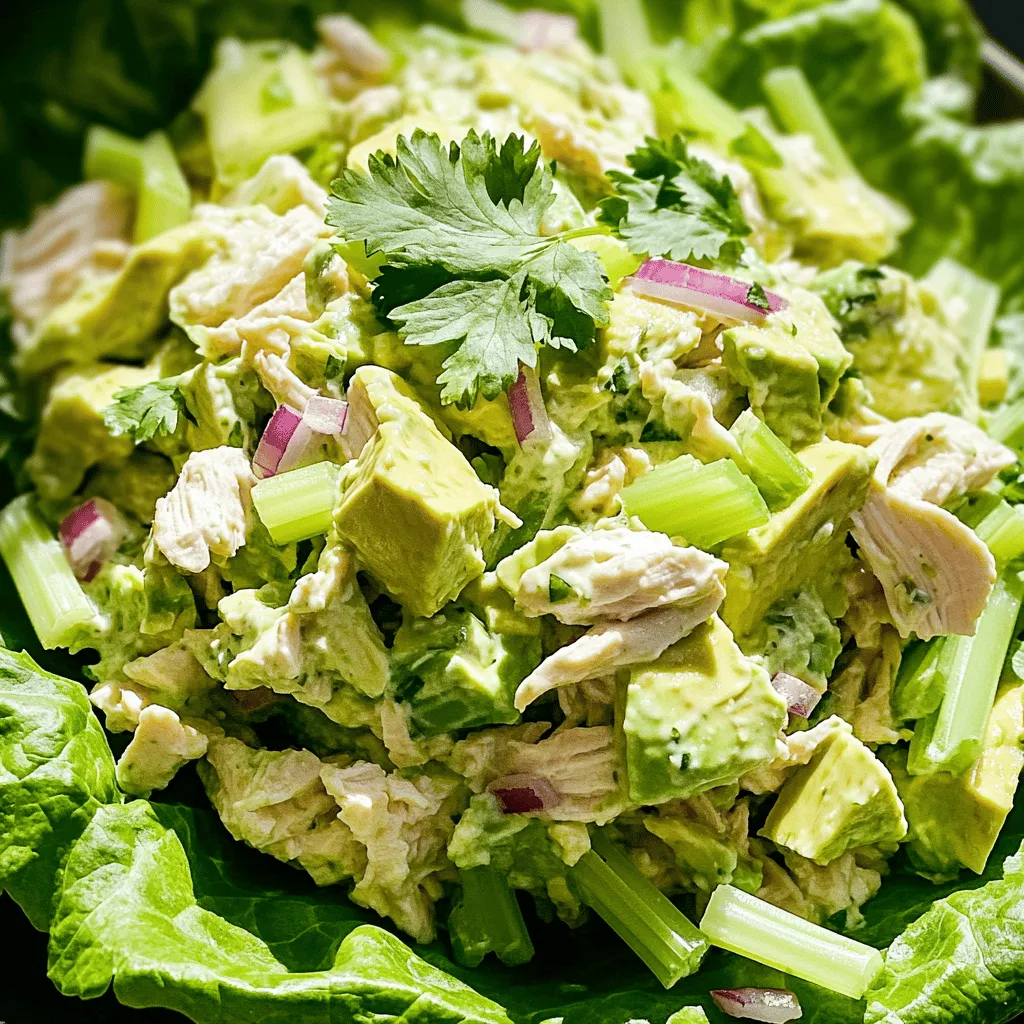
Looking for a simple and tasty dish? You’ve found it! Creamy Avocado Chicken Salad combines fresh ingredients for a satisfying meal. With tender chicken, smooth avocado, and a kick of lemon, this dish will impress your family and friends. Plus, it’s easy to customize! Ready to dive into all the delicious details? Let’s explore this creamy delight that’s perfect for lunch or dinner.
Ingredients
List of Ingredients
– 2 cups cooked chicken, shredded
– 1 ripe avocado, halved and pitted
– 1/4 cup plain Greek yogurt
– 1 tablespoon Dijon mustard
– 1 tablespoon lemon juice
– 1/4 cup celery, finely chopped
– 1/4 cup red onion, finely chopped
– 1/4 cup cilantro, freshly chopped (or parsley)
– Salt and pepper to taste
– 1/4 teaspoon garlic powder
– Lettuce leaves or whole grain wraps for serving
The first step to a great creamy avocado chicken salad is gathering your ingredients. Start with the chicken. You can use grilled, roasted, or even rotisserie chicken. Shred it nicely so it mixes well. Next, grab a ripe avocado. Look for one that gives slightly when you press it. This means it’s ready to mash.
For the dressing, plain Greek yogurt adds creaminess without too many extra calories. The Dijon mustard gives a tang that brightens the dish. Don’t skip the lemon juice. It adds freshness and helps the avocado stay green.
Chop your celery and red onion finely. This gives your salad a nice crunch and flavor. Cilantro adds a fresh touch, but if you don’t like it, parsley works too.
Season with salt, pepper, and a little garlic powder. These simple spices bring out the flavors. Finally, you can serve this salad in lettuce leaves for a light meal or in wraps for a filling option.
Measurement Conversions
– Cups to grams and ounces: 1 cup of cooked chicken is about 150 grams or 5.3 ounces.
– Metric measurements: 1/4 cup is about 60 milliliters.
Recommended Ingredient Brands
– Best yogurt for creaminess: Look for full-fat Greek yogurt for a rich taste.
– Suggested types of chicken: Rotisserie chicken is tasty and saves time.
Step-by-Step Instructions
Preparing the Avocado
To mash the avocado, cut it in half and remove the pit. Use a spoon to scoop out the green flesh into a bowl. Then, take a fork and mash the avocado until it is smooth. This makes a creamy base for our salad.
To keep the avocado fresh, add a splash of lemon juice right away. This helps prevent browning and keeps your salad looking great.
Mixing the Dressing
Next, combine the mashed avocado with plain Greek yogurt and Dijon mustard in the same bowl. Mix these ingredients well until they form a smooth dressing.
Lemon juice is key in this mix. It adds a bright flavor and helps balance the creaminess of the avocado and yogurt. Without it, the dressing may taste flat.
Assembling the Salad
Now, take a larger bowl and add 2 cups of shredded chicken, finely chopped celery, diced red onion, and fresh cilantro. These ingredients add crunch and flavor to the salad.
Pour the creamy avocado dressing over the chicken and veggies. Gently fold the mixture using a spatula. This ensures everything is coated well. Season with garlic powder, salt, and pepper for extra taste.
For serving, you can use lettuce leaves or whole grain wraps. It’s a fun way to enjoy this creamy avocado chicken salad.
Tips & Tricks
Storing Leftovers
To keep your creamy avocado chicken salad fresh, store it in an airtight container. This helps prevent the salad from browning. Use a layer of plastic wrap pressed against the surface to minimize air exposure. The salad lasts in the fridge for about three days. After that, the avocado may start to brown, and the flavors can fade.
Customizing Your Salad
You can easily change this recipe to fit your needs. For a lower-fat option, swap Greek yogurt for a lighter yogurt or a dairy-free alternative. If you like extra crunch, add chopped bell peppers or carrots. For protein, consider adding chickpeas or nuts. You can also mix in fruits like grapes or apples for a sweet touch.
Presentation Ideas
Make your salad look beautiful by serving it in lettuce cups. This adds a nice crunch and makes it easy to grab. You can also use whole grain wraps and cut them into pinwheels for a fun twist. Garnish with fresh herbs like cilantro or parsley. A few lemon wedges on the side add a pop of color and flavor.
Variations
Healthy Variations
For a low-carb option, swap the Greek yogurt with mashed cauliflower. This keeps the salad creamy while cutting carbs. You can also use shredded zucchini in place of chicken for a lighter version. If you want a vegan-friendly salad, replace the yogurt with silken tofu or avocado. Both options keep it creamy without dairy.
Flavor Variations
Adding spices can change the taste of your salad. Try a hint of cayenne pepper for heat. A dash of smoked paprika gives a nice, smoky flavor. You can also add fresh herbs like dill or basil for a refreshing twist. These herbs brighten the dish and add layers of taste.
Serving Variations
You can serve your creamy avocado chicken salad in many ways. Try it on whole grain bread or as a filling in a wrap. It also works great as a dip for crackers or vegetable sticks. This makes it a fun party dish. A colorful presentation always makes it more inviting!
Storage Info
Refrigeration Guidelines
Store your creamy avocado chicken salad in the fridge. Keep it at 32°F to 40°F. This range keeps the salad fresh. Use an airtight container to block air and moisture. This helps maintain texture and taste. Consume within three days for the best flavor. If it changes color, that’s a sign to toss it.
Freezing Options
You can freeze creamy avocado chicken salad, but it might change texture. The avocado may turn mushy after thawing. If you choose to freeze, use a freezer-safe container. This helps avoid freezer burn. Leave some space in the container for expansion. Use within one month for the best quality.
Reheating Tips
To reheat chicken salad, do it gently. Place it in the fridge overnight to thaw. Then, warm it slowly in a pan over low heat. Stir often to keep it even. Avoid the microwave, as it can make the salad watery. If you want to serve cold, just mix it well before eating. This keeps the flavor and consistency intact.
FAQs
How long does creamy avocado chicken salad last in the fridge?
Creamy avocado chicken salad lasts about 3 to 4 days in the fridge. Store it in an airtight container to keep it fresh. Always check for any off smells or changes in color before eating. If you notice anything unusual, it’s best to discard it.
Can I use canned chicken instead of cooked chicken?
Yes, you can use canned chicken if you need to save time. It’s convenient and often ready to eat. However, canned chicken may have a different texture and taste than fresh cooked chicken. It can be saltier too, so adjust your seasoning accordingly.
What can I substitute for Greek yogurt?
You can use plain yogurt or sour cream if you need a different option. For a dairy-free version, consider using mashed silken tofu or avocado. Both alternatives can add creaminess without changing the taste too much. Each option has its unique flavor, so pick what fits your diet best.
Is this salad suitable for meal prep?
Yes, creamy avocado chicken salad is great for meal prep. Make it ahead of time and store it in the fridge. Just remember to keep the salad in a sealed container. To keep it fresh, add the avocado dressing just before serving. This helps avoid browning and keeps the salad tasty.
This blog post covers how to make a creamy avocado chicken salad using fresh ingredients. You learned about key ingredients and how to prepare them effectively. The salad is easy to customize and fun to serve. Keeping leftovers and exploring variations can help you enjoy this dish longer.
Feel free to experiment with flavors and presentations. Enjoy making this healthy salad your own!


