Creamy Avocado Chicken Salad Delightful and Nutritious

Looking for a tasty, healthy meal that’s easy to make? Let me introduce you to my creamy avocado chicken salad. It’s not just delicious; it’s packed with nutrients, too! In this guide, I’ll share the best ingredients, step-by-step instructions, and tips to make it perfect every time. Whether you’re prepping for lunch or dinner, this salad will be a hit! Let’s dive into making something delightful and nutritious!
Ingredients
Complete List of Ingredients
To make this creamy avocado chicken salad, gather these fresh ingredients:
- 2 cups cooked chicken, shredded
- 1 ripe avocado, mashed
- 1/4 cup creamy Greek yogurt
- 1 tablespoon Dijon mustard
- 1 tablespoon lime juice, freshly squeezed
- 1/4 cup red bell pepper, diced
- 1/4 cup celery, chopped
- 1/4 cup red onion, chopped
- Salt, to taste
- Freshly cracked pepper, to taste
- Fresh cilantro, for garnish (optional)
- Crisp lettuce leaves for serving
For high-quality ingredients, look at local farmers’ markets for fresh produce. You can also find organic options at grocery stores. This salad is gluten-free and keto-friendly, making it a great choice for many diets.
By using rotisserie chicken, you can add more flavor and save time. Fresh lime juice enhances the taste of the avocado and adds a zesty kick. Enjoy this simple yet delightful recipe to nourish your body and satisfy your taste buds.
Step-by-Step Instructions
Preparation of the Avocado Mixture
To start, take your ripe avocado and cut it in half. Remove the pit and scoop the flesh into a bowl. Use a fork to mash it well. Aim for a smooth texture, but don’t stress about every lump. A few chunks add character. It’s best to use avocados that are at room temperature. Cold avocados can be hard to mash smoothly.
Incorporating the Chicken and Vegetables
Next, grab your cooked chicken. If you have grilled chicken, it adds great flavor. Shred the chicken into bite-sized pieces. Use two forks for easy shredding. Now, add the shredded chicken to your avocado mix. Dice your red bell pepper, chop your celery, and finely chop your red onion. Add these veggies into the bowl. They add crunch and freshness.
Combining Ingredients and Final Seasoning
Now, it’s time to blend everything. Use a spatula to fold the ingredients gently. This keeps the texture nice, so you don’t end up with mush. After that, sprinkle in salt and freshly cracked pepper. Start with a little, mix, and taste. Adjust the seasonings until it’s just right for you.
Chilling for Optimal Flavor
Cover your bowl with plastic wrap or use an airtight container. Place it in the fridge for about 30 minutes. Chilling helps the flavors blend. You want every bite to be a burst of taste.
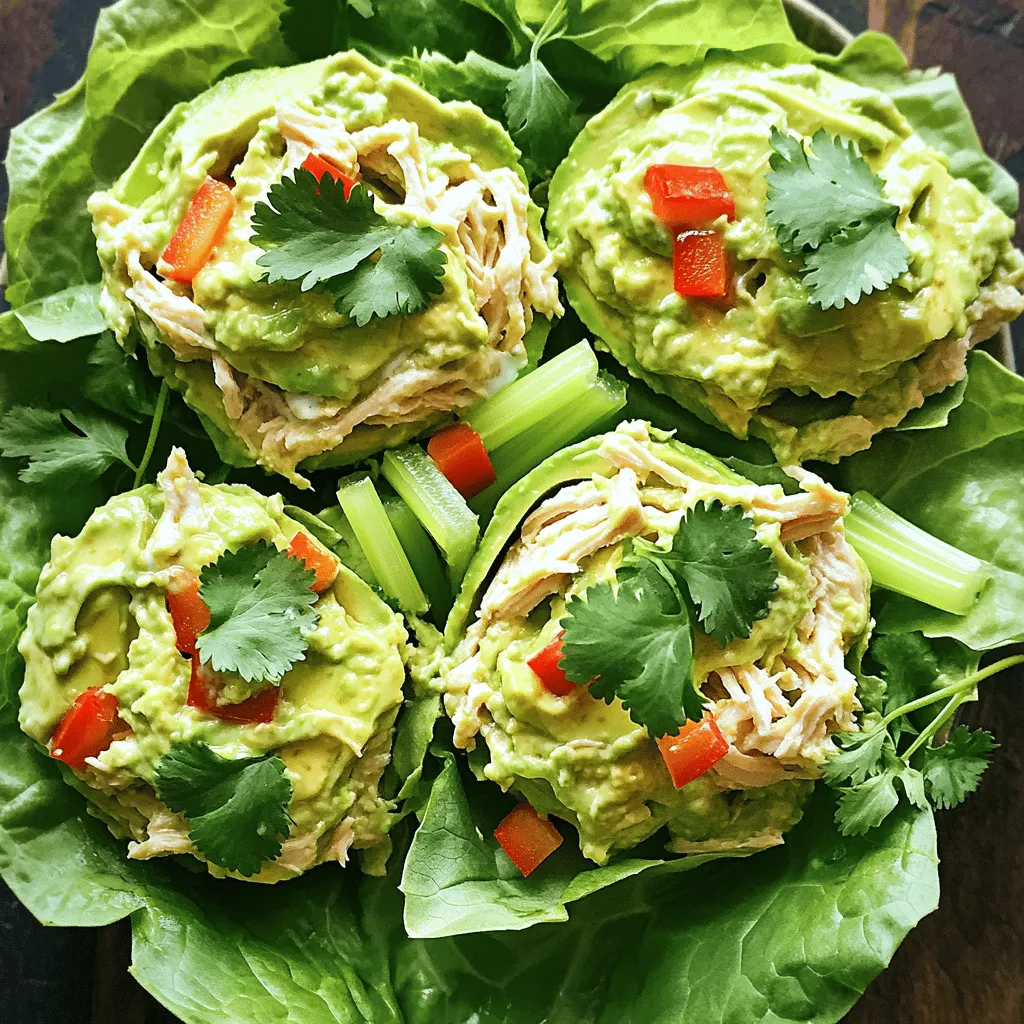
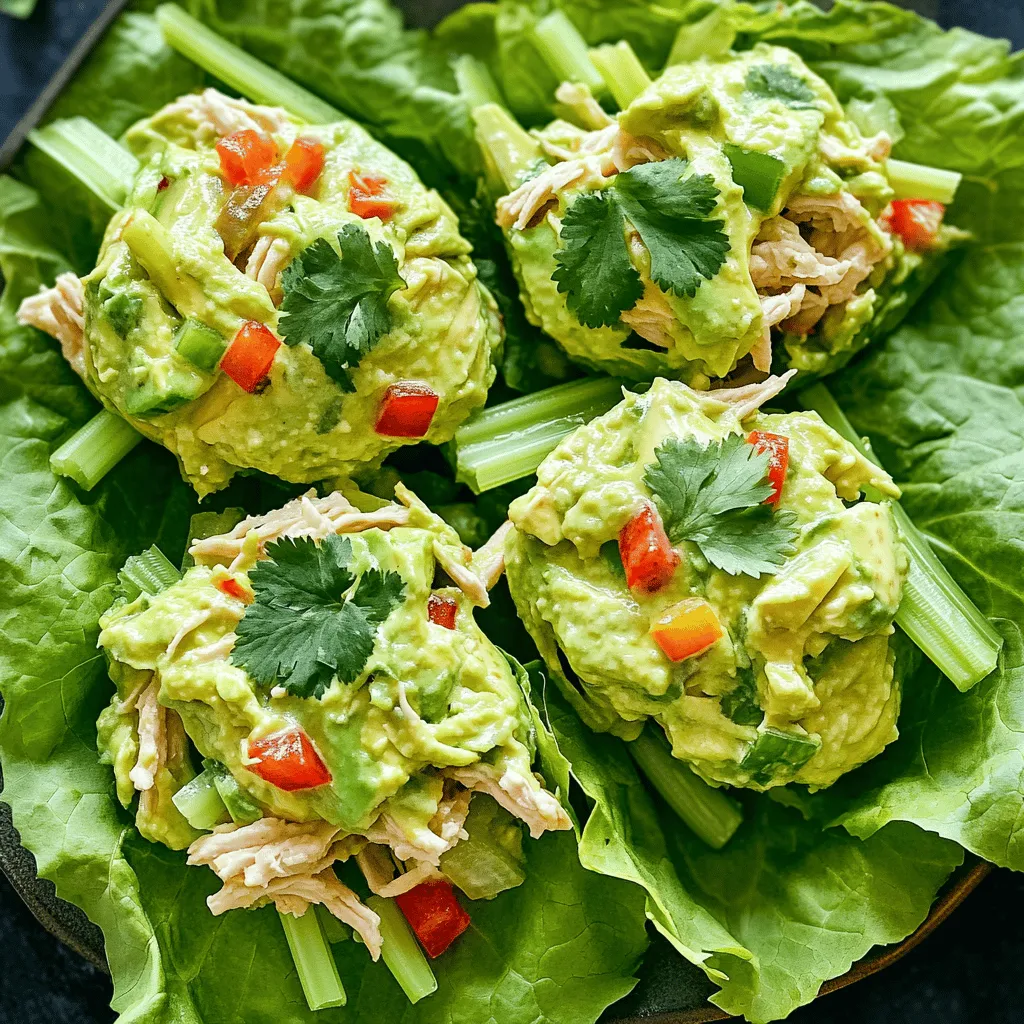
Serving Suggestions
When it’s time to serve, use crisp lettuce leaves as your base. Spoon the creamy chicken salad generously on top. You can also serve it in a pita or as a sandwich. For a fun twist, try serving it in small bowls. Garnish with fresh cilantro for a pop of color. This makes for a beautiful dish!
Tips & Tricks
Best Practices for Choosing Avocado
When you pick avocados, look for ones that feel slightly soft. Gently squeeze them in your palm. If they yield a little, they are ripe and ready to enjoy. If they feel firm, they need a few days to ripen. To store ripe avocados, keep them in the fridge. This slows down the ripening process and helps prevent browning.
Enhancing Flavor and Texture
To make your creamy avocado chicken salad more exciting, consider adding a personal twist. You can mix in chopped nuts like walnuts or almonds for a crunchy texture. Diced fruits like apples or grapes can add sweetness and balance the flavors.
For spices, a dash of smoked paprika or cayenne can add heat. Fresh herbs like dill or basil can brighten the dish. Experiment with these additions to find your favorite combination.
Common Mistakes to Avoid
One common mistake is overcooking the chicken. This can make it dry and tough. Always use cooked chicken that is tender, like grilled or rotisserie.
Measuring your ingredients accurately is vital. Too much yogurt or mustard can overpower the dish.Also, avoid mashing the avocado too much. You want some texture in your salad for a delightful crunch.

Variations
Alternative Ingredient Ideas
If you want a change, you can switch the chicken for other options. For a vegetarian twist, try chickpeas or tofu. Both add protein and texture. If you want a vegan option, use jackfruit. It shreds well and takes on flavors nicely.
You can also change the cheese in the salad. Try feta for a tangy bite. Or use shredded cheddar for a rich taste. Different dressings can also add flair. Swap Greek yogurt for avocado oil or tahini for a nutty flavor.
Flavor Profiles from Different Cuisines
To make a Mexican-inspired version, add jalapeños for heat and cilantro for freshness. This gives the salad a nice kick. You can also add corn for sweetness.
For a Mediterranean twist, include olives and feta cheese. These add a salty, briny taste. Toss in some sun-dried tomatoes for extra flavor. Each variation brings a new taste and fun to the creamy avocado chicken salad.
Storage Info
Best Practices for Storing Leftovers
To keep your creamy avocado chicken salad fresh, use airtight containers. These containers help keep air out, which can spoil the salad. If stored correctly, the salad can last in the fridge for 2 to 3 days. However, the avocado may change color slightly, so it’s best to eat it sooner rather than later.
Freezing Options
Can you freeze creamy avocado chicken salad? I don’t recommend freezing it. The texture of the avocado changes when frozen, making it mushy when thawed. If you still want to freeze it, here are some steps.
1. Prepare for Freezing: Place the salad in a freezer-safe container, leaving some space for expansion.
2. Label the Container: Write the date on the container. This way, you can track how long it’s been in the freezer.
3. Thawing Safely: When ready to eat, move the container to the fridge. Let it thaw overnight. After thawing, stir the salad gently to mix the textures back together. Remember, it may not be as creamy as fresh, but it will still taste good.
FAQs
How do I ensure my avocado does not brown in the salad?
To keep your avocado fresh and green, use a few simple tips. First, always mash your avocado just before mixing it into the salad. This reduces the time it is exposed to air. Next, add lime juice right after mashing. The acid in lime juice helps slow browning. If you have leftovers, store them in an airtight container. Press plastic wrap directly onto the surface of the avocado to minimize air contact.
Can I make this salad ahead of time?
Yes, you can prepare this salad in advance. Mix all the ingredients except the avocado and lime juice. Store the chicken mixture in the fridge. When you are ready to serve, mash the avocado and stir in the lime juice. This keeps the avocado fresh and prevents browning. You can prepare it up to two days ahead for the best flavor.
What are some serving alternatives for this salad?
You can enjoy this salad in many fun ways. Serve it on toast for a tasty sandwich. You can also use lettuce cups for a fresh and crunchy bite. If you want something different, serve it as a dip with veggies or chips. Each option adds a special touch to your meal.
Is this recipe suitable for meal prep?
Absolutely! This recipe is perfect for meal prep. You can make a big batch and store it in the fridge. Use airtight containers to keep it fresh. The salad stays good for up to three days. Just remember to add the avocado and lime juice right before serving. This way, you get all the fresh flavors without browning.
This blog post explains how to make a delicious avocado chicken salad. You learned about choosing quality ingredients, step-by-step instructions, and tips to elevate the flavor. We explored variations and storage methods for leftovers. Remember, the right prep makes all the difference. Keep it fun by experimenting with flavors and textures. With these tips, you can create a tasty and unique dish every time. Use this guide to impress friends and family with your cooking skills. Enjoy your next avocado chicken salad adventure!


![To make a delicious Vegan Lentil Shepherd's Pie, you will need: - 1 cup green or brown lentils, thoroughly rinsed - 3 cups vegetable broth - 1 medium onion, finely diced - 2 cloves garlic, minced - 2 medium carrots, diced into small cubes - 2 celery stalks, finely diced - 1 cup peas (fresh or frozen) - 2 tablespoons tomato paste - 1 tablespoon soy sauce or tamari - 1 teaspoon dried thyme - 1 teaspoon dried rosemary - Salt and freshly cracked pepper to taste - 4 large potatoes, peeled and chopped into chunks - 1/4 cup unsweetened plant-based milk (such as almond or soy) - 2 tablespoons vegan butter or olive oil You can enhance your shepherd's pie with these optional ingredients: - 1 teaspoon smoked paprika for a hint of smokiness - 1 tablespoon nutritional yeast for a cheesy flavor - 1 cup mushrooms, diced, for a hearty texture - A splash of red wine for depth of flavor This recipe serves 4-6 and is a healthy choice. Each serving has: - Approximately 300 calories - 14 grams of protein - 10 grams of fiber - Low in saturated fat - Rich in vitamins A and C from the veggies When you make this Vegan Lentil Shepherd’s Pie, you enjoy a meal that is tasty, filling, and good for you. For the complete cooking details, check out the Full Recipe. To cook the lentils, start by rinsing 1 cup of green or brown lentils. Next, place them in a medium pot with 3 cups of vegetable broth. Bring this mix to a boil, then reduce the heat. Let it simmer for 20-25 minutes. You want the lentils to be tender but not mushy. Drain any leftover liquid and put the lentils aside. In a large skillet, heat a drizzle of olive oil over medium heat. Add 1 diced onion and sauté for about 5 minutes until soft. Then, include 2 minced garlic cloves, 2 diced carrots, and 2 diced celery stalks. Cook this mix for another 5-7 minutes until all the veggies are tender. Now, stir in the cooked lentils, 1 cup of peas, 2 tablespoons of tomato paste, and 1 tablespoon of soy sauce. Add 1 teaspoon of dried thyme, 1 teaspoon of dried rosemary, and some salt and pepper. Let this simmer for about 5 minutes. While the lentil mix simmers, you can prepare the potatoes. Bring a large pot of salted water to a boil. Add 4 large, peeled, and chopped potatoes. Cook them until fork-tender, about 15-20 minutes. Drain the potatoes and return them to the pot. Mash them using a potato masher. Mix in 1/4 cup of plant-based milk and 2 tablespoons of vegan butter. Keep mashing until smooth and creamy. Adjust the seasoning with salt and pepper. Preheat your oven to 375°F (190°C). Grease a baking dish and spoon the lentil mixture into the bottom. Spread the creamy mashed potatoes over the top. Use a fork to create peaks for texture. Bake the pie for 25-30 minutes until the top is golden and crispy. This dish is now ready to enjoy! For the full recipe, check out the detailed instructions above. To make creamy mashed potatoes, start with hot potatoes. Use a potato masher or ricer for the best texture. Gradually add unsweetened plant-based milk and vegan butter for creaminess. Mix until smooth, but avoid over-mixing. A pinch of salt enhances the flavor. Use fresh ingredients for depth. Start by sautéing onions until soft. Add garlic, carrots, and celery for sweetness. Cook them until tender. Incorporate the lentils with herbs like thyme and rosemary. This step brings out the flavors. Don't forget to season with salt and pepper. Let it simmer briefly to blend all the tastes. Serve your Vegan Lentil Shepherd’s Pie hot. Pair it with a crisp green salad for balance. You can also add crusty bread for a hearty touch. For extra flair, sprinkle fresh parsley on top before serving. This adds color and freshness to your meal. Explore different side dishes like roasted vegetables or quinoa for variety. Enjoy your delightful and wholesome dinner! For the full recipe, check the [Full Recipe]. {{image_4}} You can make this lentil shepherd's pie gluten-free. Simply replace soy sauce with coconut aminos. This swap keeps the flavor but avoids gluten. Always check labels to ensure all ingredients are gluten-free. If you're avoiding lentils, try chickpeas or black beans as protein sources. For a nut-free version, skip the plant-based milk and use vegetable broth for mashing. You can also use cauliflower instead of potatoes for a low-carb twist. Incorporate seasonal vegetables to boost flavor and nutrition. Fresh spinach or zucchini works great in the filling. Mushrooms add a nice umami taste, too. Don't be afraid to mix it up based on what's in season. This keeps your dish fresh and exciting. For the full recipe, refer to the beginning of this article. To store your Vegan Lentil Shepherd's Pie, let it cool first. Once cooled, cover it tightly with plastic wrap or foil. You can also use an airtight container. Store it in the fridge for up to four days. This keeps the flavors intact and helps maintain the pie's texture. If you want to save some pie for later, freezing is a great option. Cut the pie into individual portions. Wrap each piece in plastic wrap and then in foil. This prevents freezer burn. Place the wrapped pieces in a freezer bag. You can freeze them for up to three months. When you are ready to enjoy, just thaw it in the fridge overnight. To reheat your shepherd's pie, use the oven for the best results. Preheat your oven to 350°F (175°C). Remove the pie from the fridge or freezer and unwrap it. Place it in a baking dish. Cover the dish with foil to keep it moist. Heat it for about 25-30 minutes if cold. If it’s frozen, it might take up to 45 minutes. Remove the foil for the last 5-10 minutes to crisp the top. Enjoy your delicious meal just like it was fresh! Yes, you can use canned lentils. Just drain and rinse them first. They cook faster. This saves time. For this recipe, use about 1.5 cups of canned lentils. You can serve it with a fresh salad or steamed vegetables. A side of crusty bread also works well. The pie is hearty, so keep sides light. It lasts for 3 to 5 days in the fridge. Store it in an airtight container. Reheat it in the oven or microwave. Yes, you can prepare it a day in advance. Assemble the pie, then cover it and chill. Bake it just before serving for the best taste. Check out the Full Recipe for more details! This blog post covered how to make a tasty vegan lentil shepherd's pie. We explored essential and optional ingredients, plus nutritional info. I provided clear, step-by-step cooking methods. You learned tips for creamy mashed potatoes and flavorful lentils. We noted variations for different diets and the best ways to store leftovers. In closing, I hope you enjoy making this dish! It’s a great meal for everyone.](https://dishtreats.com/wp-content/uploads/2025/06/9ba9e126-74d7-4f69-86a8-52952e7f4e77-768x768.webp)

. - Ensure even space on the baking sheet for optimal roasting. - Toss halfway through cooking for uniform caramelization. Roasting carrots and chickpeas makes them sweet and crunchy. When you spread them out, they cook evenly. If they touch, they steam instead of roast. This can make them soggy and less tasty. Tossing the mixture halfway is key. It helps to brown all sides well. This step adds more flavor and a lovely texture. - Experiment with different citrus juices like lime or orange. - Substitute tahini with Greek yogurt for a creamy dressing. The dressing can change the whole dish. Use lime juice for a zesty twist. Orange juice gives a sweet touch. Both add freshness and brightness. If you want a creamy option, use Greek yogurt instead of tahini. It makes the dressing rich and smooth. This swap gives a fun flavor change too. - Serve in individual bowls for a refined presentation. - Add a lemon wedge for guests to use. Presenting this salad in bowls looks nice. It makes each serving feel special. Guests can enjoy their own portion. Adding a lemon wedge on the side is a great idea. It lets everyone add a splash of fresh juice. This brightens the salad even more. For the full recipe, check the details above. Enjoy your cooking! {{image_4}} You can make this salad even better. Try adding other roasted veggies. Bell peppers bring sweetness. Sweet potatoes add creaminess. Both enhance flavor and texture. You can also toss in nuts or seeds. Almonds or sunflower seeds add a nice crunch. They make the salad more filling and fun. If you want more protein, try grilled chicken or tofu. Both options work well with roasted carrots and chickpeas. Grilled chicken adds a savory touch, while tofu keeps it plant-based. You can also use canned tuna. It gives the salad a different flavor and makes it heartier. Want to boost flavor? Experiment with fresh herbs. Cilantro or mint can brighten the taste. They add freshness that complements the roasted veggies. You can also spice it up with hot sauce. Just a dash gives the salad a nice kick. It’s a fun way to change the flavor profile. For the complete recipe, check out the Full Recipe section above. Store leftovers in an airtight container in the fridge. They are best consumed within 2-3 days. After that, the carrots may lose their crunch, and the flavors fade. Freezing this salad is not recommended. The dressing may separate when frozen. This can change the texture and taste of your salad. You can enjoy this salad cold or at room temperature. If you prefer, reheat in the oven. This helps retain the texture of the roasted carrots and chickpeas. Yes, use maple syrup instead of honey and omit the feta cheese. This keeps the flavors rich and plant-based. You won’t miss the cheese, trust me. The roasted carrots and chickpeas bring enough taste and texture to satisfy everyone. You can use black beans or white beans as alternatives. Both options provide protein and fiber. They also add a nice twist to the taste. Black beans bring a bit of earthiness, while white beans offer a creamier texture. Serve the dressing on the side to keep the greens crisp until serving. This way, they stay fresh and crunchy. Drizzle the dressing just before you eat for the best taste and texture. Spinach, arugula, or chopped kale work well for base greens. Each option adds a different flavor. Spinach is mild, arugula is peppery, and kale adds a hearty bite. Choose what you like best! This blog post shares a tasty recipe featuring roasted carrots and chickpeas on fresh greens. It walks through each step, from prep to assembly, and includes tips for perfect results. You can even tweak the dressing and add your favorite proteins. Don’t hesitate to make this salad your own. Experimenting with flavors makes cooking fun! Enjoy your healthy, vibrant salad that brings flavor and nutrition to your table.](https://dishtreats.com/wp-content/uploads/2025/07/15b40619-46f3-4baf-96e6-94c974b2a42a-768x768.webp)
