Looking for a light, tasty meal? I’ve got the perfect dish for you! My Cranberry Pecan Chicken Salad is simple to make and full of flavor. With just a few tasty ingredients and easy steps, you can whip up this delightful salad in no time. Get ready to impress your friends and family with this fresh dish that works for any meal or occasion. Let’s dive into the recipe!
Ingredients
Detailed Ingredient List
To make a tasty cranberry pecan chicken salad, gather these key ingredients:
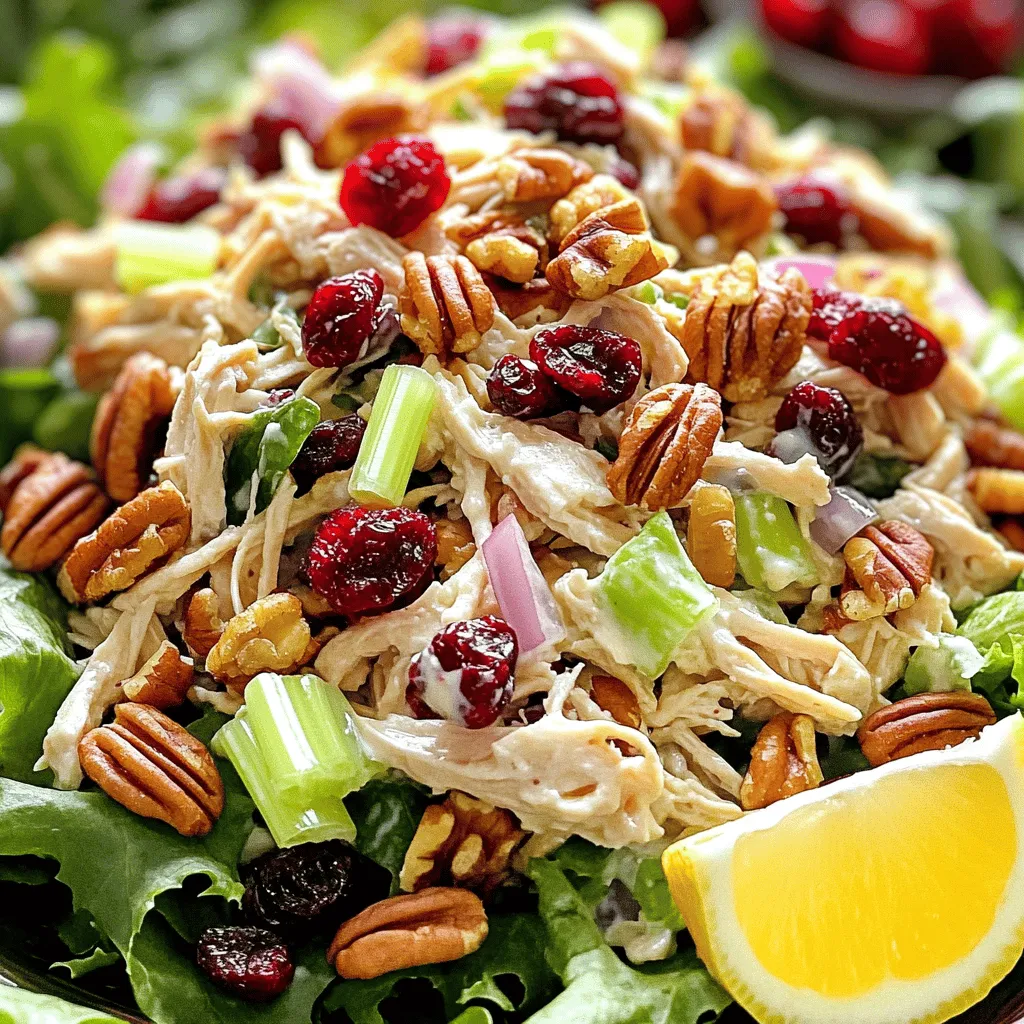
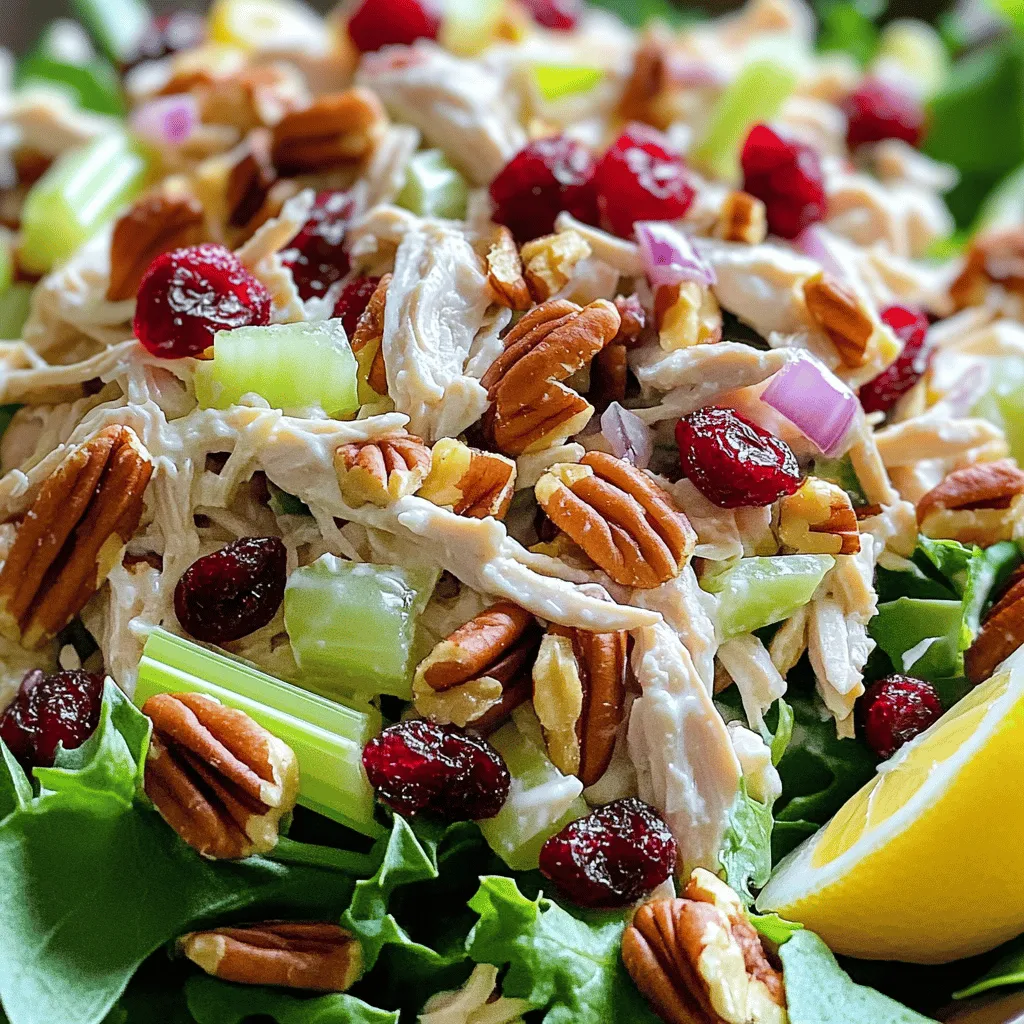
– 2 cups cooked chicken breast, shredded
– 1/2 cup dried cranberries
– 1/2 cup pecans, roughly chopped
– 1/4 cup celery, finely sliced
– 1/4 cup red onion, finely chopped
– 1/2 cup Greek yogurt
– 2 tablespoons Dijon mustard
– 1 tablespoon honey
– Salt and pepper to taste
– 4 cups mixed greens (for serving)
Each ingredient plays a role in flavor and texture. The chicken gives protein, while the cranberries add sweetness. The pecans bring crunch, and the celery and onion provide freshness. The Greek yogurt binds it all together, making it creamy and delicious.
Nutritional Information per Serving
Each serving of this salad offers a good balance of nutrients. You get:
– Calories: 320
– Protein: 30 grams
– Carbohydrates: 22 grams
– Fats: 15 grams
This makes it a healthy meal option. It is rich in protein and low in carbs, perfect for lunch or dinner.
Possible Ingredient Substitutions
Feel free to mix things up if you need to. Here are some substitutions:
– Use rotisserie chicken instead of cooked chicken breast for ease.
– Swap dried cranberries for raisins or cherries for a different flavor.
– Try walnuts or almonds in place of pecans for a new texture.
– Use plain yogurt if you prefer a lighter dressing.
These swaps let you customize the salad to fit your taste or dietary needs.
Step-by-Step Instructions
Preparation Steps
To make this salad, start with the chicken. I use two cups of cooked chicken breast. You can shred it with your hands or use two forks. In a large bowl, mix the chicken with half a cup of dried cranberries and half a cup of roughly chopped pecans. Next, you’ll need a quarter cup of finely sliced celery and a quarter cup of finely chopped red onion. Add these to your bowl and stir everything together. This mix is key for flavor and texture.
Key Cooking Techniques
The main technique here is mixing. Make sure to combine the chicken and veggies well. This helps every bite taste great. For the dressing, whisk together half a cup of Greek yogurt, two tablespoons of Dijon mustard, one tablespoon of honey, and a pinch of salt and pepper. Whisk until smooth and creamy. This dressing adds a nice tang and sweetness to the salad.
Serving Suggestions
For serving, you can use mixed greens. Place a handful on each plate. Then, add the chicken salad on top. You can also serve it in a sandwich or wrap. If you want to impress, garnish with extra pecans and cranberries. A lemon wedge on the side adds a nice touch and flavor. This recipe is simple yet full of taste.
Tips & Tricks
How to Make the Best Cranberry Pecan Chicken Salad
To make the best cranberry pecan chicken salad, focus on fresh ingredients. Use cooked chicken that is juicy and tender. Diced celery adds a nice crunch. The dried cranberries bring sweetness, while the pecans add a lovely nutty flavor. Mix the Greek yogurt, Dijon mustard, and honey well for a creamy dressing. Taste before serving. Adjust salt and pepper as needed. A pinch of lemon juice can brighten the flavors.
Storage Tips for Freshness
Store any leftovers in an airtight container. This keeps the salad fresh for up to three days. To avoid sogginess, keep the dressing separate until ready to eat. If you plan to eat it later, store the salad and greens apart. You can also refrigerate the chicken salad for a quick lunch option.
Common Mistakes to Avoid
One common mistake is over-mixing the salad. This can make the chicken mushy. Another mistake is using too much dressing, which can overwhelm the flavors. Make sure to chop the veggies evenly for balanced bites. Finally, don’t skip tasting the salad before serving. Adjustments can make a big difference in flavor.
Variations
Seasonal Variations & Add-ins
You can change this salad with the seasons. In fall, try adding diced apples or pears. They add a nice crunch and sweetness. In summer, fresh berries work great. Blueberries or strawberries can brighten up the dish. You can also mix in some shredded carrots for extra color and nutrients.
Dietary Adjustments
This recipe is easy to tweak for different diets. To make it gluten-free, ensure all your ingredients are gluten-free. Greek yogurt is often gluten-free, but check the label. For a low-carb option, skip the dried cranberries or use unsweetened ones. You can also swap the honey for a sugar-free sweetener.
Creative Serving Ideas
You can serve this salad in many fun ways. Scoop it into lettuce cups for a fresh wrap. This adds crunch and keeps it low-carb. You can also make a sandwich with whole-grain bread. For a lighter touch, put it on a bed of mixed greens. Another idea is to serve it as a dip with whole-grain crackers. Each option gives a new taste and look.
Storage Info
How to Store Leftovers
After enjoying your Cranberry Pecan Chicken Salad, store any leftovers in an airtight container. This keeps the salad fresh and tasty. Place it in the fridge right away. It will stay good for about three days. When you want to eat it again, give it a stir to mix the flavors.
Freezing Instructions
You can freeze this chicken salad, but I recommend it for only a short time. Freeze it in a container that seals well. It can stay in the freezer for up to one month. To eat, thaw it in the fridge overnight. After thawing, the texture may change, so I suggest eating it fresh if possible.
Shelf Life of Ingredients
Knowing how long the ingredients last helps avoid waste. Cooked chicken can last about three to four days in the fridge. Dried cranberries can stay fresh for six months in the pantry. Pecans last about six months too, but keep them in the fridge for longer freshness. Greek yogurt generally lasts one to three weeks after opening, so check the date on the container.
FAQs
How can I make Cranberry Pecan Chicken Salad ahead of time?
You can make this salad ahead of time. Simply prepare the salad base without the dressing. Store the chicken, cranberries, pecans, celery, and onion in an airtight container in the fridge. Mix the dressing separately. When ready to serve, combine them. This keeps the salad fresh and crunchy.
Can I use other nuts instead of pecans?
Yes, you can use other nuts. Walnuts, almonds, or cashews work well too. Each nut adds a unique flavor and texture. Choose one that you like best. Toasting the nuts lightly can enhance their flavor. Just be careful not to burn them!
What other fruits can be added for more flavor?
You can add many fruits to this salad. Apples, grapes, or mandarin oranges are great options. They add sweetness and a nice crunch. Dried fruits like raisins or apricots also work well. Don’t be afraid to mix and match to find your favorite flavor combo!
Cranberry Pecan Chicken Salad is both tasty and simple to make. We covered the key ingredients, nutrition facts, and substitutions to suit your needs. Next, we detailed step-by-step cooking instructions and serving suggestions. I shared tips to ensure freshness and avoid common mistakes. For variety, we explored seasonal options and dietary adjustments. Lastly, we discussed storage methods and answered typical questions.
Try this salad for a quick meal or a gathering. Enjoy your journey to deliciousness!


