Cranberry Pecan Chicken Salad Fresh and Flavorful Recipe

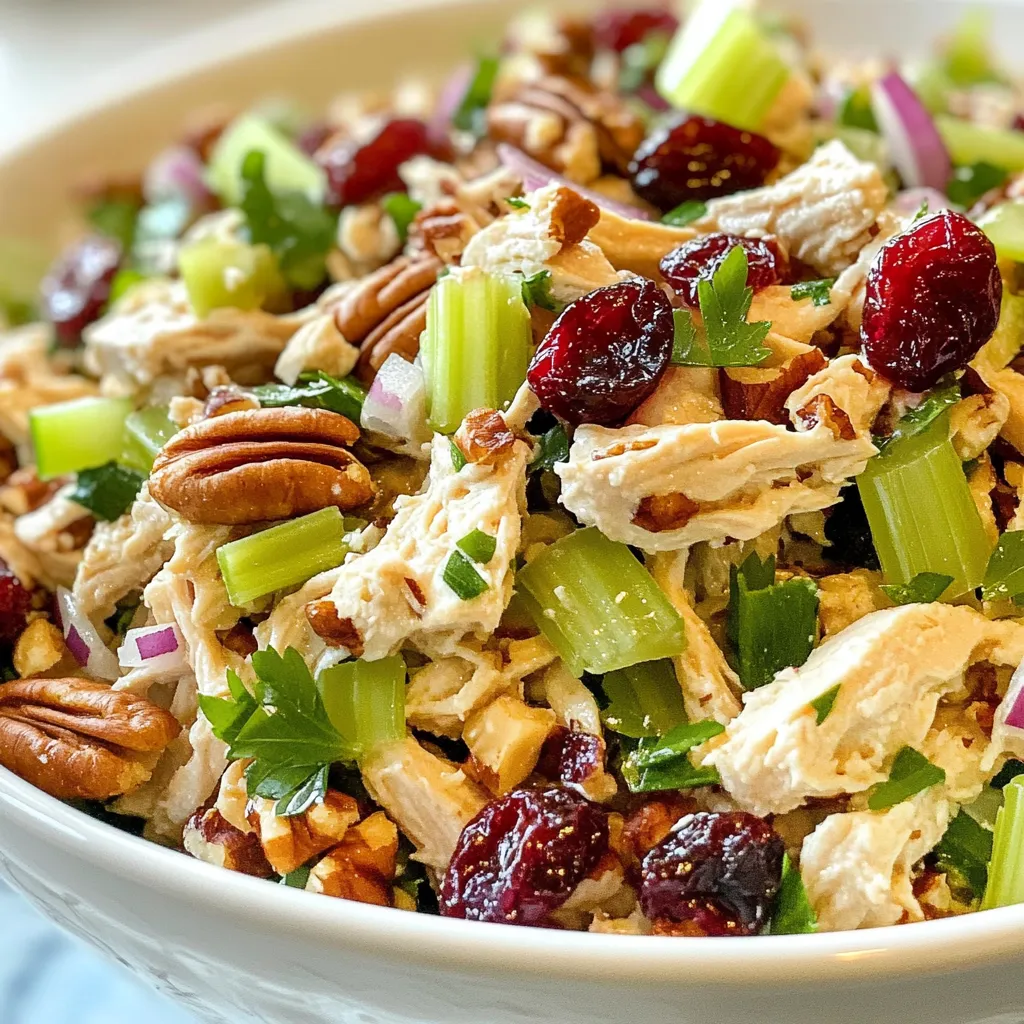
Looking for a fresh and tasty dish that’s easy to make? My Cranberry Pecan Chicken Salad is the perfect answer! This recipe blends juicy chicken, sweet cranberries, and crunchy pecans for a flavor explosion. Whether you want a quick lunch or a side dish, this salad ticks all the boxes. Ready to delight your taste buds? Let’s dive into the ingredients and make something delicious!
Why I Love This Recipe
- Delicious Flavor Combination: The sweet and tart cranberries paired with the crunchy pecans create a delightful contrast that elevates the chicken salad to a new level.
- Healthy Ingredients: This salad is packed with protein from the chicken and healthy fats from the pecans, making it a nutritious option for any meal.
- Easy to Prepare: With just a few simple steps, you can whip up this salad in no time, perfect for a quick lunch or dinner.
- Versatile Serving Options: Whether served on a bed of greens, in a sandwich, or on its own, this chicken salad can adapt to any dining situation.
Ingredients
Complete List of Ingredients
- 2 cups cooked chicken breast, shredded or cubed
- 1/2 cup dried cranberries
- 1/2 cup pecans, coarsely chopped
- 1/4 cup celery, finely chopped
- 1/4 cup red onion, finely diced
- 3/4 cup plain Greek yogurt (or mayonnaise)
- 1 tablespoon Dijon mustard
- 1 tablespoon honey
- Salt and freshly ground black pepper
- Fresh parsley for garnish (optional)
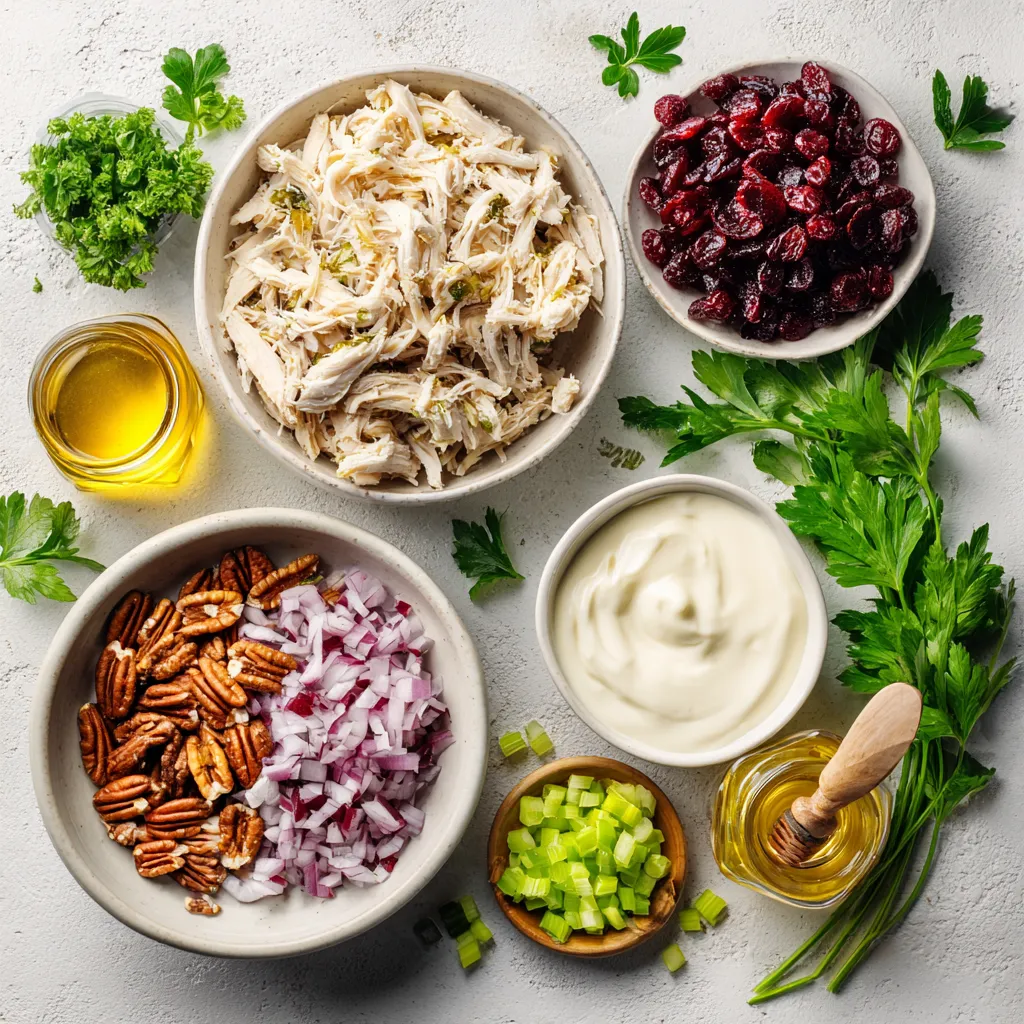
To start, gather all your ingredients. I recommend using cooked chicken breast. You can shred it or cube it, based on your taste. Next, grab dried cranberries. They add a sweet twist. Then, use coarsely chopped pecans for that crunch. Celery brings in a nice crisp texture, and red onion adds a mild bite.
For the dressing, plain Greek yogurt works well. If you prefer it creamier, use mayonnaise instead. Dijon mustard gives it a tangy kick, while honey adds sweetness. Don’t forget salt and black pepper for flavor. Lastly, fresh parsley makes a lovely garnish, but it’s optional.
This mix of flavors and textures makes the salad fresh and satisfying.

Step-by-Step Instructions
Preparation Steps
- Mixing the Chicken and Vegetables
Start by grabbing a big bowl. Add 2 cups of cooked chicken. You can shred or cube it. Next, toss in 1/2 cup of dried cranberries. Follow that with 1/2 cup of chopped pecans. Then, add 1/4 cup of finely chopped celery and 1/4 cup of diced red onion. Mix everything well using a spatula. Make sure the chicken and veggies are evenly spread.
- Preparing the Dressing
In a smaller bowl, whisk together 3/4 cup of plain Greek yogurt. You can swap it for mayonnaise if you want creaminess. Add 1 tablespoon of Dijon mustard and 1 tablespoon of honey. Season the mixture with salt and pepper. Keep whisking until it’s smooth and blended.
- Combining the Chicken Mixture and Dressing
Drizzle the dressing over the chicken mix. Use the spatula to fold the chicken and dressing together. This step is important! Ensure all ingredients get coated. Taste it and add more salt or pepper if needed.
- Chilling and Serving the Salad
Cover the bowl with plastic wrap or a lid. Put it in the fridge for at least 30 minutes. This waiting time helps the flavors mix. When you’re ready to serve, gently toss the salad again. If you like, add some chopped parsley on top for color. Serve on mixed greens or in bowls for a nice touch.
Tips & Tricks
Perfecting Your Chicken Salad
Choosing the Right Chicken
Start with cooked chicken breast. You can use leftover chicken or rotisserie chicken. Shredding or cubing the chicken works great. The texture helps mix well with other ingredients.
Adjusting the Dressing Consistency
I prefer plain Greek yogurt for a healthy twist. If you want it creamier, add mayonnaise instead. Adjust the amount to your taste. If the dressing feels too thick, add a splash of water or lemon juice. This keeps it light and fresh.
Flavor Enhancements: Herbs and Spices
Herbs can elevate your salad. Fresh parsley adds color and taste. You might try dill or tarragon for a different flavor profile. A pinch of garlic powder or paprika can add warmth. Experiment with spices to find what you love!
Pro Tips
- Use Fresh Chicken: For the best flavor and texture, use freshly cooked chicken breast instead of pre-packaged or canned chicken.
- Customize Your Nuts: Feel free to substitute pecans with walnuts or almonds for a different flavor profile.
- Add a Zesty Twist: Incorporate a splash of lemon juice or apple cider vinegar to brighten the flavors of the salad.
- Make Ahead: This salad can be made a day in advance, allowing the flavors to deepen and develop for a delicious meal prep option.

Variations
Alternative Ingredients
- Substituting Greek Yogurt for Mayonnaise
You can swap Greek yogurt for mayonnaise. This change cuts fat and adds protein. Greek yogurt has a tangy taste that brightens the salad. It also keeps the dish creamy and delicious.
- Adding Fruits and Vegetables
You can mix in other fruits and veggies for more flavor. Chopped apples or grapes add sweetness. Bell peppers give a nice crunch. You can also try adding shredded carrots for color and texture.
- Nut-Free Options
If you need a nut-free version, leave out the pecans. You can replace them with sunflower seeds for crunch. This keeps the texture enjoyable while making it safe for those with nut allergies.
Feel free to play around with these options. Each variation makes this salad unique and tasty!
Storage Info
Storing Leftovers
Best Practices for Refrigeration
To keep your cranberry pecan chicken salad fresh, store it in an airtight container. This helps lock in flavor and keep out air. Make sure the salad is cool before sealing. Place it in the fridge right away. It will stay good for about 3 to 4 days.
Freezing Instructions
You can freeze this salad, but it may change the texture. For best results, freeze only the chicken part. Place it in a freezer-safe bag. Squeeze out any air and seal it well. Use it within 2 to 3 months for optimal taste. When ready to eat, thaw it in the fridge overnight.
Shelf Life and Signs of Spoilage
Check for spoilage before eating. Look for off smells or changes in color. If you see any mold or weird textures, it’s best to toss the salad. The dressing can separate after a few days, but a quick stir usually fixes it. Always trust your senses; they guide you well in the kitchen!
FAQs
Common Questions about Cranberry Pecan Chicken Salad
Can I use rotisserie chicken?
Yes, you can use rotisserie chicken. It saves time and adds great flavor. Just shred or chop it before mixing it with the other ingredients.
How long does the salad last in the fridge?
The salad lasts about 3 to 4 days in the fridge. Always store it in an airtight container to keep it fresh.
What can I serve with Cranberry Pecan Chicken Salad?
This salad pairs well with mixed greens, crackers, or bread. You can also enjoy it in a wrap or sandwich for a quick meal.
Can I make this salad ahead of time?
Yes, you can make it ahead. Just keep it in the fridge for at least 30 minutes before serving. The flavors will blend nicely.
Is this salad gluten-free?
Yes, this salad is gluten-free. Just check the labels on your ingredients to be sure they meet your needs.
This blog post covered all you need for a delicious Cranberry Pecan Chicken Salad. We started with the essential ingredients and moved to step-by-step instructions. You learned tips for perfecting your salad, explored variations, and found helpful storage info.
Remember, you can easily adjust the recipe for your taste. Enjoy this tasty dish at your next mea

Cranberry Pecan Chicken Salad
Ingredients
- 2 cups cooked chicken breast, shredded or cubed
- 0.5 cup dried cranberries
- 0.5 cup pecans, coarsely chopped
- 0.25 cup celery, finely chopped
- 0.25 cup red onion, finely diced
- 0.75 cup plain Greek yogurt (or mayonnaise for a creamier texture)
- 1 tablespoon Dijon mustard
- 1 tablespoon honey
- to taste Salt and freshly ground black pepper
- to taste Fresh parsley, chopped (for garnish, optional)
Instructions
- In a spacious mixing bowl, combine the shredded or cubed chicken with the dried cranberries, chopped pecans, finely chopped celery, and diced red onion. Use a spatula or wooden spoon to mix thoroughly, ensuring the ingredients are well distributed.
- In a separate, smaller bowl, whisk together the plain Greek yogurt (or mayonnaise), Dijon mustard, honey, and a generous pinch of salt and pepper. Mix until the dressing is smooth and completely blended.
- Drizzle the dressing over the chicken mixture. Gently fold the ingredients together with a spatula, ensuring that everything is evenly coated in the dressing. Taste and adjust the seasoning with more salt and pepper, if necessary.
- Cover the mixing bowl securely with plastic wrap or a lid. Refrigerate for a minimum of 30 minutes, allowing the flavors to meld and the salad to chill.
- Just before serving, give the salad another gentle toss to redistribute the dressing. If desired, sprinkle with freshly chopped parsley for an added burst of color and flavor.


![To make honey garlic glazed carrots, gather these items: - 1 lb baby carrots (or 4-5 regular carrots, peeled and cut into sticks) - 3 tablespoons honey - 2 tablespoons unsalted butter - 2 cloves garlic, minced - 1 tablespoon fresh ginger, finely grated - Salt and freshly ground black pepper to taste - 2 tablespoons fresh parsley, finely chopped (for garnish) You can change up the flavor with these ingredients: - 1 teaspoon red pepper flakes for heat - 1 tablespoon soy sauce for depth - 1 tablespoon lemon juice for brightness - Chopped nuts like walnuts or pecans for crunch When selecting carrots, look for these signs: - Choose bright orange carrots without dark spots. - Check for firmness; soft carrots may be old. - Look for greens if buying whole carrots; they should be fresh and vibrant. - Avoid carrots with cracks or wrinkles, as they may be dry. These tips help ensure you use the best carrots for your dish. Fresh carrots enhance the taste and texture of your honey garlic glazed carrots. For the full recipe, don't forget to check the complete instructions! 1. Start by washing your carrots well. If you use regular carrots, peel them. Then, cut them into sticks. Baby carrots need less prep. Just wash them. 2. Take a large skillet and add the unsalted butter. Heat it on medium. Watch closely until it starts to foam. 3. Next, add the minced garlic and grated ginger. Stir them for 1-2 minutes. You want them to smell great but not brown. 4. Now, pour in the honey. Mix it well with the garlic and ginger. This makes a tasty glaze. 5. Carefully add your carrots into the skillet. Use tongs or a spoon to toss them in the glaze. Make sure they get covered well. 6. Season with salt and black pepper to taste. Lower the heat and cover the skillet. Cook for 10-15 minutes. Stir them a bit to cook evenly. They should be tender but not mushy. 7. When the carrots are done, remove the lid. Turn the heat back to medium. Sauté them uncovered for 2-3 minutes. This helps the glaze become sticky. 8. Finally, take the skillet off the heat. Move the glazed carrots to a serving dish. Garnish with fresh parsley for a bright touch. - Prep: Use a sharp knife for even cuts. This helps with cooking time. - Sautéing: Keep the heat steady. This prevents burning the garlic. - Glaze: Watch for a shiny, thick look. That means it's ready to serve. - Don’t burn the garlic. It can turn bitter fast. - Avoid overcrowding the pan. This can lead to uneven cooking. - Don’t skip the garnish. Fresh parsley adds flavor and color. By following these steps, you can create delicious honey garlic glazed carrots that everyone will love! For the full recipe, check out the [Full Recipe]. To get the best glaze, start with fresh ingredients. Use high-quality honey for more flavor. Heat the butter slowly to avoid burning. Once the garlic and ginger smell great, add the honey. Stir it well to mix the flavors. Cook the carrots in the glaze until they are tender but not mushy. This gives you that nice sticky texture. Don't forget to sauté them uncovered at the end. This helps the glaze thicken and shine. Serve your honey garlic glazed carrots in a shallow bowl. This way, the glossy glaze stands out. Add an extra sprinkle of parsley on top for color. These carrots pair well with roasted chicken or grilled fish. You can also serve them alongside rice or quinoa for a nice meal balance. They make a great side dish for any dinner. Want to spice things up? Try adding fresh herbs like thyme or rosemary. A pinch of chili flakes can give a nice kick. You can also use lemon zest for a bright taste. If you like a deeper flavor, add a splash of soy sauce. Just remember, keep it balanced. You want the sweet honey to shine, too. For even more fun, try mixing in some nuts for crunch. {{image_4}} You can make honey garlic glaze work with many veggies. Try adding green beans, broccoli, or bell peppers. Cut them to the same size as the carrots. This helps them cook evenly. Each vegetable brings its own texture and flavor. You can mix and match to keep it fun! To make this dish vegan, swap butter for olive oil or coconut oil. This keeps the flavor rich while making it plant-based. Also, use maple syrup instead of honey. It gives a sweet touch that works great with garlic. Your dish will still taste amazing while being vegan-friendly. In fall, try using roasted squash or sweet potatoes. These add a lovely flavor. For a winter twist, consider using parsnips or turnips. If you want to avoid honey, you can use agave syrup or date syrup. Both are sweet and work well with garlic. Each season offers unique veggies to explore. After enjoying your honey garlic glazed carrots, let them cool down. Place leftovers in an airtight container. Make sure to store them in the fridge. They can last up to 3 days. If you notice any excess moisture, use a paper towel to absorb it. You can freeze honey garlic glazed carrots, but they may lose some texture. Place cooled carrots in a freezer-safe bag. Try to remove as much air as possible. They can stay good for about 2 months. When you’re ready to use them, thaw them in the fridge overnight. To reheat, you have a few options. You can use the microwave for quick warming. Heat in intervals, stirring in between to ensure even heating. If you prefer, reheat them on the stove. Add a splash of water or broth in a pan. This helps keep them moist. Heat on low until warmed through, stirring gently. For a crispy finish, sauté them in a pan for a few minutes. Enjoy your sweet and savory dish again! Yes, you can! While I love baby carrots, you can use regular carrots too. Just peel and cut them into sticks. This helps them cook evenly. If you want a fun twist, try rainbow carrots. They add color and taste to your dish. These glazed carrots pair well with many dishes. Try them with roasted chicken or grilled fish. They also go great with rice or quinoa. For a hearty meal, serve them with beef or pork. You can even add them to a veggie bowl for a healthy lunch. To thicken the glaze, cook it longer. Let it simmer until it reduces and gets sticky. If you want a thinner glaze, add a bit of water or broth. Stir well to combine. Adjust it to your taste and enjoy! For the full recipe, check out the detailed steps above. Honey garlic glazed carrots are a simple side dish. They bring sweet and savory flavors to your meal. The honey adds a nice touch of sweetness. Garlic and ginger give it a warm, spicy zing. This dish is perfect for any dinner, big or small. - Prep Time: 10 min - Cook Time: 15 min - Total Time: 25 min - Servings: 4 This recipe is quick and easy. You can have it ready in just 25 minutes. Each serving of honey garlic glazed carrots is about: - Calories: 150 - Fat: 7g - Carbohydrates: 23g - Fiber: 3g - Sugar: 12g - Protein: 1g These carrots are good for you and taste great. They are a fun way to add veggies to any meal. For the full recipe, you can check out the details above. This blog post covered all you need for honey garlic glazed carrots. We talked about key ingredients, cooking steps, and variations. You learned how to avoid common mistakes and store leftovers. Remember, fresh carrots boost flavor, and adding spices can elevate your dish. Try different vegetables or keep it vegan for new tastes. With these tips, you can serve a delicious side meal every time. Happy cooking!](https://dishtreats.com/wp-content/uploads/2025/07/6848e6f0-ffb0-4855-be77-9b0adbe9293f-768x768.webp)
