Looking for a cozy winter treat? This Cozy Gingerbread Oatmeal Bake warms you from the inside out. With gingerbread spices and hearty oats, it’s perfect for chilly mornings. You’ll love how easy it is to make. Let’s dive into the ingredients, step-by-step instructions, and tips to make it just right. Get ready to bake up some comfort that will fill your home with warmth!
Ingredients
Main Ingredients for Cozy Gingerbread Oatmeal Bake
To make this warm treat, you need a few key items. Here’s what you will need:
– 2 cups rolled oats
– 1 teaspoon baking powder
– 1 teaspoon ground cinnamon
– 1 teaspoon ground ginger
– ½ teaspoon ground nutmeg
– ¼ teaspoon ground cloves
– ¼ teaspoon salt
– 2 cups almond milk (or any milk of your choice)
– ¼ cup pure maple syrup
– ¼ cup molasses
– 2 ripe bananas, mashed until smooth
– 1 teaspoon pure vanilla extract
These ingredients mix together to create a lovely flavor. The spices bring warmth, while the oats give a nice texture.
Optional Add-ins for Flavor and Texture
You can make this dish even better by adding some extras. Here are some fun options:
– ½ cup walnuts, chopped (for added crunch)
– ½ cup raisins or dried cranberries (for a burst of sweetness)
Adding these can change the texture and flavor. Walnuts add crunch, and dried fruits bring sweetness. Feel free to mix and match based on what you like!
Tips for Selecting Quality Ingredients
Choosing the right ingredients makes a big difference. Here are my tips:
– Oats: Look for whole rolled oats, not quick oats. They cook well and keep a nice texture.
– Spices: Fresh spices give better flavor. Check the date on the jar.
– Maple Syrup and Molasses: Use pure maple syrup. It tastes better than the fake stuff. Choose dark molasses for a richer flavor.
– Bananas: Make sure they are ripe. Ripe bananas are sweeter and blend better.
With these tips, you will have the best gingerbread oatmeal bake. Each bite will be warm and flavorful!
Step-by-Step Instructions
Prepping Your Ingredients
Start by gathering all your ingredients. You will need:
– 2 cups rolled oats
– 1 teaspoon baking powder
– 1 teaspoon ground cinnamon
– 1 teaspoon ground ginger
– ½ teaspoon ground nutmeg
– ¼ teaspoon ground cloves
– ¼ teaspoon salt
– 2 cups almond milk (or any milk of your choice)
– ¼ cup pure maple syrup
– ¼ cup molasses
– 2 ripe bananas, mashed until smooth
– 1 teaspoon pure vanilla extract
– ½ cup walnuts, chopped (optional)
– ½ cup raisins or dried cranberries (optional)
Preheat your oven to 350°F (175°C). Lightly grease a 9×9 inch baking dish. This helps the oatmeal bake not stick.
Mixing Dry and Wet Ingredients
In a large bowl, mix the rolled oats, baking powder, cinnamon, ginger, nutmeg, cloves, and salt. Stir well so all the dry bits combine. In another bowl, whisk together the almond milk, maple syrup, molasses, mashed bananas, and vanilla. Make sure this mix is smooth.
Now, pour the wet ingredients into the dry mix. Stir gently until combined. If you want, fold in the walnuts and raisins. They add nice texture and flavor.
Baking and Cooling the Oatmeal Bake
Carefully transfer your oatmeal mixture into the greased baking dish. Spread it out evenly with a spatula. Bake for 30-35 minutes. The top should be golden brown. The center should feel set when you press it lightly.
Once baked, let it cool for a few minutes. Then, slice it into squares. Enjoy this warm treat!
Tips & Tricks
How to Achieve the Perfect Texture
To get the best texture, use rolled oats. They hold their shape and create a nice chew. If you prefer a creamier bake, try steel-cut oats. Just remember they need longer to cook. Mixing the dry and wet ingredients well is key. This ensures every bite is full of flavor. Bake until the top is golden brown and the center feels set. This shows it’s ready!
Serving Suggestions for Cozy Mornings
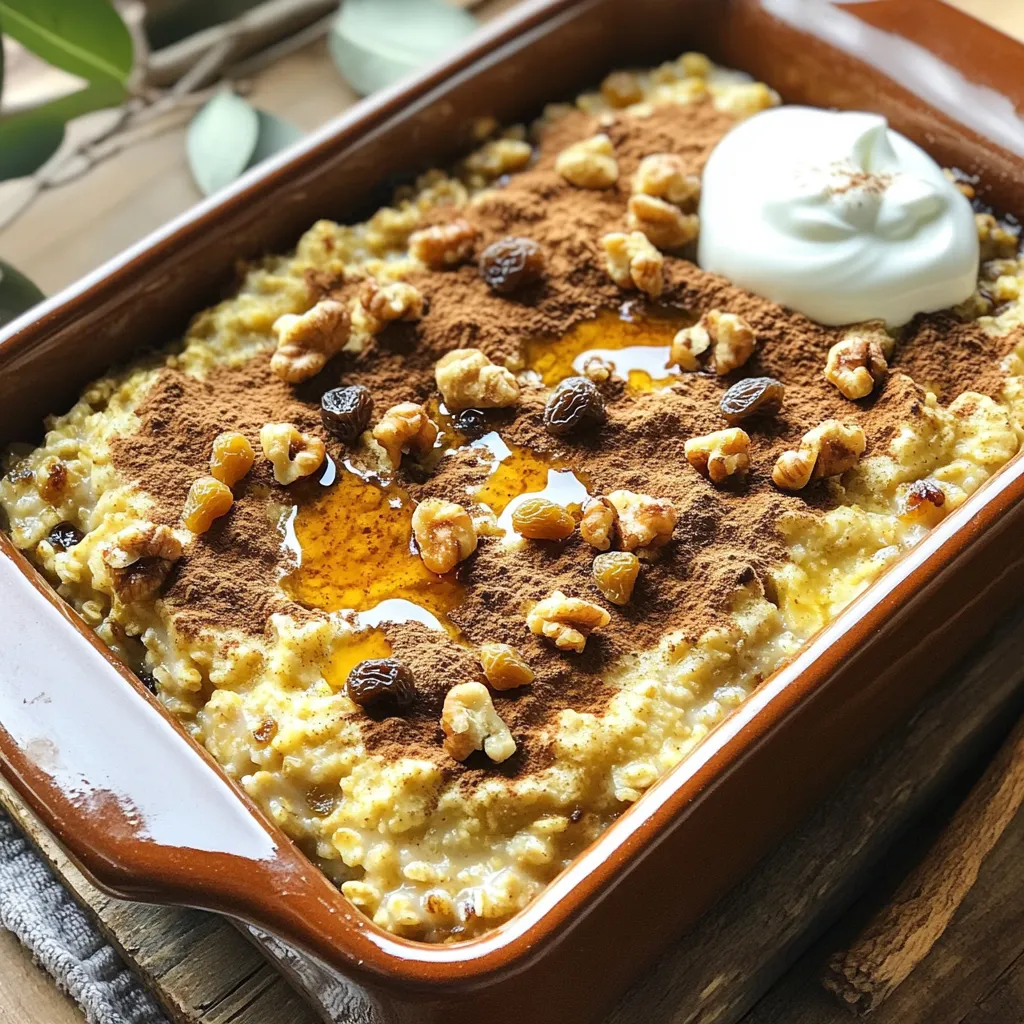
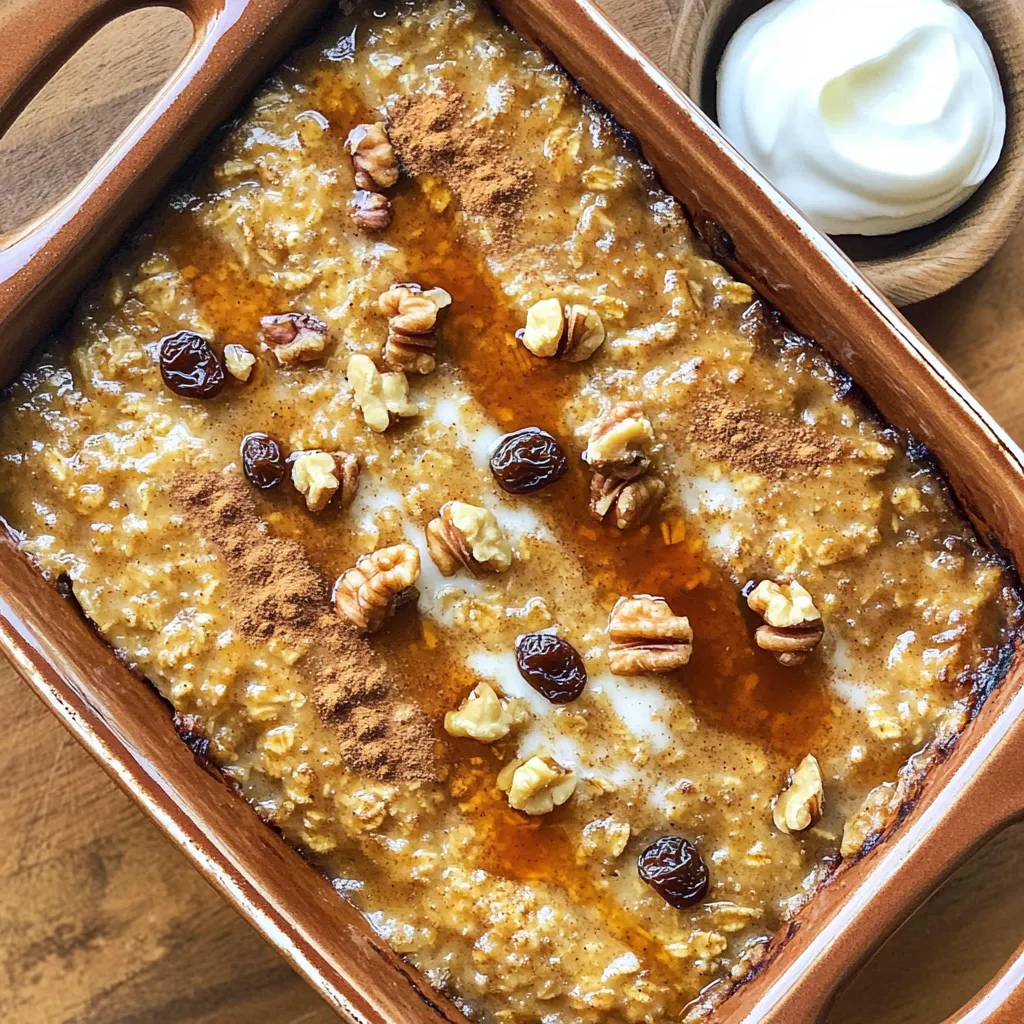
Serve this oatmeal bake warm for the best taste. Drizzle with extra maple syrup for sweetness. You can add a dollop of yogurt for creaminess. Top with a sprinkle of cinnamon for a warm spice kick. If you want a crunch, add more walnuts on top. These add great texture and flavor.
Common Mistakes to Avoid
One common mistake is overmixing the batter. This can lead to a dense bake. Make sure not to skip the resting time after baking. It helps the squares hold together better. Using unripe bananas can make the dish less sweet. Always use ripe bananas for a natural sweetness. Finally, check the bake near the end of the cooking time. This prevents overbaking and keeps it moist.
Variations
Substitutions for Dairy and Sweeteners
You can easily swap out dairy in this recipe. Use almond milk, coconut milk, or soy milk. Each option brings its own flavor and texture. For sweeteners, try honey or agave syrup instead of maple syrup. Molasses gives a rich taste, so you could reduce it if you prefer less sweetness.
Adding Fruits or Nuts for Extra Flavor
Adding fruits or nuts can make the oatmeal bake more exciting. Chopped apples or pears can add a nice sweetness. Dried cranberries or raisins work well, too. If you like a crunch, toss in some chopped walnuts or pecans. They add a great texture and flavor contrast.
Seasonal Variations for Different Holidays
You can change this recipe for different holidays. For Christmas, add in some peppermint extract or crushed candy canes. In the fall, try adding pumpkin puree and spices like allspice. Springtime can bring fresh berries mixed in. Each season can inspire a new take on this cozy dish.
Storage Info
How to Store Leftover Oatmeal Bake
To store leftover oatmeal bake, let it cool down. Once it’s cool, cut it into squares. Place the squares in an airtight container. You can keep it in the fridge for up to five days. Make sure to cover it well to keep it fresh.
Best Ways to Reheat for Serving
When you’re ready to enjoy your oatmeal bake, preheat your oven to 350°F (175°C). Place the squares on a baking sheet lined with parchment paper. Heat them for about 10-15 minutes. This warms them up nicely and keeps them soft. You can also use the microwave. Heat it for about 30 seconds to 1 minute. Add a splash of milk if it seems dry after reheating.
Freezing Instructions and Tips
You can freeze this oatmeal bake for longer storage. Wrap each square tightly in plastic wrap. Then, place them in a freezer bag or container. Label it with the date. The oatmeal bake can last for up to three months in the freezer. When you’re ready to eat, let it thaw in the fridge overnight. Reheat it as mentioned above for a warm, cozy treat.
FAQs
Can I make this recipe gluten-free?
Yes, you can easily make this recipe gluten-free. Use certified gluten-free rolled oats. They give the same great taste without gluten. Just check the label to ensure they are safe for your needs.
How long does the Cozy Gingerbread Oatmeal Bake last in the fridge?
Your Cozy Gingerbread Oatmeal Bake lasts about four to five days in the fridge. Store it in an airtight container. This keeps it fresh and tasty. When you’re ready to eat, just reheat a slice in the microwave.
Can I substitute the bananas with anything else?
You can substitute bananas with applesauce or pumpkin puree. Both options add moisture and sweetness. If you use applesauce, about 1 cup works well. For pumpkin, use about ¾ cup. These swaps keep the bake moist and delicious.
You’ve learned about the main ingredients, steps, and tips for the Cozy Gingerbread Oatmeal Bake. This dish is warm, tasty, and easy to make. Remember to use quality ingredients for the best flavor and texture. Avoid common mistakes like overmixing. Feel free to try different add-ins and variations for your own twist. Store leftovers well and reheat them for a quick breakfast. Enjoy making this cozy treat again and again!


