Coconut Curry Chickpea Soup Flavorful and Easy Recipe

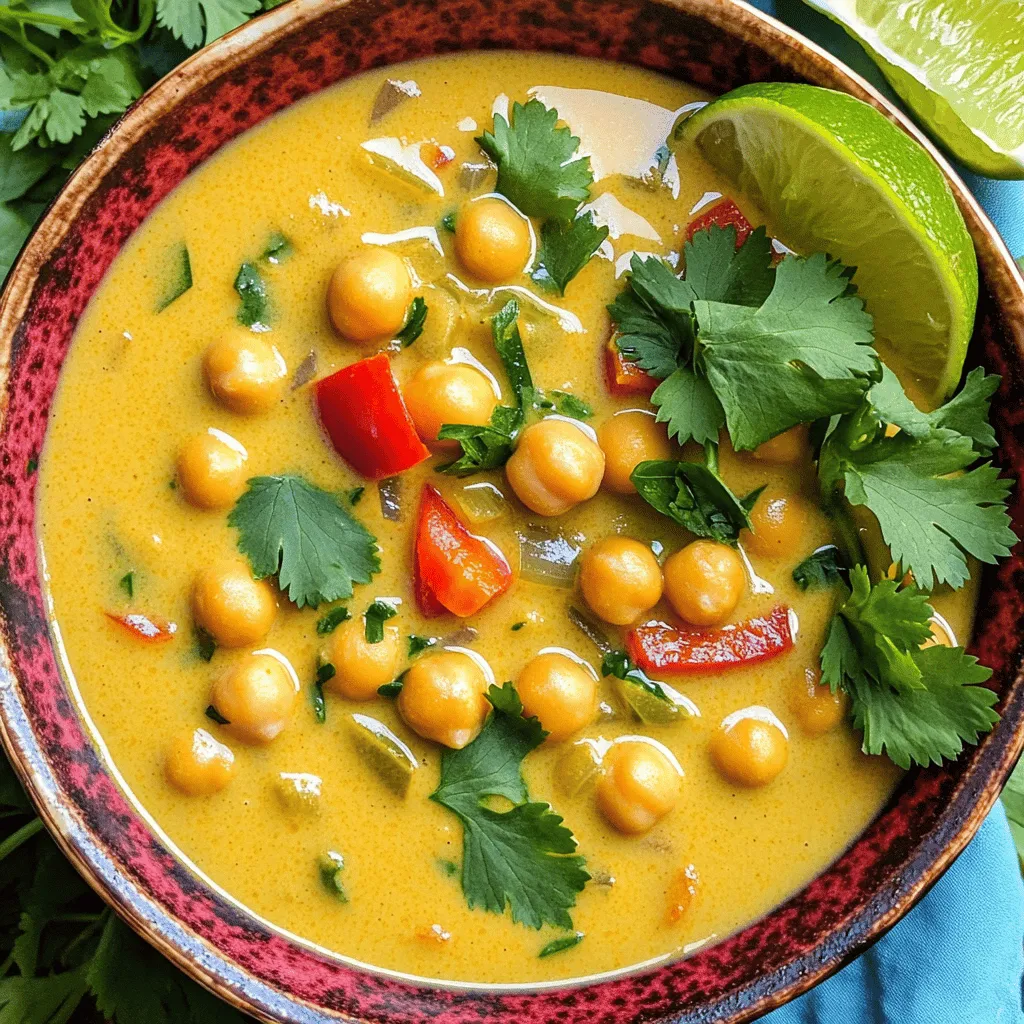
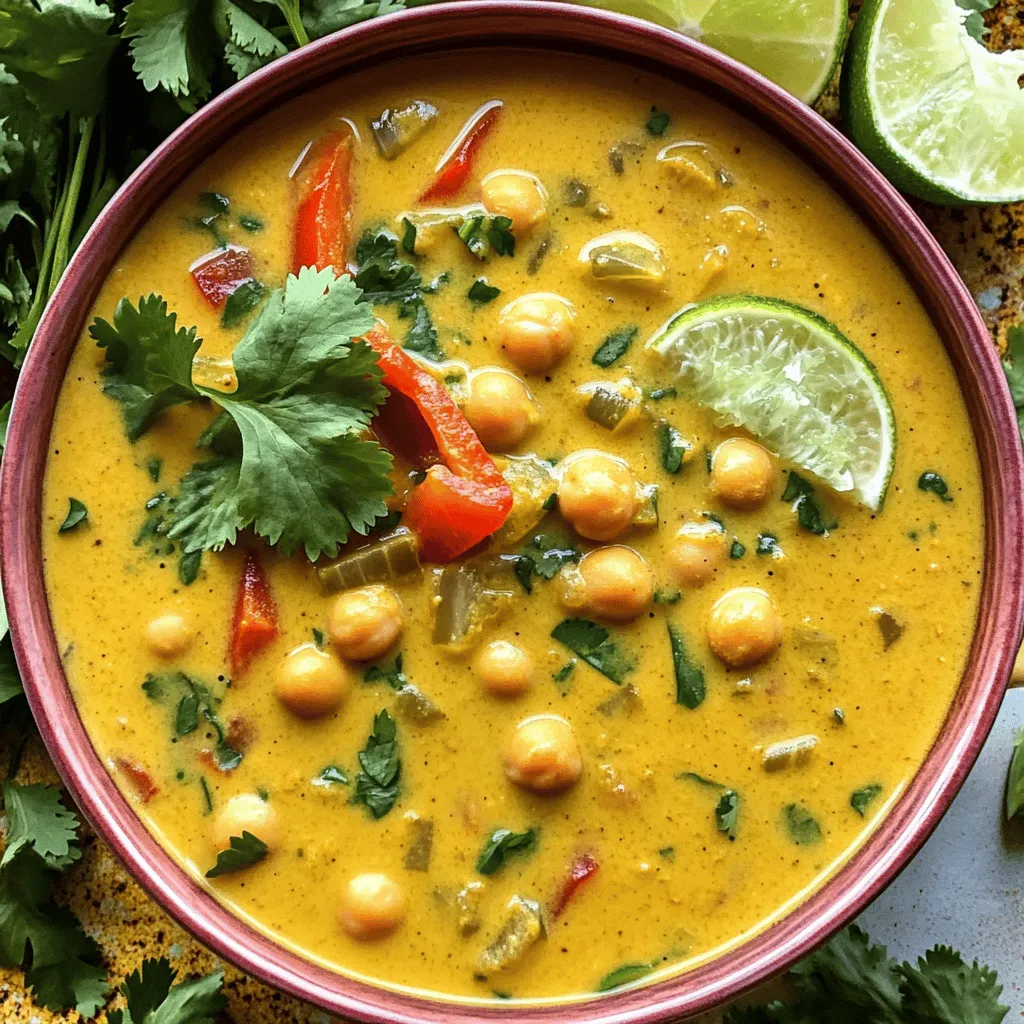
Are you ready to enjoy a bowl of warmth and comfort? My Coconut Curry Chickpea Soup is your new go-to recipe for a delicious meal that’s easy to make. Packed with flavor and healthy ingredients, this soup is perfect for busy weeknights. Plus, it caters to many dietary needs. Let’s dive into the simple steps and tips that make this dish both delightful and satisfying!
Ingredients
List of Ingredients
- 1 tablespoon coconut oil
- 1 medium onion, finely chopped
- 3 cloves garlic, finely minced
- 1 tablespoon fresh ginger, freshly grated
- 1 tablespoon red curry paste
- 1 can (14 oz) full-fat coconut milk
- 2 cups low-sodium vegetable broth
- 1 can (15 oz) chickpeas, thoroughly drained and rinsed
- 1 large red bell pepper, diced into bite-sized pieces
- 1 teaspoon ground turmeric
- 1 teaspoon ground cumin
- Sea salt and freshly ground black pepper, to taste
- Fresh cilantro leaves, roughly chopped, for garnish
- Lime wedges, for serving
Dietary Considerations
This recipe is vegan and gluten-free. It uses chickpeas for protein. Coconut milk adds creaminess without dairy. The spices offer health benefits, like anti-inflammatory properties. Always check labels on the broth and curry paste for hidden gluten or animal products.
Alternative Ingredient Suggestions
If you want a different flavor, try using green curry paste instead of red. You can swap chickpeas for lentils for a different texture. If you dislike red bell pepper, use carrots or zucchini instead. For a lighter soup, use light coconut milk. If you want more protein, add tofu or shredded chicken.
Step-by-Step Instructions
Preparing the Base
To start, grab a spacious pot. Heat 1 tablespoon of coconut oil over medium heat. Once hot, add 1 medium onion that is finely chopped. Sauté it for about 5 minutes. You want the onion to look soft and translucent.
Next, add 3 cloves of finely minced garlic and 1 tablespoon of freshly grated ginger. Cook this mix for 2 minutes. Stir it often until you smell that lovely aroma.
Now, it’s time to add flavor. Toss in 1 tablespoon of red curry paste, 1 teaspoon of ground turmeric, and 1 teaspoon of ground cumin. Stir well to blend all the spices. Cook for another 2 minutes. Let those spices bloom and fill your kitchen with warmth.
Cooking the Soup
Now, we’ll make the soup creamy. Gradually pour in 1 can (14 oz) of full-fat coconut milk. Then, add 2 cups of low-sodium vegetable broth. Stir this mix well. Bring it to a gentle simmer over medium heat.
Once simmering, add 1 can (15 oz) of thoroughly drained and rinsed chickpeas. Also, add 1 large red bell pepper, diced into bite-sized pieces. Let the soup simmer for 15 to 20 minutes. Stir occasionally to help the flavors meld together.
Final Touches
Before serving, taste the soup. Add sea salt and freshly ground black pepper to your liking. If you want a thinner soup, gently stir in more vegetable broth.
Now for the finishing touch! Garnish the soup with fresh cilantro leaves that you roughly chopped. Squeeze some lime juice over the top for a burst of flavor.
For a great presentation, ladle the soup into colorful bowls. Place a lime wedge on the rim of each bowl for a nice look. You can even drizzle some coconut milk on top for an elegant touch. Enjoy your Coconut Curry Chickpea Soup!
Tips & Tricks
Enhancing Flavor
To boost the flavor of your coconut curry chickpea soup, use fresh herbs. Add fresh cilantro at the end for a bright taste. A squeeze of lime juice also adds zest. You can try adding a dash of soy sauce for umami. If you love garlic, add more minced garlic for depth. For sweetness, toss in a few diced sweet potatoes during cooking.
Making It Creamier
If you want a creamier soup, use full-fat coconut milk. This adds rich texture. For extra creaminess, blend a part of the soup. Use an immersion blender for a few seconds. You can also stir in some cashew cream or a splash of heavy cream. These options will elevate the soup’s smoothness and richness.
Adjusting Spice Levels
To change the heat level, start with less red curry paste. You can always add more later if you want it spicier. For a milder version, use sweet curry powder. If you want more heat, add red pepper flakes or chopped fresh chili. Taste as you go to find your perfect spice level.

Variations
Adding Protein Sources
You can make this soup even heartier by adding protein. Chickpeas are great, but you can mix in cooked chicken, shrimp, or tofu. Each option adds flavor and texture. If you want a vegetarian choice, try lentils. They cook fast and soak up the spices well.
Vegetable Substitutions
Feel free to change the veggies based on what you have. You can use sweet potatoes, carrots, or spinach. Each adds a unique taste. If you want a bit of crunch, add green beans or snap peas. Just remember to add them near the end of cooking so they stay crisp.
Spicy vs. Mild Variations
You can easily adjust the spice level in this soup. For a mild version, use less red curry paste. If you like heat, add sliced jalapeños or crushed red pepper flakes. Taste as you go, and find the right balance for your palate. Don’t forget to serve lime wedges on the side to add brightness!
Storage Info
How to Store Leftovers
To store leftovers, let the soup cool to room temperature. Then, pour it into an airtight container. This keeps the soup fresh and tasty. You can store it in the fridge for up to three days. Just make sure to seal it well to avoid any spills.
Freezing Guidelines
If you want to save it longer, freezing works great! Use freezer-safe containers or bags. Make sure to leave some space at the top, as soup expands when frozen. The soup can last up to three months in the freezer. Label the containers with the date, so you know when you made it.
Reheating Instructions
When you’re ready to enjoy it again, take it out of the fridge or freezer. For fridge leftovers, just pour it into a pot. Heat over medium heat until warm, stirring often. If it’s frozen, let it thaw in the fridge overnight. Then, reheat it in a pot. You can add a splash of vegetable broth if it’s too thick. Enjoy your soup warm!
FAQs
Can I use low-fat coconut milk?
Yes, you can use low-fat coconut milk. It will change the creaminess of the soup. The full-fat version adds richness and depth. Low-fat will still taste good but may be less creamy.
What can I serve with Coconut Curry Chickpea Soup?
You can serve this soup with many tasty sides:
- Crusty bread for dipping
- Rice or quinoa for extra fiber
- A fresh salad for crunch
- Naan bread for a fun twist
These options pair well and add more texture to your meal.
How long does Coconut Curry Chickpea Soup last in the fridge?
Coconut Curry Chickpea Soup lasts about 4 to 5 days in the fridge. Store it in a sealed container to keep it fresh. You can also freeze it for up to 3 months. Just thaw in the fridge before reheating.
This article covered how to make Coconut Curry Chickpea Soup. We listed key ingredients, alternative choices, and dietary notes. You learned step-by-step cooking techniques and tips for flavor, creaminess, and spice. We discussed various versions and how to store leftovers properly.
This simple recipe is perfect for any meal. Enjoy making it your own and sharing it with others!


![To make loaded Greek fries, you need fresh and tasty ingredients. Here’s what you need: - 4 large Russet potatoes - 1/4 cup olive oil - 1 teaspoon garlic powder - 1 teaspoon paprika - Salt and pepper to taste - 1 cup crumbled feta cheese - 1 cup cherry tomatoes, halved - 1/2 cup Kalamata olives, pitted and sliced - 1/2 cucumber, diced - 1/4 red onion, finely chopped - Fresh parsley, chopped for garnish - 1/2 cup tzatziki sauce You can get creative with your fries! Here are some tasty toppings to try: - Sliced jalapeños for heat - Chopped bell peppers for crunch - Grilled chicken or lamb for protein - Avocado for creaminess Season your fries to boost flavor! Here are some ideas: - Oregano adds a nice herbal flavor. - Lemon zest gives a fresh, zesty touch. - Red pepper flakes can spice things up. - Dill pairs well with tzatziki and adds brightness. These ingredients and toppings make loaded Greek fries a fun and easy dish. You can mix and match to fit your taste. Enjoy cooking with this Full Recipe! To start, wash four large Russet potatoes. Make sure to scrub them well. Next, cut the potatoes into thin fries, about 1/4 inch thick. This size helps them cook evenly. Place the cut fries in a large bowl. Drizzle 1/4 cup of olive oil over them. Add 1 teaspoon of garlic powder and 1 teaspoon of paprika. Sprinkle salt and pepper to taste. Toss the fries. Make sure every fry gets coated well. Now it's time to bake. Preheat your oven to 425°F (220°C). Spread the seasoned fries on a baking sheet lined with parchment paper. Try to keep them in one layer. This helps them get crispy. Bake for 25 to 30 minutes. Remember to flip them halfway through. Look for a golden brown color when they are done. While the fries bake, prepare the toppings. In a medium bowl, mix 1 cup of halved cherry tomatoes, 1/2 cup of sliced Kalamata olives, 1/2 diced cucumber, and 1/4 cup of finely chopped red onion. Drizzle a bit of olive oil over this mix. Add salt and pepper to taste, then gently combine. When the fries are ready, pull them out of the oven. Immediately sprinkle 1 cup of crumbled feta cheese on top. Next, add your prepared veggie mix. Finally, add a generous dollop of tzatziki sauce on top. For a nice finish, sprinkle chopped fresh parsley for color. Enjoy your Loaded Greek Fries! You can find the full recipe [here]. To make the best fries, start with the right potatoes. I prefer Russet potatoes for their starchiness. Cut your fries thin, around 1/4 inch thick. This helps them cook evenly and get crispy. Soak the cut fries in cold water for at least 30 minutes. This removes extra starch and aids crispiness. After soaking, dry them well with a towel. Coat the fries with olive oil and seasonings. Bake at 425°F (220°C) for 25-30 minutes. Remember to flip them halfway through for an even crunch. Great flavor makes all the difference. I love using garlic powder and paprika for a warm, savory taste. Add salt and pepper to taste. You can also try adding dried oregano or thyme for a Greek touch. Don't be afraid to experiment! Mix your favorite spices into the oil before coating the fries. This will infuse flavor right into the fries. For an extra kick, add some chili powder or cayenne pepper. Presentation matters when serving Loaded Greek Fries. Serve them on a large platter for a fun look. Drizzle extra Tzatziki sauce over the top for a creamy touch. Use fresh parsley to add color and freshness. You can also add slices of lemon for a pop of brightness. For easy serving, provide toothpicks or small forks. This makes it fun for guests to enjoy! For the full recipe, check out the detailed instructions above. {{image_4}} You can make Loaded Greek Fries vegetarian by skipping the meat toppings. The base is already rich with flavor. Use extra toppings like roasted red peppers or artichoke hearts. You can also add a variety of cheeses, like goat cheese or mozzarella, for a creamy twist. These options keep the dish hearty and satisfying. If you want to add protein, consider grilled chicken or shrimp. Both pair well with the Greek flavors. Gyro meat is another great choice. Cook it until it's crispy and flavorful. You can also try chickpeas for a plant-based protein. They add a nice crunch and boost the nutrition. Different regions of Greece offer unique flavors. From the island of Crete, you can add capers and mint for a fresh taste. In the north, try adding smoked paprika for depth. From the Peloponnese, olives and citrus zest can give a bright flavor. Mix and match these ingredients for your own twist on Loaded Greek Fries. For the full recipe, check out the complete guide on Loaded Greek Fries. To keep your loaded Greek fries fresh, let them cool first. Place them in an airtight container. If you have toppings like tomatoes or cucumbers, store them separately. This keeps everything crisp. When you want to enjoy your leftovers, preheat your oven to 375°F (190°C). Spread the fries on a baking sheet. Heat for about 10-15 minutes until hot and crispy. Avoid microwaving them, as this can make them soggy. These loaded Greek fries last about 2-3 days in the fridge. Make sure they are in an airtight container. If you notice any change in smell or texture, it’s best to toss them. Enjoy them fresh for the best taste! I recommend using Russet potatoes for Loaded Greek Fries. They are starchy and fluffy, which gives you that nice, crispy texture when baked. Their skin adds a great crunch, too. Yukon Gold potatoes also work well. They are creamier, which can add a different taste. Yes, you can prepare the fries ahead of time! Cut the potatoes and soak them in water to keep them fresh. This step removes some starch and helps them crisp up better. When you are ready to cook, just dry them off and season them. Bake them fresh for the best taste. Loaded Greek Fries go well with many dishes. They are great alongside grilled meats like chicken or lamb. You can serve them with a fresh Greek salad for a light meal. They also pair nicely with tzatziki, which adds a cool contrast to the warm fries. Enjoy them as a fun snack at gatherings or parties! For a complete experience, check out the Full Recipe to guide you through making these tasty fries. Loaded Greek fries are a fun dish packed with flavors. We explored key ingredients, optional toppings, and tasty seasonings. I shared step-by-step instructions to prepare and bake your fries, then assemble them perfectly. I offered tips for crispy fries and smart presentation ideas. You can even customize your dish with vegetarian options or protein toppings from various Greek regions. Finally, I outlined storage tips to keep leftovers fresh. Enjoy making these fries; they are sure to impress everyone!](https://dishtreats.com/wp-content/uploads/2025/06/9c6541bd-b31d-423a-b196-3f6ab3dd7c20-768x768.webp)

![To make crispy sweet and sour chicken, you need some key ingredients. Here’s what to gather: - 1 lb (450g) chicken breast, cut into bite-sized pieces - 1 cup cornstarch - 2 large eggs, beaten - Oil for frying - Salt and black pepper to taste These ingredients form the base of your dish. The chicken gives protein, while cornstarch creates that crispy texture. Eggs help the cornstarch stick to the chicken. Adding vibrant colors and fresh flavors is easy with the right vegetables and fruits. Here’s what you’ll need: - 1 cup bell peppers, chopped (mix of colors for visual appeal) - 1 cup pineapple chunks (fresh or canned) - 1 cup onion, chopped - 3 cloves garlic, minced The bell peppers and onions add crunch and sweetness. Pineapple brings a juicy burst of flavor. Garlic adds depth to the dish. The sweet and sour sauce makes this dish memorable. Gather these components: - 1/2 cup ketchup - 1/4 cup apple cider vinegar - 1/4 cup brown sugar - 2 tablespoons soy sauce - 1 tablespoon cornstarch mixed with 2 tablespoons water (for slurry) This sauce balances sweetness and tang. Ketchup gives a rich base, while apple cider vinegar adds a zesty kick. Brown sugar enhances the sweetness, and soy sauce adds umami. The cornstarch slurry thickens the sauce perfectly. For the full recipe, check out the complete list of steps to follow. Happy cooking! Start by seasoning the chicken pieces with salt and pepper. This simple step adds great flavor. Next, dredge each piece in cornstarch. Make sure to shake off any extra cornstarch. This helps create a nice, crispy crust. After that, dip the chicken pieces into the beaten eggs. This coating will help the cornstarch stick well. In a large skillet, heat oil over medium-high heat. You want the oil to shimmer before adding the chicken. Fry the chicken in batches. Avoid crowding the pan to keep the chicken crispy. Cook each piece for about 4-5 minutes per side. When golden brown, use a slotted spoon to remove the chicken. Place it on paper towels to drain any excess oil. Lower the heat to medium. In the same pan, add chopped onions and bell peppers. Sauté them for about 3-4 minutes or until soft. This brings out their sweetness. Then, add minced garlic and cook for another minute. The aroma will fill your kitchen and make your mouth water. In a bowl, whisk together the sauce ingredients: ketchup, apple cider vinegar, brown sugar, and soy sauce. Combine these until smooth. Pour this sweet and tangy sauce over the sautéed vegetables. Stir gently to mix everything together. The colors and smells will be inviting. Raise the heat slightly and bring the sauce to a gentle simmer. This helps blend the flavors. Once it simmers, add pineapple chunks for sweetness. Then, mix the cornstarch slurry and pour it in. Stir continuously until the sauce thickens, which takes about 2-3 minutes. You want it to coat the chicken well. Add the crispy chicken back into the pan. Carefully fold it into the thickening sauce. Toss everything gently to coat each piece of chicken. Once warmed through, the dish is ready to serve. For a great presentation, plate it over fluffy rice or steamed quinoa. You can also garnish it with sesame seeds and green onions for extra flair. To get that perfect crispy texture, start with your oil. Heat it well, around 350°F (175°C) is ideal. If the oil isn't hot enough, your chicken will soak up oil and get soggy. Fry the chicken in batches to avoid crowding. This keeps the oil temperature steady. Once fried, place the chicken on paper towels. This helps drain off any extra oil. For a twist on the classic sauce, try adding a splash of orange juice. It brightens the flavor. You can also swap brown sugar with honey for a different sweetness. Using fresh ginger in your sauce will give an extra kick. Remember to taste as you mix. Adjust salt and pepper to suit your taste buds. Presentation makes your dish look more appealing. Serve your crispy sweet and sour chicken over fluffy white rice or quinoa. Sprinkle sesame seeds on top for crunch. Finely chopped green onions add a pop of color. You can even add a few slices of fresh pineapple on the side for a tropical touch. This will make your meal look vibrant and inviting. {{image_4}} You can switch up the protein in this dish. Shrimp works great and cooks fast. Just sauté it until it turns pink. Tofu is another good option. Use firm tofu for the best texture. Cut it into cubes and fry until golden. Pork also fits well. Use pork tenderloin or chops, cut into bite-sized pieces. Each protein adds its own flavor, keeping things exciting. You can mix in different veggies for added nutrition. Broccoli is a great choice. It adds a nice crunch and color. Carrots give a sweet flavor and vibrant look. Snap peas are another fun option. They stay crisp and add a pop of freshness. Feel free to combine any of these for a colorful plate. It makes your meal more appealing and nutritious. You can easily tweak the sauce to match your taste. If you like heat, add some red pepper flakes or sriracha. This will spice up the dish nicely. For sweetener options, you can swap brown sugar for honey or maple syrup. This change adds a different flavor twist. Adjust the acidity by adding more vinegar or a squeeze of lime juice. Each change can create a new experience with this classic dish. For the full recipe, check out the detailed instructions earlier. After enjoying your crispy sweet and sour chicken, store any leftovers in an airtight container. This keeps the dish fresh for up to three days. Before storing, let the chicken cool down to room temperature. This prevents condensation, which can make the chicken soggy. If you have sauce left over, store it separately to keep the chicken crispy. To freeze your crispy sweet and sour chicken, place it in a freezer-safe container or bag. Make sure to remove as much air as possible. This helps avoid freezer burn. It can stay good for about one month. When you're ready to eat, thaw it overnight in the fridge. For the best taste and texture, reheat your chicken in an oven. Preheat the oven to 350°F (175°C). Spread the chicken on a baking sheet and cover with foil. Heat for about 15-20 minutes or until warm. This method helps keep the chicken crispy. You can also reheat it in a skillet over medium heat. Just add a splash of water to the pan to create steam, which helps warm it without drying out. Enjoy your leftovers just as much as the first time! To make crispy sweet and sour chicken, start with these steps: 1. Prep Chicken: Cut chicken breast into bite-sized pieces. Season with salt and pepper. Dredge in cornstarch, then coat in beaten eggs. 2. Fry Chicken: Heat oil in a skillet over medium-high heat. Fry chicken pieces until golden brown, about 4-5 minutes per side. Drain on paper towels. 3. Sauté Vegetables: Lower heat and add chopped onion and bell peppers to the same pan. Cook for 3-4 minutes. Add minced garlic and cook for another minute. 4. Prepare Sauce: Mix ketchup, apple cider vinegar, brown sugar, and soy sauce in a bowl. Pour this mixture over the vegetables in the pan. 5. Thicken Sauce: Bring the sauce to a gentle simmer. Add pineapple chunks and cornstarch slurry. Stir until the sauce thickens, about 2-3 minutes. 6. Combine Chicken and Sauce: Add the fried chicken back into the pan. Toss gently to coat the chicken in the sauce. 7. Serve: Let the dish rest for a minute. Serve it over rice or quinoa for a complete meal. Yes, you can prepare some parts in advance. Cook the chicken and the sauce ahead of time. Store them separately in airtight containers in the fridge. You can keep the chicken for up to three days. The sauce will last about a week. When ready to serve, reheat the chicken and sauce together in a pan. This keeps the chicken crispy and the sauce fresh. Yes, you can make a vegetarian version! Use tofu instead of chicken. Press the tofu to remove excess moisture, then cut it into cubes. Coat and fry the tofu pieces just like you would with chicken. You can also use seitan or tempeh for a similar texture. The sauce remains the same, giving you that sweet and sour flavor. I love serving crispy sweet and sour chicken with steamed rice or quinoa. You can also pair it with: - Fried rice - Noodles - Steamed broccoli - A fresh cucumber salad These sides complement the dish well and add color to your plate. Enjoy your meal! For the complete recipe, check the [Full Recipe]. Crispy sweet and sour chicken is a delightful dish. We explored key ingredients, cooking methods, and tips for perfecting it. You learned how to achieve that crispy texture and enhance flavors. Remember, try different proteins and veggies for variety. Proper storage keeps leftovers fresh. This dish is not only tasty but also versatile. Enjoy making and sharing it with friends and family. Let your kitchen creativity shine with this classic recipe!](https://dishtreats.com/wp-content/uploads/2025/05/ffc138cc-1bdb-4282-b515-13f85bd5dbd6-768x768.webp)

