Classic Key Lime Pie Simple and Tangy Recipe
![To make a true classic key lime pie, you need these key items: - 1 ½ cups graham cracker crumbs - ½ cup unsweetened coconut flakes - ⅓ cup granulated sugar - ½ cup unsalted butter, melted - 4 large egg yolks - 1 (14 oz) can sweetened condensed milk - ½ cup freshly squeezed key lime juice (approx. 12 key limes) - Zest of 2 key limes - 1 cup heavy whipping cream - 2 tablespoons powdered sugar - Lime slices and extra zest for garnish These ingredients work together to create a sweet, tangy pie that sings of sunshine. You can add some optional ingredients to enhance your pie: - Toasted coconut flakes for extra crunch - A pinch of salt to balance sweetness - Lime zest for a stronger lime flavor These add-ons can make your pie even more delightful. If you're missing an ingredient, here are some easy swaps: - Use regular lime juice instead of key lime juice. It will taste different but still good. - Swap graham cracker crumbs with crushed vanilla wafers for a unique flavor. - Replace heavy cream with whipped topping for a lighter version. These substitutions can help you prepare the pie with what you have. For the exact steps, check out the Full Recipe. First, preheat your oven to 350°F (175°C). This step is key for a great crust. In a medium bowl, mix the graham cracker crumbs, coconut flakes, and granulated sugar. Pour in the melted butter and stir until it feels like moist sand. Next, grab a 9-inch pie pan. Press the crumb mixture into the bottom and up the sides of the pan. Make sure it’s firm and even. Bake this crust for 8-10 minutes until the edges are golden. After baking, let it cool completely. Now, let’s make the filling. In a large bowl, whisk the egg yolks until they are pale yellow. Then, add the sweetened condensed milk, key lime juice, and lime zest. Whisk until everything is smooth. You want to have no lumps here! Carefully pour this lime mixture into your cooled crust. Spread it out evenly. Bake the pie for 15 minutes. The filling should be set but still a bit jiggly in the center. After baking, take it out and let it cool at room temperature. Once it’s cool, put the pie in the fridge for at least 2 hours. This chilling time makes it even tastier! For the full recipe, check out the details above! To get the best texture and flavor in your Key Lime Pie, follow a few simple tips: - Use Fresh Key Limes: Fresh key limes give a bright taste. They also add a nice zing. - Whisk Egg Yolks Well: Whisk the yolks until they are pale. This helps create a smooth filling. - Don’t Overbake: Bake the filling until it is just set. It should still jiggle a bit in the middle. - Chill Properly: Let the pie cool at room temp before refrigerating. This step enhances the flavor. Some mistakes can ruin your pie. Here are a few to watch out for: - Skipping the Zest: The zest adds flavor and aroma. Don’t skip it! - Using Cold Ingredients: Let your ingredients reach room temperature. This helps them mix better. - Overmixing the Filling: Whisk just until combined. Overmixing can create bubbles in the filling. - Not Cooling the Crust: Always cool the crust completely before adding the filling. A warm crust can make the filling runny. Having the right tools makes cooking easier and more fun: - 9-inch Pie Pan: This is the perfect size for your Key Lime Pie. - Mixing Bowls: Use medium and large bowls for mixing your crust and filling. - Electric Mixer: This helps you whip the cream to stiff peaks easily. - Zester or Grater: A good zester is key for getting the lime zest just right. These tips and tools will help you create a perfect Key Lime Pie every time. For the full recipe, check out the [Full Recipe]. {{image_4}} You can change up the crust for your Key Lime Pie. Here are some fun ideas: - Graham Cracker Crust: This is the classic choice. It’s sweet and crunchy. - Oreo Crust: Use crushed Oreos instead of graham crackers for a chocolate twist. - Nut Crust: Ground almonds or pecans add a nice nutty flavor. Mix them with butter and a bit of sugar. - Coconut Crust: Use shredded coconut for a tropical feel. It pairs well with the lime. Want to try something different? Here are some tasty twists: - Mango Key Lime Pie: Add pureed mango to the filling for a fruity kick. - Berry Key Lime Pie: Mix in fresh berries like strawberries or blueberries for color and flavor. - Coconut Key Lime Pie: Stir in coconut milk for a creamier texture and tropical taste. - Chocolate Key Lime Pie: Add melted chocolate to the filling for a rich, sweet layer. Making your pie look great can be fun. Here are some ideas: - Whipped Cream Topping: Spread whipped cream on top. Use a spatula to make swirls. - Garnish with Lime: Add lime slices or zest for a pop of color. - Serve in Mason Jars: For a fun twist, serve individual portions in jars. - Add Fresh Berries: Place berries around the pie for extra flair. For the full recipe, check out the Zesty Classic Key Lime Pie . To keep your key lime pie fresh, cover it tightly with plastic wrap or aluminum foil. This prevents the pie from absorbing fridge odors. Store it in the fridge for up to three days. Make sure to slice the pie before storing to make it easier to serve later. You can freeze key lime pie if you want to save some for later. First, let the pie cool completely after baking. Wrap the pie tightly in plastic wrap and then in aluminum foil. This double wrapping helps prevent freezer burn. You can freeze it for up to three months. Just remember to label it with the date. To enjoy your frozen key lime pie, move it from the freezer to the fridge. Let it thaw overnight. If you're in a hurry, you can leave it at room temperature for about two hours. Do not microwave it, as this can change the texture. Once thawed, you can add fresh whipped cream or lime zest for extra flavor before serving. Yes, you can use regular limes. Key limes are smaller and more fragrant. They have a tart flavor that makes the pie special. If you use regular limes, the pie will taste a bit different but still good. You might want to adjust the sugar to balance the flavor. You can keep key lime pie in the fridge for up to three days. Cover it well to prevent it from drying out. If the pie has whipped cream on top, eat it within two days. The cream can lose its texture after that. You can use coconut cream or a dairy-free option. If you need a lighter option, try using yogurt. For a richer flavor, you can also use mascarpone cheese. Each choice will change the taste and texture a bit, but they all work well in this recipe. Check the [Full Recipe] for more details. In this post, we explored the key ingredients for classic Key Lime Pie, from crust to filling. I shared step-by-step instructions for baking. We discussed tips to avoid common mistakes and explored variations for flavor and presentation. Additionally, we covered how to store and reheat leftovers effectively. Key Lime Pie is simple to make and delightful to share. Enjoy creating your version and savor each bite. When you follow these tips, your pie will shine!](https://dishtreats.com/wp-content/uploads/2025/07/bf504450-0d09-4d53-b035-55d87c168019.webp)
Craving a dessert that’s both simple and tangy? You’ve come to the right place! In this post, I’ll guide you through making a classic Key Lime Pie that’s bursting with flavor and a breeze to whip up. We’ll cover everything from essential ingredients to tips for perfecting your pie. Get ready to impress your friends and family with a treat that’s sure to delight. Let’s get started!
Ingredients
Key Ingredients for Classic Key Lime Pie
To make a true classic key lime pie, you need these key items:
- 1 ½ cups graham cracker crumbs
- ½ cup unsweetened coconut flakes
- ⅓ cup granulated sugar
- ½ cup unsalted butter, melted
- 4 large egg yolks
- 1 (14 oz) can sweetened condensed milk
- ½ cup freshly squeezed key lime juice (approx. 12 key limes)
- Zest of 2 key limes
- 1 cup heavy whipping cream
- 2 tablespoons powdered sugar
- Lime slices and extra zest for garnish
These ingredients work together to create a sweet, tangy pie that sings of sunshine.
Optionally Available Ingredients
You can add some optional ingredients to enhance your pie:
- Toasted coconut flakes for extra crunch
- A pinch of salt to balance sweetness
- Lime zest for a stronger lime flavor
These add-ons can make your pie even more delightful.
Substitutions and Adjustments
If you’re missing an ingredient, here are some easy swaps:
- Use regular lime juice instead of key lime juice. It will taste different but still good.
- Swap graham cracker crumbs with crushed vanilla wafers for a unique flavor.
- Replace heavy cream with whipped topping for a lighter version.
These substitutions can help you prepare the pie with what you have.
Step-by-Step Instructions
Preheating and Crust Preparation
First, preheat your oven to 350°F (175°C). This step is key for a great crust. In a medium bowl, mix the graham cracker crumbs, coconut flakes, and granulated sugar. Pour in the melted butter and stir until it feels like moist sand. Next, grab a 9-inch pie pan. Press the crumb mixture into the bottom and up the sides of the pan. Make sure it’s firm and even. Bake this crust for 8-10 minutes until the edges are golden. After baking, let it cool completely.
Filling the Pie
Now, let’s make the filling. In a large bowl, whisk the egg yolks until they are pale yellow. Then, add the sweetened condensed milk, key lime juice, and lime zest. Whisk until everything is smooth. You want to have no lumps here! Carefully pour this lime mixture into your cooled crust. Spread it out evenly.
Baking and Cooling Process
Bake the pie for 15 minutes. The filling should be set but still a bit jiggly in the center. After baking, take it out and let it cool at room temperature. Once it’s cool, put the pie in the fridge for at least 2 hours. This chilling time makes it even tastier!
Tips & Tricks
Achieving the Perfect Texture and Flavor
To get the best texture and flavor in your Key Lime Pie, follow a few simple tips:
- Use Fresh Key Limes: Fresh key limes give a bright taste. They also add a nice zing.
- Whisk Egg Yolks Well: Whisk the yolks until they are pale. This helps create a smooth filling.
- Don’t Overbake: Bake the filling until it is just set. It should still jiggle a bit in the middle.
- Chill Properly: Let the pie cool at room temp before refrigerating. This step enhances the flavor.
Common Mistakes to Avoid
Some mistakes can ruin your pie. Here are a few to watch out for:
- Skipping the Zest: The zest adds flavor and aroma. Don’t skip it!
- Using Cold Ingredients: Let your ingredients reach room temperature. This helps them mix better.
- Overmixing the Filling: Whisk just until combined. Overmixing can create bubbles in the filling.
- Not Cooling the Crust: Always cool the crust completely before adding the filling. A warm crust can make the filling runny.
Essential Tools and Equipment
Having the right tools makes cooking easier and more fun:
- 9-inch Pie Pan: This is the perfect size for your Key Lime Pie.
- Mixing Bowls: Use medium and large bowls for mixing your crust and filling.
- Electric Mixer: This helps you whip the cream to stiff peaks easily.
- Zester or Grater: A good zester is key for getting the lime zest just right.
These tips and tools will help you create a perfect Key Lime Pie every time.
Variations
Alternative Crust Options
You can change up the crust for your Key Lime Pie. Here are some fun ideas:
- Graham Cracker Crust: This is the classic choice. It’s sweet and crunchy.
- Oreo Crust: Use crushed Oreos instead of graham crackers for a chocolate twist.
- Nut Crust: Ground almonds or pecans add a nice nutty flavor. Mix them with butter and a bit of sugar.
- Coconut Crust: Use shredded coconut for a tropical feel. It pairs well with the lime.
Flavor Variations of Key Lime Pie
Want to try something different? Here are some tasty twists:
- Mango Key Lime Pie: Add pureed mango to the filling for a fruity kick.
- Berry Key Lime Pie: Mix in fresh berries like strawberries or blueberries for color and flavor.
- Coconut Key Lime Pie: Stir in coconut milk for a creamier texture and tropical taste.
- Chocolate Key Lime Pie: Add melted chocolate to the filling for a rich, sweet layer.
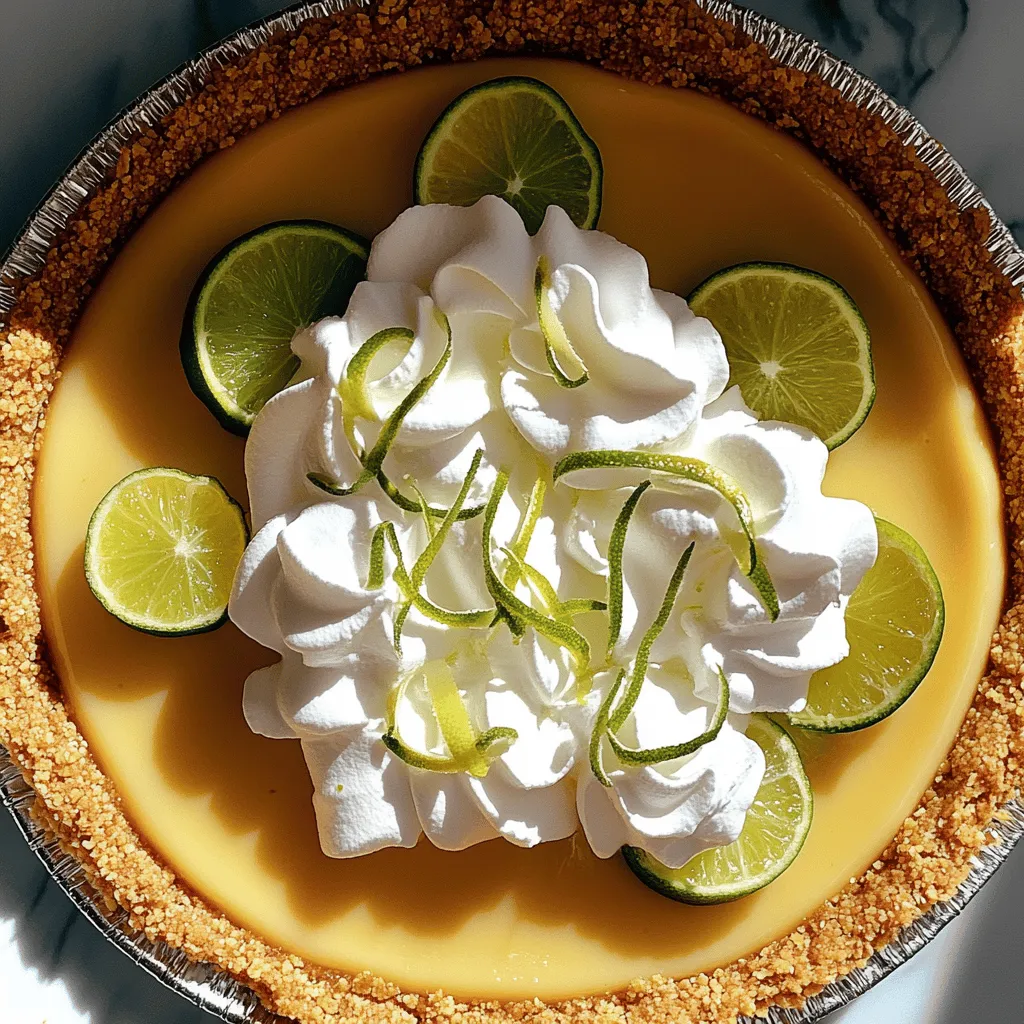
Presentation Ideas for Serving
Making your pie look great can be fun. Here are some ideas:
- Whipped Cream Topping: Spread whipped cream on top. Use a spatula to make swirls.
- Garnish with Lime: Add lime slices or zest for a pop of color.
- Serve in Mason Jars: For a fun twist, serve individual portions in jars.
- Add Fresh Berries: Place berries around the pie for extra flair.
Storage Info
How to Store Leftover Key Lime Pie
To keep your key lime pie fresh, cover it tightly with plastic wrap or aluminum foil. This prevents the pie from absorbing fridge odors. Store it in the fridge for up to three days. Make sure to slice the pie before storing to make it easier to serve later.
Freezing Instructions for Key Lime Pie
You can freeze key lime pie if you want to save some for later. First, let the pie cool completely after baking. Wrap the pie tightly in plastic wrap and then in aluminum foil. This double wrapping helps prevent freezer burn. You can freeze it for up to three months. Just remember to label it with the date.
Best Practices for Reheating or Thawing
To enjoy your frozen key lime pie, move it from the freezer to the fridge. Let it thaw overnight. If you’re in a hurry, you can leave it at room temperature for about two hours. Do not microwave it, as this can change the texture. Once thawed, you can add fresh whipped cream or lime zest for extra flavor before serving.
FAQs
Can I use regular limes instead of key limes?
Yes, you can use regular limes. Key limes are smaller and more fragrant. They have a tart flavor that makes the pie special. If you use regular limes, the pie will taste a bit different but still good. You might want to adjust the sugar to balance the flavor.
How long can I keep key lime pie in the fridge?
You can keep key lime pie in the fridge for up to three days. Cover it well to prevent it from drying out. If the pie has whipped cream on top, eat it within two days. The cream can lose its texture after that.
What can I substitute for heavy whipping cream?
You can use coconut cream or a dairy-free option. If you need a lighter option, try using yogurt. For a richer flavor, you can also use mascarpone cheese. Each choice will change the taste and texture a bit, but they all work well in this recipe.
In this post, we explored the key ingredients for classic Key Lime Pie, from crust to filling. I shared step-by-step instructions for baking. We discussed tips to avoid common mistakes and explored variations for flavor and presentation. Additionally, we covered how to store and reheat leftovers effectively.
Key Lime Pie is simple to make and delightful to share. Enjoy creating your version and savor each bite. When you follow these tips, your pie will shine!
![To make a true classic key lime pie, you need these key items: - 1 ½ cups graham cracker crumbs - ½ cup unsweetened coconut flakes - ⅓ cup granulated sugar - ½ cup unsalted butter, melted - 4 large egg yolks - 1 (14 oz) can sweetened condensed milk - ½ cup freshly squeezed key lime juice (approx. 12 key limes) - Zest of 2 key limes - 1 cup heavy whipping cream - 2 tablespoons powdered sugar - Lime slices and extra zest for garnish These ingredients work together to create a sweet, tangy pie that sings of sunshine. You can add some optional ingredients to enhance your pie: - Toasted coconut flakes for extra crunch - A pinch of salt to balance sweetness - Lime zest for a stronger lime flavor These add-ons can make your pie even more delightful. If you're missing an ingredient, here are some easy swaps: - Use regular lime juice instead of key lime juice. It will taste different but still good. - Swap graham cracker crumbs with crushed vanilla wafers for a unique flavor. - Replace heavy cream with whipped topping for a lighter version. These substitutions can help you prepare the pie with what you have. For the exact steps, check out the Full Recipe. First, preheat your oven to 350°F (175°C). This step is key for a great crust. In a medium bowl, mix the graham cracker crumbs, coconut flakes, and granulated sugar. Pour in the melted butter and stir until it feels like moist sand. Next, grab a 9-inch pie pan. Press the crumb mixture into the bottom and up the sides of the pan. Make sure it’s firm and even. Bake this crust for 8-10 minutes until the edges are golden. After baking, let it cool completely. Now, let’s make the filling. In a large bowl, whisk the egg yolks until they are pale yellow. Then, add the sweetened condensed milk, key lime juice, and lime zest. Whisk until everything is smooth. You want to have no lumps here! Carefully pour this lime mixture into your cooled crust. Spread it out evenly. Bake the pie for 15 minutes. The filling should be set but still a bit jiggly in the center. After baking, take it out and let it cool at room temperature. Once it’s cool, put the pie in the fridge for at least 2 hours. This chilling time makes it even tastier! For the full recipe, check out the details above! To get the best texture and flavor in your Key Lime Pie, follow a few simple tips: - Use Fresh Key Limes: Fresh key limes give a bright taste. They also add a nice zing. - Whisk Egg Yolks Well: Whisk the yolks until they are pale. This helps create a smooth filling. - Don’t Overbake: Bake the filling until it is just set. It should still jiggle a bit in the middle. - Chill Properly: Let the pie cool at room temp before refrigerating. This step enhances the flavor. Some mistakes can ruin your pie. Here are a few to watch out for: - Skipping the Zest: The zest adds flavor and aroma. Don’t skip it! - Using Cold Ingredients: Let your ingredients reach room temperature. This helps them mix better. - Overmixing the Filling: Whisk just until combined. Overmixing can create bubbles in the filling. - Not Cooling the Crust: Always cool the crust completely before adding the filling. A warm crust can make the filling runny. Having the right tools makes cooking easier and more fun: - 9-inch Pie Pan: This is the perfect size for your Key Lime Pie. - Mixing Bowls: Use medium and large bowls for mixing your crust and filling. - Electric Mixer: This helps you whip the cream to stiff peaks easily. - Zester or Grater: A good zester is key for getting the lime zest just right. These tips and tools will help you create a perfect Key Lime Pie every time. For the full recipe, check out the [Full Recipe]. {{image_4}} You can change up the crust for your Key Lime Pie. Here are some fun ideas: - Graham Cracker Crust: This is the classic choice. It’s sweet and crunchy. - Oreo Crust: Use crushed Oreos instead of graham crackers for a chocolate twist. - Nut Crust: Ground almonds or pecans add a nice nutty flavor. Mix them with butter and a bit of sugar. - Coconut Crust: Use shredded coconut for a tropical feel. It pairs well with the lime. Want to try something different? Here are some tasty twists: - Mango Key Lime Pie: Add pureed mango to the filling for a fruity kick. - Berry Key Lime Pie: Mix in fresh berries like strawberries or blueberries for color and flavor. - Coconut Key Lime Pie: Stir in coconut milk for a creamier texture and tropical taste. - Chocolate Key Lime Pie: Add melted chocolate to the filling for a rich, sweet layer. Making your pie look great can be fun. Here are some ideas: - Whipped Cream Topping: Spread whipped cream on top. Use a spatula to make swirls. - Garnish with Lime: Add lime slices or zest for a pop of color. - Serve in Mason Jars: For a fun twist, serve individual portions in jars. - Add Fresh Berries: Place berries around the pie for extra flair. For the full recipe, check out the Zesty Classic Key Lime Pie . To keep your key lime pie fresh, cover it tightly with plastic wrap or aluminum foil. This prevents the pie from absorbing fridge odors. Store it in the fridge for up to three days. Make sure to slice the pie before storing to make it easier to serve later. You can freeze key lime pie if you want to save some for later. First, let the pie cool completely after baking. Wrap the pie tightly in plastic wrap and then in aluminum foil. This double wrapping helps prevent freezer burn. You can freeze it for up to three months. Just remember to label it with the date. To enjoy your frozen key lime pie, move it from the freezer to the fridge. Let it thaw overnight. If you're in a hurry, you can leave it at room temperature for about two hours. Do not microwave it, as this can change the texture. Once thawed, you can add fresh whipped cream or lime zest for extra flavor before serving. Yes, you can use regular limes. Key limes are smaller and more fragrant. They have a tart flavor that makes the pie special. If you use regular limes, the pie will taste a bit different but still good. You might want to adjust the sugar to balance the flavor. You can keep key lime pie in the fridge for up to three days. Cover it well to prevent it from drying out. If the pie has whipped cream on top, eat it within two days. The cream can lose its texture after that. You can use coconut cream or a dairy-free option. If you need a lighter option, try using yogurt. For a richer flavor, you can also use mascarpone cheese. Each choice will change the taste and texture a bit, but they all work well in this recipe. Check the [Full Recipe] for more details. In this post, we explored the key ingredients for classic Key Lime Pie, from crust to filling. I shared step-by-step instructions for baking. We discussed tips to avoid common mistakes and explored variations for flavor and presentation. Additionally, we covered how to store and reheat leftovers effectively. Key Lime Pie is simple to make and delightful to share. Enjoy creating your version and savor each bite. When you follow these tips, your pie will shine!](https://dishtreats.com/wp-content/uploads/2025/07/bf504450-0d09-4d53-b035-55d87c168019-300x300.webp)