Are you craving a healthy snack that is easy to make and boast a delicious flavor? Look no further! My Cinnamon Apple Energy Muffins are simple, tasty, and packed with nutrients. These muffins combine sweet apples and warm cinnamon, making for a perfect breakfast or snack. With easy steps, helpful tips, and options for all diets, you can bake your way to a delightful treat. Let’s dive into this wonderful recipe together!
Why I Love This Recipe
- Nutritious Ingredients: This recipe incorporates whole wheat flour, bananas, and apples, making it a wholesome choice packed with fiber and natural sweetness.
- Quick and Easy:
- Customizable: You can easily adapt this recipe by adding different nuts, seeds, or dried fruits to suit your taste preferences.
- Delicious Aroma: The warm scent of cinnamon and baked apples fills your kitchen, creating a cozy atmosphere that everyone will love.
Ingredients
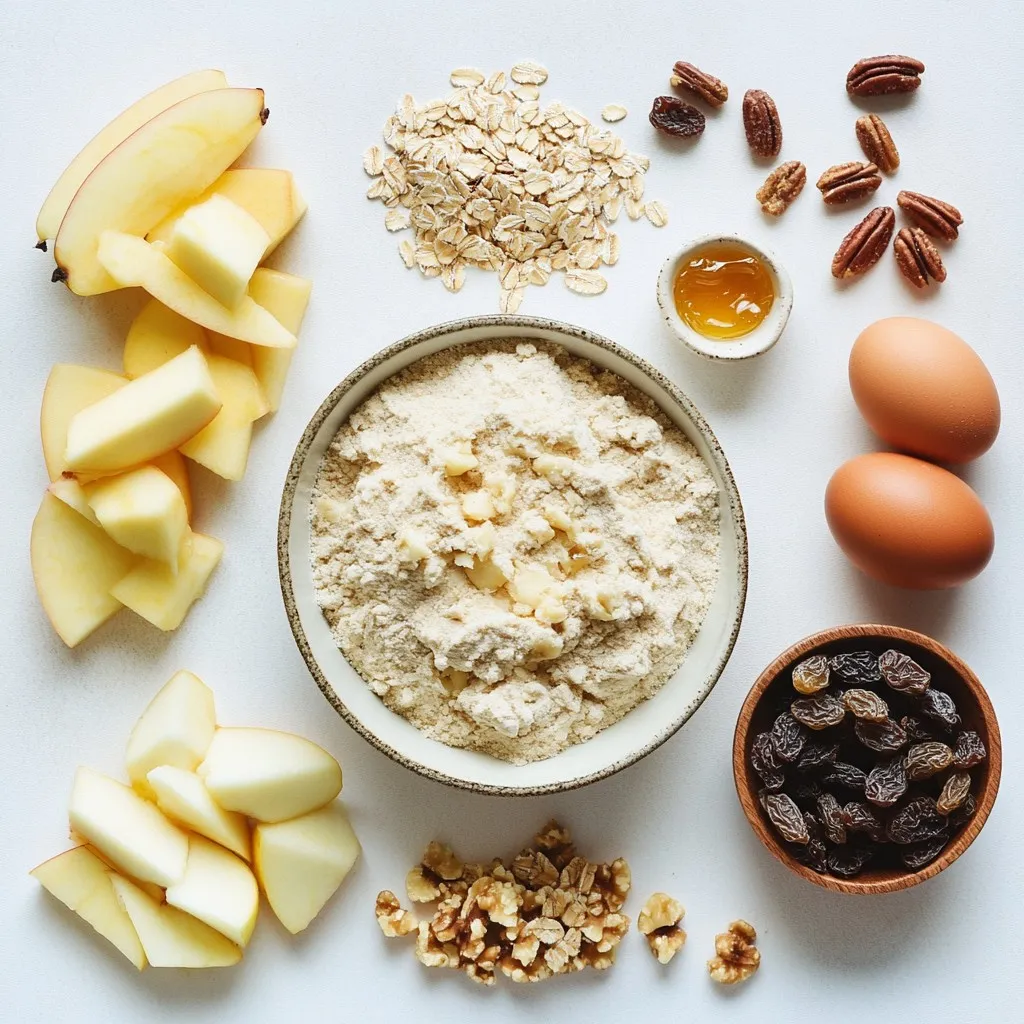
When I make Cinnamon Apple Energy Muffins, I use simple, wholesome ingredients. Each one adds unique flavor and nutrition. Here’s a closer look at what I use:
– Whole wheat flour (1 ½ cups)
Whole wheat flour adds fiber and nutrients. It helps keep you full longer.
– Baking powder (1 teaspoon)
This helps the muffins rise. It makes them light and fluffy.
– Baking soda (½ teaspoon)
Baking soda balances the acidity in the batter. It helps with rising, too.
– Ground cinnamon (1 teaspoon)
Cinnamon brings warmth and sweetness. It also has antioxidants.
– Salt (¼ teaspoon)
Salt enhances flavors. It makes the muffins taste better.
– Ripe bananas (2, mashed)
Bananas add natural sweetness and moisture. They help bind the muffins.
– Unsweetened applesauce (½ cup)
Applesauce keeps the muffins moist. It also cuts down added sugar.
– Honey or maple syrup (¼ cup)
I use honey or maple syrup for sweetness. They are natural sweeteners.
– Large eggs (2)
Eggs provide protein and structure. They help the muffins hold together.
– Pure vanilla extract (1 teaspoon)
Vanilla adds a lovely aroma and flavor. It enhances the overall taste.
– Diced fresh apples (1 cup)
Fresh apples add texture and sweetness. They also pack vitamins.
– Rolled oats (½ cup)
Oats provide extra fiber and heartiness. They give the muffins a nice chew.
– Chopped walnuts (¼ cup, optional)
Walnuts add crunch and healthy fats. They boost the muffin’s flavor.
– Raisins or dried cranberries (¼ cup, optional)
These add natural sweetness and chewiness. They make the muffins more fun.
Each ingredient works together to create a nourishing treat. They provide energy and flavor. You can enjoy these muffins any time of day!
Step-by-Step Instructions
Prepping Your Muffin Batter
1. Mixing dry ingredients: In a big bowl, add 1 ½ cups of whole wheat flour, 1 teaspoon of baking powder, ½ teaspoon of baking soda, 1 teaspoon of ground cinnamon, and ¼ teaspoon of salt. Use a whisk to mix well. This helps the muffins rise and taste great.
2. Combining wet ingredients: In another bowl, mash 2 ripe bananas. Then, add ½ cup of unsweetened applesauce, ¼ cup of honey or maple syrup, 2 large eggs, and 1 teaspoon of pure vanilla extract. Mix until smooth with a fork or whisk.
3. Folding in additional ingredients: Pour the wet mix into the dry mix. Stir gently with a spatula until just combined. Be careful not to overmix. Then, fold in 1 cup of diced fresh apples, ½ cup of rolled oats, and if you like, ¼ cup of chopped walnuts and ¼ cup of raisins or cranberries.
Baking the Muffins
1. How to fill muffin cups properly: Preheat your oven to 350°F (175°C). Line a muffin tin with paper liners or grease it lightly. Use a scoop or spoon to fill each muffin cup about three-quarters full. This gives them space to rise.
2. Baking time and temperature: Place the muffin tin in your preheated oven. Bake for 18-22 minutes. The muffins should rise beautifully and turn golden brown.
3. Testing for doneness: To check if they are done, insert a toothpick into the center of a muffin. If it comes out clean or with a few moist crumbs, they are ready.
Cooling and Serving
1. Cooling tips: After baking, let the muffins cool in the pan for about 5 minutes. Then, transfer them to a wire rack to cool completely. This keeps them from getting soggy.
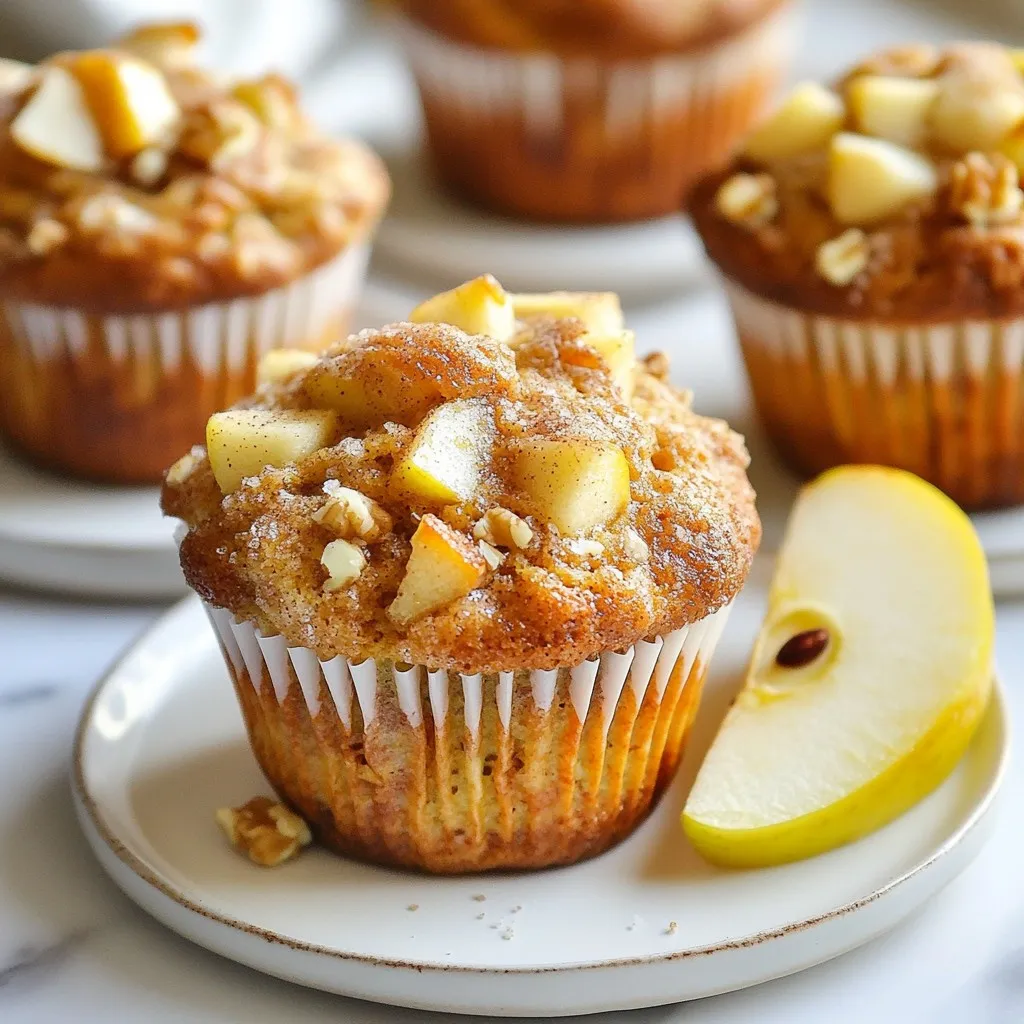
2. Presentation ideas: Serve these warm muffins with a light dusting of ground cinnamon on top. Add a fresh slice of apple on the side for a nice touch. Enjoy them as a tasty breakfast or snack!
Tips & Tricks
Ingredient Substitutions
You might want to swap honey or maple syrup. Try agave nectar or brown sugar. Both sweeteners work well. For a gluten-free option, use almond flour or a gluten-free blend. These will keep your muffins tasty and fluffy.
Achieving the Perfect Texture
Do not overmix your batter. Mixing too much can make your muffins dense. Gently stir until the ingredients are just combined. This helps keep muffins light and airy. Also, bake at 350°F (175°C) for the best results. If your oven runs hot, lower the temperature slightly.
Storing Muffins
Store your muffins in an airtight container. This keeps them fresh longer. For extra storage, freeze them. Wrap each muffin in plastic wrap, then place them in a freezer bag. They will stay good for up to three months. To enjoy, just thaw them overnight in the fridge.
Pro Tips
- Use Ripe Bananas: The riper the bananas, the sweeter and more flavorful your muffins will be. Look for bananas with plenty of brown spots for the best results.
- Don’t Overmix: To achieve a light and fluffy texture, mix the wet and dry ingredients until just combined. Overmixing can lead to dense muffins.
- Experiment with Add-Ins: Feel free to customize your muffins by adding other ingredients like chocolate chips, coconut flakes, or different nuts for a unique flavor twist.
- Store Properly: Keep your muffins in an airtight container at room temperature for up to 3 days, or freeze them for longer storage. To reheat, microwave for a few seconds.
Variations
Healthier Alternatives
To make these muffins even better for you, try reducing the sugar content. You can use less honey or maple syrup. This simple change keeps the muffins tasty while cutting calories. Another great option is to boost fiber by adding more oats. Instead of using only half a cup, try a full cup. This adds texture and makes the muffins heartier.
Flavor Enhancements
Want to add a twist? You can enhance the flavor with spices or zest. Try adding nutmeg or ginger for a warm kick. A bit of lemon or orange zest can brighten the taste. You can also introduce different fruits or nuts. Swap the apples for pears or add chopped pecans for a crunchy bite. These changes keep the muffins exciting!
Vegan and Allergy-Friendly Options
If you want a vegan version, use flax eggs instead of regular eggs. To make one flax egg, mix one tablespoon of flaxseed meal with three tablespoons of water. Let it sit for a few minutes until it thickens. For those avoiding dairy, use almond or oat milk in place of any dairy ingredients. These simple swaps make the muffins friendly for all diets.
Nutritional Information
Overview of Nutritional Benefits
Cinnamon Apple Energy Muffins are packed with nutrients. They have high fiber and protein content. Whole wheat flour brings fiber, aiding digestion. Apples add vitamins and natural sweetness. Bananas provide potassium and energy. Oats boost heart health. Walnuts, if used, add healthy fats and protein. Honey or maple syrup gives natural sweetness without refined sugar. These ingredients help keep your energy up throughout the day.
Caloric Breakdown
Each muffin has about 150 calories. This is a great option compared to store-bought muffins. Many store-bought muffins have added sugars and unhealthy fats. Their calorie count can reach 400 or more. Making your own lets you control ingredients and calories. You get a tasty treat that fuels your day without the extra guilt. Each bite of these muffins is not just delicious; it supports your health goals.
FAQs
Common Questions about Cinnamon Apple Energy Muffins
How do I know when the muffins are done baking?
You can check if the muffins are done by inserting a toothpick into the center. If it comes out clean or with a few moist crumbs, the muffins are ready. They should also be golden brown on top.
Can I replace the applesauce with another ingredient?
Yes, you can use mashed pumpkin or yogurt instead of applesauce. Both will add moisture and flavor, but keep the texture light.
What’s the best way to store leftover muffins?
Store leftover muffins in an airtight container at room temperature for up to three days. For longer storage, place them in the fridge or freezer.
Can I make these muffins in advance?
Absolutely! You can make these muffins a day ahead. Just store them in an airtight container. They taste great the next day.
Tips for Making the Best Muffins
What type of apples are best for baking?
I recommend using sweet apples like Fuji, Honeycrisp, or Gala. They hold their shape and add a nice flavor.
How can I make the muffins tastier?
To add flavor, try sprinkling some cinnamon on top before baking. You can also mix in nuts or dried fruit for more texture.
This post explored making delicious cinnamon apple energy muffins. We reviewed key ingredients and their health benefits. I shared simple steps for preparing and baking. You learned how to cool and present your muffins. We discussed helpful tips for substitutions, texture, and storage. Variations added extra fun, from healthier options to vegan-friendly choices.
Creating these muffins can be easy and rewarding. I hope you try this recipe. You’ll enjoy fresh, homemade muffins in no tim


