Looking for a quick and tasty meal? Cilantro Lime Rice Bowls are the answer! They’re packed with fresh flavors and simple ingredients. In this post, I’ll guide you through making these bowls, from cooking jasmine rice to adding crunchy veggies. You’ll find tips for perfecting the dish and ideas for custom toppings. Let’s whip up a meal that’s not just easy but also bright and delicious! Ready to get started?
Why I Love This Recipe
- Fresh and Flavorful: This recipe combines the bright flavors of lime and cilantro, making every bite refreshing and vibrant.
- Customizable: With various toppings like avocado, jalapeños, and feta, you can easily tailor it to your taste preferences.
- Quick and Easy: Ready in just 30 minutes, this dish is perfect for busy weeknights or a meal prep option.
- Nutritious: Packed with protein from black beans and healthy fats from avocado, it’s a wholesome choice for any meal.
Ingredients
Main Ingredients
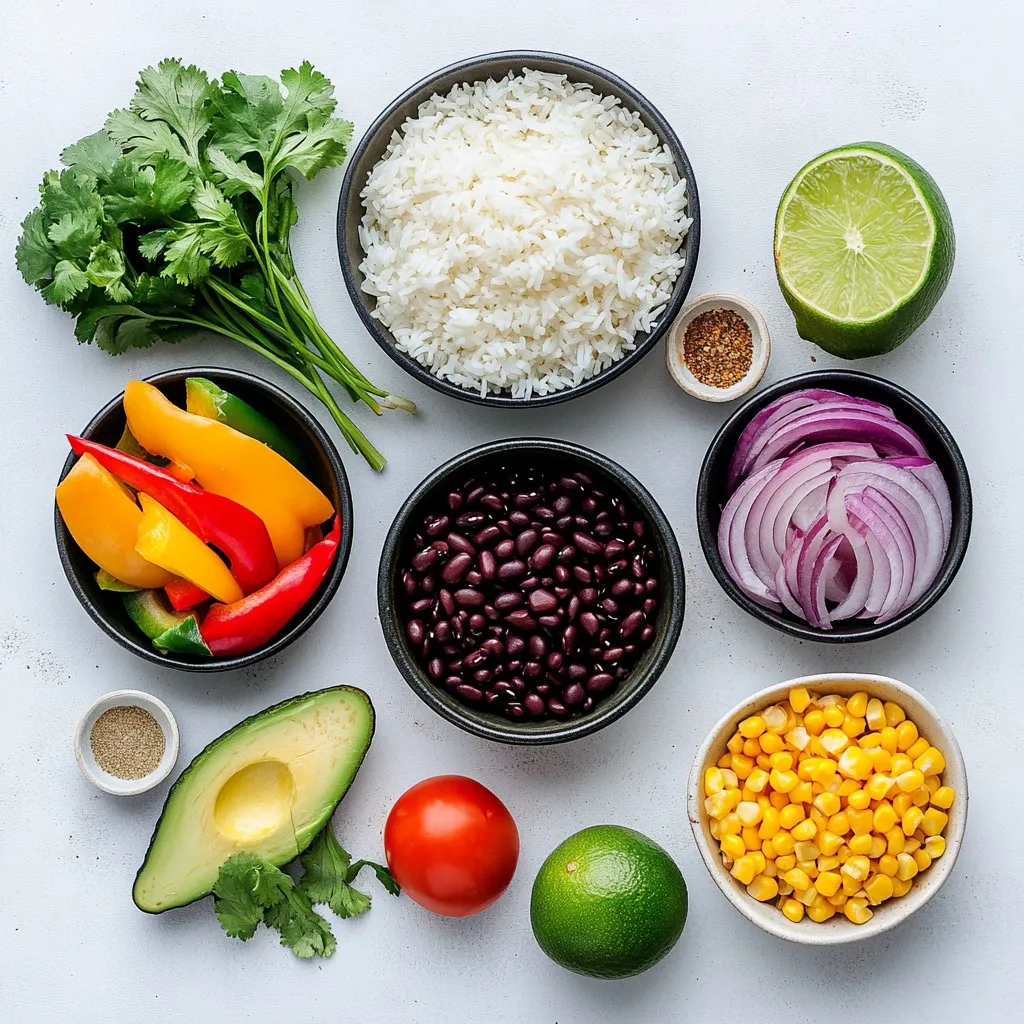
– 1 cup jasmine rice
– 2 cups vegetable broth
– 1 can black beans, rinsed and drained
The main ingredients form the backbone of your Cilantro Lime Rice Bowls. Jasmine rice offers a lovely aroma and soft texture. Vegetable broth adds flavor and depth. Black beans provide protein and heartiness, making this meal filling.
Fresh Ingredients
– 1 cup fresh cilantro, chopped (plus extra for garnish)
– 1 red bell pepper, diced
– 1 avocado, sliced
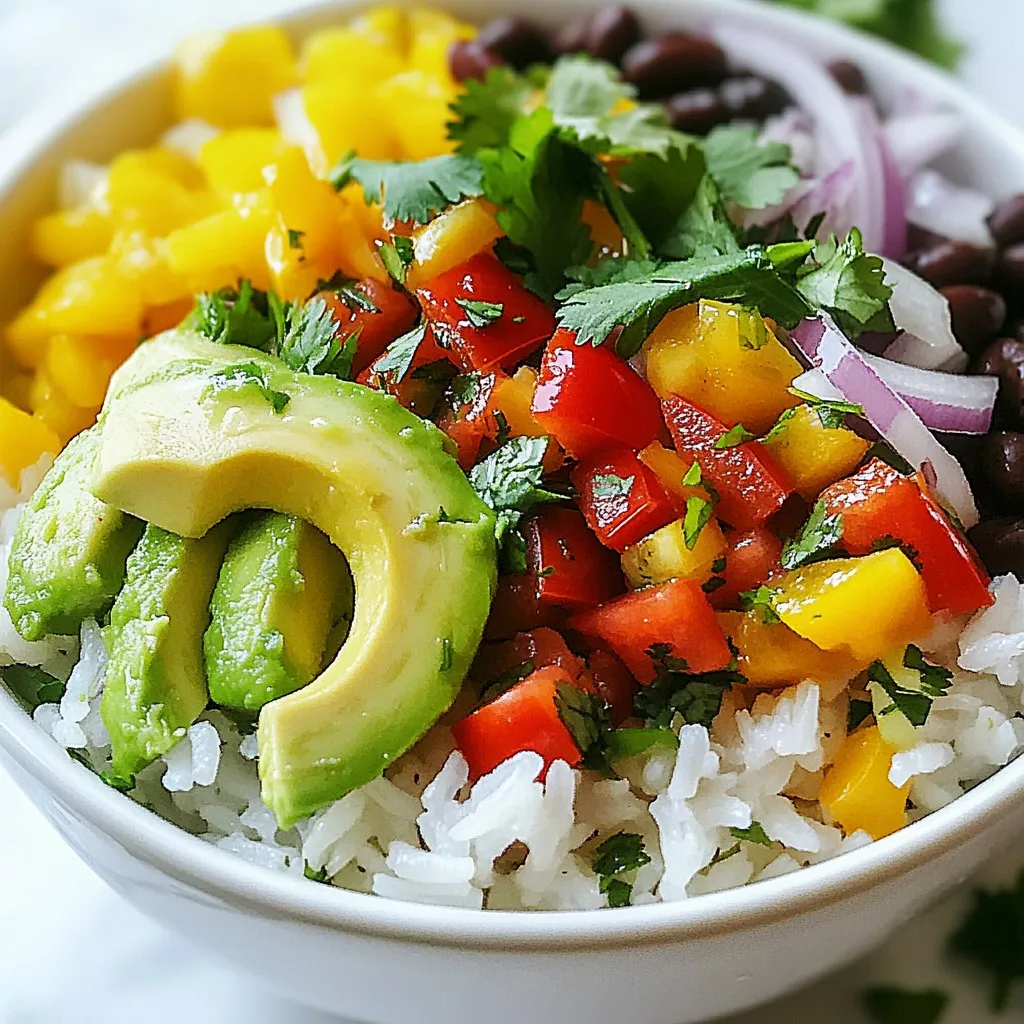
Fresh ingredients bring brightness to the dish. Cilantro adds a fresh, herby taste. Diced red bell pepper adds color and sweetness. Sliced avocado contributes creaminess, balancing the bowl perfectly.
Seasoning and Optional Toppings
– Ground cumin, garlic powder, salt, and pepper
– Optional toppings: sliced jalapeños, sour cream, crumbled feta cheese
Seasoning is key for flavor. Ground cumin gives a warm, earthy taste. Garlic powder adds depth. Don’t forget salt and pepper for balance. Optional toppings like jalapeños, sour cream, or feta cheese let you customize your bowl. Each topping adds a unique twist.
Step-by-Step Instructions
Preparing the Rice
Start by rinsing 1 cup of jasmine rice under cold water. This step is key. It helps remove extra starch. Rinse until the water runs clear. Next, bring 2 cups of vegetable broth to a boil in a medium pot. When it boils, add the rinsed rice. Lower the heat and cover the pot. Let it simmer for 15 to 18 minutes. The rice will be tender when done. Once cooked, remove it from heat. Let it sit for 5 minutes, covered. This steaming step makes the rice fluffy.
Flavoring the Rice
Now, it’s time to add some zing! Mix in the zest of 1 lime, juice from 2 limes, and half of the chopped cilantro. Stir gently to combine. This mix gives the rice a bright flavor. Let it sit for a bit to let the flavors meld together. The longer it sits, the better it tastes.
Sautéing the Vegetables
In a skillet, drizzle a bit of olive oil and heat it over medium. Add 1 diced red bell pepper and 1 cup of corn. Sauté for about 5 minutes. You want the bell pepper to soften. Season the mix with 1 teaspoon of ground cumin, 1 teaspoon of garlic powder, salt, and pepper. Stir well to coat everything. Remove from heat once the veggies are tender and fragrant.
Tips & Tricks
Achieving Perfect Rice
Rinsing the rice is key. It removes excess starch. This helps make the rice fluffy, not sticky. Rinse it until the water runs clear. This step is quick and easy but very important.
Cook the jasmine rice in vegetable broth for great flavor. Bring the broth to a boil first. After adding the rice, lower the heat and cover it. Cook for 15-18 minutes. Let it sit covered for 5 minutes after cooking. This steaming step makes the rice perfect.
Enhancing Flavors
Adjust the lime juice to your taste. Some like it tangy, while others prefer less. Adding more lime juice can brighten the dish. Use fresh herbs in the mix for extra flavor. Consider adding a pinch of salt and pepper as well.
For toppings, get creative! Sliced jalapeños add heat, while sour cream cools it down. Crumbled feta brings a salty bite. Mix and match toppings to find your favorite combo. Each bite can be different and exciting.
Meal Prep and Serving Suggestions
You can prepare the rice ahead of time. Store it in the fridge for up to three days. This makes it an easy meal option during busy weeks. Just warm it up when you’re ready to eat.
To serve, use a large bowl for a beautiful presentation. Start with a base of the cilantro lime rice. Layer on black beans, sautéed veggies, and avocado. Top it with fresh cilantro and your choice of toppings. This makes for a colorful and inviting meal.
Pro Tips
- Rinse the Rice: Always rinse jasmine rice under cold water until the water runs clear. This removes excess starch and prevents the rice from becoming gummy.
- Let it Steam: After cooking the rice, let it sit covered for an additional 5 minutes. This helps the grains to firm up and absorb any remaining moisture.
- Fresh Ingredients: For the best flavor, use fresh cilantro and lime juice. Fresh herbs can elevate the dish significantly compared to dried alternatives.
- Customize Your Bowl: Feel free to add or substitute toppings based on your preference. Try adding grilled chicken, shrimp, or a variety of veggies for added nutrition and flavor.
Variations
Protein Options
You can make your cilantro lime rice bowls even better by adding protein. Grilled chicken or shrimp brings a tasty boost. Just season them with lime and salt before cooking. If you prefer vegetarian options, tofu or tempeh works great. Marinate them in lime juice for extra flavor. Both choices are easy and delicious.
Additional Veggies
Feel free to add more veggies to your bowls. Think about using diced tomatoes, zucchini, or spinach. Seasonal produce adds freshness and color. For example, in summer, fresh corn is sweet and crunchy. In fall, roasted pumpkins bring warmth. Mixing in different veggies keeps your meals exciting and healthy.
Different Rice Options
While jasmine rice is lovely, you can try other types. Brown rice gives a nutty taste and more fiber. Quinoa is another great option, high in protein and gluten-free. Both alternatives can replace jasmine rice in your bowl. Just adjust the cooking time as needed. This way, you can enjoy your bowls in many delicious ways!
Storage Info
Storing Leftovers
To keep your Cilantro Lime Rice Bowls fresh, store them in airtight containers. This method prevents moisture loss and keeps flavors intact. You can use glass or plastic containers with tight-fitting lids. Your leftovers will stay good for about 3 to 5 days in the fridge.
Reheating Instructions
To reheat your rice bowls, use the microwave or stove. For the microwave, place the rice in a bowl and cover it with a damp paper towel. This step helps keep the rice moist. Heat for 1 to 2 minutes, stirring halfway through. If using a stove, warm the rice in a pan over low heat. Add a splash of water or broth to restore moisture.
After reheating, freshen up the flavors by adding a bit more lime juice and cilantro. This simple trick revives the dish and adds a burst of freshness.
Freezing Guidance
Yes, you can freeze the components! The rice, beans, and veggies freeze well. However, it’s best to keep the avocado and fresh toppings out. Pack everything in freezer-safe bags or containers. Try to remove as much air as possible to prevent freezer burn.
When you’re ready to eat, thaw in the fridge overnight. Reheat the rice and veggies as described earlier. Enjoy your bowls with fresh toppings for the best taste!
FAQs
What can I substitute for jasmine rice?
You can use several different types of rice. Long-grain white rice works well. Basmati rice is another great choice for its fragrance. If you want something healthier, try brown rice or quinoa. Both options add a nutty flavor and a nice texture.
How long do the bowls last in the fridge?
These bowls stay fresh for about three to four days. Make sure to store them in an airtight container. This keeps the flavors intact and prevents spoilage. If you notice any changes in smell or texture, it’s best to toss them out.
Can I make this recipe vegan?
Yes, this recipe is very easy to make vegan. Use vegetable broth for cooking rice, which you already do. All the other ingredients are vegan-friendly. Just skip any optional toppings that are not vegan, like sour cream or cheese. You can replace them with avocado or a vegan yogurt alternative.
This blog post detailed how to make Cilantro Lime Rice Bowls with ease. You learned about key ingredients like jasmine rice, black beans, and fresh veggies. I shared tips for cooking the rice just right and enhancing flavors with seasonings. We explored protein options and variations to suit your taste. Remember, proper storage will keep your bowls fresh longer. With these steps, you can create a nutritious and tasty meal. Enjoy making your own delicious rice bowls toda


