Chocolate Peanut Butter Pumpkin Fudge No Bake Delight

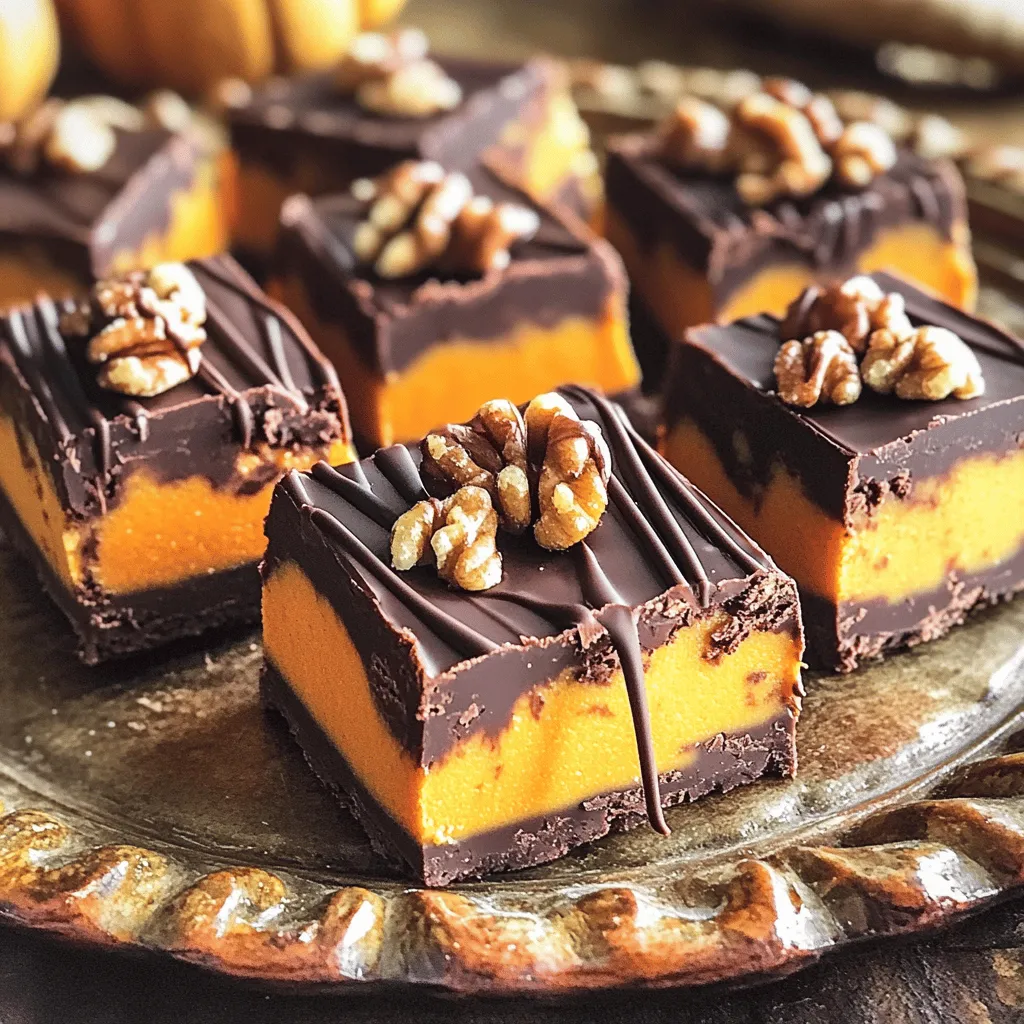
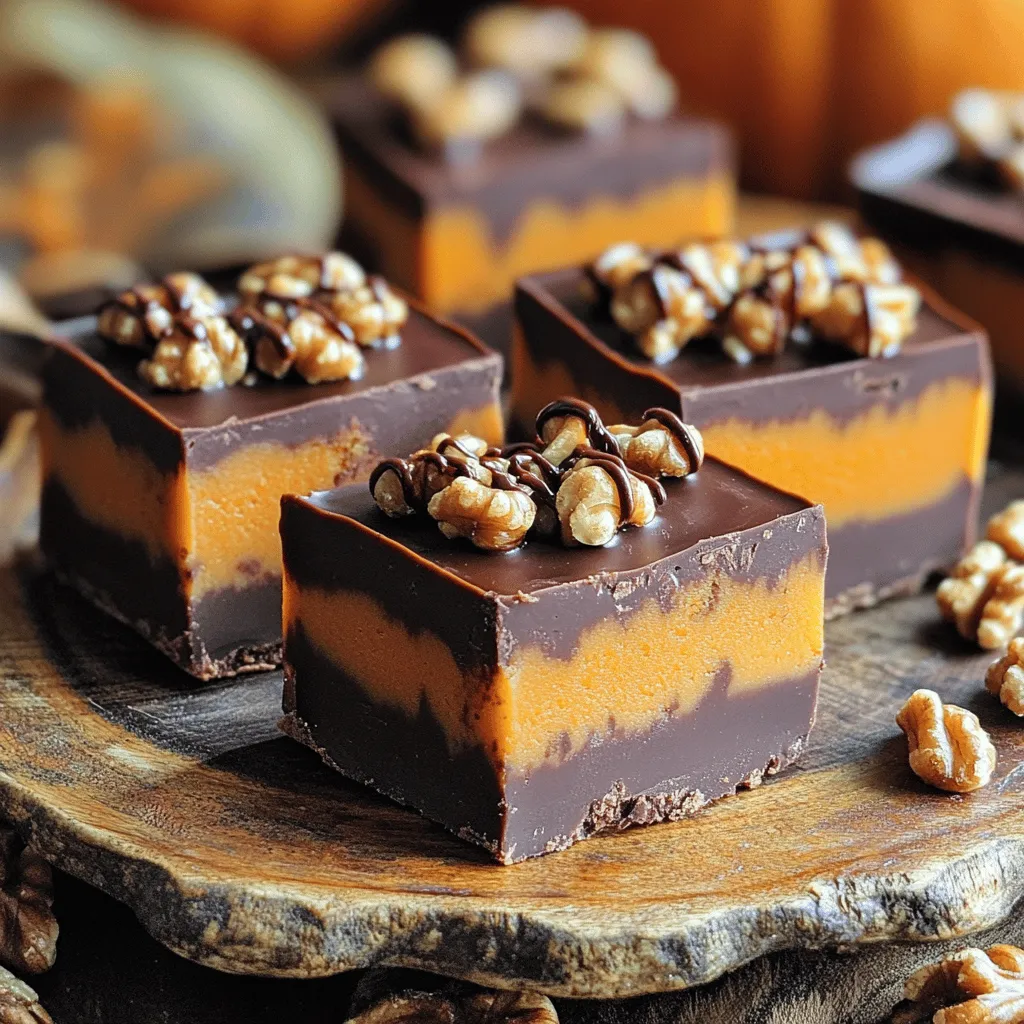
Indulge your sweet tooth with a treat that’s both easy and delicious: Chocolate Peanut Butter Pumpkin Fudge! This no-bake recipe combines creamy peanut butter, rich cocoa, and warm pumpkin spices for a dessert that’s simple yet satisfying. Perfect for sharing or enjoying all by yourself, this fudge comes together quickly and requires no cooking. Let me guide you through the steps to create this delightful treat!
Ingredients
List of Ingredients Needed
- 1 cup creamy peanut butter
- 1 cup canned pumpkin puree
- 1/2 cup pure maple syrup
- 1 teaspoon pure vanilla extract
- 1 cup unsweetened cocoa powder
- 1/2 teaspoon ground cinnamon
- 1/4 teaspoon ground nutmeg
- 1/4 teaspoon sea salt
- 1/2 cup dark chocolate chips
- 1/4 cup finely chopped walnuts or pecans (optional)
Gathering the right ingredients is key for a tasty treat. I love using creamy peanut butter for a smoother texture. Canned pumpkin puree gives the fudge a rich flavor and a lovely orange hue. Pure maple syrup adds sweetness and pairs well with the cocoa.
When it comes to flavor, vanilla extract is a must. It enhances the overall taste. The unsweetened cocoa powder gives that deep chocolate flavor we all crave. Don’t forget the spices! Ground cinnamon and nutmeg add warmth and depth to the fudge.
The sea salt helps balance the sweetness. Finally, dark chocolate chips make every bite special. If you want extra crunch, add chopped walnuts or pecans. They are optional but so good!
With these ingredients, you are ready to create a delightful fudge that will impress everyone.
Step-by-Step Instructions
Mixing the Base
- In a large mixing bowl, combine 1 cup of creamy peanut butter, 1 cup of canned pumpkin puree, and 1/2 cup of pure maple syrup.
- Whisk the mix until it is smooth and uniform. You want it to blend well without lumps. This base gives your fudge a rich flavor.
Adding Flavors and Texture
- Next, add 1 teaspoon of pure vanilla extract, 1 cup of unsweetened cocoa powder, 1/2 teaspoon of ground cinnamon, 1/4 teaspoon of ground nutmeg, and 1/4 teaspoon of sea salt to the bowl.
- Mix thoroughly until everything is fully combined. The texture should be velvety and inviting. If you love chocolate, this is the moment you’ll appreciate it!
- Gently fold in 1/2 cup of dark chocolate chips and 1/4 cup of finely chopped walnuts or pecans if you want some crunch. This adds texture and extra flavor to your fudge.
Preparing to Set
- Line an 8×8-inch square baking dish with parchment paper. Leave some paper hanging over the sides. This will help you lift the fudge out later.
- Carefully pour the fudge mixture into the dish. Use a spatula to spread it evenly across the surface. It’s important to get an even layer for a nice finish.
Chilling and Serving
- Cover the dish with plastic wrap or a lid and refrigerate for at least 2 hours. You want it to be firm to the touch.
- Once the fudge is set, lift it from the dish using the overhanging parchment paper. Cut it into small squares with a sharp knife. Each square will be a tasty treat!
Tips & Tricks
Ensuring the Right Consistency
To get smooth fudge, start by mixing peanut butter and pumpkin well. Use a whisk or spatula for the best results. Make sure there are no lumps. When adding cocoa powder, mix it in slowly to avoid clumps. This helps keep the texture velvety.
For the dry ingredients, sprinkle them in gradually. This makes it easier to combine. Mix thoroughly after each addition. The fudge will be creamy if done right.
Presentation Suggestions
For plating, use a nice platter to show off your fudge. Cut the fudge into neat squares to make it look appealing. A drizzle of warm melted chocolate adds a rich touch. It’s easy to do—just melt some chocolate and pour it over the fudge.
Add chopped nuts on top for crunch and color. Walnuts or pecans work great here. This not only enhances the look but also adds flavor. A sprinkle of cinnamon can also add a nice touch.

Variations
Dietary Adjustments
This fudge can easily fit into special diets. For a gluten-free option, check your cocoa powder and maple syrup for gluten. Both are usually safe. If you want a vegan treat, use maple syrup and ensure your chocolate chips are dairy-free.
For sugar substitutes, try using agave nectar or stevia. These options can cut the sugar while keeping the fudge sweet.
Flavor Enhancements
You can spice up your fudge with more flavors. Adding a pinch of cardamom or ginger gives it a warm kick. These spices pair well with pumpkin.
If you want to mix up the nut butter, almond or cashew butter works great, too. You can also add flavor extracts like almond or hazelnut for a new twist. Let your taste buds lead the way!
Storage Info
Best Practices for Storage
To keep your Chocolate Peanut Butter Pumpkin Fudge fresh, wrap it well. Use plastic wrap or foil. This helps prevent air from drying it out. You can also place it in an airtight container. A glass or plastic container works great.
Shelf Life
How long does the fudge last in the fridge? If stored right, it can last up to two weeks. The cool, dark spot in your fridge is best for storing it. You can also freeze the fudge for longer storage. Just cut it into squares and place it in a freezer-safe bag. It can last up to three months in the freezer. To enjoy, simply thaw it in the fridge overnight.
FAQs
Can I use crunchy peanut butter instead of creamy?
Yes, you can use crunchy peanut butter. It adds a nice texture. The fudge may be a bit grainy but still tasty.
How do I know when the fudge is set?
The fudge is set when it feels firm to the touch. You can also insert a toothpick; it should come out clean.
Can I substitute maple syrup with other sweeteners?
Yes, you can use honey or agave syrup. Just keep in mind that it may change the flavor a bit.
What if I don’t have dark chocolate chips?
If you lack dark chocolate chips, use milk chocolate or white chocolate chips. Each will add a unique taste to the fudge.
How to make the fudge nut-free?
To make the fudge nut-free, simply skip the chopped nuts. Ensure your peanut butter is made in a nut-free facility for safety.
This blog post covered a simple fudge recipe using peanut butter and pumpkin. You learned how to mix, flavor, and chill your fudge for a tasty treat. Key tips ensured you get the right texture and great presentation.
Overall, feel free to get creative with flavors and storage. Enjoy making this fudge for yourself and others. It’s fun, easy, and delicious! Try out the variations for even more tasty options.


![- 2 cups cooked chicken, shredded - 4 cups mixed salad greens - 1 cup cherry tomatoes - 1 cup corn - 1 ripe avocado - 1/2 cup red onion - 1 cup shredded cheddar cheese - 1/2 cup ranch dressing - BBQ sauce - Salt and freshly ground black pepper - Crispy tortilla strips, fresh cilantro leaves When making BBQ Ranch Chicken Salad, start with fresh, quality ingredients. The chicken brings protein and heartiness. I love using shredded chicken that is moist and flavorful. Mixed salad greens add crunch and color. You can choose your favorites like romaine, arugula, or baby spinach. Cherry tomatoes bring sweetness. Always cut them in half to make them easy to eat. Corn adds a pop of sweetness too, and you can use canned or fresh. I prefer fresh corn when it’s in season for the best taste. The avocado adds creaminess. A ripe avocado makes the salad smooth and rich. Red onion gives a nice bite. Keep it thinly sliced so it does not overpower. Shredded cheddar cheese adds a delightful sharpness, making each bite even tastier. The ranch dressing is creamy and tangy, tying everything together. Pair it with BBQ sauce for a smoky flavor boost. This combo is truly delicious. For seasoning, use salt and freshly ground black pepper. These simple touches really enhance the flavors. Lastly, crispy tortilla strips add a fun crunch. Fresh cilantro leaves not only look great but also add a fresh taste. You can find the full recipe [Full Recipe]. Enjoy mixing these ingredients for a vibrant, tasty salad! - Combine shredded chicken with BBQ sauce. - Use a large bowl for easy mixing. - Season with salt and black pepper to taste. - Mix until the chicken is fully coated. This step is key. The BBQ sauce gives the chicken a sweet and smoky flavor. It makes the salad pop with taste. - Create the salad base with mixed greens. - Spread the greens evenly in a large bowl. - Layer fresh ingredients: tomatoes, corn, avocado, and onion. - Arrange each ingredient for a colorful look. The vibrant colors make the salad appealing. Each bite brings a different taste, making it fun to eat! - Top with BBQ chicken and cheddar cheese. - Spoon the chicken evenly over the fresh veggies. - Drizzle with ranch dressing, adjusting to your liking. - Toss gently with clean hands or tongs to mix. This salad is now ready to impress! The creamy ranch dressing and savory chicken blend perfectly. Check the [Full Recipe] for more tips! To make your BBQ Ranch Chicken Salad shine, adjust the ranch dressing to your taste. If you love creamy flavors, add more dressing. For a lighter touch, use less. This lets you control how rich the salad feels. Make sure all ingredients mix well. This way, each bite has a bit of everything. An even spread of chicken, veggies, and cheese creates balance. For a lovely presentation, serve the salad in individual bowls or on a large platter. This makes it easy for everyone to take their share. Add some cilantro leaves and crispy tortilla strips on top. These toppings not only look great but also add flavor and crunch. A colorful display of greens and toppings makes the salad more appealing. Feel free to experiment with different seasonings. A dash of chili powder can add a nice kick. You might also try garlic powder or smoked paprika for depth. Also, think about adding extra ingredients for more variety. Black beans, diced peppers, or even fresh corn can bring new tastes. Each addition offers a chance to create your perfect salad blend. For more details on making this delicious salad, check out the Full Recipe. {{image_4}} You can easily change the protein in this salad. If you want a different taste, use pulled pork or tofu instead of chicken. Both options add great flavor. For a seafood twist, grilled shrimp works well. The shrimp adds a nice, light touch to the salad. While ranch dressing is a favorite, you can swap it out. Blue cheese dressing gives a strong flavor. A vinaigrette adds a tangy kick that brightens the salad. You can also make your own dressing blends. Mix yogurt with herbs for a fresh taste. Don't be afraid to add more veggies. Bell peppers, cucumbers, and radishes give a nice crunch. You can also roast vegetables like zucchini or carrots. Roasting adds a warm, rich taste that contrasts nicely with the cool salad. For a full recipe, check out the BBQ Ranch Chicken Salad with a Crunchy Twist. Store your BBQ Ranch Chicken Salad in an airtight container. This keeps it fresh and tasty. For best results, eat it within 2-3 days. The longer it sits, the soggier it may get. If you want to freeze some, consider freezing the chicken separately. This helps keep the chicken tasty when you eat it later. Avoid freezing the salad with dressing. The dressing makes the greens soggy, and nobody likes that! To refresh your leftovers, toss them with fresh greens. This adds crunch and makes it feel new again. If you want to reheat the BBQ chicken, do it separately. This keeps it warm without making the salad wilt. To make BBQ Ranch Chicken Salad, follow these simple steps: 1. Prepare the BBQ Chicken: Mix shredded chicken with BBQ sauce in a big bowl. Add salt and black pepper. Stir until the chicken is well coated. 2. Build the Salad Base: In another large bowl, spread the mixed greens evenly. This is your salad's base. 3. Layer Fresh Ingredients: Add halved cherry tomatoes, corn, diced avocado, and sliced red onion on top of the greens. This creates a colorful layer. 4. Top with BBQ Chicken: Spoon the BBQ chicken evenly over the fresh layers. This ensures every bite has flavor. 5. Add Creamy Cheese: Sprinkle shredded cheddar cheese over the salad. Let it melt slightly into the warm chicken. 6. Drizzle with Dressing: Pour ranch dressing over the salad. Adjust the amount to fit your taste. 7. Toss Gently: Use clean hands or tongs to mix everything. Make sure the ranch dressing coats all the ingredients. 8. Taste Test: Before serving, taste the salad. Add more salt or black pepper if needed. 9. Add Crunch and Garnish: Top with crispy tortilla strips and fresh cilantro for a nice finish. This process makes a delicious and colorful salad. For the complete recipe, check the Full Recipe above. Yes, you can prep this salad ahead of time. Here are some tips: - Cook the Chicken: You can cook and shred the chicken a day in advance. Store it in the fridge with BBQ sauce. - Chop Veggies: Cut the vegetables, like tomatoes and onions, a few hours before serving. Keep them in airtight containers. - Store Dressing Separately: Keep the ranch dressing separate until serving. This keeps the greens fresh and crisp. - Combine Before Serving: Mix everything together just before you eat. This keeps your salad from becoming soggy. This BBQ Ranch Chicken Salad goes great with several side dishes. Here are some ideas: - Crusty Bread: A nice loaf of bread pairs well and adds a hearty touch. - Chips: Tortilla chips or potato chips add crunch and fun. - Fruit Salad: A fresh fruit salad adds sweetness and a refreshing taste. - Grilled Veggies: Grilled vegetables complement the salad's flavors. - Coleslaw: A crunchy coleslaw gives a nice contrast to the salad. These sides enhance your BBQ Ranch Chicken Salad experience. Enjoy! We explored a tasty BBQ Ranch Chicken Salad. You learned about the main and optional ingredients, along with step-by-step instructions for making it. You also picked up tips for perfecting the salad and ideas for variations. Don’t forget to check the storage info for leftovers. This salad is easy to adjust, making it a fun dish for everyone. Enjoy this recipe and make it your own!](https://dishtreats.com/wp-content/uploads/2025/07/4c564630-ecab-497d-8bae-b951c19ef4f1-768x768.webp)

