Chocolate Peanut Butter Protein Bites Tasty Snack Idea

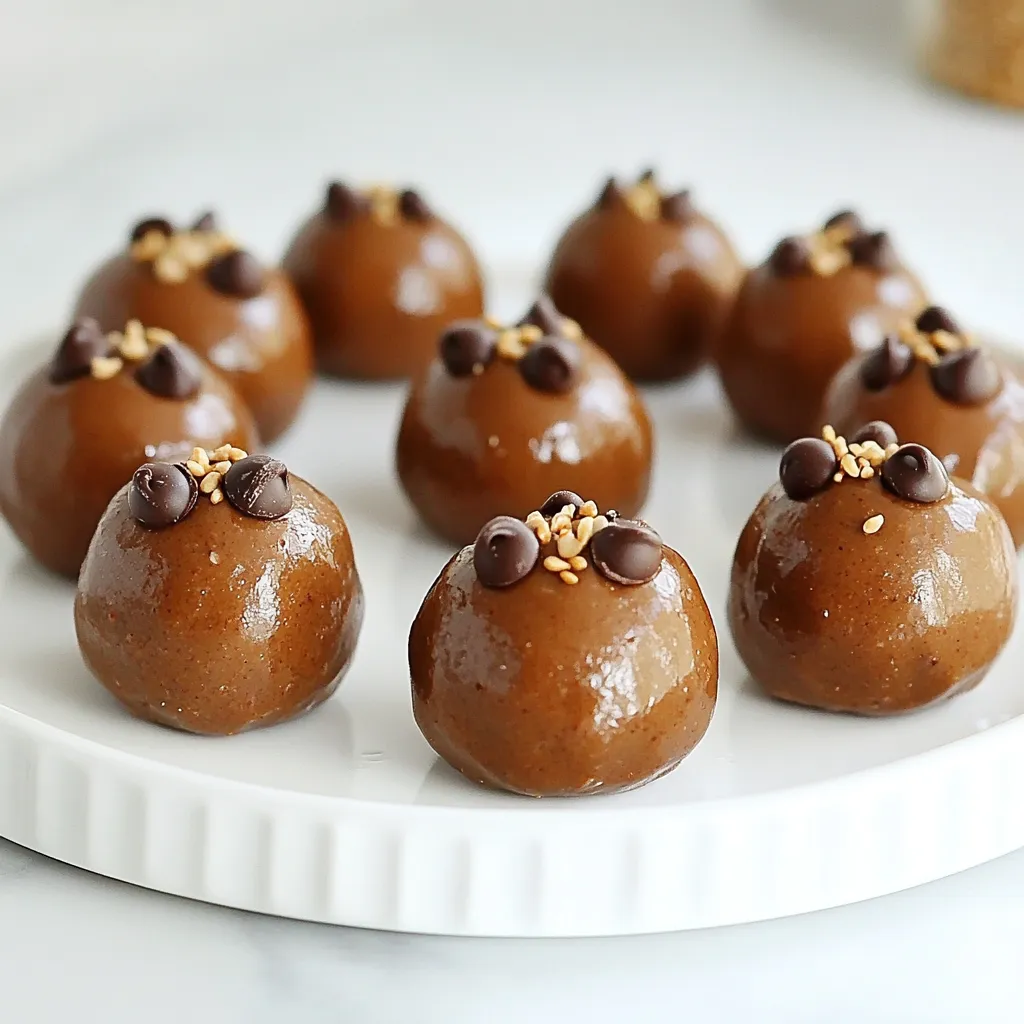
Looking for a quick, tasty snack that fuels your day? These Chocolate Peanut Butter Protein Bites are perfect! Packed with protein and essential nutrients, they’re easy to make and deliciously satisfying. Whether you need a pre-workout boost or a late-night treat, this recipe has got you covered. Join me as we explore the simple steps to whip up these delightful bites and discover their amazing health benefits!
Why I Love This Recipe
- Easy to Make: This recipe requires minimal ingredients and only a few simple steps, making it perfect for busy days.
- Healthy Snack: Packed with protein and healthy fats, these bites are a nutritious option for a quick energy boost.
- Customizable: You can easily swap out ingredients to suit your taste, such as using different nut butters or sweeteners.
- Deliciously Indulgent: The combination of chocolate and peanut butter creates a rich, satisfying flavor that feels like a treat.
Ingredients
Main Ingredients List
- 1 cup rolled oats
- 1/2 cup natural peanut butter
- 1/4 cup honey or maple syrup
- 1/4 cup protein powder
- 1/4 cup mini dark chocolate chips
- 1/4 cup ground flaxseed
- 1 teaspoon vanilla extract
- Pinch of sea salt
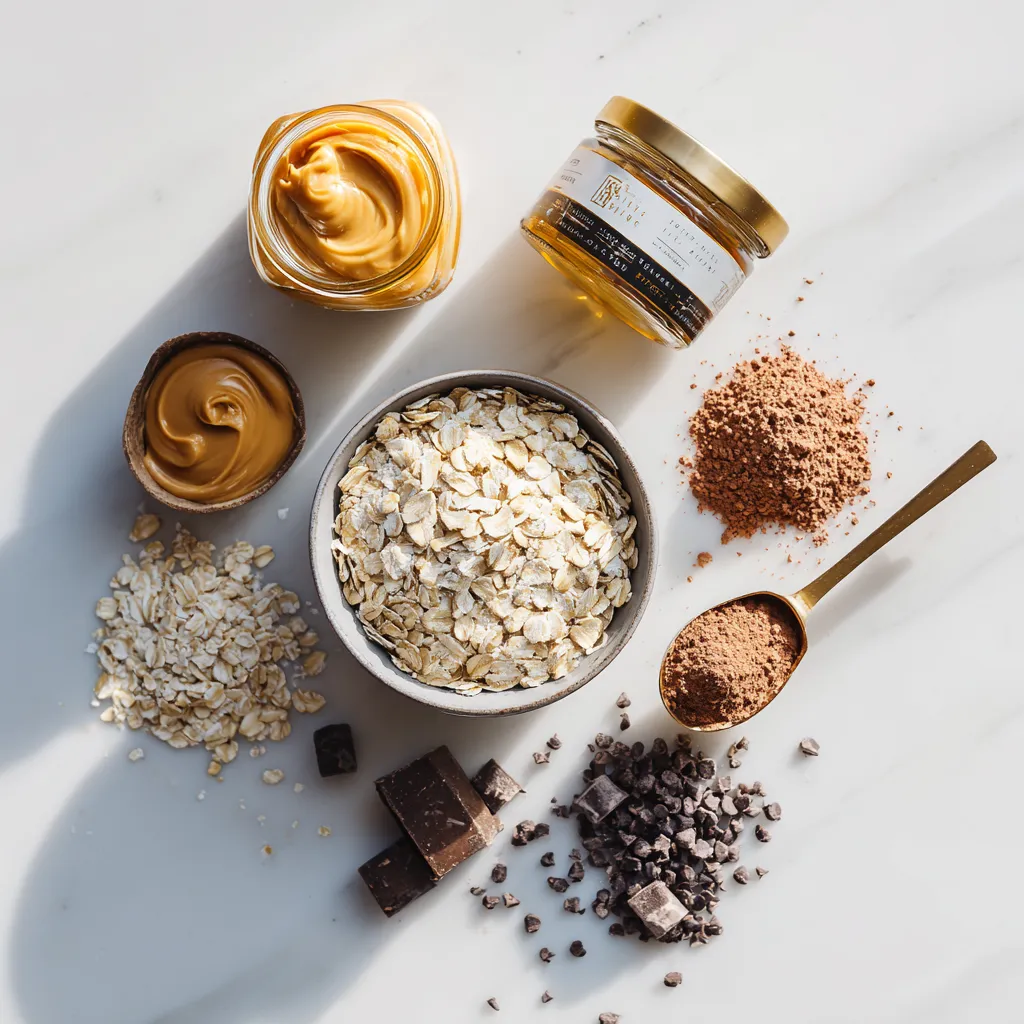
The ingredients for these protein bites are simple and wholesome. You start with rolled oats, which give a great base and add fiber. Natural peanut butter gives these bites a rich flavor and healthy fats. You can choose honey or maple syrup for sweetness; both work well.
Protein powder adds a protein boost, making these bites a great snack after a workout. Mini dark chocolate chips bring a touch of sweetness and a delightful crunch. Ground flaxseed is packed with nutrients, adding omega-3s and fiber. A splash of vanilla extract enhances the flavor, while a pinch of sea salt balances the sweetness perfectly.
Nutritional Benefits
Overview of protein content
These protein bites offer a good amount of protein, thanks to the protein powder and peanut butter. Depending on the protein powder you choose, each bite can contain around 4-6 grams of protein. This helps with muscle repair and keeps you feeling full longer.
Health benefits of oats and flaxseed
Rolled oats are a fantastic source of fiber. They help with digestion and keep your heart healthy. Flaxseed is also rich in fiber and contains healthy fats. Together, they provide lasting energy and keep you satisfied.
Sugar alternatives: honey vs. maple syrup
Using honey adds a floral sweetness, while maple syrup offers a rich, caramel flavor. Both are natural sweeteners, so you can choose based on your taste. Honey is slightly sweeter, so you might use less. Maple syrup has a lower glycemic index, which is better for blood sugar control.

Step-by-Step Instructions
Preparation Steps
1. Start by taking a large mixing bowl. Add 1 cup rolled oats, 1/4 cup protein powder, and 1/4 cup ground flaxseed. Mix these dry ingredients well.
2. In another bowl, combine 1/2 cup natural peanut butter, 1/4 cup honey or maple syrup, 1 teaspoon vanilla extract, and a pinch of sea salt. Stir until you have a smooth mixture.
3. Now, pour the peanut butter mix into the bowl with the dry ingredients. Use a spatula or wooden spoon to mix everything until fully blended.
Forming the Bites
- To shape the bites, take small amounts of the mixture and roll them into balls about 1 inch in size. Clean hands work best, but if it feels too sticky, wet your hands slightly for ease.
- If the mixture sticks to your hands, try using a little oil on your palms. This simple step can help prevent stickiness while you form the bites.
Chilling Process
- Chilling is key for firm bites. It helps them hold their shape when you eat them.
- Place the bites on a parchment-lined baking sheet and chill them in the fridge for at least 30 minutes. This wait is worth it!
Tips & Tricks
Perfecting the Recipe
To make these chocolate peanut butter protein bites just right, you can tweak the sweetness. Start with the honey or maple syrup. If you prefer a sweeter bite, add a bit more. If you like less sweetness, cut back on the syrup. The great thing is you can adjust to your taste.
Also, feel free to use different protein powders. You can go with chocolate or vanilla. Each choice gives a unique flavor. Experimenting with plant-based protein can also add a fun twist.
Kitchen Tools & Equipment
For mixing, I recommend using a large bowl. A sturdy spatula or wooden spoon works best for mixing the ingredients. This helps you combine everything without making a mess.
When it comes to storing, use airtight containers. These keep the protein bites fresh. You can also use small jars for easy grab-and-go snacks.
Presentation Tips
To make your bites look great, arrange them on a pretty plate. You can sprinkle a few mini chocolate chips around for extra flair. If you want to take them on the go, wrap each bite in parchment paper. Tie them with string or ribbon. This not only looks nice but makes sharing easy too.
Pro Tips
- Chill Time Matters: Allowing the protein bites to chill for at least 30 minutes helps them firm up, making them easier to handle and eat.
- Customize Your Flavor: Experiment with different flavors of protein powder to find your favorite combination. Chocolate, vanilla, or even a berry-flavored powder can add a unique twist!
- Boost Nutrients: Add in extras like chia seeds, hemp seeds, or dried fruits for added nutrition and flavor diversity in your protein bites.
- Storage Tips: Keep your protein bites fresh by storing them in an airtight container in the fridge. They can last up to a week, making them a great snack option!

Variations
Flavor Variations
You can switch up the flavor of your protein bites easily. Try using almond or cashew butter instead of peanut butter. This change gives a different taste while keeping the bites creamy and rich. You can also add spices like cinnamon or cocoa powder. A dash of cinnamon brings warmth, while cocoa adds deep chocolate notes.
Dietary Adaptations
If you follow a vegan diet, you can still enjoy these bites. Use maple syrup instead of honey for sweetness. Choose a plant-based protein powder to keep it vegan-friendly. For gluten-free options, make sure your oats are certified gluten-free. This way, you can enjoy these bites without any worry.
Additional Add-ins
Want to make your bites even better? Add some chopped nuts, seeds, or dried fruits. Walnuts or pecans give a nice crunch. Sunflower seeds add a fun texture. You can also mix in raisins or dried cranberries for a sweet touch. These add-ins enhance both flavor and nutrition, making your snacks even more satisfying.
Storage Info
Shelf Life
These chocolate peanut butter protein bites last about one week in the fridge. To keep them fresh, store them in an airtight container. If you want them to last longer, you can freeze them. They will stay good for up to three months in the freezer. Just remember to wrap each bite in plastic wrap before freezing. This helps keep them fresh and tasty.
Best Storage Practices
Using airtight containers is best for storing your protein bites. This way, they won’t dry out or absorb smells from your fridge. If you use regular storage, the bites may go stale faster. Here are some tips to keep them fresh:
- Always seal the container tightly after each use.
- Keep them in a cool, dark place in your fridge.
- If freezing, label them with the date for easy tracking.
By following these tips, you can enjoy your protein bites at their best!
FAQs
Common Questions
Can I use different sweeteners?
Yes, you can switch sweeteners! Maple syrup and agave nectar work well. You can also use stevia for a lower-calorie option.
Are these protein bites suitable for children?
Absolutely! These protein bites make a great snack for kids. They are tasty and packed with nutrients.
How can I make them lower in calories?
To cut calories, use less peanut butter or honey. You can also use a low-calorie protein powder.
Troubleshooting
What to do if the mixture is too dry or wet?
If the mix is too dry, add a bit of water or more peanut butter. If it’s too wet, add more oats or protein powder.
Solutions for sticky bites
If the bites are too sticky, moisten your hands when shaping them. You can also chill the mix longer before rolling.
Serving Suggestions
Best ways to enjoy protein bites
You can eat these bites as a snack or dessert. They are great for a post-workout boost too.
Pairing with drinks or other snacks
Pair these bites with milk or a smoothie. They also go well with fruit for a balanced snack.
This blog covered how to make tasty protein bites. We reviewed key ingredients like oats, peanut butter, and flaxseed. You learned about nutritional benefits, such as protein content. The step-by-step instructions helped you mix and form the bites easily. We shared tips for customization, storage, and serving ideas.
Try these bites as a snack or gift. Experiment with flavors and enjoy the health perks they offer. You’ll love making them for yourself and other

Chocolate Peanut Butter Protein Bites
Ingredients
- 1 cup rolled oats
- 0.5 cup natural peanut butter
- 0.25 cup honey or maple syrup
- 0.25 cup protein powder
- 0.25 cup mini dark chocolate chips
- 0.25 cup ground flaxseed
- 1 teaspoon vanilla extract
- a pinch sea salt
Instructions
- In a large mixing bowl, start by combining the rolled oats, protein powder, and ground flaxseed. Stir well to ensure even distribution of the dry ingredients.
- In another bowl, mix together the natural peanut butter, honey (or maple syrup), vanilla extract, and a pinch of sea salt. Stir until the mixture is smooth and fully combined.
- Pour the peanut butter mixture into the bowl containing the dry ingredients. Use a spatula or wooden spoon to thoroughly mix everything together until the ingredients are fully incorporated.
- Gently fold in the mini dark chocolate chips, ensuring they are evenly distributed throughout the mixture.
- Once all components are well mixed, use clean hands to form the mixture into bite-sized balls, approximately 1 inch in diameter. This step may get a bit sticky, so you might want to moisten your hands with a little water if needed.
- Arrange the formed protein bites on a parchment-lined baking sheet, ensuring they are spaced out for easy handling.
- Place the baking sheet in the refrigerator and chill for at least 30 minutes. This will help the bites firm up and hold their shape.
- After chilling, transfer the protein bites to an airtight container for storage. Keep them refrigerated to maintain freshness.


![- 4 thick slices of bread (brioche or challah) - 2 large eggs - 1/2 cup milk - 1 teaspoon vanilla extract - 1 teaspoon ground cinnamon - 1 tablespoon granulated sugar For this recipe, I love using thick slices of brioche or challah bread. They soak up the egg mixture well and give a soft, rich texture. The eggs, milk, and vanilla extract create a smooth base for dipping. Ground cinnamon adds warmth and flavor, while granulated sugar enhances the sweetness. - 1 tablespoon granulated sugar - 1/2 teaspoon ground cinnamon - 1 tablespoon unsalted butter (for frying) The cinnamon sugar mixture is the star here. It adds a sweet crunch that makes each bite special. Using unsalted butter for frying helps achieve that golden brown crust. You want the sticks to be crispy on the outside but soft inside. - Maple syrup or honey - Optional fresh fruits and berries Serve these French toast sticks with maple syrup or honey for dipping. It adds a nice touch of sweetness. Fresh fruits or berries can brighten the plate and add some refreshing flavor. You can use strawberries, blueberries, or even banana slices. It all comes together for a fun and tasty breakfast! For the full recipe, visit [Full Recipe]. To start, grab a shallow bowl. In this bowl, whisk together 2 large eggs, 1/2 cup of milk, 1 teaspoon of vanilla extract, and 1 teaspoon of ground cinnamon. Add 1 tablespoon of granulated sugar for sweetness. It’s important to mix until everything blends well and becomes slightly frothy. This mixture will coat your bread sticks and give them great flavor. Now, take your thick slices of bread, like brioche or challah. Cut each slice into uniform sticks, about 1 inch wide. This helps them cook evenly. After cutting, dip each stick into the egg mixture. Make sure to fully submerge it so it gets well-coated. Let any extra liquid drip off before cooking. This step is key to avoid soggy sticks. Next, it's time to cook! Preheat a non-stick skillet over medium heat. Add 1 tablespoon of unsalted butter to the pan. Wait for it to melt and swirl it around to coat the bottom. Carefully place the coated bread sticks in the skillet, making sure not to overcrowd them. Cook each side for about 2-3 minutes. You want them to turn golden brown and get a slightly crispy texture. This method gives you the best result for your Cinnamon Sugar French Toast Sticks. For a full recipe with all details, check out the [Full Recipe]. To make great cinnamon sugar French toast sticks, you need to control the heat. I suggest using medium heat for the best results. Medium heat cooks the bread evenly without burning it. If you cook on high heat, you may get burnt outsides and soggy insides. Next, prevent soggy French toast sticks. After dipping the sticks in the egg mixture, let them sit for a moment. This helps the bread absorb the mixture without getting too wet. For an appealing look, stack the French toast sticks neatly on a plate. You can sprinkle a little extra cinnamon sugar on top for a pop of color. Add fresh fruit like strawberries or blueberries on the side. This not only adds color but also freshness. Using the right tools makes cooking easier. A non-stick skillet or griddle is best for frying. This helps prevent sticking and makes cleanup simple. A spatula is handy for flipping the sticks. A shallow bowl is key for mixing the egg mixture. You’ll find this method gives you the best results for your cinnamon sugar French toast sticks. Remember to check the [Full Recipe] for detailed steps and proportions to ensure success. {{image_4}} You can change the flavor of your cinnamon sugar French toast sticks in fun ways. Adding a few drops of almond or orange extract gives a twist to the classic taste. These extracts bring a unique sweetness that pairs well with cinnamon. You can also try using different types of bread. Flavored bread like chocolate or pumpkin spice adds an exciting touch. Just think about how much fun it would be to bite into a chocolate French toast stick! If you need gluten-free or dairy-free options, you can easily adapt this recipe. Use gluten-free bread made from rice or almond flour. For dairy-free, almond or oat milk works well. If you want vegan French toast sticks, substitute eggs with flaxseed meal or a plant-based egg replacement. This way, everyone can enjoy this treat, no matter their diet. Get creative with dipping sauces and toppings! You can try different sauces like chocolate, peanut butter, or fruit compote. These add a fun twist to the flavor. You can also serve your French toast sticks with whipped cream or yogurt. Top them with fresh fruits like strawberries or blueberries for extra color and taste. Each bite can be a new flavor adventure! To store leftover cinnamon sugar French toast sticks, place them in an airtight container. This keeps them fresh and prevents drying out. You can store them in the fridge for up to three days. If you want to keep them longer, consider freezing. When reheating, I recommend using the oven for the best texture. Preheat your oven to 350°F (175°C). Place the sticks on a baking sheet and heat for about 10 minutes. This method helps restore their crispiness. If you use the microwave, heat them for 20-30 seconds. However, they may turn a bit soggy. To freeze cooked French toast sticks, let them cool completely first. Then, place them in a single layer on a baking sheet. Freeze until solid, then transfer them to a freezer-safe bag. They last up to two months in the freezer. To thaw, move them to the fridge overnight. Reheat in the oven for the best results. To make your French toast sticks crispy, use thick slices of bread. Brioche or challah works best. They soak up the egg mixture without getting too soggy. Here are some tips for crispiness: - Preheat your pan: Heat your skillet on medium. A hot pan helps form a nice crust. - Use enough butter: Butter adds flavor and helps create a golden crust. Don't skimp on it! - Cook without crowding: Give each stick space in the pan. This allows heat to circulate for even cooking. - Flip carefully: Use a spatula to turn them gently. This keeps them from breaking apart. Yes, you can prepare the egg mixture in advance. This saves time when you're ready to cook. Here’s how to store it: - Refrigerate: Store the mixture in a sealed container. Use it within 24 hours for the best results. - Give it a whisk: Before using, stir it again to ensure the ingredients mix well. The type of bread you choose can change the flavor and texture of your French toast sticks. Here are some great options: - Brioche: This bread is soft and rich, making it perfect for soaking up the egg mixture. - Challah: It has a slightly sweet flavor and holds up well when cooked. - Texas toast: Thick slices of this bread create a hearty bite. - Sourdough: If you like a tangy taste, sourdough adds a unique twist. For the full recipe, check out the detailed instructions! In this post, we explored how to make delicious French toast sticks. You learned about key ingredients, quick preparation steps, and helpful cooking tips. We also discussed fun variations and smart storage methods for leftovers. With these tips, you can create a tasty meal that impresses. Remember, the right bread and careful cooking make all the difference. Enjoy your French toast sticks, and feel free to get creative with flavors and toppings!](https://dishtreats.com/wp-content/uploads/2025/07/664e1dd1-150a-4660-86e6-505ad35a42cc-768x768.webp)

![When making apple cinnamon overnight oats, you need simple and healthy ingredients. Here’s what you’ll need: - 1 cup rolled oats - 2 cups almond milk (or your preferred milk) - 1 medium apple, diced (a Granny Smith works great for a touch of tartness) - 1 tablespoon chia seeds - 1 tablespoon maple syrup (adjust based on your sweetness preference) - 1 teaspoon ground cinnamon - 1/2 teaspoon vanilla extract - A pinch of salt - Toppings: sliced almonds, additional apple slices, and a sprinkle of cinnamon These ingredients make a tasty breakfast that is full of fiber and nutrients. Rolled oats provide a solid base. Almond milk adds creaminess without extra calories. Diced apple brings natural sweetness and crunch. Chia seeds boost fiber and omega-3s. Maple syrup gives a touch of sweetness, while ground cinnamon adds warmth and flavor. A pinch of salt balances everything out. Feel free to adjust the ingredients to fit your taste. You can add more or less maple syrup, depending on how sweet you like it. I recommend using fresh apples for the best flavor. For a fun twist, try adding your favorite nuts or seeds on top. Check out the Full Recipe for all the details on making this delicious dish! To make apple cinnamon overnight oats, start with a clean space. Gather your ingredients first. This helps make the process smooth and quick. It only takes about ten minutes to prepare. You will need rolled oats, milk, chia seeds, and other tasty items. In a medium bowl, combine 1 cup of rolled oats and 2 cups of almond milk. Then, add 1 tablespoon of chia seeds, 1 tablespoon of maple syrup, and 1 teaspoon of ground cinnamon. Don't forget 1/2 teaspoon of vanilla extract and a pinch of salt. Whisk everything together until it’s mixed well. Next, fold in 1 diced apple. Make sure the apple pieces spread evenly through the mixture. This adds great flavor to every spoonful. Now, take two jars or airtight containers. Spoon the oat mixture evenly into them. Leave some space at the top. This space is important as the oats will expand. Seal the containers tightly and place them in the fridge. Let them chill overnight or for at least six hours. When you wake up, the oats will be ready! Just stir them, and if they are too thick, add a bit of almond milk to reach your desired creaminess. Enjoy! You can find the full recipe [here]. To get the best creamy oats, use the right milk. I like almond milk, but any milk will work. Soaking the oats overnight is key. This allows them to absorb the liquid. If your oats look too thick in the morning, add a splash of milk. Stir well to reach your perfect texture. Choosing the right apple makes a big difference. I recommend using Granny Smith apples for a nice tart flavor. They contrast well with the sweetness of the maple syrup. Other good choices are Honeycrisp or Fuji apples. Both add a sweet crunch and vibrant taste. For a beautiful presentation, use clear glass jars. Show off those lovely layers of oats, apples, and toppings. Just before serving, drizzle extra maple syrup on top. This adds shine and an extra touch of sweetness. Garnish with sliced almonds or apple slices for a pop of color. Enjoy the visual feast as much as the taste! {{image_4}} You can swap almond milk for any milk you like. Cow's milk gives a creamy taste. Cashew milk adds richness. Coconut milk brings a tropical twist. Each milk changes the flavor a bit, so try different ones to find your favorite. Maple syrup is the base for sweetness, but it’s not the only choice. You can use honey if you want a floral note. Agave syrup works well for a mild sweetness. If you prefer less sugar, try mashed bananas or stevia for a low-cal option. Adjust to your taste! Adding more ingredients is easy! You can mix in nuts or seeds for healthy fats. Try flax seeds for extra fiber. Some berries can add antioxidants and a pop of color. A spoonful of yogurt can make it creamy and add protein. Feel free to experiment with different add-ins to boost your overnight oats. Check the Full Recipe for more details on ingredients! You can store your apple cinnamon overnight oats in airtight containers. Glass jars work great. Make sure each jar is sealed tightly. This keeps the oats fresh and tasty. Place them in the fridge after making them. They last well in the cold. These oats are best when eaten within five days. After five days, their taste and texture change. If you see any mold, throw them away. Always check for a sour smell too. It’s better to be safe than sorry! You can freeze overnight oats if you want to keep them longer. Use freezer-safe containers or bags. Just leave some space to allow for expansion. When you're ready to eat, thaw them in the fridge overnight. You can also warm them in the microwave. This way, you enjoy a healthy breakfast boost anytime! For the full recipe, check out the details above. Yes, you can use instant oats, but the texture will change. Instant oats cook faster and may become mushy when soaked. If you want a creamier texture, stick with rolled oats. They absorb liquid well and hold their shape, giving you a better bite. You can change the flavor in many ways. Try different spices like nutmeg or ginger. Add a scoop of peanut butter or almond butter for creaminess. You can also mix in dried fruits, like raisins or cranberries, for a sweet touch. Experimenting with toppings can add crunch, too! Absolutely! This recipe is perfect for meal prep. Make a batch and store it in jars. It will last in the fridge for up to five days. Each morning, you can grab a jar, stir it up, and enjoy a healthy breakfast. Check the full recipe for more details on making these oats. This blog post showed you how to make delicious overnight oats. We covered the key ingredients and step-by-step instructions. Tips helped you achieve creamy texture and great flavor. Plus, I shared fun ways to personalize your oats. Remember, these oats store well, making them perfect for meal prep. Enjoy your tasty and healthy breakfast with ease. You can mix it up as you like and keep it fresh! Start experimenting today and make breakfast something you look forward to.](https://dishtreats.com/wp-content/uploads/2025/07/b5672784-8b9d-49df-af82-0a82d4d3c269-768x768.webp)

![- 2 cups watermelon, diced into bite-sized cubes - 1 cup fresh pineapple, diced - 1 cup ripe mango, peeled and diced - 1 cup strawberries, hulled and sliced - 1 cup plump blueberries - 1 tablespoon pure honey - 2 tablespoons freshly squeezed lime juice - 1 teaspoon finely grated lime zest - Fresh mint leaves, for a lovely garnish When picking fruits, look for bright colors and firm textures. Choose watermelon that feels heavy for its size. Make sure the skin is smooth and free from blemishes. For pineapple, smell the base; a sweet scent means it's ripe. Ripe mangoes should yield slightly when you press them. Strawberries should be bright red, without white tips. Pick blueberries that are firm and plump, with a deep color. This fruit salad is not just tasty; it’s also packed with nutrients. Watermelon is hydrating and low in calories. Pineapple provides vitamin C and enzymes that aid digestion. Mango is rich in antioxidants and vitamins A and C. Strawberries boost heart health due to their high fiber and vitamin C content. Blueberries are known for their powerful antioxidants. The honey adds a natural sweetness, while lime juice helps with vitamin C and adds a zesty kick. Each bite not only delights your taste buds but also nourishes your body. First, gather all your fruits. You will need watermelon, pineapple, mango, strawberries, and blueberries. Wash each fruit well to remove any dirt. Dice the watermelon into cubes. Cut the pineapple and mango into small pieces. Hull and slice the strawberries. Finally, add the blueberries. Place all the fruit into a large mixing bowl. Be gentle while mixing to keep the fruit intact. In a separate small bowl, combine one tablespoon of honey with two tablespoons of freshly squeezed lime juice. Add one teaspoon of finely grated lime zest for extra flavor. Whisk the mixture together until it is smooth and well-blended. This honey lime dressing will add a sweet and tangy flavor to your salad. Now, drizzle the honey lime dressing over the fruit. Make sure to cover every piece of fruit for the best taste. Use a gentle motion to toss the salad. This helps the dressing coat all the fruit without mashing it. Let the salad sit for about 10 minutes. This resting time allows the flavors to blend well. When ready to serve, garnish with fresh mint leaves. This adds a lovely touch to your fruit salad. Enjoy your Honey Lime Fruit Salad Delight! For a full recipe, visit the [Full Recipe]. Cutting fruit can be fun and easy. Start with a sharp knife for safety. For watermelon, slice it in half. Then, cut each half into thick wedges. Remove the rind and dice the flesh into cubes. Pineapple is best peeled and cored first. Cut the fruit into thick slices, then dice. For strawberries, remove the green tops and slice them. Keep your cuts even for a pretty look. You can add more fun to the salad. Try adding a splash of orange juice. This will give it a citrus twist. You can also mix in a pinch of cinnamon for warmth. Chopped nuts like almonds or walnuts add crunch. If you like creamy, add a dollop of yogurt. These extra flavors make the salad pop! Make your fruit salad shine with great presentation. Use a clear glass bowl to show off the colors. You can layer the fruits for a rainbow effect. Garnish with mint leaves on top for a fresh touch. A few extra blueberries scattered around add visual flair. Serve with colorful spoons for added fun. Remember, we eat with our eyes first! {{image_4}} You can switch up fruits in your Honey Lime Fruit Salad. Try using peaches or nectarines for a juicy twist. Grapes add a nice pop, and kiwi brings a tart flavor. You might also add oranges for an extra citrus kick. Mix and match based on your taste! Change your fruit salad with the seasons. In summer, use berries and stone fruits for freshness. Fall is great for apples and pears, while winter calls for citrus fruits like clementines and grapefruits. Spring gives you the chance to add strawberries and rhubarb for a bright taste. Add nuts or seeds for a crunchy texture. Almonds and walnuts are perfect options. If you prefer seeds, sprinkle in some pumpkin or sunflower seeds. These additions not only improve texture, but they also boost the nutrition of your salad. Enjoy the added flavor and health benefits! Store leftover honey lime fruit salad in an airtight container. This keeps the fruit fresh and tasty. If you can, eat it within a day or two. The longer it sits, the softer the fruit may get. I recommend using glass or plastic containers with tight-fitting lids. These help lock in moisture and prevent spills. If you have smaller portions, use smaller containers for easy access. The salad stays fresh for about two days in the fridge. Keep it away from foods with strong odors. To refresh the taste, add a little more honey or lime juice before serving. If you notice any browning, remove those pieces before enjoying. For the full recipe, make sure to check the main article! Yes, you can make Honey Lime Fruit Salad a few hours ahead. However, I recommend serving it fresh. If you prepare it too early, the fruit may get soft and lose its crunch. If you decide to make it ahead, store it in the fridge. This keeps it cool and fresh. Just remember to add the dressing right before serving to keep the fruit juicy. The best fruits for Honey Lime Fruit Salad are those that are ripe and sweet. I love using: - Watermelon - Pineapple - Mango - Strawberries - Blueberries These fruits blend well together, creating a vibrant and tasty mix. You can also try using kiwi or grapes for extra flavor. The key is to choose fruits that you enjoy and that are in season. Yes, you can use another sweetener if you prefer. Options include agave syrup or maple syrup. These sweeteners work great in the dressing. Just keep in mind that the flavor may change slightly. I suggest starting with the same amount as the honey. You can always adjust it to your taste. For a sugar-free option, consider using a sugar substitute that you like. In this blog post, we explored how to make a tasty Honey Lime Fruit Salad. We discussed the key ingredients, tips for selecting fresh fruits, and the nutritional benefits they offer. You learned step-by-step instructions for preparation, dressing, and serving. We also shared tips for cutting fruits and enhancing flavor. Plus, variations for using different fruits and tips for storage were provided. Creating this salad is simple and rewarding. Enjoy it yourself or share it with friends. It’s a fun and healthy treat everyone will love.](https://dishtreats.com/wp-content/uploads/2025/07/a7fe8aa9-0619-4c4c-8a63-94d099c8a4d2-768x768.webp)
