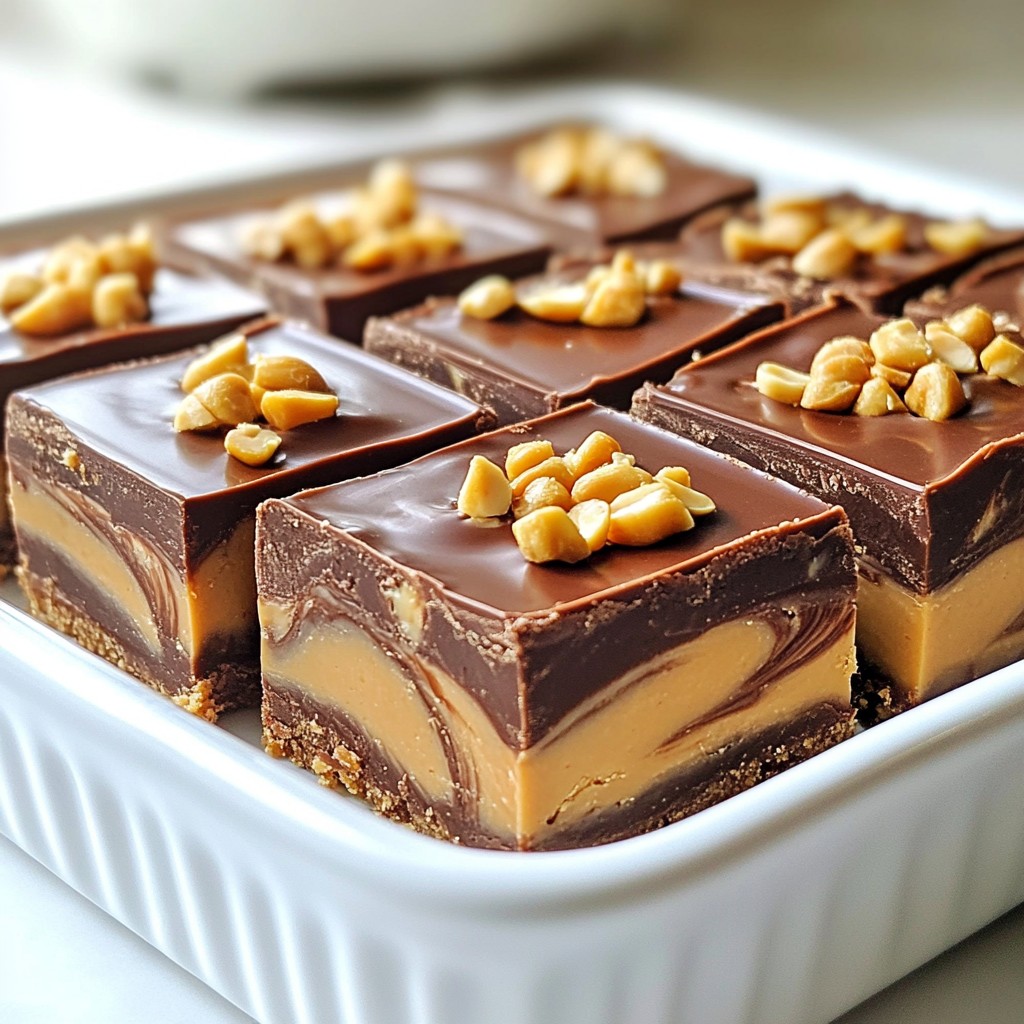
Craving something sweet and indulgent? Look no further! This easy Chocolate Peanut Butter Fudge is your answer. With just a few simple ingredients and steps, you can create a rich, creamy treat that will impress everyone. Perfect for sharing or savoring alone, this fudge is a must-try for any occasion. Let me show you how to whip up this delightful dessert in no time!
Why I Love This Recipe
- Decadent Flavor Combination: The rich chocolate and creamy peanut butter create a luscious treat that satisfies any sweet tooth.
- Easy to Make: With just a few simple ingredients and minimal cooking time, this fudge can be whipped up in no time.
- Perfect for Sharing: Cut into squares, this fudge is ideal for parties, gatherings, or simply as a treat to share with friends and family.
- Customizable: Add your favorite nuts, sprinkles, or even a drizzle of caramel to make this fudge your own!
Ingredients
List of Ingredients
- 1 cup creamy peanut butter
- 1 cup semi-sweet chocolate chips
- 1/2 cup sweetened condensed milk
- 1 teaspoon pure vanilla extract
- 1/4 teaspoon fine sea salt
- Optional: 1/4 cup chopped peanuts for topping
Tools and Equipment
- Medium saucepan
- 8x8 inch square baking dish
- Parchment paper
- Spatula
- Knife
To create this easy and decadent chocolate peanut butter fudge, you need a few simple ingredients. The key players are creamy peanut butter and semi-sweet chocolate chips.
Sweetened condensed milk adds a rich creaminess that makes the fudge smooth. Pure vanilla extract enhances the flavors, while fine sea salt balances the sweetness. If you love extra crunch, chopped peanuts make a great topping.
For tools, you'll need a medium saucepan for melting. An 8x8 inch square baking dish helps shape the fudge. Parchment paper makes it easy to lift out the fudge later. A spatula is perfect for mixing and spreading. Finally, a knife is essential for cutting the fudge into squares.
These ingredients and tools work together to give you a delicious treat that everyone will love.

Step-by-Step Instructions
Preparing the Baking Dish
Start by lining an 8x8 inch square baking dish with parchment paper. This step helps the fudge lift out easily. Make sure you leave some paper hanging over the edges. This overhang is key for easy lifting later.
Melting the Peanut Butter Mixture
Next, grab a medium saucepan. Over low heat, combine 1 cup of creamy peanut butter and 1/2 cup of sweetened condensed milk. Stir the mixture constantly until it melts together. You want it to be smooth and creamy. This should take just a few minutes. Once melted, remove the saucepan from the heat. Add 1 teaspoon of pure vanilla extract and 1/4 teaspoon of fine sea salt. Stir well until everything blends nicely.
Layering the Fudge
Now, it’s time to layer the fudge. Carefully pour half of the warm peanut butter mixture into the bottom of your prepared baking dish. Use a spatula to spread it evenly, forming a solid base layer.
Put the saucepan back on low heat. Add 1 cup of semi-sweet chocolate chips to the remaining peanut butter mixture. Stir until the chocolate melts completely and blends in well. Pour this rich chocolate mixture over the first layer of peanut butter. Smooth it out with your spatula to cover everything.
Now, pour the rest of the peanut butter mixture over the chocolate layer. To create a lovely marbled effect, use a knife or spatula to gently swirl the two mixtures together. Be careful not to mix them too much; you want to see both layers. If you like, sprinkle 1/4 cup of chopped peanuts on top for added texture and flavor.
After you finish layering, place the baking dish in the refrigerator. Let it chill for at least 2 hours or until the fudge is firm enough to slice. Once set, lift it out using the parchment paper and cut it into squares. Enjoy your tasty treat!
Tips & Tricks
Perfecting the Texture
Using low heat is key to melting the peanut butter and sweetened condensed milk. Too much heat can scorch the mixture. Stir it slowly and keep an eye on it. You want it warm, not bubbling. This helps achieve a smooth fudge mixture that is creamy and rich.
To ensure a silky texture, mix well after adding vanilla and salt. This step enhances the flavor and blends everything nicely. If you see lumps, keep stirring until they disappear.
Swirling Technique
To create a beautiful marbled design, pour the chocolate mixture over the peanut butter layer. Use a spatula to smooth it out. Then, pour the remaining peanut butter mixture on top.
For swirling, use a knife or spatula. Gently drag it through both layers. Be careful not to mix them too much. You want distinct swirls, not a full blend. This method makes your fudge look fancy!
Setting the Fudge
Refrigerate the fudge for at least 2 hours. This time is crucial for it to set properly. If it feels soft after chilling, you may need more time.
To check firmness, gently press the top with your finger. It should feel firm but still slightly soft. This way, you can slice it easily later. Enjoy your tasty treats!
Pro Tips
- Use High-Quality Chocolate: The flavor of your fudge depends heavily on the quality of the chocolate chips. Opt for a good brand of semi-sweet chocolate for the best taste.
- Don’t Overheat the Mixture: When melting the peanut butter and chocolate, keep the heat low and stir constantly to prevent burning and ensure a smooth consistency.
- Chill Thoroughly: Make sure to refrigerate the fudge for at least 2 hours or until fully set. This helps the fudge firm up properly for easy slicing.
- Experiment with Mix-Ins: Feel free to get creative! Add-ins like mini marshmallows, chocolate chunks, or dried fruit can add extra flavor and texture to your fudge.
Variations
Nutty Variations
You can add more crunch to your fudge. Try mixing in chopped almonds or walnuts. These nuts add a nice texture and flavor. If you want a nut-free version, you can skip the nuts altogether. You can replace them with seeds, like sunflower or pumpkin seeds. This still gives some crunch without the nuts.
Flavor Adaptations
Adding extracts can change the taste of your fudge. Almond or hazelnut extracts are great choices. They bring a unique flavor that pairs well with chocolate and peanut butter. You can also experiment with different types of chocolate. Dark chocolate gives a rich taste, while milk chocolate adds sweetness. Each type brings a new twist to your fudge.
Dietary Adjustments
Want to make your fudge vegan? Swap regular sweetened condensed milk with coconut cream or a vegan alternative. Use dairy-free chocolate chips too. This keeps the fudge rich without any animal products. If you need a gluten-free option, this fudge is great as is. All the ingredients are naturally gluten-free, so enjoy without worry!
Storage Info
Best Storage Practices
To keep your chocolate peanut butter fudge fresh, use an airtight container. Glass or plastic containers work well. If you stack layers, place parchment paper between them. This keeps the fudge from sticking together. Store the container in a cool, dry spot. Avoid places with heat or sunlight.
Freezing the Fudge
To freeze your fudge, first cut it into squares. Wrap each square in plastic wrap. Then place the wrapped fudge in a freezer bag. Be sure to remove as much air as possible. This helps prevent freezer burn. To thaw, just take out what you need. Let it sit at room temperature for about 30 minutes. Enjoy the creamy texture even after freezing.
Shelf Life
In the fridge, your fudge can last up to two weeks. Keep an eye on it for any signs of spoilage. Look for a change in color or texture. If it smells off or has a hard crust, toss it. Proper storage will keep your fudge delicious and safe to eat!
FAQs
Can I use natural peanut butter?
Yes, you can use natural peanut butter. It has a unique taste. Here are the pros and cons:
- Pros: It has no added sugar or oils. This makes it healthier. Natural peanut butter gives a rich flavor to the fudge.
- Cons: It can be harder to melt. The texture may be less smooth. You might need to adjust the amount of sweetened condensed milk.
Natural peanut butter can change the fudge's taste and texture. If you like a stronger peanut flavor, give it a try!
How can I make the fudge softer or firmer?
You can adjust the fudge's softness or firmness easily. Here are some tips:
- Softer Fudge: Add a bit more sweetened condensed milk. This will make it creamier. You can also lower the chilling time.
- Firmer Fudge: Add a little more chocolate chips. This will help it set better. You can chill it longer if you prefer a firmer texture.
Try these tips to find the perfect consistency for your fudge!
What is the best way to cut fudge?
Cutting fudge can be tricky, but here are some recommended techniques:
- Use a sharp knife: This will help you get clean cuts.
- Warm the knife: Dip it in hot water, then dry it. This makes cutting easier.
- Chill the fudge: Make sure it’s firm before cutting.
Cut the fudge into even squares for a nice presentation. Enjoy your delicious treats!
This blog post covered how to make tasty peanut butter fudge. We discussed the key ingredients and tools, along with step-by-step instructions. I shared tips for perfect texture and ways to personalize your fudge. You can store it easily or freeze it for later. Remember, you can change flavors and textures to fit your taste. Enjoy making this simple treat! It's fun to share your fudge with friends and family.