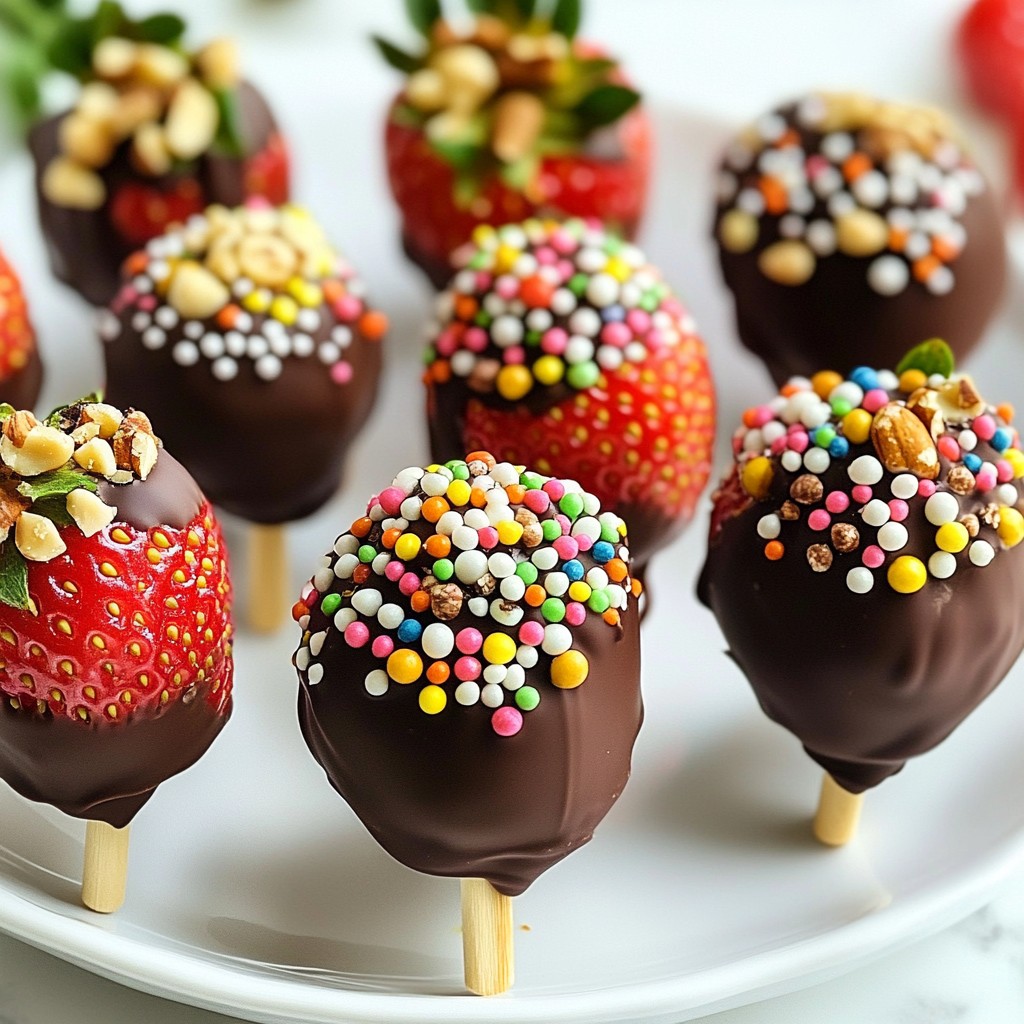
Get ready to create a delicious treat that everyone will love—Chocolate Dipped Strawberry Pops! In this easy and fun guide, I’ll show you how to make these sweet snacks using simple steps. From choosing fresh strawberries to picking the right chocolate, we’ll cover it all. Plus, I’ll share tips for great toppings and stunning presentations. Let’s dive into making this tasty dessert that’s perfect for any occasion!
Why I Love This Recipe
- Easy to Make: This recipe requires minimal ingredients and steps, making it perfect for quick and enjoyable cooking sessions.
- Customizable Toppings: You can personalize these pops with your favorite nuts or sprinkles, allowing for endless variations to suit your taste.
- Healthy Indulgence: Fresh strawberries paired with dark chocolate create a delicious yet healthier dessert option that feels indulgent without the guilt.
- Great for Sharing: These pops are visually appealing and perfect for parties, making them a delightful treat to share with friends and family.
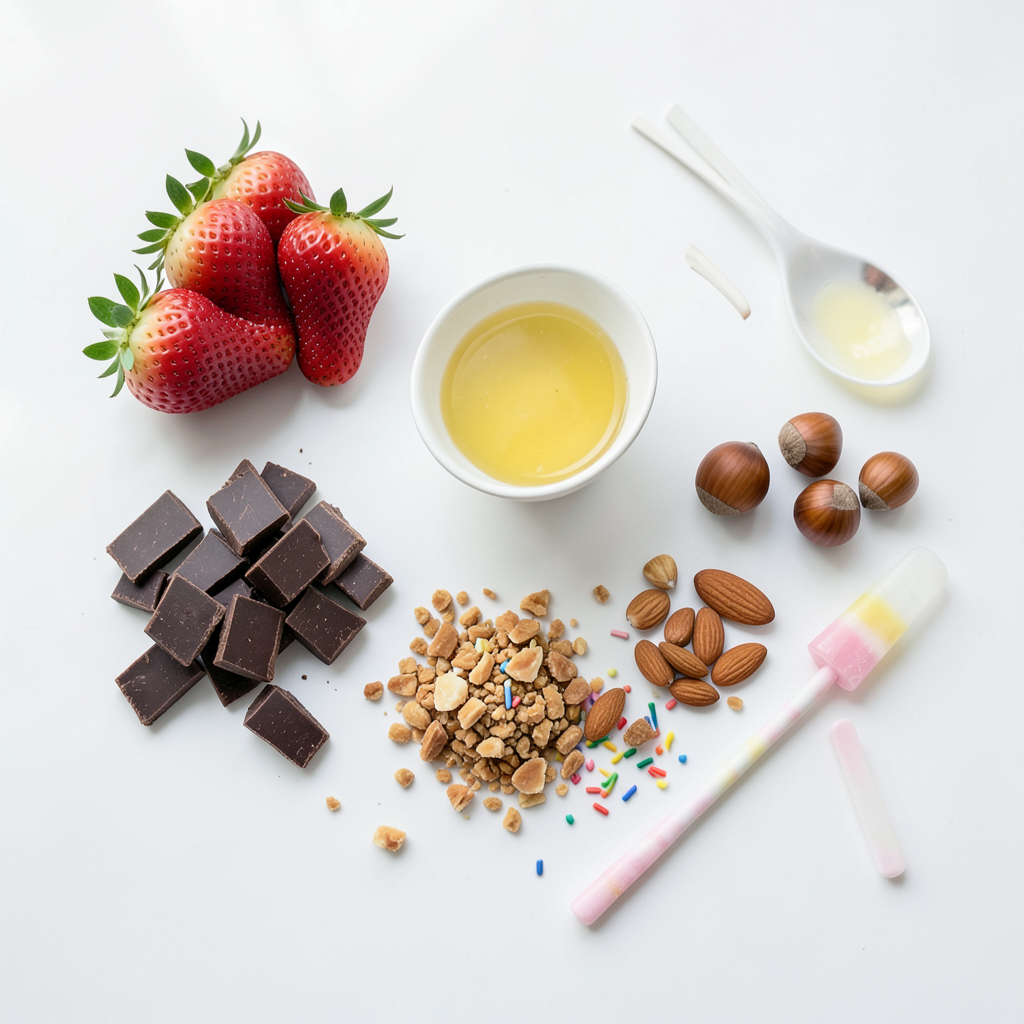
Ingredients
Fresh Strawberries
Start with 1 pound of fresh strawberries. Choose ones that are ripe, firm, and bright red. Wash them gently under cool water. Make sure to dry each strawberry well with a clean towel. This step is key; moisture can prevent the chocolate from sticking.
Chocolate Options
You need 8 ounces of dark chocolate. You can chop a chocolate bar into small pieces or use chocolate chips. If you want a smoother finish, add 1 tablespoon of coconut oil. This is optional but gives a nice shine to your chocolate.
Additional Toppings
Get creative with toppings! You can use 1/2 cup of crushed nuts like almonds or hazelnuts for crunch. For a fun twist, add 1/2 cup of colorful sprinkles. These add flair and make the pops more appealing. Choose toppings you love to make each bite special!
Step-by-Step Instructions
Preparing the Strawberries
Start with fresh strawberries. Wash them well and dry them using a paper towel. This step is key. Moisture can ruin the chocolate coating. Now, take a lollipop stick or wooden skewer. Insert it into the stem end of each strawberry. Push gently to secure it. Make sure not to pierce the bottom. Once done, place the strawberries on a baking sheet lined with parchment paper. This will help keep them from sticking later.
Melting the Chocolate
Next, we need to melt the chocolate. Take 8 ounces of dark chocolate and chop it into small pieces. If you prefer, you can use chocolate chips. Place the chocolate in a microwave-safe bowl. If you want a smoother texture, add a tablespoon of coconut oil. Heat the bowl in the microwave for 30 seconds. After each interval, stir the chocolate well. Repeat until the chocolate is melted. This should take about 1 to 2 minutes.
Dipping and Decorating the Pops
Now comes the fun part! Grasp each strawberry by the stick. Dip it into the melted chocolate. Make sure to swirl it around for an even coating. Let any excess chocolate drip back into the bowl. While the chocolate is still wet, sprinkle on your toppings. You can use crushed nuts for crunch or colorful sprinkles for flair. This step adds a fun touch!
Chilling and Serving
Once you’ve decorated all the pops, place them back on the parchment-lined baking sheet. Transfer the tray to the refrigerator. Chill the pops for at least 30 minutes. This will help the chocolate set and become firm. Once the chocolate is hard, take the pops from the fridge. You can serve them on a nice platter or wrap them in clear cellophane. Enjoy your tasty treats!
Tips & Tricks
Perfecting Your Chocolate Coating
To get a smooth chocolate coating, melt your chocolate slowly. Use a microwave and heat in small bursts of 30 seconds. Stir well after each burst. If the chocolate feels thick, add a little coconut oil. This helps the chocolate glide over the strawberries. Dip each strawberry fast to avoid hardening. Swirl it gently to coat evenly.
Choosing Quality Ingredients
Start with fresh, ripe strawberries. They should be firm and bright red. For the best taste, choose dark chocolate with at least 60% cocoa. Higher quality chocolate melts better and tastes richer. If you want a sweeter option, milk chocolate works too. Toppings like nuts or sprinkles should be fresh and colorful. This will make your pops look great and taste delightful.
Creating Stunning Presentation
To present your pops well, use a clean and pretty platter. Arrange the pops in a fun way. You can place them upright in a cup filled with rice or beans for a neat look. Wrap individual pops in clear cellophane for gifts. This keeps them fresh and adds a special touch. Remember, the more colorful your toppings, the more fun your pops will look!
Pro Tips
- Choose the Right Chocolate: Opt for high-quality dark chocolate for the best flavor and smoothness. If you're not a fan of dark chocolate, milk chocolate can also be used for a sweeter taste.
- Perfect Strawberry Prep: Make sure to wash and thoroughly dry the strawberries, as any moisture will prevent the chocolate from sticking properly.
- Customize Your Toppings: Get creative with your toppings! Try adding toasted coconut, mini marshmallows, or even crushed cookies for a fun twist.
- Storage Tips: Store the chocolate strawberry pops in an airtight container in the fridge. They are best enjoyed within 2-3 days for optimal freshness.
Variations
Flavor Combinations
You can switch up the chocolate to change the flavor. I love using white chocolate or milk chocolate. Both create a nice contrast with the fresh strawberries. To make it even more fun, try mixing dark and white chocolate. This creates a beautiful marbled effect. Just melt both chocolates separately, then swirl them together before dipping.
Unique Toppings
Toppings can make your strawberry pops stand out. I suggest using crushed nuts like almonds or hazelnuts for crunch. You can also add colorful sprinkles for a festive look. Try shredded coconut for a tropical twist. For a richer flavor, drizzle caramel or chocolate sauce over the pops. The options are endless!
Seasonal Themes for Decoration
You can match your pops to the seasons. In spring, use pastel sprinkles for Easter. For summer, try bright colors to celebrate sunny days. In fall, add crushed pumpkin spice cookies for that cozy vibe. During winter, use red and green toppings for a holiday touch. These little details make your treats extra special.
Storage Info
Best Practices for Storing Chocolate Dipped Pops
Store your chocolate dipped strawberry pops in the fridge. Use an airtight container to keep them fresh. Make sure they are fully set before stacking them. This prevents the chocolate from sticking to each other. Lay them flat on parchment paper if possible. Avoid placing them in warm areas as heat can melt the chocolate.
Freezing Options
You can freeze these pops for later enjoyment. Wrap each pop in plastic wrap tightly. Then, place them in a freezer-safe bag. They can last up to three months in the freezer. When ready to eat, remove them and let them thaw in the fridge. This helps keep the strawberries fresh and tasty.
Shelf Life and Freshness Tips
Chocolate dipped strawberry pops are best eaten within two days for peak flavor. They may last up to five days in the fridge but can lose some freshness. Always check for any signs of spoilage before serving. If the chocolate appears dull or the strawberries look shriveled, it’s best to discard them. Enjoy them fresh for the best experience!
FAQs
How to make chocolate dipped strawberry pops without a microwave?
You can melt chocolate without a microwave using a double boiler. Fill a pot with water and bring it to a simmer. Place a heat-safe bowl on top of the pot, ensuring it does not touch the water. Add your chopped chocolate to the bowl. Stir it as it melts. This method gives you smooth, melted chocolate without burning it.
Can I use any type of chocolate for dipping?
Yes, you can use many types of chocolate. Dark chocolate, milk chocolate, and white chocolate all work well. Each type has its own taste and sweetness. Dark chocolate gives a rich flavor, while milk chocolate is sweeter. White chocolate adds a creamy touch. Choose your favorite!
What are the best toppings for chocolate dipped strawberry pops?
The best toppings add flavor and texture. Here are some great options:
- Crushed nuts (like almonds or hazelnuts)
- Colorful sprinkles for fun
- Shredded coconut for a tropical twist
- Mini chocolate chips for extra chocolatey goodness
- Crushed cookies for a crunchy bite
Feel free to mix and match!
How long do chocolate dipped strawberry pops last?
Chocolate dipped strawberry pops last about 2-3 days in the fridge. Store them in an airtight container to keep them fresh. You can also freeze them for up to a month. Just remember, freezing may change the texture of the strawberries. Enjoy your treats while they are fresh!
In this article, we explored how to create delicious chocolate-dipped strawberry pops. We covered ingredients like fresh strawberries and various chocolate options. You learned step-by-step instructions, from preparing the strawberries to chilling and serving your tasty treats. Our tips helped you perfect the coating and presentation. Remember, you can get creative with flavors and toppings. Store your pops well to keep them fresh. Enjoy making these sweet snacks, and share them with friends for fun gatherings or parties. You have the tools to impress!