Chocolate Covered Strawberry Smoothie Delightful Treat

Are you ready to indulge in a deliciously sweet treat? The Chocolate Covered Strawberry Smoothie is a perfect blend of rich chocolate and fresh strawberries. This smoothie not only satisfies your cravings, but it’s also quick and easy to make. In this post, I’ll share simple steps, tips, and tasty variations to elevate your smoothie game. Let’s dive in and whip up this delightful drink together!
Ingredients
Complete List of Ingredients
To make a yummy chocolate covered strawberry smoothie, you need:
- 1 cup frozen strawberries
- 1 ripe banana
- 1 cup almond milk (or your preferred milk alternative)
- 2 tablespoons unsweetened cocoa powder
- 1 tablespoon honey or maple syrup (or more to taste)
- 1 tablespoon almond butter (or substitute with your favored nut butter)
- 1/2 teaspoon pure vanilla extract
- A pinch of sea salt
- Optional: 1 tablespoon chia seeds (for added texture and nutrition)
These simple items create a smooth and tasty drink.
Ingredient Substitutes
You can use different items if you can’t find the main ones. Try:
- Any frozen berries instead of strawberries.
- Regular milk or oat milk instead of almond milk.
- Use agave syrup if you don’t have honey or maple syrup.
- Peanut butter can replace almond butter.
- You can skip the chia seeds if you don’t have them.
These swaps can bring new flavors to your smoothie.
Tips for Choosing the Best Strawberries
For the best taste, choose ripe strawberries. Look for:
- Bright red color with no white spots.
- Firm texture without any mushy parts.
- A sweet smell, which shows they are fresh.
Fresh strawberries will make your smoothie pop with flavor.
Step-by-Step Instructions
Preparation Overview
To make your Chocolate Covered Strawberry Smoothie, gather all your ingredients. The key items are frozen strawberries, a ripe banana, and almond milk. You will also need cocoa powder, honey or maple syrup, almond butter, vanilla extract, and sea salt. Optional chia seeds can boost nutrition. This smoothie takes just five minutes to prepare.
Detailed Blending Steps
1. Add Ingredients: Start by placing 1 cup of frozen strawberries, 1 ripe banana, and 1 cup of almond milk into your blender.
2. Add Flavor: Next, sprinkle in 2 tablespoons of cocoa powder. Choose your sweetener, either 1 tablespoon of honey or maple syrup.
3. Nutty Goodness: Spoon in 1 tablespoon of almond butter. Add 1/2 teaspoon of pure vanilla extract and finish with a pinch of sea salt.
4. Optional Boost: If you want, add 1 tablespoon of chia seeds for texture and nutrients.
5. Blend Away: Blend on high speed until smooth. Make sure everything is mixed well.
6. Taste and Adjust: Taste your smoothie. If you want it sweeter, add more honey or maple syrup. Blend again briefly to mix.
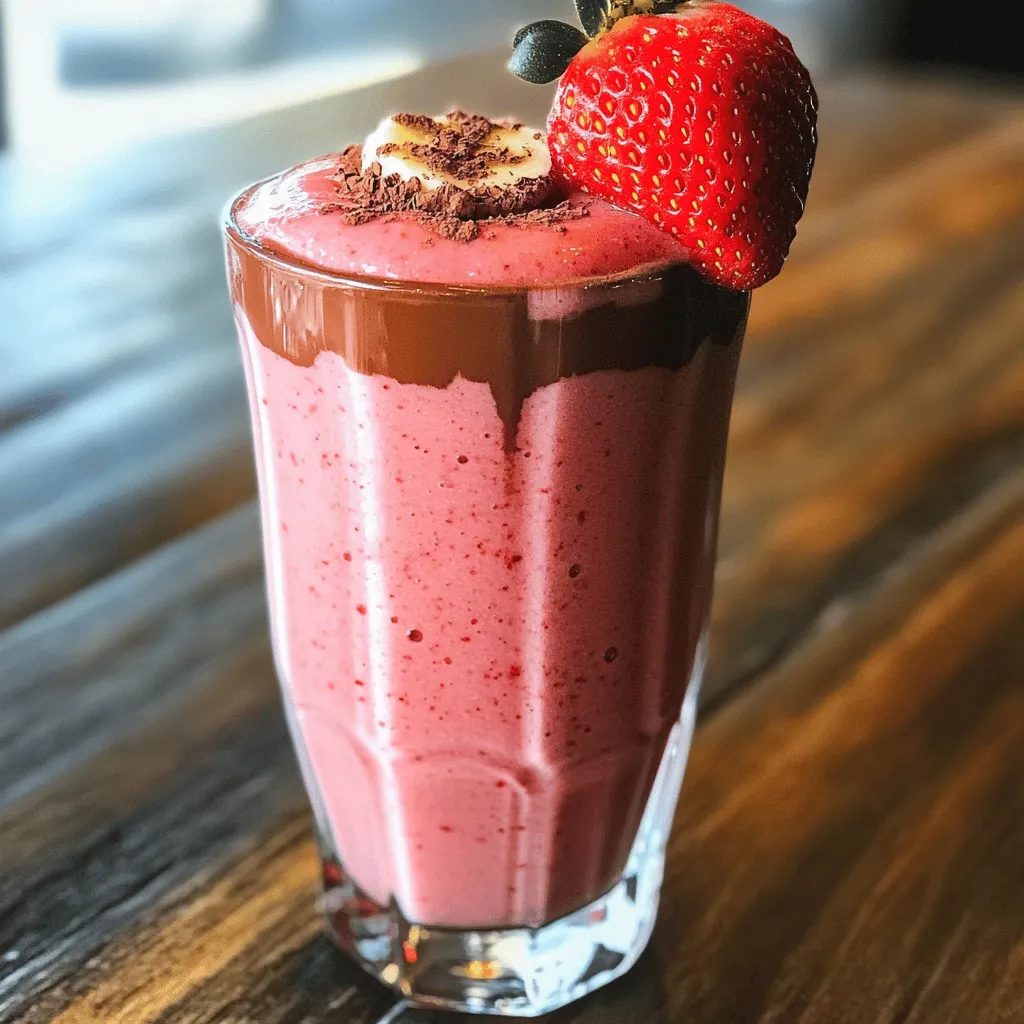
Final Touches for Presentation
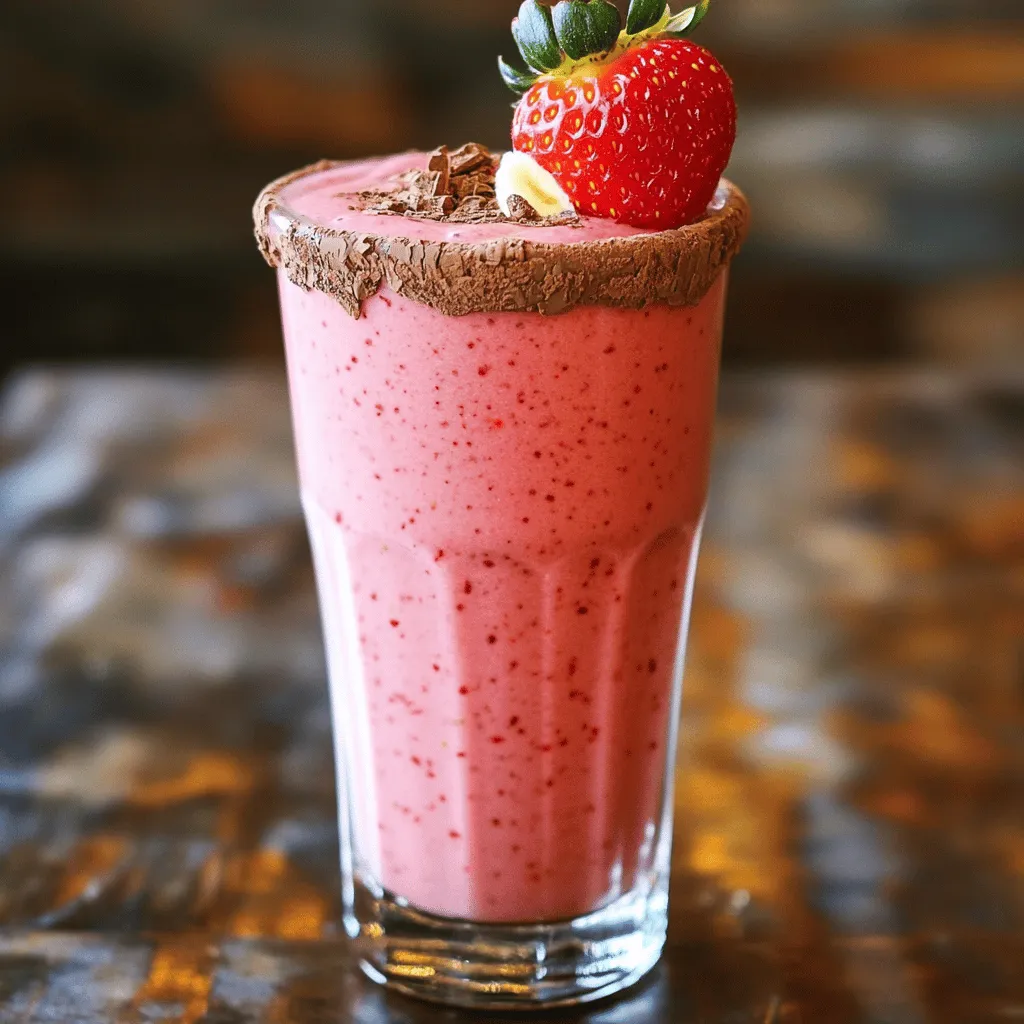
Pour your smoothie into a tall glass. For a fun touch, garnish it with sliced strawberries on top. You can also dust a little cocoa powder for a nice finish. Serve it with a stylish straw and place a whole strawberry on the rim of the glass. This adds color and charm to your drink!
Tips & Tricks
Adjusting Sweetness to Taste
You can change the sweetness of your smoothie easily. Start with the honey or maple syrup. If your smoothie is not sweet enough, add more. Blend again to mix it in well. Taste it after each addition. This way, you can create your perfect balance. Everyone likes different levels of sweetness!
Enhancing Flavor with Spices
Adding spices makes your smoothie more exciting. You can try adding a dash of cinnamon or nutmeg. These spices bring warmth and depth to the flavor. They pair well with chocolate and strawberries. You might also enjoy a little cayenne for a spicy kick. Just a pinch will do!
Smoothie Consistency Tips (thicker or thinner)
The consistency of your smoothie is key. If you like it thick, use less almond milk. You can also add more frozen strawberries or a banana. For a thinner smoothie, add more almond milk slowly. Blend until you reach your desired texture. Always remember, you can adjust it as you blend!

Variations
Dairy-Free or Vegan Alternatives
To make this smoothie dairy-free or vegan, swap almond milk for a plant-based milk. You can use coconut milk, oat milk, or soy milk. Each choice gives a unique taste. You can also replace honey with maple syrup or agave for sweetness. These options keep your drink creamy and delicious without dairy.
Adding Protein (Protein Powder Options)
If you want to add protein, try adding protein powder. Use your favorite brand, like whey or plant-based blends. Start with one scoop. This gives your smoothie a nutrition boost. It can help keep you full longer. You can blend it in with the other ingredients for a smooth finish.
Different Nut Butter Choices
Nut butter adds flavor and creaminess. Almond butter is great, but you can use peanut butter or cashew butter too. Each nut butter gives a different taste. If you want something unique, try sunflower seed butter. It’s nut-free and has a nice flavor. Just pick what you like best!
Storage Info
How to Store Leftover Smoothie
If you have leftover smoothie, pour it into an airtight container. Seal it tight and place it in the fridge. It can stay fresh for up to 24 hours. When you’re ready to drink it again, just shake or stir well. If it separates, that’s normal.
Freezing Smoothie Ingredients
Freezing your smoothie is simple. You can freeze individual ingredients first. For example, freeze your strawberries and banana in small bags. This way, they stay fresh longer. When you want to make the smoothie, just blend the frozen fruit with your milk and other ingredients. You can also freeze the finished smoothie in ice cube trays. Once frozen, transfer the cubes to a freezer bag.
Shelf Life of Ingredients
- Frozen strawberries: Keep well for around six months in the freezer.
- Ripe bananas: Use them in up to three days. After that, they turn brown.
- Almond milk: Check the date on the carton. Once opened, use it within seven days.
- Cocoa powder: It lasts for two to three years if stored in a cool place.
- Honey or maple syrup: They can last for years without spoiling.
- Almond butter: Store it in the fridge to last for three months after opening.
- Vanilla extract: It can last indefinitely when kept properly.
- Chia seeds: They stay fresh for about two years if stored dry and cool.
By knowing how to store leftovers and freeze ingredients, you can enjoy this smoothie anytime!
FAQs
Can I make this smoothie ahead of time?
Yes, you can make this smoothie ahead of time. Store it in the fridge for up to 24 hours. Just keep it in an airtight container. Note that it might separate a bit. Give it a good shake or stir before you drink. This method helps save time on busy mornings.
What can I use instead of almond butter?
If you don’t have almond butter, you can use other nut butters. Peanut butter works well and adds a nice taste. Sunflower seed butter is another good choice for nut-free diets. You can even try cashew butter for a creamier texture. Each option brings its unique flavor to the smoothie.
How do I make this smoothie thicker?
To make your smoothie thicker, add more frozen strawberries. You can also use less almond milk. Another great tip is to add chia seeds or oats. Both options increase thickness while adding nutrition. Blend until you reach your desired smoothness. Enjoy a rich and creamy treat!
In this blog post, we covered all you need to know about making a great smoothie. We talked about choosing fresh strawberries and how to blend them perfectly. You learned tips for flavor, sweetness, and different options for dairy-free or protein-rich smoothies. Remember, how you store your smoothie matters too. With these ideas, you can create a tasty drink that suits your needs. Enjoy the process and have fun experimenting with flavors and textures. Smoothies are a simple way to enjoy healthy ingredients every day.


![- Rice paper wrappers - 1 ripe mango, peeled and cut into thin julienne strips - 2 ripe avocados, halved, pitted, and sliced into thin wedges - 1/2 cucumber, peeled and julienned - 1 cup shredded carrots - 1/4 cup fresh mint leaves, torn if large - 1/4 cup fresh cilantro leaves - 1 tablespoon sesame seeds (optional) - 3 tablespoons soy sauce - 1 tablespoon freshly squeezed lime juice - 1 teaspoon honey or agave syrup - 1/2 teaspoon freshly grated ginger Mango avocado summer rolls shine with fresh ingredients. You need rice paper wrappers to hold all this goodness. The key fresh items are ripe mango and creamy avocado. Their flavors blend perfectly. Crunchy cucumber and colorful carrots add texture and fun. Fresh herbs like mint and cilantro brighten the rolls. For a twist, sprinkle sesame seeds for extra crunch. Now, let's talk about the dipping sauce. It's easy to make and enhances the taste. Just mix soy sauce, lime juice, honey, and ginger. This sauce adds a tangy, sweet kick that pairs well with the rolls. You can find the full recipe with all these details. Enjoy creating your mango avocado summer rolls today! To start, you need to make the dipping sauce. In a small mixing bowl, add the soy sauce, lime juice, honey or agave syrup, and grated ginger. Whisk these ingredients together well. This sauce adds a bright, tangy flavor that pairs nicely with the fresh summer rolls. Set it aside for the flavors to blend. Next, grab a shallow dish or a large plate. Fill it with warm water. Take one rice paper wrapper and dip it in the warm water for about 10 seconds. You want it to be soft but not too mushy. Carefully lift it out and lay it flat on a damp kitchen towel or a clean surface. This makes it easier to work with. Now it’s time to layer your ingredients. In the center of the rice paper wrapper, place a few strips of mango, a couple of avocado slices, sticks of cucumber, and a handful of shredded carrots. Don’t forget the fresh mint and cilantro leaves! They add a burst of flavor. You can also sprinkle sesame seeds on top for extra crunch if you like. To roll up the summer rolls, fold the sides of the wrapper over the filling. Then, gently roll the wrapper away from you while tucking in the filling tightly. This helps keep everything secure inside. Repeat this for the rest of the wrappers and filling. You’ll soon have a beautiful platter of summer rolls! After rolling, place the summer rolls on a serving plate. Cover them with a damp cloth. This keeps them fresh and prevents them from drying out while you finish the rest. Make sure they stay moist for the best taste. When you are ready to serve, present the summer rolls with the dipping sauce on the side. This makes it fun for everyone to dip their rolls as they wish. Enjoy the fresh flavors and the crisp textures of your homemade Mango Avocado Summer Rolls! For the full recipe, check out the complete instructions above. To avoid tearing the rice paper wrappers, keep these tips in mind: - Soak each wrapper just until soft, about 10 seconds in warm water. - Work on a damp surface to prevent sticking. - Don't overfill the wrapper; less is more! - When rolling, tuck in the sides gently, but firmly. Choosing ripe ingredients makes a big difference. Here are my best practices: - Look for mangoes that yield slightly to gentle pressure. - Choose avocados that are firm but not hard. - Select cucumbers that are crisp and have a smooth skin. - Fresh herbs should be vibrant and fragrant; avoid wilting. Want to make your rolls even better? Try these ideas: - Add cooked shrimp or chicken for extra protein. - Include bell peppers or radishes for a crunchier bite. - Swap in different herbs like basil or parsley for a unique flavor. - Use quinoa or rice noodles for a heartier filling. For the complete recipe, check out the [Full Recipe]. Enjoy making your summer rolls! {{image_4}} If you want a fully plant-based dish, there are many fun swaps. You can use tofu instead of fish or shrimp. Try adding bean sprouts for a nice crunch. You can also toss in sliced bell peppers for a splash of color. These swaps keep the rolls fresh and tasty. To give your summer rolls an Asian twist, add fresh herbs like basil or dill. You can also use hoisin sauce or peanut sauce instead of the soy sauce. A drizzle of sriracha can bring some heat. These changes will make your rolls pop with flavor. For easy assembly, prep your ingredients ahead of time. Cut your mango, avocado, and cucumber in advance. Store them in airtight containers in the fridge. This way, you can whip up these rolls in just a few minutes. It makes summer roll night so much easier! For the full recipe, check out the detailed instructions provided. To keep your summer rolls fresh, wrap them in a damp cloth. Place them on a plate and cover with plastic wrap. This method helps prevent the rice paper from drying out. Store the rolls in the fridge if you plan to eat them later. Try to consume them within 24 hours for the best taste and texture. If you want to freeze unassembled summer rolls, first prepare the ingredients. Gather your mango, avocados, and veggies. Then, make the rolls but do not roll them up yet. Lay each rice paper wrapper flat on a parchment-lined tray. Fill the wrappers but leave them open. Freeze the tray for about one hour. Once frozen, place the rolls in a freezer bag. This helps you save space and keeps them fresh. When you’re ready to enjoy your summer rolls, take them out of the freezer. Place them in the fridge for a few hours or overnight to thaw. For a faster option, you can run them under warm water for a few seconds. Never use a microwave, as it can make the rice paper tough. After thawing, assemble the rolls with your favorite sauce, and enjoy a fresh and tasty meal! To make Mango Avocado Summer Rolls, follow these steps: 1. First, prepare the dipping sauce by mixing soy sauce, lime juice, honey, and ginger. 2. Next, soak rice paper wrappers in warm water for about 10 seconds. 3. Lay the softened wrapper on a damp surface. 4. Place mango strips, avocado slices, cucumber sticks, shredded carrots, and herbs in the center. 5. Optionally, add sesame seeds for crunch. 6. Fold the sides over the filling and roll tightly. 7. Repeat until all ingredients are used. Serve with dipping sauce. This process is easy and fun, perfect for summer gatherings. Yes, you can add meat or seafood to your summer rolls. Here are some great options: - Grilled chicken or shrimp adds protein and flavor. - Thinly sliced beef or pork works well too. - For a tasty twist, try crab or lobster. These additions make your rolls even more filling and delicious. You can try different dipping sauces beyond the suggested one. Here are some ideas: - Peanut sauce for a creamy texture and nutty flavor. - Sweet chili sauce adds a spicy kick. - A simple vinegar and soy sauce mix is also tasty. Feel free to experiment with flavors you love! You now know how to make delicious summer rolls with fresh ingredients and tasty dipping sauce. We covered the necessary components, step-by-step instructions, and tips for success. Remember, you can customize these rolls to fit your tastes. With the right care, you can store or even freeze them for later. Enjoy the fun of making and sharing these tasty treats. Trust me, they’re worth the effort!](https://dishtreats.com/wp-content/uploads/2025/07/e9c41e61-bd63-46cf-9640-b605cd161798-768x768.webp)
![- 2 cups canned chickpeas - Fresh herbs: parsley and cilantro - Key spices: cumin and coriander To make crispy baked falafel, start with the main ingredients. The base is 2 cups of canned chickpeas. They give falafel a wonderful texture. Fresh herbs like parsley and cilantro add bright flavors. Using both gives a fresh taste. Spices are key too. Ground cumin and coriander bring warmth and depth. They create a balance that makes falafel special. - Aromatics: onion and garlic - Binding ingredients: tahini and breadcrumbs - Optional: olive oil for drizzling Next, we have additional ingredients. Aromatics like onion and garlic make the falafel smell great. They add a savory note that enhances the dish. Binding ingredients are also important. Tahini helps hold everything together. Breadcrumbs add crunch and structure. If you want a golden and crispy finish, drizzle olive oil on top. It helps the falafel bake evenly and get that perfect crunch. For the full recipe, check out the detailed instructions provided. 1. Preheat your oven to 400°F (200°C). 2. Line a baking sheet with parchment paper. This helps prevent sticking and ensures even cooking. 3. In a food processor, add the drained chickpeas, chopped onion, minced garlic, parsley, cilantro, cumin, coriander, baking powder, salt, black pepper, lemon juice, and tahini. 4. Pulse the mixture. You want it well combined but still chunky, like a paste. 1. Transfer the mixture to a mixing bowl. 2. Fold in the breadcrumbs. If it feels wet, add more breadcrumbs until it holds together. 3. Use your hands to shape the mixture into small balls or patties, about the size of golf balls. 4. Place them evenly on the prepared baking sheet. 1. Drizzle a good amount of olive oil over the falafel balls. This helps them get crispy. 2. Bake in the oven for about 20 minutes. Flip them halfway through for even browning. 3. Look for a golden brown color and a crispy outside. 4. Let the falafel cool for a few minutes before serving. This enhances their flavor and texture. For the full recipe, check the detailed instructions provided earlier. To make your falafel crispy, olive oil plays a key role. It adds flavor and helps create a golden crust. I suggest drizzling olive oil on top of your falafel before baking. This not only enhances the taste but also promotes even cooking. Baking techniques matter too. Preheat your oven to 400°F (200°C) for the best results. Use parchment paper on your baking sheet to prevent sticking. This will help the falafel stay intact and crisp up nicely. Adjusting the breadcrumbs is also important. If your mixture feels too wet, add more breadcrumbs until it holds together. If you want extra crunch, consider using panko breadcrumbs. They give a delightful texture that enhances the overall experience. For a beautiful presentation, arrange your crispy baked falafel on a colorful platter. Pair it with a creamy tahini sauce and a fresh cucumber-tomato salad. This adds both flavor and visual appeal. You might also want to serve it with warm pita bread. Add a side of hummus or tzatziki for a fun dip. These flavors complement the falafel well and make for a tasty meal. One common mistake is not achieving the right consistency. If your falafel falls apart during baking, it may be too wet. Always ensure your mixture holds together well. Adjust breadcrumbs as needed to fix this. Another mistake is overcrowding the baking sheet. Give each falafel space to bake evenly. This helps them crisp up nicely. Flip them halfway through baking for even browning. Finally, don’t skip the cooling step. Let the falafel cool for a few minutes after baking. This enhances their flavor and texture, making your dish even more delightful. For the full recipe, you can refer to the detailed guide above. {{image_4}} You can make falafel even more exciting by adding spices. Try mixing in smoked paprika for a warm, smoky flavor. If you want a brighter taste, add some zest from a lemon. You might also enjoy using fresh herbs like mint or dill for a fresh twist. Each region has its own spin, so feel free to experiment! For those who need gluten-free options, you can swap breadcrumbs with ground oats or almond flour. Both work well and keep the falafel together. If you want to make it vegan, just skip the tahini or use sunflower seed butter instead. This way, everyone can enjoy these tasty bites! While baking gives falafel a nice crunch, you can try air frying them for a quicker option. Air-frying uses less oil and cooks them evenly. You can also pan-fry them in a little oil for golden-brown goodness. Just make sure to keep an eye on them so they don’t burn. For the full recipe, check out the detailed steps above to make your crispy baked falafel! To store leftover falafel, place them in an airtight container. This helps keep them fresh. If you have sauce, store it separately. Leftover falafel stays tasty for about three to four days in the fridge. For freezing, let the falafel cool completely first. Then, space them on a baking sheet and freeze until solid. Once frozen, transfer them to a freezer bag. This way, they won’t stick together. To reheat, bake them directly from the freezer. Heat at 375°F (190°C) for about 15-20 minutes until warm and crispy. In the fridge, your leftover falafel will last about three to four days. If frozen, they can last up to three months. Just remember to seal them well to avoid freezer burn. Enjoy your crispy baked falafel whenever you want with these easy storage tips. For the full recipe, check back to create these delicious bites! Crispy baked falafel pairs well with many sides. You can serve it with: - Hummus for a creamy dip - Tahini sauce for added flavor - Tzatziki sauce for a cool touch - Fresh salads like cucumber-tomato salad - Pita bread for a classic wrap These options enhance the meal and add fresh tastes. To achieve extra crispy falafel, follow these tips: - Use panko breadcrumbs instead of regular ones. They add more crunch. - Drizzle olive oil generously over the falafel before baking. This helps with browning. - Bake at 400°F (200°C) for the best crispiness. Flip them halfway for even cooking. These small changes can make a big difference in texture. Yes, you can use dried chickpeas! Here’s how: - Soak 1 cup of dried chickpeas overnight in water. This softens them. - Drain and rinse the chickpeas before using them in the recipe. - Cook them in boiling water for about 1 hour until tender. Using dried chickpeas gives a fresher taste but takes more time. For the complete details on making crispy baked falafel, check out the [Full Recipe]. Baked falafel is easy and fun to make. By using canned chickpeas, fresh herbs, and key spices like cumin, you create a tasty dish. Follow the steps for perfect shapes, timing, and crunch. Remember to use olive oil and adjust breadcrumbs for crispiness. Play with flavors and storage tips to maximize your enjoyment. With this guide, you can make falafel that delights and satisfies. Now, you're ready to impress friends and family with your delicious creation!](https://dishtreats.com/wp-content/uploads/2025/06/049364cc-9d10-4f08-b8d2-88a9c6614eda-768x768.webp)


