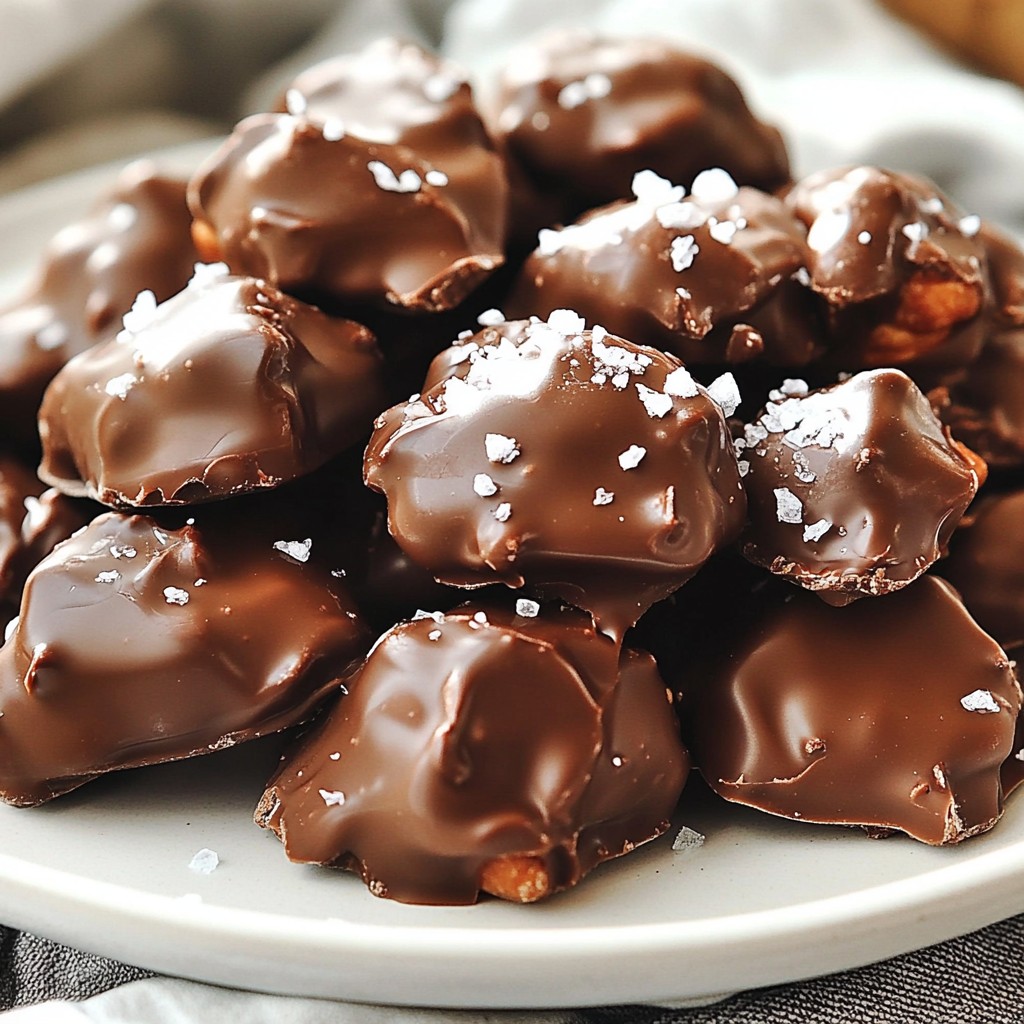
Are you ready to satisfy your sweet tooth with a fun and easy treat? Chocolate Covered Peanut Clusters are the perfect mix of crunchy nuts and smooth chocolate. With just a handful of ingredients and simple steps, you can create this delightful snack in no time. In this article, I’ll show you how to whip up these tasty clusters and share tips to make them even better. Let’s dive in!
Why I Love This Recipe
- Simple to Make: This recipe requires minimal ingredients and is incredibly straightforward, making it perfect for cooks of all skill levels.
- Customizable: You can easily swap out the peanuts for your favorite nuts or even add dried fruits for a unique twist.
- Perfect for Sharing: These clusters make a delightful treat for parties, gifts, or just to enjoy during family movie nights.
- Decadent Flavor: The combination of rich chocolate and crunchy peanuts creates an irresistible flavor that satisfies any sweet tooth.
Ingredients
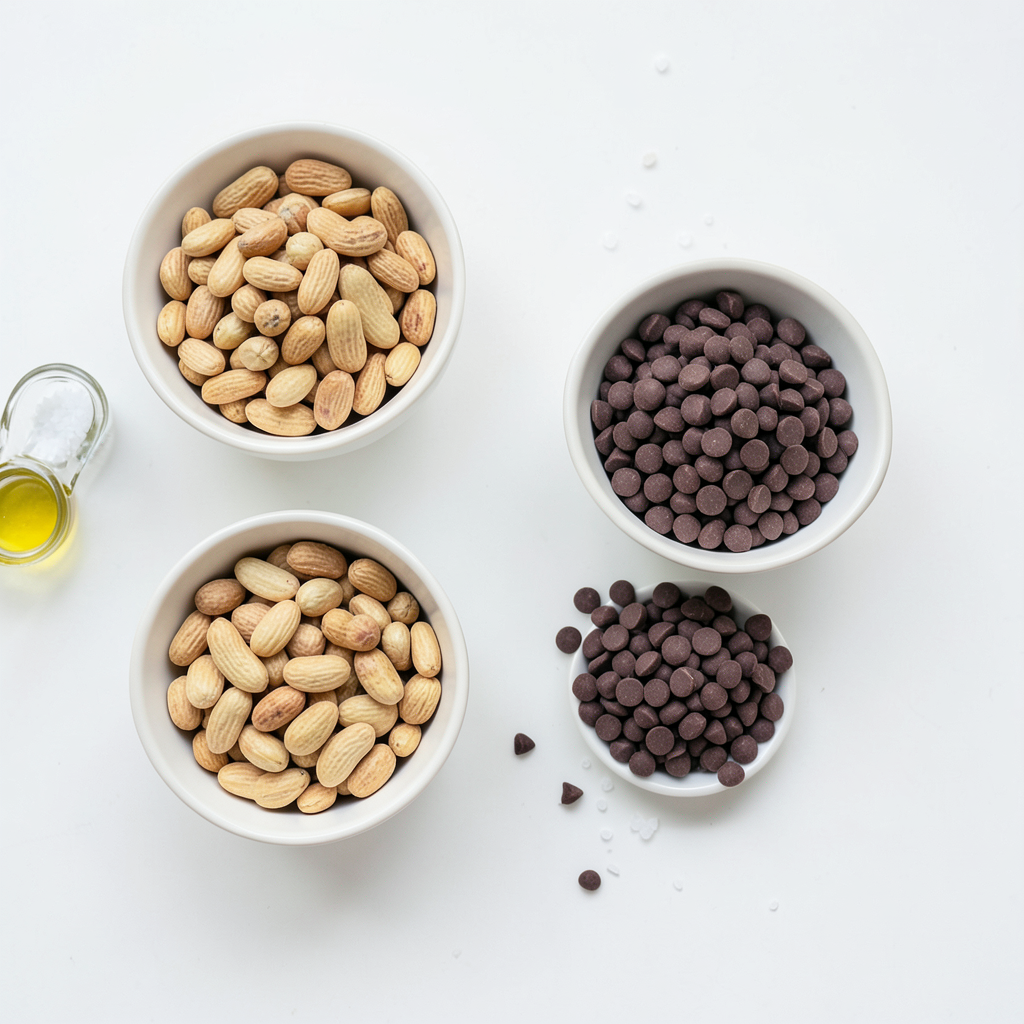
To make delicious chocolate covered peanut clusters, you'll need a few simple ingredients. Here’s what you should gather:
- 2 cups roasted unsalted peanuts
- 1 cup semi-sweet chocolate chips
- 1/2 cup milk chocolate chips
- 1 teaspoon coconut oil (or butter)
- Optional: Sea salt for sprinkling
These ingredients work together to create a sweet and crunchy treat. The roasted unsalted peanuts bring a lovely nutty flavor. The semi-sweet and milk chocolate chips blend perfectly, giving a rich taste. Adding coconut oil helps the chocolate melt smoothly, making it easy to coat the peanuts. If you like a touch of salt, sprinkling sea salt on top adds a nice contrast to the sweetness.
Gather these items, and you’re ready to create a crowd-pleasing snack!
Step-by-Step Instructions
Preparation of Baking Sheet
First, line a baking sheet with parchment paper or a silicone mat. This helps the clusters not to stick. Set the lined sheet aside for later use.
Melting the Chocolate
Next, take a microwave-safe bowl. Add the semi-sweet and milk chocolate chips with the coconut oil. Heat this mix in the microwave for 30 seconds. Stir well after each interval. Repeat until the chocolate melts smoothly. This should take about 1 to 2 minutes. Stop when you see a glossy texture.
Combining Peanuts and Chocolate
Once the chocolate is melted, take the bowl out of the microwave. Add the roasted unsalted peanuts to the chocolate. Gently fold the peanuts into the chocolate. Make sure all the peanuts are covered well.
Forming Clusters
Now, use a spoon or small cookie scoop. Portion out the chocolate-covered peanuts onto the lined baking sheet. Leave enough space between each cluster. This helps them stay separate as they set.
Adding Sea Salt
If you like a salty kick, sprinkle a pinch of sea salt on each cluster. This enhances the sweet flavor of the chocolate.
Chilling to Set
Place the baking sheet in the refrigerator. Let the clusters chill for about 30 to 40 minutes. This cooling time allows the chocolate to harden completely.
Storing Clusters
Once the chocolate is set, lift the clusters off the parchment paper carefully. You can serve them right away as a treat. If you want to save some, store them in an airtight container. Keep the container in a cool, dry place for up to two weeks. Enjoy them over time!
Tips & Tricks
Best Practices for Melting Chocolate
To melt chocolate well, avoid burning it. Heat it slowly. Use your microwave at 30-second intervals. Stir between each interval. This helps the chocolate melt evenly. If you don’t have a microwave, use a double boiler. Place a heat-safe bowl over simmering water. This method gives you more control and prevents burning.
Ensuring Perfect Clusters
When forming your clusters, space them well on the baking sheet. Leave about two inches between each one. As they set, they may spread. Cooling time is also key. Let your clusters chill for 30 to 40 minutes. This helps the chocolate harden and keeps the shape.
Variations in Ingredients
You can switch up the nuts or chocolate types. Try almonds or cashews for a twist. For chocolate, dark or white chocolate works great too. To add flair, mix in spices like cinnamon or a dash of vanilla. Experimenting with flavors can lead to a new favorite treat!
Pro Tips
- Use High-Quality Chocolate: The flavor of your clusters heavily depends on the chocolate you choose. Opt for high-quality chocolate chips for the best taste and texture.
- Cool the Chocolate Gradually: After melting, let the chocolate cool for a minute before adding the peanuts. This helps prevent the nuts from getting too hot and losing their crunch.
- Experiment with Mix-Ins: Feel free to add other ingredients like dried fruits, pretzels, or even a dash of cinnamon to customize your clusters and make them unique!
- Store Properly: To maintain freshness, store your chocolate clusters in an airtight container in a cool place. This will help preserve their texture and flavor for longer.
Variations
Different Types of Chocolate
You can use different chocolates for your clusters. Dark chocolate gives a rich flavor. It has less sugar and adds depth to each bite. You can use a mix of dark and milk chocolate too.
White chocolate is another fun choice. It adds a sweet touch and makes the clusters look pretty. Try using it for a sweeter treat.
Nut Variations
Peanuts are great, but you can switch things up! Almonds add a lovely crunch. They have a unique taste that pairs well with chocolate. Cashews also work well. Their creamy texture adds richness to the clusters. Feel free to mix and match your nuts for fun flavors.
Flavor Additions
Want to make your clusters special? Add spices or extracts! A pinch of cinnamon gives warmth. A drop of vanilla enhances the sweet taste. You can even try a bit of sea salt for balance. These small changes can make a big difference in flavor. Explore these ideas to find your favorite twist!
Storage Info
Best Storage Methods
To keep your chocolate covered peanut clusters fresh, use an airtight container. This helps prevent moisture from ruining their texture. A glass jar or a plastic container with a tight seal works great. Avoid using a paper bag, as it allows air in.
Shelf Life of Chocolate Clusters
You can store these tasty treats for up to two weeks. If kept in a cool, dry place, they will stay delicious. Check for any signs of melting or stickiness before eating. If they look good, they should taste great!
Tips for Freshness
Keep your clusters cool and dry. Heat can melt the chocolate, making them sticky. A pantry shelf or a cool kitchen cabinet is best. Avoid areas near the stove or windows, as heat can ruin their charm.
FAQs
How to make chocolate covered peanut clusters easily?
Making chocolate covered peanut clusters is simple. First, line a baking sheet with parchment paper. Melt semi-sweet and milk chocolate chips with coconut oil in the microwave. Stir every 30 seconds until smooth. Then, fold in roasted unsalted peanuts until they are well coated. Scoop out clusters onto the lined sheet, leaving space between each. Chill in the fridge for 30 to 40 minutes to set.
Can I use different types of chocolate?
Yes, you can use different types of chocolate. Dark chocolate adds a rich flavor. White chocolate gives a sweet and creamy taste. Each type will change the clusters' final flavor. Feel free to mix and match as you like. Just remember to adjust the melting time if needed.
What are the best tips for ensuring chocolate doesn’t burn?
To avoid burning chocolate, melt it in short intervals. Use a microwave-safe bowl and heat in 30-second bursts. Stir well between each heating. If chocolate starts to look thick, stop heating. Adding a little coconut oil can help keep it smooth.
How long do they need to chill to set properly?
The clusters should chill in the fridge for about 30 to 40 minutes. This time allows the chocolate to harden. You want the chocolate to be firm but not too cold. Check them after 30 minutes to see if they are set.
Are these clusters suitable for gifting?
Absolutely! Chocolate covered peanut clusters make a great gift. You can package them in a clear bag or a decorative box. Add a ribbon for a nice touch. They are perfect for holidays, birthdays, or just because. Your friends and family will love them!
You now know how to make delicious chocolate peanut clusters. We covered the key ingredients, from roasted peanuts to chocolate choices. The step-by-step guide ensures a smooth cooking process. Remember, using the right techniques helps avoid burning chocolate. Feel free to explore variations with different nuts and flavors. Store your clusters well for freshness. Now, enjoy your treats or gift them to others. Happy making and sharing your tasty creations!