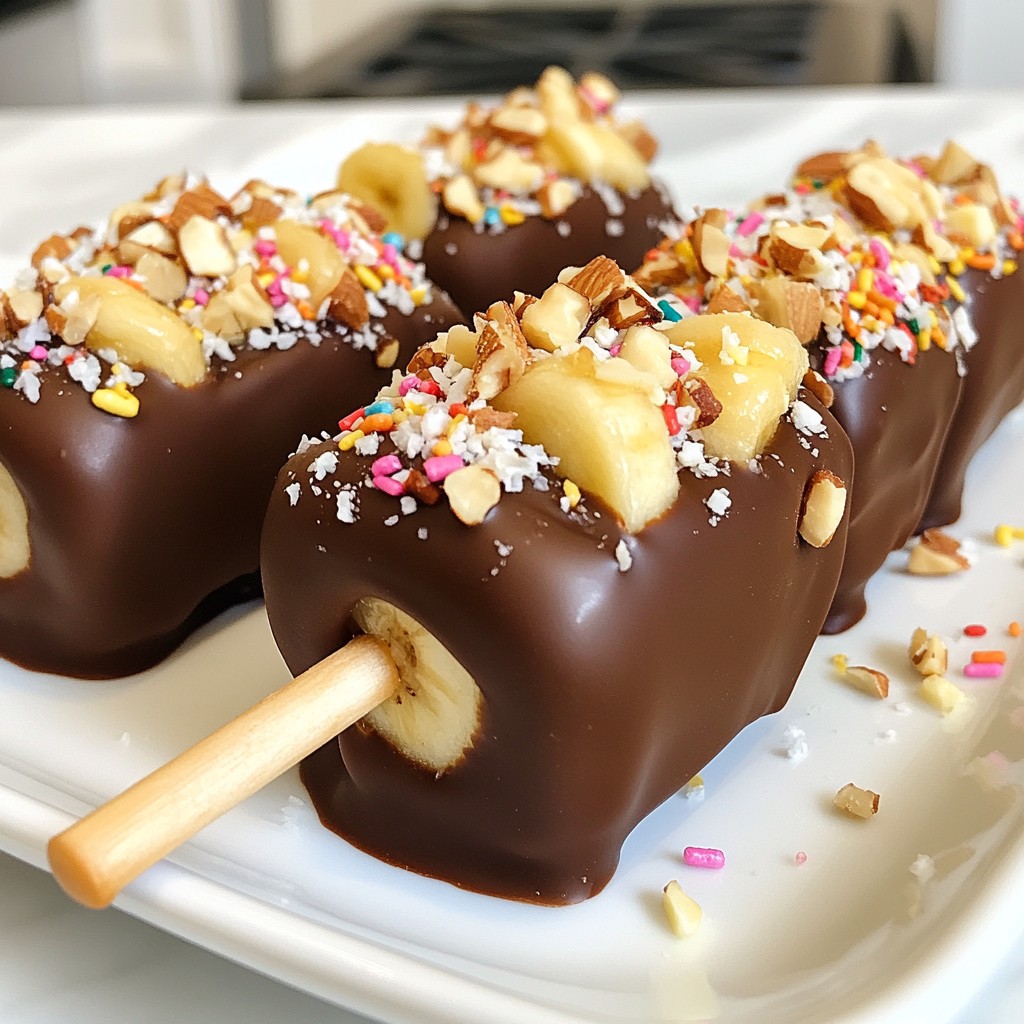
Are you ready to enjoy a tasty treat that’s fun to make? Chocolate Covered Banana Pops are the perfect frozen delight for everyone! With just a few simple ingredients and steps, you can turn ripe bananas into a delicious snack. I’ll guide you through creating these yummy pops, adding toppings, and even storing them! Grab your bananas and let’s get started on this sweet adventure!
Why I Love This Recipe
- Healthy Treat: These banana pops are a delicious way to enjoy fruit while satisfying your sweet tooth without the guilt.
- Customizable: You can easily switch up the toppings to match your preferences or dietary needs, making them fun for everyone!
- Kid-Friendly: This recipe is a hit with kids, making it a great choice for parties or as a fun activity to do together in the kitchen.
- Quick and Easy: With minimal prep time and simple ingredients, these banana pops are perfect for a last-minute dessert.
Ingredients
List of Ingredients Needed
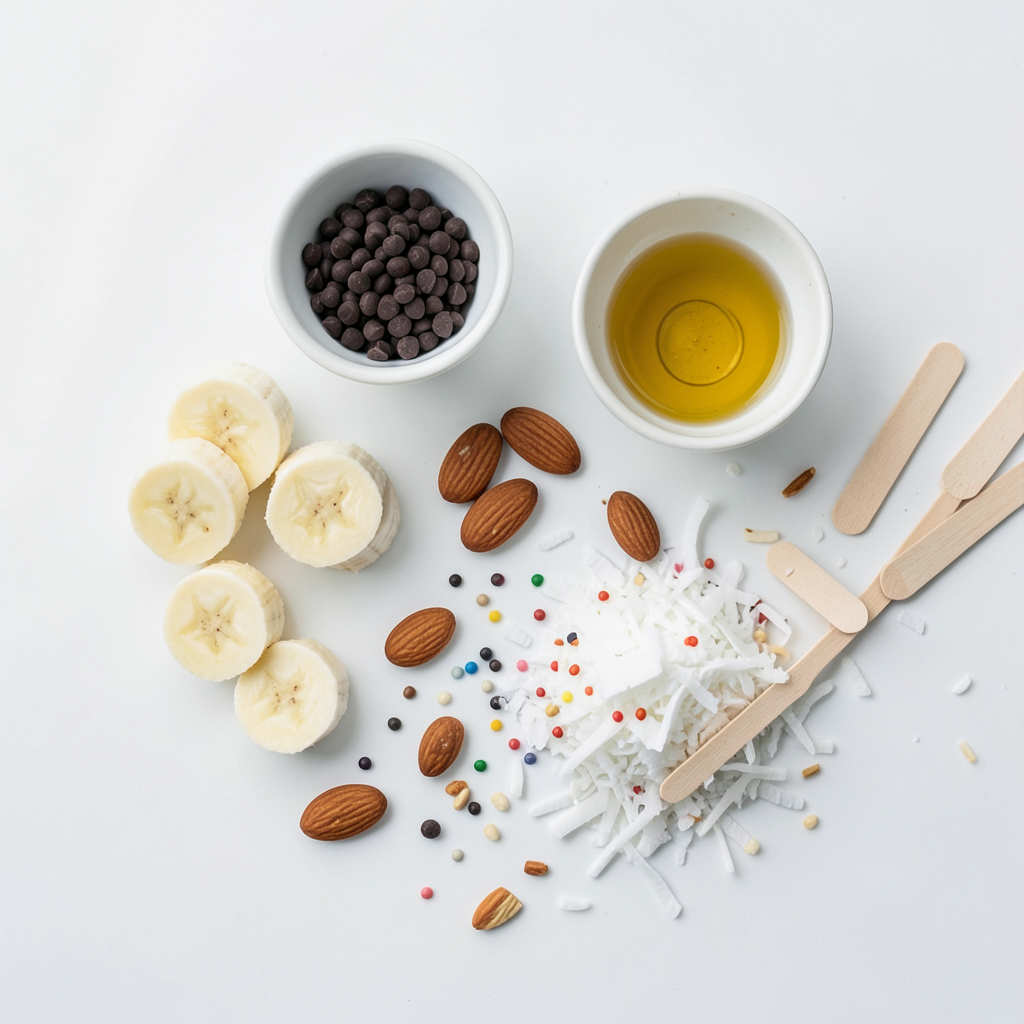
- 2 ripe bananas
- 1 cup dark chocolate chips
- 1 tablespoon coconut oil (optional)
Optional Toppings
- 1/4 cup chopped nuts
- 1/4 cup unsweetened shredded coconut
- 1/4 cup colorful sprinkles
Equipment Required
- Wooden popsicle sticks
- Baking sheet
- Parchment paper
To make chocolate covered banana pops, you need simple ingredients. Start with two ripe bananas. They should be yellow and slightly soft for the best flavor. Next, get one cup of dark chocolate chips. If you like it sweeter, you can use milk chocolate chips instead.
Coconut oil is optional but helps make the chocolate smoother. If you want to add some fun, consider toppings. Chopped nuts add crunch. You can choose almonds, walnuts, or peanuts. Shredded coconut gives a tropical taste, while colorful sprinkles bring joy to your treat.
For equipment, you need wooden popsicle sticks. These will hold your banana pops. A baking sheet is also essential for freezing. Lastly, use parchment paper to keep the pops from sticking.
Gather these ingredients and tools, and you are ready to create a tasty frozen delight!
Step-by-Step Instructions
Preparing the Bananas
- Start by peeling the bananas. This is easy and quick.
- Slice them into 1-inch thick rounds. Aim for even sizes.
- Next, insert a wooden popsicle stick into the center of each slice. Push gently until it is secure.
- Arrange the banana pops on a baking sheet lined with parchment paper. Make sure they are not touching.
- Place the baking sheet in the freezer for about 30 minutes. You want them firm to the touch.
Melting the Chocolate
- Grab a microwave-safe bowl. Add the dark chocolate chips and coconut oil if you want.
- Microwave the mix in 30-second intervals. Stir well between each interval.
- Keep an eye on the chocolate. You want it glossy and smooth, not burnt.
Dipping and Decorating
- Once the banana pops are firm, take them out of the freezer.
- Dip each banana slice into the melted chocolate. Make sure it is fully coated.
- Let any extra chocolate drip off back into the bowl.
- While the chocolate is still wet, sprinkle on your toppings. Use chopped nuts, shredded coconut, or colorful sprinkles.
- Return the decorated banana pops to the parchment-lined baking sheet. Place them back in the freezer.
- Allow them to freeze for another hour. This ensures the chocolate coating sets nicely.
Tips & Tricks
Achieving the Perfect Chocolate Coating
To get a smooth chocolate coating, use coconut oil. It helps the chocolate melt evenly. This oil makes the chocolate glossy and easier to dip. Without it, chocolate can clump together. Always stir well as you melt it to keep it smooth.
Freezing Techniques
Set your freezer to the coldest level. This helps the banana pops freeze quickly. Freeze them for about 30 minutes before dipping. This will keep them firm and easy to coat. To prevent sticking, place parchment paper on your baking sheet. Lay the pops on this paper, so they don’t freeze together.
Presentation Tips
Serve your banana pops on a bright platter. This makes them look fun and inviting. For a special touch, drizzle melted chocolate or honey over the top. Use a squeeze bottle for control. You can also sprinkle extra toppings for color and texture.
Pro Tips
- Use Ripe Bananas: The riper the bananas, the sweeter and creamier they will be. Look for bananas with brown spots for the best flavor.
- Customize Your Toppings: Get creative with your toppings! Try crushed cookies, mini marshmallows, or even a drizzle of caramel sauce for a unique twist.
- Melt Chocolate Properly: To avoid burning the chocolate, melt it in short intervals and stir well. This ensures a smooth and glossy finish.
- Storage Tips: Keep the banana pops in an airtight container in the freezer for up to a week to maintain their freshness and texture.
Variations
Different Chocolate Options
You have options when it comes to chocolate. Milk chocolate gives a sweet taste. Dark chocolate offers a richer flavor. Both work great for banana pops. You can even mix them for a fun twist.
White chocolate is another choice. It adds a creamy and sweet touch. Use it if you want a different flavor profile. You can melt it the same way as dark chocolate. Just remember, white chocolate doesn’t have the same depth as dark.
Seasonal Toppings
Get creative with toppings based on the season. For Halloween, use orange-colored sprinkles. During Christmas, you can add crushed candy canes. For summer, try colorful fruit pieces like strawberries or blueberries.
Mixing in fruits adds freshness. You can also use candy for a fun crunch. Think mini chocolate chips or colorful gummies. These toppings not only look good but taste great too!
Dietary Modifications
If you're looking for nut-free options, skip the nuts. You can still enjoy tasty toppings like coconut or sprinkles. For a vegan version, use dairy-free chocolate. There are many brands that offer great taste without animal products.
Gluten-free options are easy too. Most ingredients are naturally gluten-free. Just check the chocolate labels to ensure they are safe. This way, everyone can enjoy these chocolate-covered banana pops!
Storage Info
How to Store Banana Pops
To keep your banana pops fresh, use airtight containers. They help avoid freezer burn. You can also use freezer bags. Just make sure to push out all the air. This keeps your pops tasting great.
Freezing Duration
Banana pops stay good in the freezer for about one month. After that, they may lose flavor. If you see ice crystals or a strange smell, it's time to toss them out. Always check before you eat.
Reheating Instructions
You don't need to reheat banana pops. Instead, let them sit at room temperature for a few minutes. This helps soften them a bit. You can also run them under warm water for a quick defrost. Serve them right away for the best taste!
FAQs
Can I use frozen bananas?
Yes, you can use frozen bananas. Frozen bananas work well in recipes like smoothies or banana bread. They are soft and sweet. However, they may not hold their shape as well in pops. If you choose frozen bananas, thaw them slightly. This makes them easier to dip in chocolate.
How can I make these banana pops healthier?
You can make these banana pops healthier by using a few simple swaps. Consider using dark chocolate with at least 70% cocoa. It has less sugar and more antioxidants. You can also use yogurt instead of chocolate. Greek yogurt adds creaminess and protein. Another option is to skip the toppings or use fruits like berries or nuts. This cuts down on sugar and calories.
What can I serve with Chocolate Covered Banana Pops?
Chocolate covered banana pops pair well with many snacks. You can serve them with fresh fruit like strawberries or blueberries. Yogurt is another tasty option. For a fun twist, try serving them with a small bowl of nut butter for dipping. They also go well with a glass of milk or a smoothie.
You now know how to make tasty chocolate-covered banana pops. Start with bananas, chocolate, and coconut oil. Use fun toppings and stick them on popsicle sticks. Melt chocolate without burning it, then coat the bananas well. Freeze them right for the best taste. Feel free to switch up the chocolate or try new toppings.
Keep these pops in the freezer for later. With these tips, you can enjoy sweet treats anytime!