Looking for a quick and tasty treat? Look no further! Chocolate covered banana bites are simple to make and oh-so-delicious. With just three main ingredients, you can whip up these sweet snacks in no time. Whether for a party or a late-night craving, these treats hit the spot. Keep reading to discover easy steps, fun variations, and tips for perfecting your chocolate-covered bites!
Ingredients
Essential Ingredients
To make chocolate-covered banana bites, you need:
– 2 large ripe bananas
– 1 cup dark chocolate chips
– 1 tablespoon coconut oil
These ingredients create a tasty treat that is easy to prepare. The ripe bananas bring natural sweetness, while the dark chocolate adds rich flavor. Coconut oil helps the chocolate melt smoothly and gives a nice sheen.
Optional Add-Ins
You can make your banana bites even better with these optional add-ins:
– 1/4 cup chopped nuts
– Sea salt for sprinkling
– 1/4 cup shredded coconut or mini marshmallows
Chopped nuts add crunch, while sea salt enhances flavor. Shredded coconut or mini marshmallows add fun and sweetness. You can mix and match these options based on your taste.
Step-by-Step Instructions
Preparing the Bananas
– Peel and cut the bananas into rounds.
– Arrange banana slices on a parchment-lined baking sheet.
First, I peel the bananas and slice them into rounds about one inch thick. This size is perfect for dipping. Next, I lay the slices on a baking sheet lined with parchment paper. This step ensures they don’t stick together later.
Melting the Chocolate
– Combine chocolate chips and coconut oil in a microwave-safe bowl.
– Melt in 30-second intervals until smooth.
I take a microwave-safe bowl and add chocolate chips with coconut oil. The coconut oil helps the chocolate melt smoothly. I microwave the mixture for 30 seconds at a time, stirring in between. This method prevents burning and helps create a creamy texture.
Dipping the Banana Slices
– Dip each banana slice in the melted chocolate.
– Let excess chocolate drip back into the bowl.
Using a fork or toothpick, I dip each banana slice into the melted chocolate. I make sure each piece is well-coated. After dipping, I let any extra chocolate drip back into the bowl to avoid a mess.
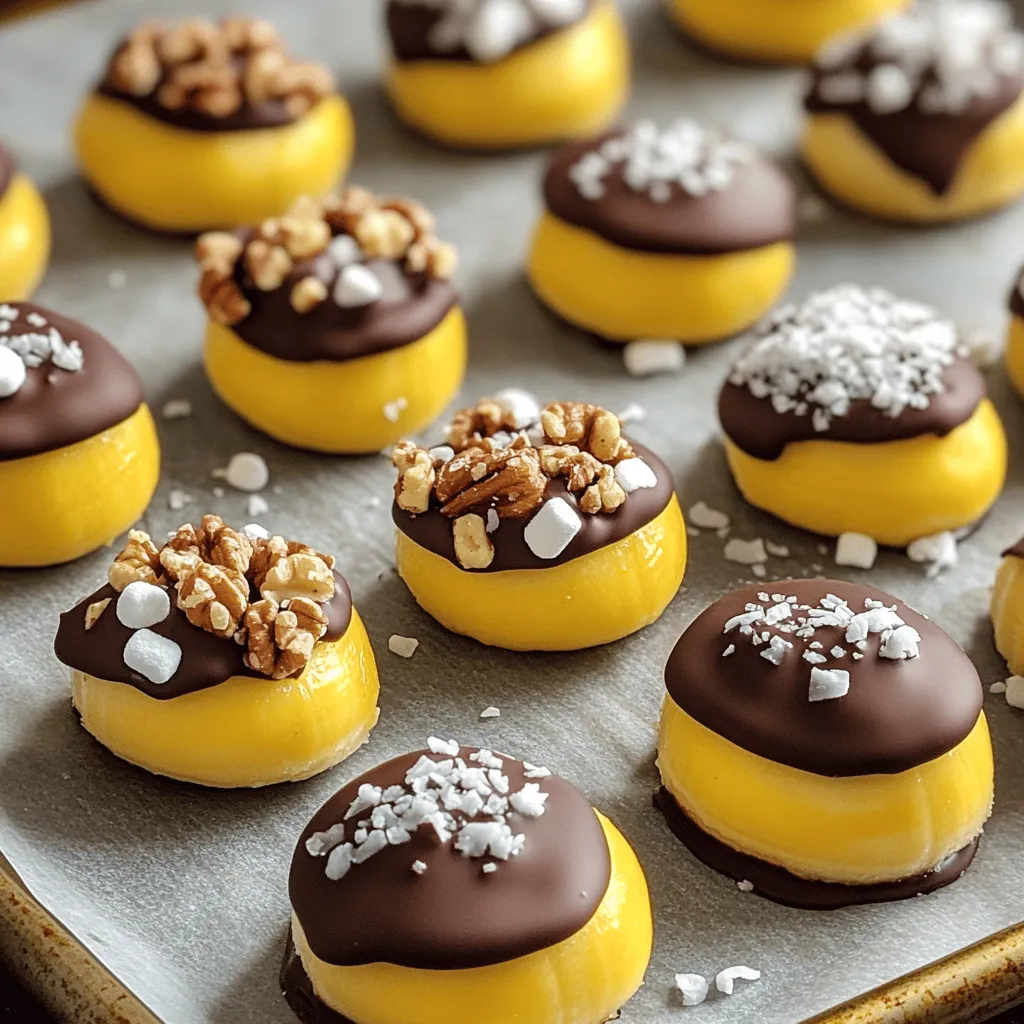
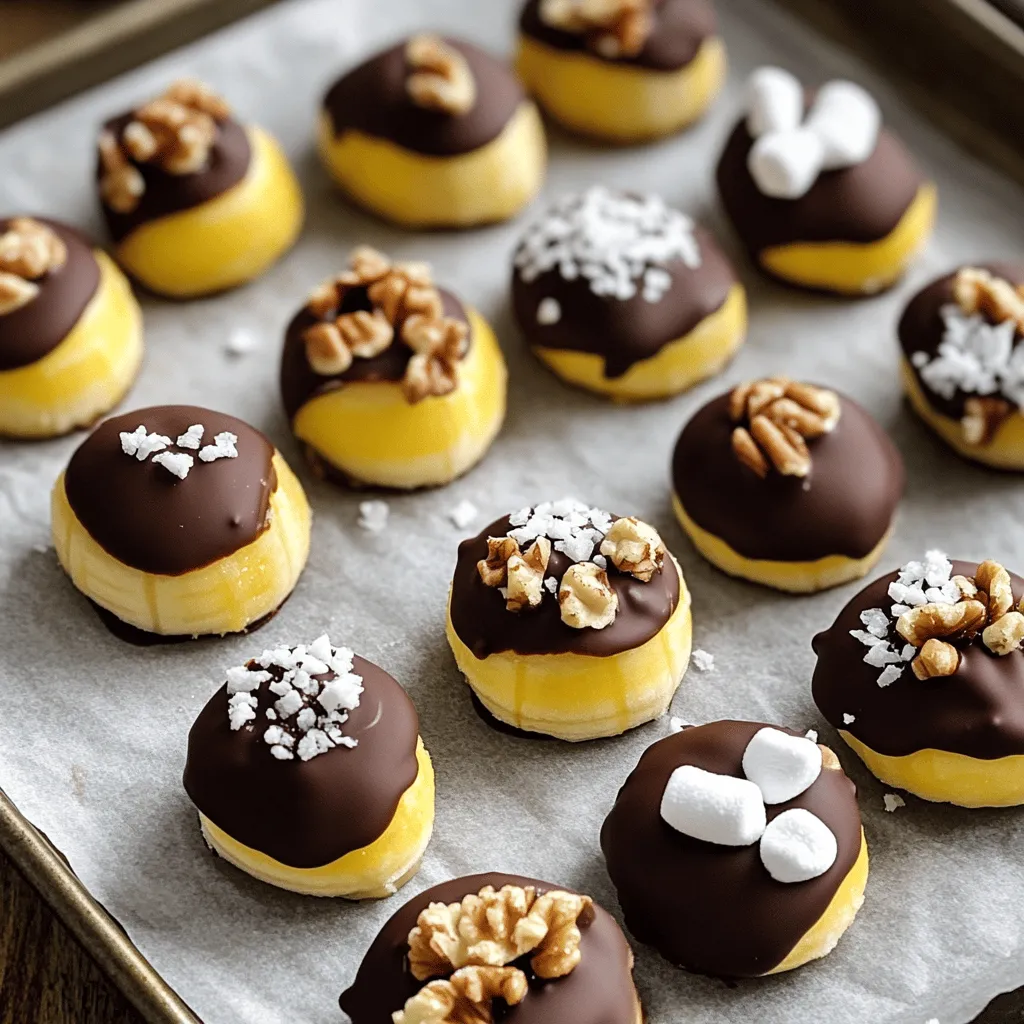
Adding Toppings
– Sprinkle chopped nuts or coconut/marshmallows on top.
– Ensure toppings adhere while chocolate is warm.
While the chocolate is still warm, I sprinkle chopped nuts on half of the bites. For a fun twist, I add shredded coconut or mini marshmallows on the rest. The warmth of the chocolate helps the toppings stick well.
Chilling to Set
– Transfer to freezer and chill for 15-20 minutes.
Next, I place the baking sheet in the freezer. I let the banana bites chill for about 15 to 20 minutes. This step makes the chocolate harden, giving a nice crunch when you bite into them.
Serving Suggestions
– Lift bites off the parchment paper.
– Arrange bites on a serving platter with sea salt sprinkle.
Once the chocolate is set, I gently lift the bites off the parchment paper. I place them on a serving platter. A light sprinkle of sea salt enhances the flavor and makes them even more delicious.
Tips & Tricks
Choosing the Right Bananas
– Use ripe bananas for optimal sweetness.
– Ensure they are firm yet slightly soft to the touch.
Choosing the right bananas is key. Ripe bananas taste sweet and creamy, perfect for this treat. When you press gently, they should give a bit but not feel mushy. This balance ensures a good texture when you bite into them.
Perfect Chocolate Consistency
– Adjust chocolate type for desired flavor.
– Use coconut oil for a smoother texture.
Chocolate type matters. Dark chocolate gives a rich taste, while semi-sweet chocolate is sweeter. For a smooth finish, add coconut oil when melting. This helps the chocolate flow easily and makes a nice coating.
Ensuring Even Coating
– Use a fork or toothpick for easier dipping.
– Coat thoroughly for a delicious chocolate coverage.
Dipping can be tricky. A fork or toothpick helps you grab the banana slice without a mess. Make sure to cover each slice well with chocolate. This ensures every bite is tasty and satisfying.
Variations
Flavor Combinations
You can make your chocolate-covered banana bites even more fun. Start by choosing different types of chocolate. Dark chocolate gives a rich taste, while milk chocolate is sweeter. White chocolate adds a creamy touch.
Want a little heat? Add spices like cinnamon or cayenne. Just a pinch can give your banana bites a nice kick. Experiment with these flavors to find your favorite mix.
Unique Toppings
Toppings can change the whole vibe of your bites. Crushed graham crackers add a crunchy, sweet twist. Toffee bits give a rich caramel flavor.
You can also use different nuts. Walnuts, almonds, or pistachios all bring unique textures. Try out several nuts to see which one you enjoy most.
Adding Fruit
Let’s get creative with fruit! You can add other fruits like strawberries or pineapple chunks. These fruits can balance the sweetness of the banana.
Mixing banana with other fruits creates an exotic flavor. A banana-strawberry combo is always a hit. The options are endless, and each bite can be a new adventure.
Storage Info
Storing Leftovers
To keep chocolate-covered banana bites fresh, store them in an airtight container. Place the container in your fridge. They will stay good for up to a week. This way, you can enjoy the treats later without losing flavor or texture.
Freezing Options
If you want to keep your bites longer, freezing is a great option. Place the banana bites on a baking sheet and freeze them first. Once they are solid, transfer them to a freezer-safe bag. This helps save space. When you are ready to eat them, let the bites thaw for a few minutes before serving. They will still taste delicious!
FAQs
How long do chocolate-covered banana bites last?
Stored in the fridge, they last up to a week; frozen bites last longer. The cool air helps keep them fresh. If you want them for later, just pop them in the freezer. They can stay there for a few months without losing taste.
Can I use other types of chocolate?
Yes, you can use milk, white, or even flavored chocolate options. Each type gives a different taste. Milk chocolate is sweeter. White chocolate is creamy. Flavored options can add fun twists, like peanut butter or mint.
What’s the best way to dip without making a mess?
Use a fork or toothpick, and let excess chocolate drip off into the bowl. This trick keeps your hands clean. It also helps the chocolate coat the bananas evenly. Don’t rush; take your time for the best results.
Are these chocolate-covered banana bites healthy?
They can be a healthy treat depending on chocolate type and toppings used. Dark chocolate has health benefits. Adding nuts boosts protein. Just watch how much chocolate you use. Enjoy the bites, but keep balance in mind.
In this blog post, we explored how to make delicious chocolate-covered banana bites. You learned the essential and optional ingredients, as well as step-by-step instructions to prepare them. I also shared tips for better flavor and texture. Remember, you can get creative with toppings and chocolate types. These bites are fun, tasty, and can fit any diet if made wisely. Enjoy making this treat. It’s simple and sure to please everyone!


