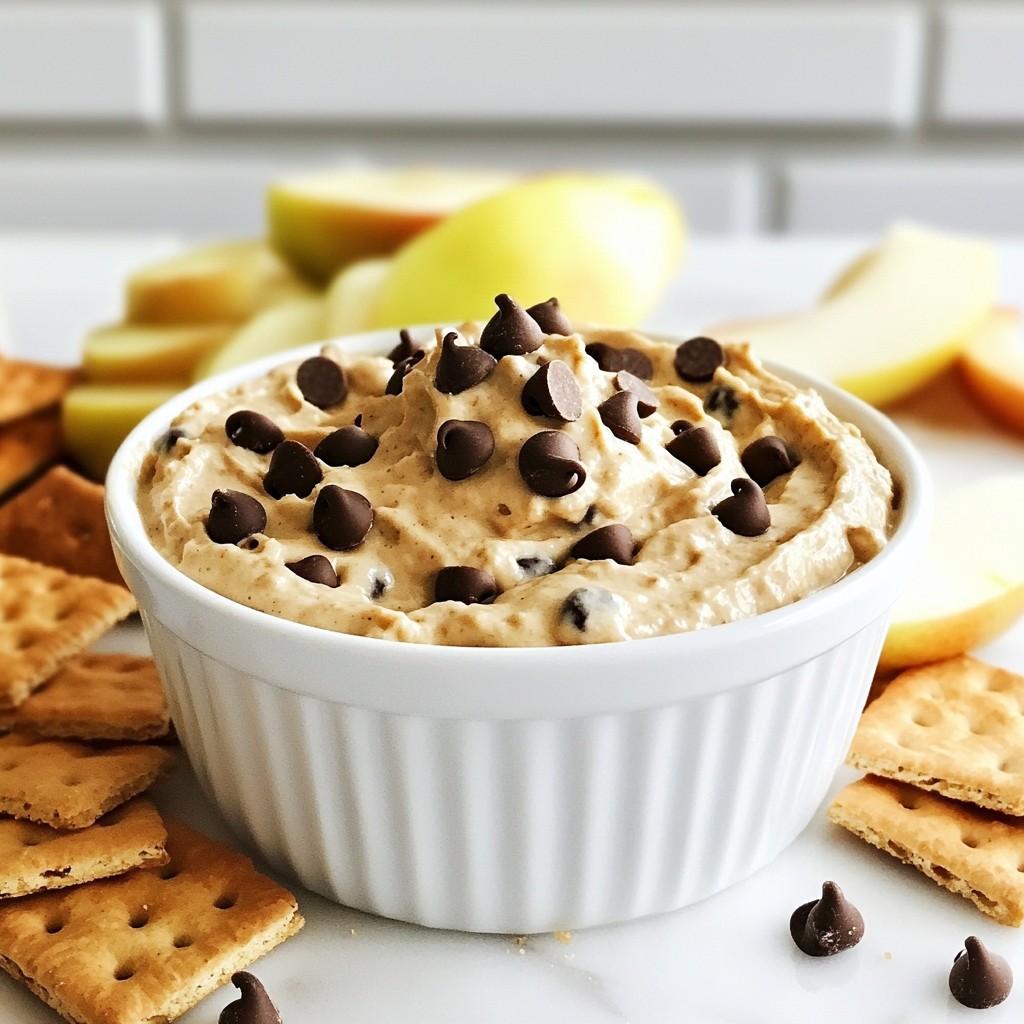
Who doesn’t love the sweet taste of cookie dough? In this post, I will show you how to make a simple and delicious chocolate chip cookie dough dip. This treat is perfect for parties or just a fun snack at home. With easy ingredients and clear steps, you’ll have this dessert ready in no time. Let’s dive in and get started on this tasty journey!
Why I Love This Recipe
- Decadent Flavor: This dip captures the classic taste of cookie dough, making it a delightful treat for any sweet tooth.
- Easy to Make: With just a few simple steps and ingredients, you can whip up this indulgent dip in no time.
- Versatile Dipping Options: Serve it with graham crackers, apple slices, or pretzels for a fun and interactive dessert experience.
- Perfect for Any Occasion: Whether it's a party, movie night, or just a sweet craving, this dip is always a crowd-pleaser.
Ingredients
Complete List of Ingredients
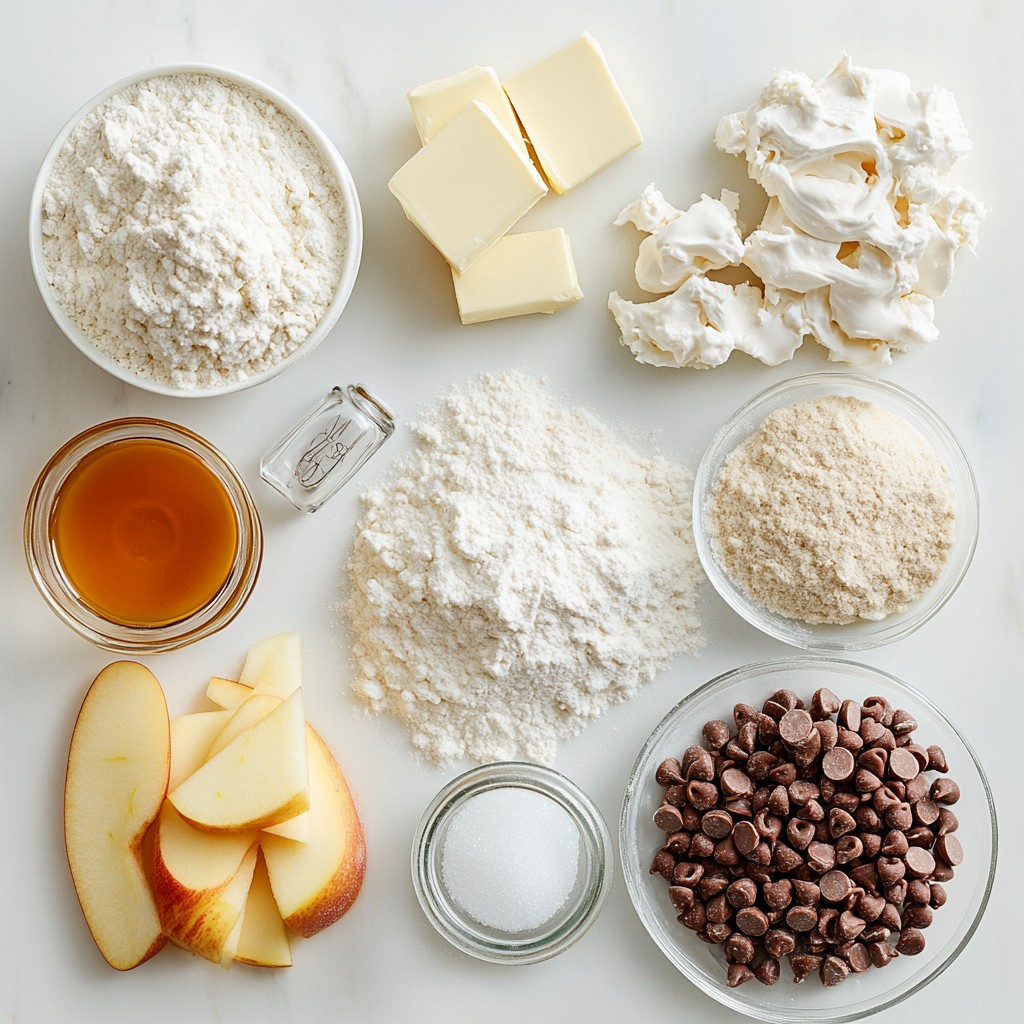
To make this tasty chocolate chip cookie dough dip, gather the following items:
- 1 cup all-purpose flour
- ½ cup packed brown sugar
- ½ cup granulated sugar
- 1 teaspoon vanilla extract
- ½ cup unsalted butter, softened at room temperature
- 1 cup cream cheese, softened for easy blending
- 1 cup mini chocolate chips
- ¼ teaspoon salt
- Optional: graham crackers, fresh apple slices, or crunchy pretzels for dipping
Alternative Ingredients for Dietary Restrictions
If you have dietary needs, you can still enjoy this dip. Here are some swaps:
- Use gluten-free flour in place of all-purpose flour for a gluten-free version.
- Substitute dairy cream cheese with a vegan cream cheese for a dairy-free treat.
- Replace granulated sugar with coconut sugar or a sugar substitute for a lower-sugar dip.
Equipment Needed
To make this dip, you will need some basic kitchen tools:
- Medium mixing bowl
- Large mixing bowl
- Electric mixer
- Spatula or wooden spoon
- Serving bowl
- Plastic wrap
These tools will help you mix and serve your dip with ease.
Step-by-Step Instructions
Preparation of Ingredients
First, gather your ingredients. You need:
- 1 cup all-purpose flour
- ½ cup packed brown sugar
- ½ cup granulated sugar
- 1 teaspoon vanilla extract
- ½ cup unsalted butter, softened
- 1 cup cream cheese, softened
- 1 cup mini chocolate chips
- ¼ teaspoon salt
Make sure your butter and cream cheese are at room temperature. This helps them mix better. Measure everything accurately. This will make your dip taste great.
Mixing and Combining Steps
Start by mixing the flour and salt in a medium bowl. Stir until they are well combined. Set this bowl aside for later.
In a large bowl, beat the softened butter, brown sugar, and granulated sugar together. Use an electric mixer to mix for about 2-3 minutes. You want it creamy and fluffy.
Next, add the cream cheese and vanilla extract. Keep mixing until it is smooth with no lumps.
Now, take your flour mixture and slowly add it to the creamy mixture. Mix on low speed. Be careful not to overmix. This can change how your dip feels.
Finally, gently fold in the mini chocolate chips. Use a spatula or a wooden spoon. Make sure the chips are evenly spread throughout the dip.
Chilling and Serving Instructions
Transfer the dip into a serving bowl. Smooth the top with a spatula. Cover the bowl with plastic wrap. Put it in the refrigerator for at least 30 minutes. This helps the dip firm up.
When ready to serve, take it out and remove the plastic wrap. You can serve it with graham crackers, apple slices, or crunchy pretzels. For a nice touch, sprinkle a few mini chocolate chips on top. Enjoy your tasty dip!
Tips & Tricks
How to Perfect Texture and Flavor
To get the best texture, use softened butter and cream cheese. This helps mix everything smoothly. Mix the butter and sugars until they are light and fluffy. This step adds air and makes your dip creamy. When adding flour, mix on low speed. Overmixing can make the dip tough. If you want a richer flavor, add a pinch of extra salt. It balances the sweetness and makes every bite pop.
Serving Suggestions and Presentation Tips
For a stunning presentation, use a large, colorful platter. Place the dip in the center. Surround it with an array of dippable items like graham crackers, apple slices, and pretzels. This not only looks great but also gives your guests choices. To make it even more appealing, sprinkle mini chocolate chips on top. This adds a fun touch and invites everyone to dig in.
Best Dipping Options
The best dippers for this cookie dough dip are crunchy and sweet. Some favorites include:
- Graham crackers: They add a nice crunch.
- Fresh apple slices: Their tartness pairs well with the dip’s sweetness.
- Crunchy pretzels: They offer a salty contrast to the sweet dip.
Feel free to experiment with other dippers too!
Pro Tips
- Use Heat-Treated Flour: To make the dip safe to eat raw, consider heat-treating your flour. Spread it on a baking sheet and bake at 350°F (175°C) for 5-10 minutes, then let it cool before using.
- Experiment with Mix-ins: Feel free to customize your dip by adding other mix-ins like chopped nuts, toffee bits, or even a swirl of peanut butter for added flavor.
- Chill for Optimal Texture: Allow the dip to chill for at least 30 minutes; this helps to firm it up and enhances the flavors, making it even more delicious.
- Presentation Matters: Use a colorful platter to serve your dip, and consider garnishing with a sprinkle of mini chocolate chips or a drizzle of chocolate sauce for an appealing look.
Variations
Vegan Chocolate Chip Cookie Dough Dip
You can make a vegan version of this dip. Use a plant-based butter instead of regular butter. Replace cream cheese with vegan cream cheese. For sweetener, try maple syrup or coconut sugar. This keeps the rich taste while being dairy-free.
Gluten-Free Option
To make a gluten-free dip, swap all-purpose flour for gluten-free flour. Many brands offer great blends that work well in this recipe. Just ensure that your chocolate chips are also gluten-free. This way, you can enjoy the dip without worry.
Creative Mix-Ins and Add-Ons
Want to spice things up? Add in different mix-ins! Try chopped nuts, or even add a splash of almond extract for a twist. You can also mix in sprinkles for a fun look. Dried fruits like cranberries or cherries can add a nice touch too. Get creative and make the dip your own!
Storage Info
How to Store Leftovers
To store leftovers, place the dip in an airtight container. Make sure the lid seals well. This helps keep the dip fresh. Store it in the fridge for up to five days. If you want to serve it later, just scoop it out and enjoy!
Freezing Tips for Long-Term Storage
You can freeze this dip for longer storage. Use a freezer-safe container and spoon the dip inside. Leave some space at the top because it will expand. It can last up to three months in the freezer. When you want to eat it, thaw it in the fridge overnight before serving.
Shelf Life and Reheating Instructions
The dip stays good in the fridge for five days. It’s best served cold, so no need to reheat. If you prefer it softer, let it sit at room temperature for a bit before serving. Just remember that the dip tastes best when fresh!
FAQs
Can I eat raw flour in this recipe?
No, you should not eat raw flour. Raw flour can carry harmful germs. To make it safe, heat the flour before using it. You can do this by baking it at 350°F for about 5 minutes. This step makes it safe and still keeps the great taste.
How long does the dip last in the fridge?
This dip lasts for up to five days in the fridge. Make sure to store it in an airtight container. This keeps it fresh and tasty for your next snack or party.
Can I make this ahead of time?
Yes, you can make this dip ahead of time. It tastes even better after chilling in the fridge. Make it a day before your event and let it sit overnight. This gives the flavors a chance to mix well.
What can I use instead of cream cheese?
If you need a cream cheese substitute, try Greek yogurt or ricotta cheese. Both give a creamy texture. You can also use vegan cream cheese for a dairy-free option. Just make sure to adjust the amount to keep the dip thick and tasty.
This blog post covers all you need for a great dip. We shared a full list of ingredients and options for various diets. You learned step-by-step instructions, plus tips for the best flavor and texture. We also looked at fun variations, like vegan and gluten-free. Finally, I provided storage tips for keeping your dip fresh.
Try out these tips and enjoy your delicious creation!