Chipotle Lime Shrimp Skewers Juicy and Flavorful Recipe

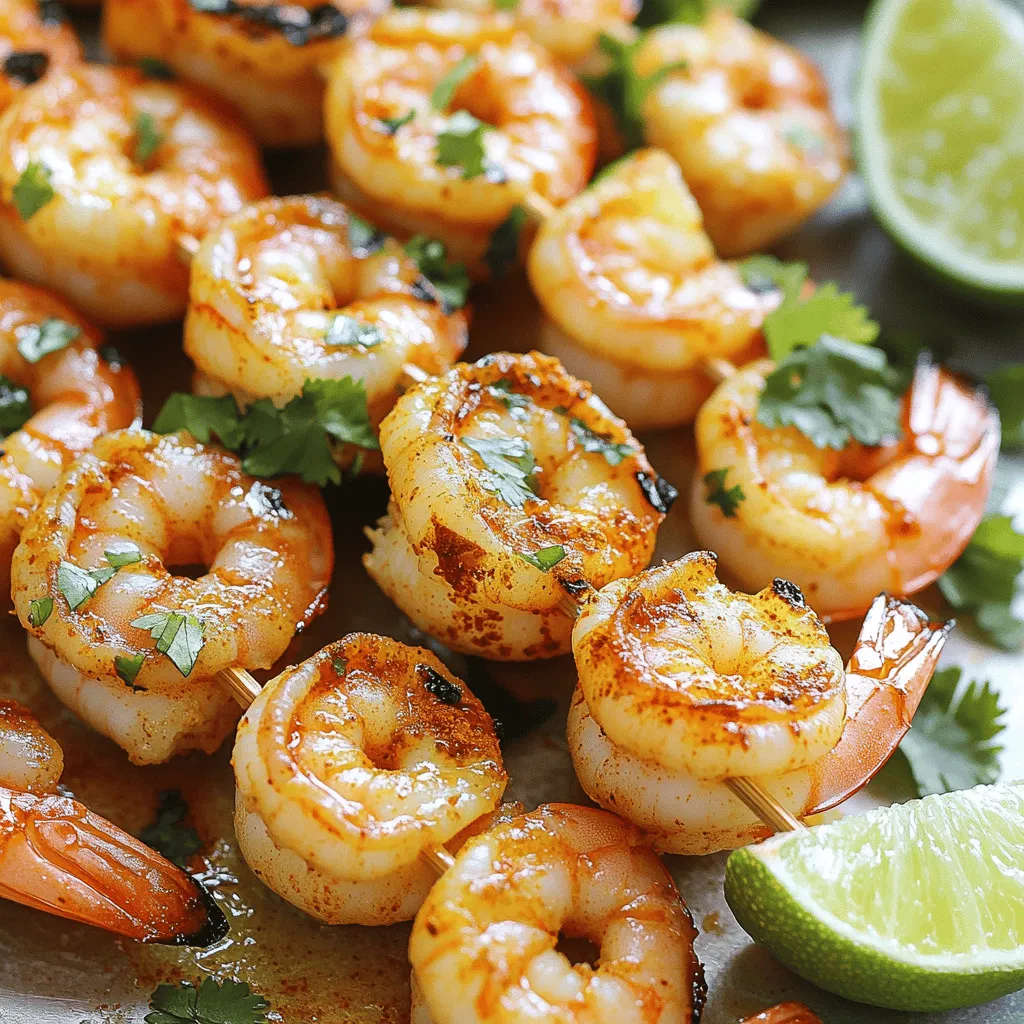
Are you ready to elevate your grilling game? These Chipotle Lime Shrimp Skewers pack bold flavors that will impress your guests. With the perfect mix of spices and a zesty lime twist, these juicy shrimp are quick to prepare and full of taste. Join me as we dive into this easy, mouthwatering recipe that’s perfect for summer cookouts or cozy dinners. Let’s get grilling!
Ingredients
Main Ingredients
- 1 pound large shrimp, peeled and deveined
- 2 tablespoons olive oil
- 2 tablespoons freshly squeezed lime juice
Spice Mix
- 1 tablespoon chipotle powder
- 1 teaspoon garlic powder
- 1 teaspoon smoked paprika
- 1 teaspoon ground cumin
- Salt and freshly ground black pepper, to taste
Garnishes and Serving
- Fresh cilantro, chopped (for garnish)
- Lime wedges (for serving)
The key to great Chipotle Lime Shrimp Skewers lies in the quality of your ingredients. You want fresh shrimp, vibrant spices, and zesty lime juice to bring out the best flavors.
Start with 1 pound of large shrimp, peeled and deveined. This size cooks quickly and stays juicy. Next, grab 2 tablespoons of olive oil. This adds richness and helps the spices stick to the shrimp. Freshly squeezed lime juice is a must. Use 2 tablespoons to brighten the dish.
For the spice mix, you need 1 tablespoon of chipotle powder for heat and smoky flavor. Add 1 teaspoon each of garlic powder, smoked paprika, and ground cumin. These spices create a warm and complex flavor profile. Don’t forget salt and freshly ground black pepper to taste. They balance the spices and enhance the shrimp’s natural sweetness.
For garnishing, chop fresh cilantro to add color and freshness. Lime wedges on the side provide an extra zing when serving.
Step-by-Step Instructions
Prepare the Marinade
First, you need to gather your ingredients. In a medium bowl, combine:
- 2 tablespoons olive oil
- 2 tablespoons freshly squeezed lime juice
- 1 tablespoon chipotle powder
- 1 teaspoon garlic powder
- 1 teaspoon smoked paprika
- 1 teaspoon ground cumin
- Salt and freshly ground black pepper, to taste
Whisk these together until smooth. This marinade packs a punch with all those flavors.
Marinate the Shrimp
Next, add 1 pound of peeled and deveined shrimp to the bowl. Make sure each shrimp gets coated well with the marinade. Cover the bowl with plastic wrap and let it chill in the fridge for about 30 minutes. This marinating time helps the shrimp soak in all that zesty flavor.
Grill the Shrimp
While the shrimp marinates, preheat your grill or grill pan over medium-high heat. If you’re using wooden skewers, soak them in water for 15-20 minutes. This helps prevent burning.
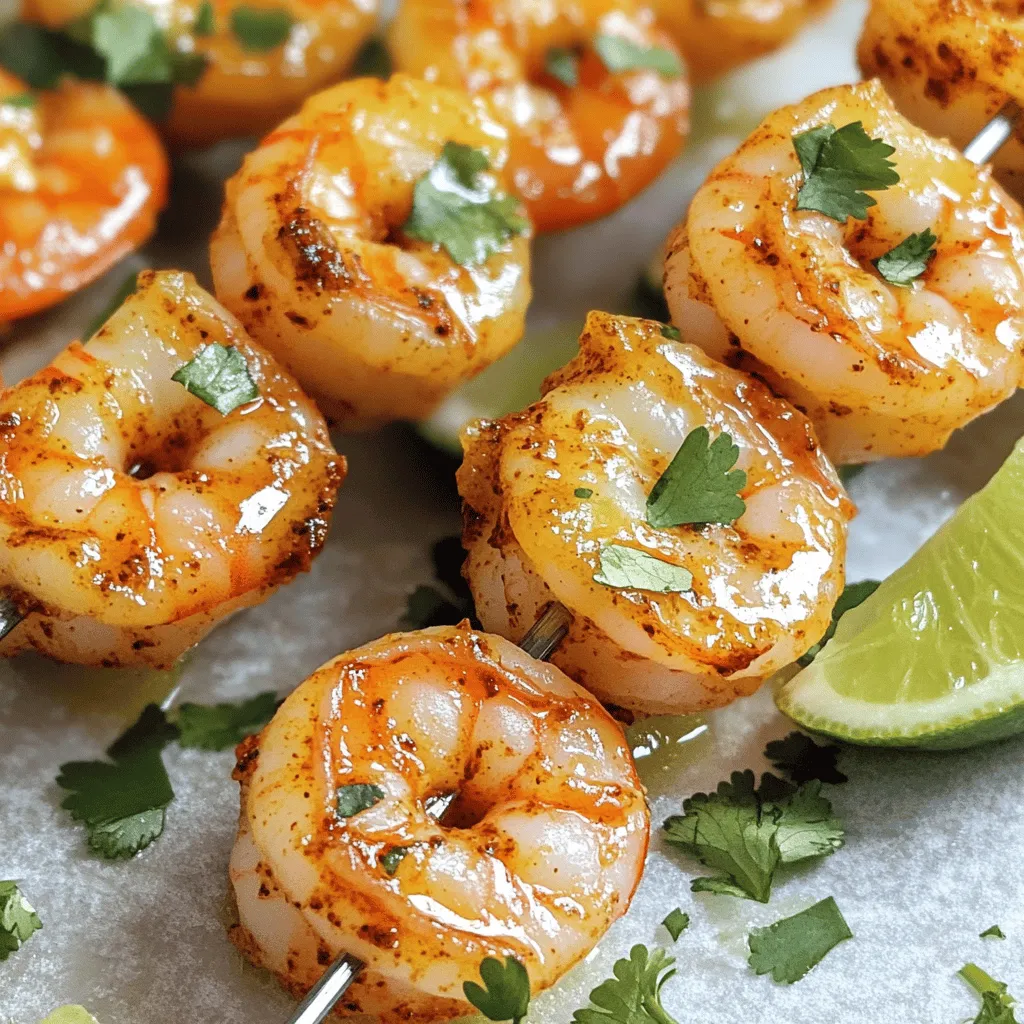
After marinating, carefully thread the shrimp onto the skewers. Aim for 4-5 shrimp per skewer. This spacing allows them to cook evenly.
Place the skewers on the grill and cook for 2-3 minutes on each side. Watch them closely; they should turn pink and opaque. Be careful not to overcook them, or they’ll become rubbery.
Once done, take them off the grill and let them rest for about a minute. This helps keep the juices inside.
To serve, garnish your skewers with freshly chopped cilantro and add lime wedges on the side. This dish is a sure crowd-pleaser.
Tips & Tricks
Achieving Perfectly Cooked Shrimp
To know when shrimp are done, look for a pink color. The shrimp should also be opaque. If they curl tightly, they are likely overcooked. Avoid this by grilling for only 2-3 minutes on each side.
- Watch closely while cooking.
- Remove them from heat when they turn pink.
- Let them rest for a minute to keep their juices inside.
Flavor Enhancements
You can add more depth to your shrimp with spices. Consider using chili powder for extra heat or fresh herbs like parsley for freshness. If you want a twist, try using lime zest in the marinade.
- Swap lime juice for orange juice for a sweeter taste.
- Mix in some honey for a sweet and spicy blend.
- Experiment with fresh garlic or shallots for added flavor.
Presentation Ideas
For a beautiful presentation, serve the skewers on a bright platter. Arrange them in a fan shape for a fun look. Garnish with chopped cilantro and lime wedges. This adds color and freshness to the dish.
- Use colorful sides like grilled veggies or a salad.
- Skewer some lime slices for a pop of color.
- Drizzle a bit of sauce or extra marinade over the top for shine.
Enjoy creating your Chipotle Lime Shrimp Skewers with these tips and tricks!

Variations
Vegetarian Option
You can make this dish vegetarian by using vegetables instead of shrimp. Great choices include bell peppers, zucchini, and cherry tomatoes. Cut the veggies into bite-sized pieces.
- Grilling times for veggies:
- Bell peppers: 3-4 minutes per side.
- Zucchini: 2-3 minutes per side.
- Cherry tomatoes: 2-3 minutes per side.
This way, you still get a tasty and colorful dish!
Spicy Version
If you love heat, you can amp up the spice. Just add more chipotle powder or a splash of hot sauce to the marinade.
- Recommended heat levels:
- For mild spice, use 1 tablespoon of chipotle powder.
- For medium spice, use 2 tablespoons.
- For hot, add a few dashes of your favorite hot sauce.
You control the heat, so make it as spicy as you like!
Cooking Methods
Grilling is great, but there are other ways to cook these skewers. You can bake or pan-sear them too.
- Baking: Preheat your oven to 400°F. Place the skewers on a baking sheet and bake for 10-12 minutes.
- Pan-searing: Heat a skillet over medium heat. Add a little oil and cook the skewers for about 2-3 minutes per side.
Adjust the cooking times based on the method you choose. Enjoy your delicious meal however you like!
Storage Information
Refrigeration Guidelines
To store leftover Chipotle Lime Shrimp Skewers, place them in an airtight container. This keeps them fresh longer. You should eat them within 2-3 days for the best taste. Avoid leaving shrimp out at room temperature for more than two hours.
Freezing Shrimp Skewers
If you want to freeze your skewers, wrap them tightly in plastic wrap. Then, place them in a freezer bag. This helps prevent freezer burn. You can freeze the skewers for up to three months. When you’re ready to eat, thaw them in the fridge overnight.
Reheating Instructions
To reheat shrimp skewers, use a grill or a skillet over low heat. This helps to keep them juicy. Avoid using the microwave, as it can dry them out. Heat for about 2-3 minutes until warmed through. For extra flavor, brush a little olive oil before reheating.
FAQs
How do I know when shrimp are fully cooked?
You can tell shrimp are cooked when they turn pink and opaque. They should curl into a C shape. If they stay a gray color or look clear, they need more time. Watch the cooking time closely. Overcooked shrimp can become tough and rubbery. Aim for 2-3 minutes per side on the grill for perfect results.
Can I make Chipotle Lime Shrimp Skewers ahead of time?
Yes, you can prepare these skewers in advance. Marinate the shrimp for up to 2 hours in the fridge. This enhances the flavor. After marinating, thread the shrimp onto skewers and cover them. Store them in the fridge until you are ready to grill. If you plan to cook later, consider marinating them the night before.
What can I serve with Chipotle Lime Shrimp Skewers?
These skewers pair well with many sides. Here are some tasty options:
- Rice: Cilantro lime rice adds a fresh taste.
- Salad: A crisp green salad offers a nice crunch.
- Vegetables: Grilled veggies like zucchini or bell peppers work great.
- Tacos: Use the shrimp in tacos with fresh toppings.
Feel free to get creative with your sides!
To sum up, this guide offers a simple way to make Chipotle Lime Shrimp Skewers. You learned about the key ingredients, marinades, and grilling tips. I shared ideas for variations and storage best practices. Remember, the right spices and cooking methods matter. You can impress friends and family with this dish. Follow these steps, and your shrimp will be tasty every time. Enjoy your cooking and the delicious results!


![To make a tasty and moist chocolate zucchini bread, gather these simple ingredients: - 1 medium zucchini, finely grated - 1 cup whole wheat flour - 1/2 cup unsweetened cocoa powder - 1/2 teaspoon baking soda - 1/2 teaspoon baking powder - 1/4 teaspoon salt - 1/2 cup pure maple syrup or honey - 1/4 cup unsweetened applesauce - 2 large eggs - 1 tablespoon vanilla extract - 1/2 cup dark chocolate chips (optional) - 1/4 cup chopped walnuts or pecans (optional) These ingredients help create a rich flavor and moist texture. The grated zucchini adds moisture without a strong taste. Whole wheat flour makes the bread hearty and healthy. Cocoa powder gives it that delicious chocolate flavor. Sweeteners like maple syrup or honey ensure the bread stays moist and sweet. Applesauce also adds moisture while cutting down on fat. The eggs help bind everything together. Optional items like dark chocolate chips can add extra richness. Walnuts or pecans bring a nice crunch. You can adjust the recipe to suit your taste. For the full recipe, refer to [Full Recipe]. 1. Preheat your oven to 350°F (175°C). Prepare a 9x5-inch loaf pan. You can grease it lightly or line it with parchment paper. This will help with easy removal once it’s baked. 2. In a large mixing bowl, combine the finely grated zucchini, maple syrup (or honey), unsweetened applesauce, eggs, and vanilla extract. Whisk them together until blended. 3. In a separate bowl, gently whisk the whole wheat flour, cocoa powder, baking soda, baking powder, and salt. Make sure they mix well to avoid clumps. 1. Gradually add the dry ingredients into the wet mixture. Stir just until combined. Avoid over mixing to keep the bread light and fluffy. 2. If you like, gently fold in dark chocolate chips and chopped walnuts or pecans. These add a nice crunch and rich flavor. 3. Carefully pour the batter into the prepared loaf pan. Use a spatula to smooth the top for an even bake. 1. Bake in the preheated oven for 45-50 minutes. Test doneness by inserting a toothpick into the center. It should come out clean or with a few moist crumbs. 2. Once baked, remove the bread from the oven. Let it cool in the pan for about 10 minutes. Then, transfer it to a wire rack to cool completely. For the full recipe, check out the details provided earlier. Enjoy your baking! To make your chocolate zucchini bread perfect, mix well but don’t overdo it. Overmixing can lead to a tough loaf. Stir the batter until just combined. This keeps the bread soft and moist. Accurate measurements matter too. Use a kitchen scale for the best results if you have one. If not, make sure to level off your measuring cups. If you want to switch up the flour, try using almond flour. It gives a nice flavor and works well in this recipe. For sweeteners, you can use agave syrup or coconut sugar. Both options keep the bread tasty and healthy. Just use the same amount as maple syrup or honey. Serve your zucchini bread warm for the best taste. Slice it and dust with powdered sugar for a pretty look. You can also spread nut butter on top for a yummy twist. Pair it with a glass of milk or a cup of tea. These drinks enhance the rich flavors of the bread. For the full recipe, check out the earlier section. {{image_4}} For those with dietary needs, you can easily adapt this recipe. - Gluten-free options: Use a gluten-free flour blend. It works well in this recipe. Just make sure it has a good mix of starch and protein. - Vegan alternatives: Replace the eggs with flax eggs. Mix one tablespoon of ground flaxseed with three tablespoons of water. Let it sit for five minutes until it thickens. You can also switch the honey with agave syrup or another plant-based sweetener. These changes keep the bread tasty while meeting different needs. You can enhance the flavor of your chocolate zucchini bread. - Adding spices like cinnamon or nutmeg: A teaspoon of cinnamon or nutmeg brings warmth. These spices pair well with chocolate and add depth to the flavor. - Incorporating other mix-ins like dried fruit: Try adding dried cherries, cranberries, or even raisins. They add sweetness and chewiness. Mix in about half a cup for the best results. These variations make your bread unique and fun! For the full recipe, check out the details above. To keep your chocolate zucchini bread fresh, store it correctly. Wrap the cooled bread tightly in plastic wrap or aluminum foil. This keeps moisture in and prevents it from drying out. Place it in an airtight container for extra protection. You can store it at room temperature for about three days. If you want to keep it longer, freezing works great. To freeze chocolate zucchini bread, slice it first. Wrap each slice in plastic wrap. Then, place the wrapped slices in a freezer-safe bag. This way, you can grab a slice whenever you want a treat. It can stay fresh in the freezer for up to three months. When you’re ready to enjoy your chocolate zucchini bread, warming it up adds to the taste. The best way to heat it is in the microwave. Place a slice on a microwave-safe plate, cover it with a paper towel, and heat for 15-20 seconds. This keeps the bread moist. You can also reheat it in the oven. Preheat the oven to 350°F (175°C). Wrap the bread in foil to prevent it from getting dry. Heat for about 10-15 minutes. This method helps keep the texture soft and warm. For the best taste, enjoy your chocolate zucchini bread within three days if stored at room temperature. If frozen, try to eat it within three months for the best flavor. To keep zucchini bread moist, use fresh zucchini. Grate it finely to release its juice. Adding unsweetened applesauce or pure maple syrup also helps boost moisture. - Bake at the right temperature. Too high can dry it out. - Don’t overmix the batter. This keeps the bread tender. - Cover the bread with foil if it browns too fast. Yes, you can use frozen zucchini. Just let it thaw and drain excess water first. Frozen zucchini works well but may change the texture slightly. - Fresh zucchini offers the best flavor and moisture. - If you have frozen, make sure to squeeze out the water. - Using frozen is a great way to reduce waste. Check for doneness with a toothpick. Insert it into the center of the bread. If it comes out clean or with a few moist crumbs, it’s done. - The edges will pull away from the pan slightly. - The top should look set and spring back when you touch it. - Baking time is usually 45-50 minutes, but ovens vary. For the complete method to make this treat, check out the Full Recipe! You’ve learned how to make delicious chocolate zucchini bread. We covered the main ingredients, step-by-step instructions, and helpful tips. Remember, precise measurements and mixing are key to success. You can also explore variations to match your tastes and dietary needs. Store your bread properly for long-lasting freshness. With these insights, you’ll enjoy baking and sharing this treat. Dive in and enjoy the process!](https://dishtreats.com/wp-content/uploads/2025/06/124341aa-b5ba-4a17-ada7-3bb78900324d-768x768.webp)
![To make this dish, you need some key items. Gather the following ingredients: - 3 cups cooked rotini pasta - 2 cups cooked chicken, shredded - 1 cup fresh mushrooms, sliced (white or cremini) - 2 cups heavy cream - 1 cup grated Parmesan cheese - 1 cup shredded mozzarella cheese - 2 cloves garlic, minced - 1 tablespoon olive oil - 1 teaspoon dried Italian herbs (such as oregano, basil, and thyme) - Salt and freshly ground black pepper, to taste - Fresh parsley, chopped (for garnish) These ingredients come together to create a creamy, rich dish that warms the soul. You can add more fun to your Chicken and Mushroom Alfredo Bake. Here are some optional items to consider: - Sun-dried tomatoes for a tangy twist - Spinach or kale for added greens - Cooked bacon for extra flavor - More cheese for a cheesier bake These add-ins make the dish your own and can enhance its taste and texture. Seasonings can elevate the dish. Here are some suggestions: - Fresh thyme or rosemary for bright flavor - Crushed red pepper flakes for heat - Extra Parmesan or mozzarella on top for a golden crust - A drizzle of truffle oil for a gourmet touch These toppings can take your Chicken and Mushroom Alfredo Bake to the next level. For the full recipe, follow the steps closely, and enjoy this creamy delight! Start by preheating your oven to 375°F (190°C). This step is key for even cooking. While the oven warms up, take a 9x13-inch baking dish. Grease it lightly with cooking spray or a bit of olive oil. This will help the pasta bake not stick to the dish. Next, grab a large skillet and heat 1 tablespoon of olive oil over medium heat. Once hot, add 2 cloves of minced garlic. Sauté this for about 1 minute. You want it fragrant but not brown. Now, toss in 1 cup of sliced mushrooms. Cook these for around 5 minutes, stirring often. They should become tender and release their juices. Add salt and black pepper to boost their flavor. In a big mixing bowl, combine 3 cups of cooked rotini pasta and 2 cups of shredded chicken. Next, add the sautéed mushrooms and 2 cups of heavy cream. Sprinkle in half of the 1 cup of grated Parmesan cheese and 1 teaspoon of dried Italian herbs. Mix everything well until it’s all coated in that creamy goodness. Pour the mixture into the greased baking dish. Spread it out evenly. Top it with the rest of the Parmesan and 1 cup of shredded mozzarella cheese for a cheesy finish. Now you are ready for the next steps in your Chicken and Mushroom Alfredo Bake journey! For the full recipe, make sure to check the details provided earlier. To get the best flavor, use fresh mushrooms. They add a rich taste to the dish. I recommend cremini or white mushrooms for this recipe. Make sure you shred the chicken finely. This helps mix it well with the pasta and sauce. For a truly creamy bake, let your pasta cool slightly before mixing it with the sauce. This prevents the cheese from clumping. Use heavy cream for the richest texture. It helps create a smooth, velvety sauce that coats the pasta perfectly. Stir the sauce gently to keep it creamy. If you want to lighten it up a bit, you can mix in some milk, but it may not be as thick. Adding a bit of reserved pasta water can also help if the sauce seems too thick. Baking at 375°F (190°C) is ideal for even cooking. Cover the dish with foil for the first part of baking. This ensures the pasta heats through without drying out. After 25 minutes, remove the foil for the last 15 minutes. This allows the cheese to brown nicely and become bubbly. Always let the dish sit for a few minutes before serving. This helps everything set and makes for easier serving. For the full recipe, check the earlier sections! {{image_4}} You can boost your Chicken and Mushroom Alfredo Bake by adding veggies. Try spinach, broccoli, or bell peppers. These veggies add color and nutrition. You can also use different proteins. Swap chicken for shrimp or cooked sausage for a new twist. Each protein brings its own flavor, making this dish more exciting. If you need gluten-free options, use gluten-free pasta. Many brands offer great choices that taste good. For a low-carb version, replace pasta with zucchini noodles or cauliflower rice. This change keeps the dish light and healthy while still being creamy and satisfying. To change the flavor, add herbs and spices to your bake. Fresh basil or parsley adds a nice touch. You can also try crushed red pepper for heat or smoked paprika for a deeper flavor. Experiment with these options to find your perfect taste. Each adjustment can make your Chicken and Mushroom Alfredo Bake feel new and fun. Check [Full Recipe] for more ideas. After enjoying your Chicken and Mushroom Alfredo Bake, store leftovers properly for the best taste. Let the dish cool down first. Then, transfer it to an airtight container. You can keep it in the fridge for up to three days. Be sure to label the container with the date. To reheat, place the leftovers in a baking dish. Cover it with foil to keep moisture in. Preheat your oven to 350°F (175°C) and bake for about 20 minutes. Stir halfway through to heat evenly. You can also microwave individual portions for a quick meal. Just add a splash of cream or milk to keep it creamy. If you want to freeze your Chicken and Mushroom Alfredo Bake, it’s easy! Use a freezer-safe container or wrap it tightly in plastic wrap and foil. You can freeze it for up to three months. When you’re ready to eat, thaw it in the fridge overnight. Bake it at 350°F (175°C) until heated through, about 30 minutes. Enjoy every creamy bite from the Full Recipe! You can prepare Chicken and Mushroom Alfredo Bake ahead of time by following these steps. First, make the dish up to the point of baking. Once you mix the pasta, chicken, and sauce, place it in your greased baking dish. Cover it tightly with plastic wrap or aluminum foil. Store it in the fridge for up to 24 hours. When ready to bake, preheat your oven to 375°F (190°C). Remove the covering and bake as directed in the Full Recipe. You may need to add a few extra minutes to the baking time. Yes, you can use different cheese in your Chicken and Mushroom Alfredo Bake. If you want a sharper flavor, try using aged cheddar or gouda. For a creamier texture, consider using cream cheese or ricotta. Blend different cheeses for a unique taste. Just ensure that the total amount of cheese stays the same for best results. Your bake will still come out tasty and creamy. You can serve many tasty sides with Chicken and Mushroom Alfredo Bake. Garlic bread is a classic choice and adds a nice crunch. A fresh green salad with a light vinaigrette pairs well too. You can add steamed vegetables like broccoli or green beans for a healthy touch. These sides balance the richness of the bake and round out your meal nicely. This blog post covered how to make a delicious Chicken and Mushroom Alfredo Bake. You learned about the main ingredients, steps to prepare, and tips for the best results. I shared ways to adapt the recipe to your liking and how to store leftovers. With these tools, you can make a creamy dish that satisfies every time. Cooking can be fun and easy when you follow simple steps. Enjoy experimenting and making this recipe your own!](https://dishtreats.com/wp-content/uploads/2025/06/8d8b4d23-05f5-46f0-9917-116c769775c3-768x768.webp)
