Chicken Caesar Wraps Quick and Tasty Meal Idea

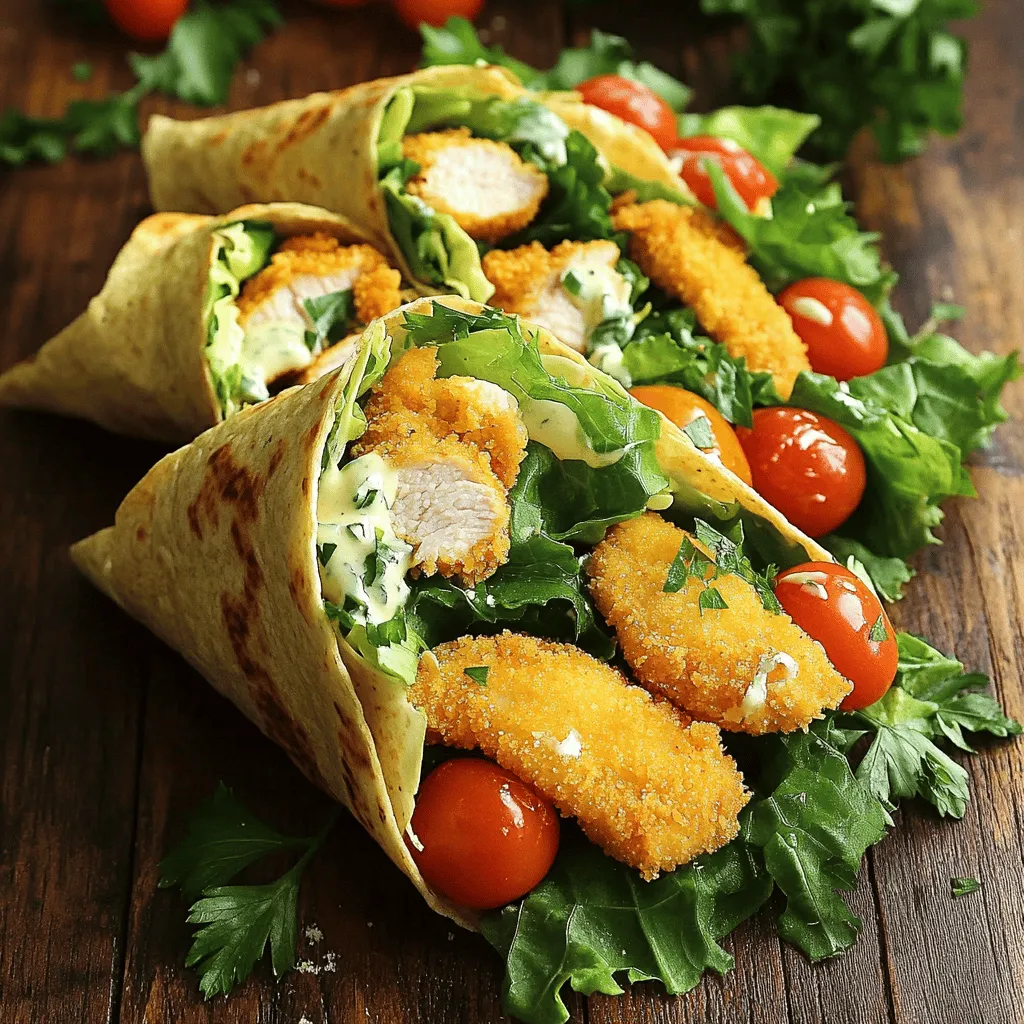
Looking for a quick and tasty meal? Chicken Caesar Wraps are your answer! These easy-to-make wraps combine savory chicken, crisp lettuce, and zesty dressing, all rolled up for a satisfying bite. Whether you’re busy during the week or planning lunch for the family, you’ll love how simple and fun these wraps are to prepare. Let’s dive into the ingredients and steps to create this delicious dish.This recipe serves four and is quick to prepare in about 30 minutes. Here’s what you need:
Fresh Ingredients for Chicken Caesar Wraps
- 2 boneless, skinless chicken breasts
- 1 cup Romaine lettuce, finely chopped
- ½ cup cherry tomatoes, halved
- ½ cup creamy Caesar dressing
- ¼ cup grated Parmesan cheese
- 1 teaspoon garlic powder
- 1 teaspoon smoked paprika
- Salt and freshly cracked black pepper, to taste
- 4 large flour tortillas
- Olive oil, for cooking
- Fresh parsley, chopped, for garnish (optional)
Essential Cooking Tools
To cook Chicken Caesar Wraps, gather these tools:
- A large skillet for cooking the chicken
- A cutting board for slicing
- A sharp knife for cutting the wraps
- A mixing bowl for tossing the filling
- Tongs to mix and serve the salad mix
Using these fresh ingredients and tools, you’ll make a meal that is both tasty and satisfying.
Step-by-Step Instructions
Preparing the Chicken
Start by seasoning the chicken. In a small bowl, mix garlic powder, smoked paprika, salt, and pepper. Rub this mix all over the chicken breasts. This step adds a lot of flavor.
Next, heat a tablespoon of olive oil in a large skillet over medium heat. Once hot, add the seasoned chicken. Cook for about 6-7 minutes on each side. You need the chicken to reach 165°F inside. This way, it is fully cooked and safe to eat.
After cooking, take the chicken out of the pan and let it rest on a cutting board for a few minutes. Resting makes the chicken juicy. Slice it into thin strips for easy wrapping.
Creating the Filling
In a large mixing bowl, combine the chopped Romaine lettuce, halved cherry tomatoes, sliced chicken, creamy Caesar dressing, and grated Parmesan cheese. Use tongs to gently toss the mixture. Make sure everything is coated well in the dressing. This blend brings all the flavors together.
Assembling the Wraps
Lay a tortilla flat on a clean surface. Spoon a good amount of the chicken Caesar mixture into the center. Be careful not to overfill it. Too much filling can make wrapping hard.
Now, fold the sides of the tortilla inward. Then, roll it tightly from the bottom to the top. This keeps all the tasty filling inside.
Repeat this process with the other tortillas and filling until you have all your wraps ready.
Optional Crisping Technique
For a crunchy texture, place the wraps seam-side down in the same skillet over medium heat. Cook for about 2-3 minutes on each side. You want them golden brown and crispy. This adds a nice touch to your wraps.
Now, your Chicken Caesar Wraps are ready to enjoy!
Tips & Tricks
Perfecting the Chicken Seasoning
To make your chicken shine, use simple spices. Combine garlic powder, smoked paprika, salt, and pepper. This mix adds great flavor. Rub it all over your chicken breasts. Let it sit for a few minutes to soak in. Cooking the chicken in olive oil gives it a nice golden crust. Make sure to cook it until it reaches 165°F. This ensures it is safe to eat.
How to Avoid Overfilling Wraps
When you assemble your wraps, be careful not to overfill them. Too much filling can lead to a messy meal. Start with a smaller amount of the chicken Caesar mixture. Use about ⅓ to ½ cup per tortilla. This way, you can fold the sides in easily. Roll it up tightly to keep everything inside.
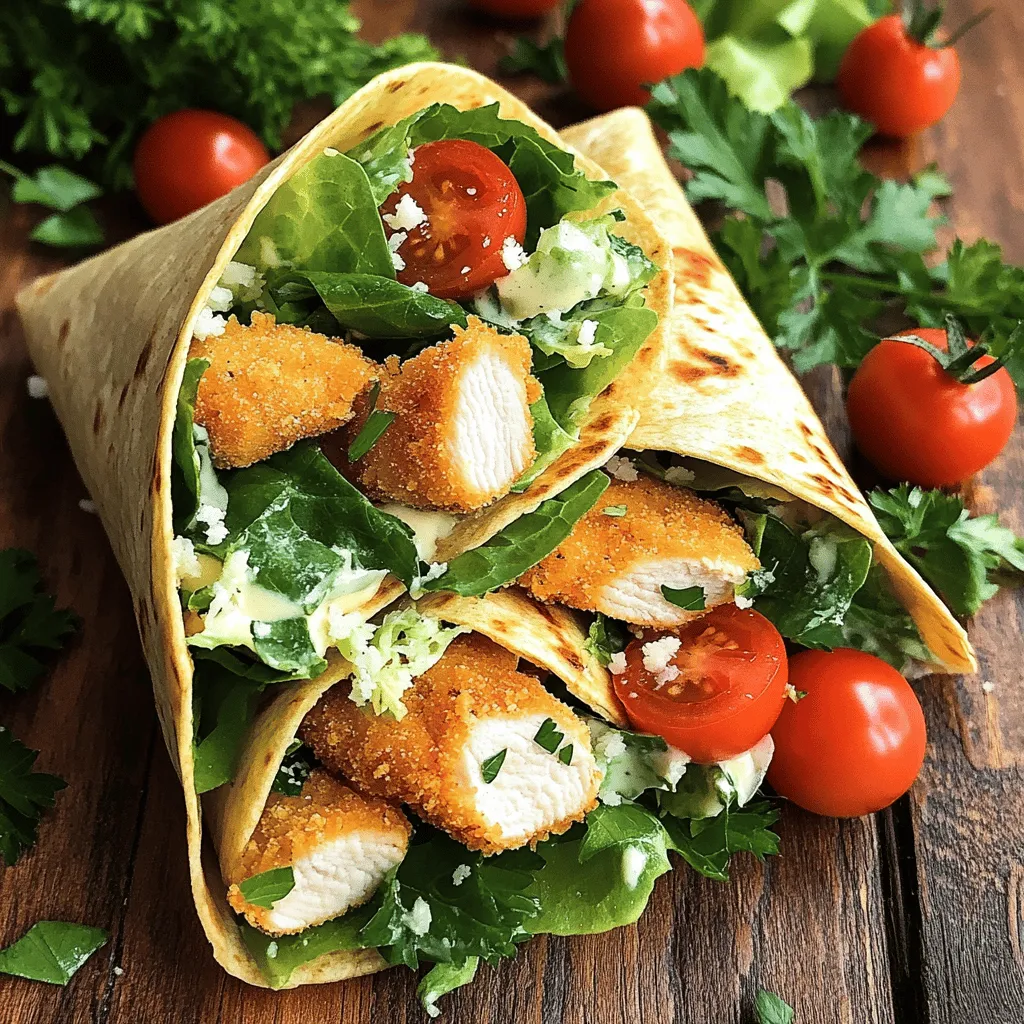
Presentation Suggestions for Serving
Serving your Chicken Caesar Wraps well makes them more appealing. Try using a wooden cutting board for a rustic look. You can also use colorful plates to brighten up the meal. Slice each wrap in half to show off the filling. Add a sprinkle of Parmesan cheese on top for a nice touch. Serve extra Caesar dressing on the side for dipping. This makes it fun and tasty!

Variations
Vegetarian Alternatives
If you want a meatless wrap, try using roasted vegetables. Grilled zucchini, bell peppers, and mushrooms work well. You can also use chickpeas or black beans for protein. Toss them with Caesar dressing and cheese for flavor. These options make a hearty wrap without chicken.
Gluten-Free Options
For gluten-free wraps, choose corn tortillas or lettuce leaves. Corn tortillas are flexible and hold up well. Lettuce leaves provide a fresh, crunchy alternative. Just be sure to check labels for gluten-free dressing. This way, everyone can enjoy a tasty wrap.
Flavor Modifications
You can change the flavors in your Chicken Caesar Wraps easily. Add sliced avocado for creaminess or spicy jalapeños for heat. Swap the Caesar dressing for ranch or a yogurt-based dressing. You can also sprinkle in some fresh herbs like basil or cilantro for extra flavor. Each twist makes the wrap special and unique.
Storage Info
Best Practices for Refrigerating Wraps
To keep your Chicken Caesar Wraps fresh, store them in the fridge. Wrap each one in plastic wrap or foil. This keeps them from drying out. Place them in an airtight container for added protection. They stay good for up to three days. Make sure to label your container with the date. This helps you remember when you made them.
Freezing Techniques for Meal Prep
If you want to make wraps ahead of time, freezing is a great option. First, wrap each Chicken Caesar Wrap in plastic wrap. Then, place them in a freezer bag. Try to remove as much air as possible. This step helps prevent freezer burn. You can freeze them for up to three months. When you’re ready to eat, just thaw them in the fridge overnight.
Reheating Instructions
To reheat your wraps, start by removing the plastic wrap. You can use a skillet or microwave. If using a skillet, heat it on medium. Place the wrap seam-side down and heat for about 2-3 minutes on each side. This method gives a nice crisp. If you use a microwave, heat it for 30-45 seconds. Check if it’s warm inside before eating. Enjoy your tasty Chicken Caesar Wraps!
FAQs
What can I use instead of Caesar dressing?
If you don’t have Caesar dressing, you can try ranch dressing or Greek yogurt. These options give great flavor too. You can also mix mayonnaise with lemon juice for a creamy dressing. Adding herbs like dill or parsley can boost the taste.
How do I ensure my chicken stays juicy?
To keep chicken juicy, don’t overcook it. Use a meat thermometer to check the temperature. Aim for 165°F. Let the chicken rest after cooking. This allows the juices to stay inside. Also, marinating the chicken for a few hours helps add flavor and moisture.
Can I make Chicken Caesar Wraps ahead of time?
Yes, you can make Chicken Caesar Wraps ahead of time. Just store them in the fridge. Wrap them in plastic wrap to keep them fresh. They will taste best if eaten within one day. If you want to prepare the filling ahead, keep it separate from the tortillas. This way, the wraps won’t get soggy.
This blog post shared a simple way to make Chicken Caesar Wraps. We discussed fresh ingredients, essential tools, and step-by-step cooking instructions. You learned tips for great seasoning and presentation. We also explored variations for everyone’s diet and provided storage advice.
In the end, these wraps are fun and easy to customize. Enjoy creating your own versions!


![- 2 grilled chicken breasts, shredded - 1 cup BBQ sauce (choice of homemade or your favorite store-bought) - 4 cups mixed greens (combination of spinach, arugula, and romaine) - 1 cup cherry tomatoes, halved - 1 cup corn (freshly cooked, canned, or frozen) - 1 ripe avocado, diced - ½ cup red onion, finely sliced - ½ cup shredded cheddar cheese - ¼ cup fresh cilantro, chopped (optional for garnish) - Salt and freshly ground black pepper, to taste - Tortilla chips, for serving on the side Gather these ingredients before you start cooking. Grilled chicken gives a great flavor. You can use any BBQ sauce you like. If you want homemade sauce, that works too! The salad greens add crunch and freshness. Cherry tomatoes and corn give sweetness. Avocado adds creaminess. Red onion gives a nice bite. Shredded cheese makes everything richer. The cilantro is optional, but it adds a nice touch. Finally, don’t forget the tortilla chips for a fun crunch on the side. This combination makes for a bright, colorful, and tasty BBQ chicken salad bowl. For the complete recipe, follow the steps provided in the article. First, shred your grilled chicken breasts. Place the chicken in a medium bowl. Next, pour in your BBQ sauce. You can use homemade sauce or your favorite store-bought kind. Mix it well. Make sure every piece of chicken gets coated with the sauce. This step is key to getting great flavor. After mixing, set the chicken aside. Let it sit for a few minutes. This allows the flavors to meld together. Grab a large salad bowl for this part. Start by adding your mixed greens, which can include spinach, arugula, and romaine. Next, toss in the halved cherry tomatoes, corn, and sliced red onion. Use salad tongs or your hands to mix the greens and veggies. You want everything to be evenly distributed. Now, gently add the diced avocado. Take care to fold it in without mashing it. This keeps the avocado pieces intact and adds a creamy texture. Now it’s time for the fun part! Divide your colorful salad mixture into individual serving bowls. This makes for a beautiful display. On top of each bowl, add a generous scoop of the BBQ chicken. Finish each bowl with a sprinkle of shredded cheddar cheese. This adds richness and flavor. If you like, you can also garnish with fresh cilantro. This step gives a nice touch. Serve your bowls with tortilla chips on the side. They add a satisfying crunch to the meal. For the full recipe, check out the earlier section. Grilling chicken gives it a smoky flavor. This method adds a nice char. Baking chicken is easier and keeps it juicy. Choose what fits your time and setup. For great BBQ flavor, marinate the chicken overnight. This helps the sauce soak in well. Boost your BBQ sauce with spices. Try adding garlic powder, onion powder, or smoked paprika. Fresh herbs like oregano or thyme can also work wonders. If you want cheese alternatives, try feta or goat cheese. Both add a tangy kick to your salad. Layer your salad ingredients for a beautiful look. Start with greens, then add the chicken. Place colorful toppings like tomatoes and corn on top. Use bright bowls to make the meal pop. Vibrant tortilla chips add a fun touch and great crunch. For the full recipe, check back to the beginning! {{image_4}} You can make BBQ chicken salad bowls even more fun by swapping ingredients. Instead of grilled chicken, try using pulled pork or even tofu for a vegetarian option. These proteins still soak up that yummy BBQ flavor. For salad greens, don't feel stuck with just one type. You can mix in kale, romaine, or even baby spinach. Each green adds a new taste and texture. You might also consider adding different vegetables like bell peppers or cucumbers. They can add a nice crunch and freshness to your bowls. While BBQ sauce is a star, you can explore other dressings too. Ranch dressing gives a creamy twist. A tangy vinaigrette can make the salad lighter. Try mixing BBQ sauce with ranch for a unique blend. Don't hesitate to play with BBQ sauce flavors. You could use a spicy version for a kick or a honey BBQ for sweetness. Each type creates a new experience every time you make this dish. When serving your BBQ chicken salad bowls, think about sides that go well. Cornbread or sweet potato fries are great options. They can balance the salad's freshness with some warmth. Get creative with your bowls. Use large lettuce leaves as edible bowls or even hollowed-out bell peppers. This makes your meal fun and different. Plus, it adds color and excitement to your table. For more ideas, check out the Full Recipe to get inspired on how to mix things up! To keep your BBQ chicken salad fresh, store it in the fridge. Use airtight containers. This helps keep the flavors and textures intact. You can also separate the chicken from the salad if you prefer. For reheating BBQ chicken, place it in a microwave-safe dish. Heat it for short intervals, about 30 seconds at a time. Stir it in between to ensure even heating. You want it warm, not hot, to keep the chicken juicy. You can safely eat your prepared salad for up to three days. After that, the greens may wilt and lose their crunch. If you want to keep it longer, consider freezing some components. You can freeze the BBQ chicken for up to three months. Just make sure to package it well in freezer bags. The salad greens and toppings should stay in the fridge, as freezing changes their texture. For a full recipe on how to make this delicious dish, check the [Full Recipe]. It takes about 15 minutes to prep and 15 minutes to cook. So, in total, you’ll need around 30 minutes. This quick time makes it perfect for busy days. Yes, you can prepare this salad ahead of time! Just keep the salad and chicken separate until you’re ready to eat. This way, the greens stay fresh and crisp. You can store the chicken in the fridge for up to three days. When you are ready, mix them together for a tasty meal. If you want to swap out BBQ sauce, you can try teriyaki sauce for a sweet twist. Ranch dressing also works well if you prefer something creamy. Each option gives a different flavor, making your salad fun and unique. To make this recipe gluten-free, choose a gluten-free BBQ sauce. Many brands offer tasty options. Also, ensure your tortilla chips are gluten-free. This way, you can enjoy this dish without worry! This blog post detailed how to create tasty BBQ chicken salad bowls. You learned about key ingredients, from grilled chicken to colorful salad greens. We discussed step-by-step instructions for preparing and assembling the salad, along with cool tips for flavor and presentation. You also discovered variations for ingredients, sauces, and serving suggestions. Now, you can enjoy these bowls at home. Try new flavors and enjoy your meals. With simple swaps, your salad will always be fresh and fun.](https://dishtreats.com/wp-content/uploads/2025/06/ab007e5c-1328-4456-8678-35604ca2185e-768x768.webp)

![To make a healthy sweet potato hash, you need these ingredients: - 2 large sweet potatoes, peeled and cut into small cubes - 1 red bell pepper, cut into small cubes - 1 green bell pepper, cut into small cubes - 1 small red onion, finely diced - 3 cloves of garlic, minced - 1 teaspoon smoked paprika - 1 teaspoon ground cumin - ½ teaspoon cayenne pepper (optional, for a spicy kick) - 2 tablespoons olive oil - Sea salt and freshly cracked black pepper, to taste - 4 large eggs (optional, for topping) - Fresh cilantro or parsley, finely chopped (for garnish) These ingredients work well together. Sweet potatoes bring a natural sweetness. Bell peppers add crunch and color. Onions and garlic give a lovely aroma and flavor. Spices like smoked paprika and cumin make this dish really pop. If you want extra protein, you can add eggs on top. Fresh herbs add a nice touch at the end. For the full recipe, you can check the detailed instructions I provided earlier. 1. First, heat 2 tablespoons of olive oil in a large skillet over medium heat. Wait until it shimmers, which means it’s ready. 2. Next, add 2 large sweet potatoes, cut into small cubes. Spread them out in a single layer. Let them cook for about 5 minutes without stirring. This helps them get crispy. 3. After 5 minutes, stir the sweet potatoes. Cook until they are soft and golden, about another 10 minutes. 1. Now, it’s time to add flavor! Stir in 1 small red onion, finely diced. Keep cooking for about 3-4 minutes until the onion is soft and clear. 2. Then, mix in 3 cloves of minced garlic, 1 red bell pepper, and 1 green bell pepper, both cut into small cubes. 3. Add spices: 1 teaspoon smoked paprika, 1 teaspoon ground cumin, and ½ teaspoon cayenne pepper if you want heat. Stir well and let it cook for 5-7 minutes. The peppers should be tender, and the sweet potatoes should be fork-tender. Season with sea salt and black pepper to taste. 1. If you want to add eggs, create 4 small wells in the hash mixture. Crack an egg into each well. 2. Cover the skillet with a lid and cook for about 5 minutes. This cooks the eggs to your liking. For runny yolks, 5 minutes is perfect. This vibrant sweet potato hash is not just easy to make; it’s also packed with flavor. For the full recipe, refer to the earlier sections. To get the best sweet potato hash, focus on the cooking process. Start with small cubes of sweet potato. This helps them cook faster and evenly. Cook them in a hot skillet so they get crispy. I recommend using a cast-iron skillet. It holds heat well and gives a nice sear to your veggies. Spices can really boost the flavor. I love using smoked paprika and cumin. These spices add warmth and depth. If you like heat, add cayenne pepper too. You can adjust the spice levels based on your taste. Start with a small amount and add more if needed. Serving matters! For a pretty look, use shallow bowls. Place the hash in the center, and if you added eggs, make sure they sit on top. This highlights them nicely. A sprinkle of fresh herbs like cilantro or parsley adds color. A slice of creamy avocado on the side makes it even better. For the complete recipe, check out the [Full Recipe]. {{image_4}} Sweet potatoes are packed with nutrients. They are high in vitamins A and C. These vitamins help keep your skin healthy and boost your immune system. One medium sweet potato gives you over 400% of your daily vitamin A needs. This vitamin is great for your eyes and skin. Sweet potatoes also contain fiber. Fiber helps your digestion and keeps you feeling full. By adding sweet potatoes to your breakfast, you get a tasty way to start your day. You include a healthy veggie that fills you with energy. To make this sweet potato hash a balanced meal, add proteins and healthy fats. Protein keeps you strong and satisfied. You can top your hash with eggs for extra protein. Eggs also add a creamy texture. If you want healthy fats, consider adding avocado. This will give your dish a smooth, rich flavor. You can also use nuts or seeds for crunch. Integrating this hash into your diet is easy. It suits different meals, not just breakfast. Serve it for lunch or dinner too. This flexibility makes it a great choice for any day. Enjoy this delicious dish while knowing you are eating well. Check out the Full Recipe for more details! You can change the flavors in your sweet potato hash easily. Adding different vegetables makes it fun. Try adding zucchini or spinach for a fresh twist. Both add great taste and color. You can also use Italian herbs for a different flavor profile. Oregano and basil can enhance your dish. Don't be afraid to mix and match! Adding protein to your hash makes it more filling. You can use chicken or turkey for a hearty meal. Just cook the meat first, then add it to the hash. If you prefer a vegetarian option, tofu or beans work well. Tofu can soak up the flavors of the spices. Beans like black or kidney add fiber and protein. You can serve sweet potato hash in many ways. For breakfast, serve it with eggs on top. The runny yolks add creaminess to each bite. If you're having brunch, add a side salad for balance. You can also create a savory sweet potato bowl. Just layer the hash with your favorite toppings. Think avocado, salsa, or even a dollop of yogurt. Each of these changes keeps your meal exciting! For the full recipe, check out the detailed guide. You can store sweet potato hash in the fridge for up to four days. Make sure to place it in an airtight container. When you’re ready to eat, reheat it on the stove or in the microwave. For the best taste, add a splash of olive oil when reheating. This helps keep the hash moist and tasty. Yes, you can easily make this recipe vegan. Instead of eggs, you can use tofu or chickpea flour. Just scramble the tofu or mix chickpea flour with water to create a batter. You can also replace olive oil with avocado oil or coconut oil. This keeps the flavors rich while making it plant-based. Absolutely! Sweet potato hash is perfect for meal prep. You can cook a big batch and store it in the fridge. Divide it into portions for the week. Just reheat what you need each day. You can also add different proteins or veggies for variety throughout the week. To reheat the hash, use a skillet over medium heat. This helps keep its texture nice. Stir occasionally to ensure even heating. If using a microwave, heat it in short bursts of 30 seconds. Stir in between to avoid hot spots. This way, your hash stays tasty and not mushy. Yes, cheese can add great flavor! Try sharp cheddar or feta for a nice twist. You can sprinkle it on top while the hash is still hot. This lets the cheese melt nicely. If you prefer a creamier texture, consider adding cream cheese or goat cheese. This blog post covered a tasty sweet potato hash recipe from start to finish. We explored essential ingredients, cooking steps, and tips to enhance flavor. You also learned about nutritional benefits and variations to customize your dish. In the end, this recipe is not just easy to make; it’s also a great way to start your day. Try it and enjoy the burst of flavors and textures. You can make it your own with simple adjustments or serve it as is. Your breakfast just got better!](https://dishtreats.com/wp-content/uploads/2025/06/2729619c-b847-4f07-91dc-14d4acdaca85-768x768.webp)

