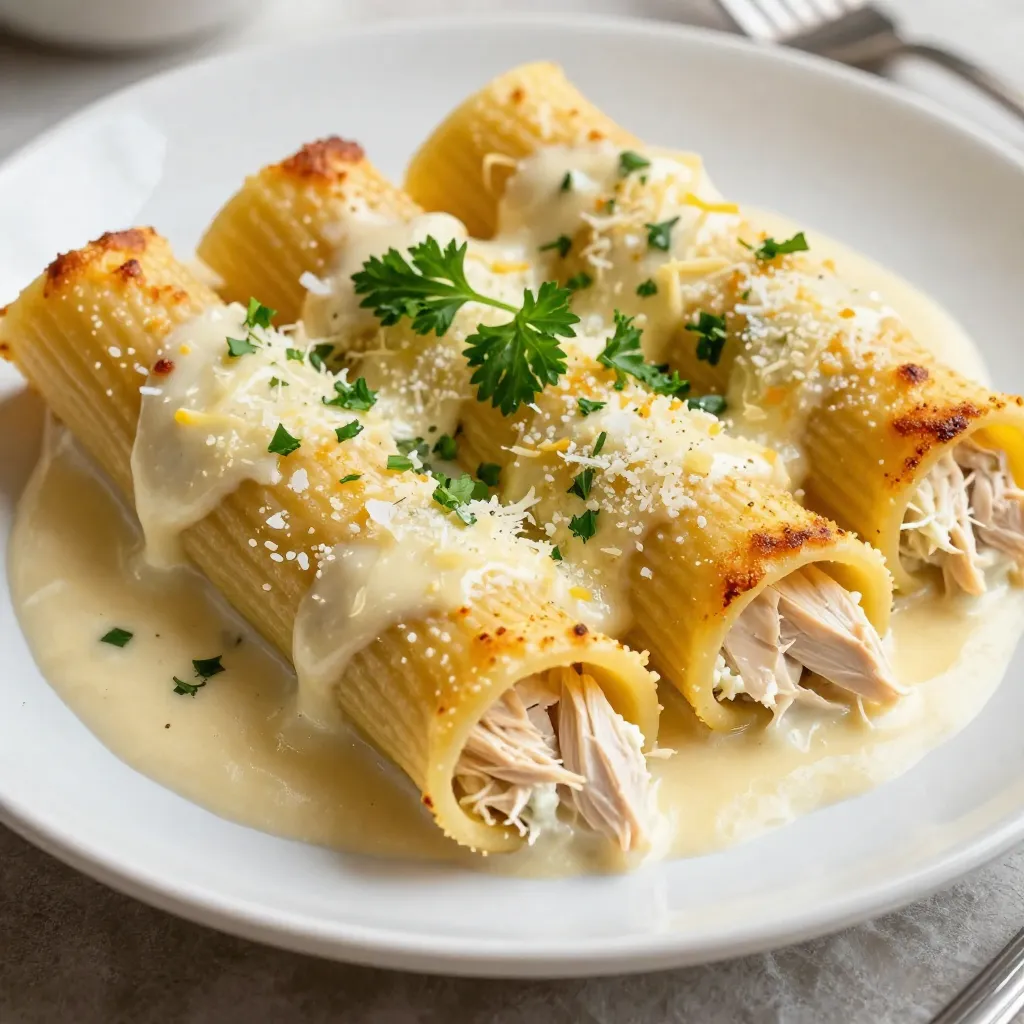
Craving a meal that warms your heart and fills your belly? Look no further! My Chicken Alfredo Stuffed Manicotti is the perfect comfort food. Creamy Alfredo sauce meets tender chicken, all wrapped in pasta tubes. This dish not only pleases the taste buds but also brings joy to the table. Join me as I guide you through this easy recipe that transforms simple ingredients into a flavor-packed delight! Let’s get cooking!
Why I Love This Recipe
- Comfort Food Classic: This Chicken Alfredo Stuffed Manicotti is the epitome of comfort food, combining creamy Alfredo sauce with tender chicken and cheesy goodness.
- Easy to Prepare: With just 20 minutes of prep time, this recipe is simple enough for a weeknight dinner yet impressive enough to serve at gatherings.
- Customizable Ingredients: Feel free to swap out the chicken for turkey or add your favorite vegetables for a personal touch!
- Delicious Leftovers: This dish keeps well in the fridge, making for fantastic leftovers that taste just as good the next day.
Ingredients
Main Ingredients for Chicken Alfredo Stuffed Manicotti
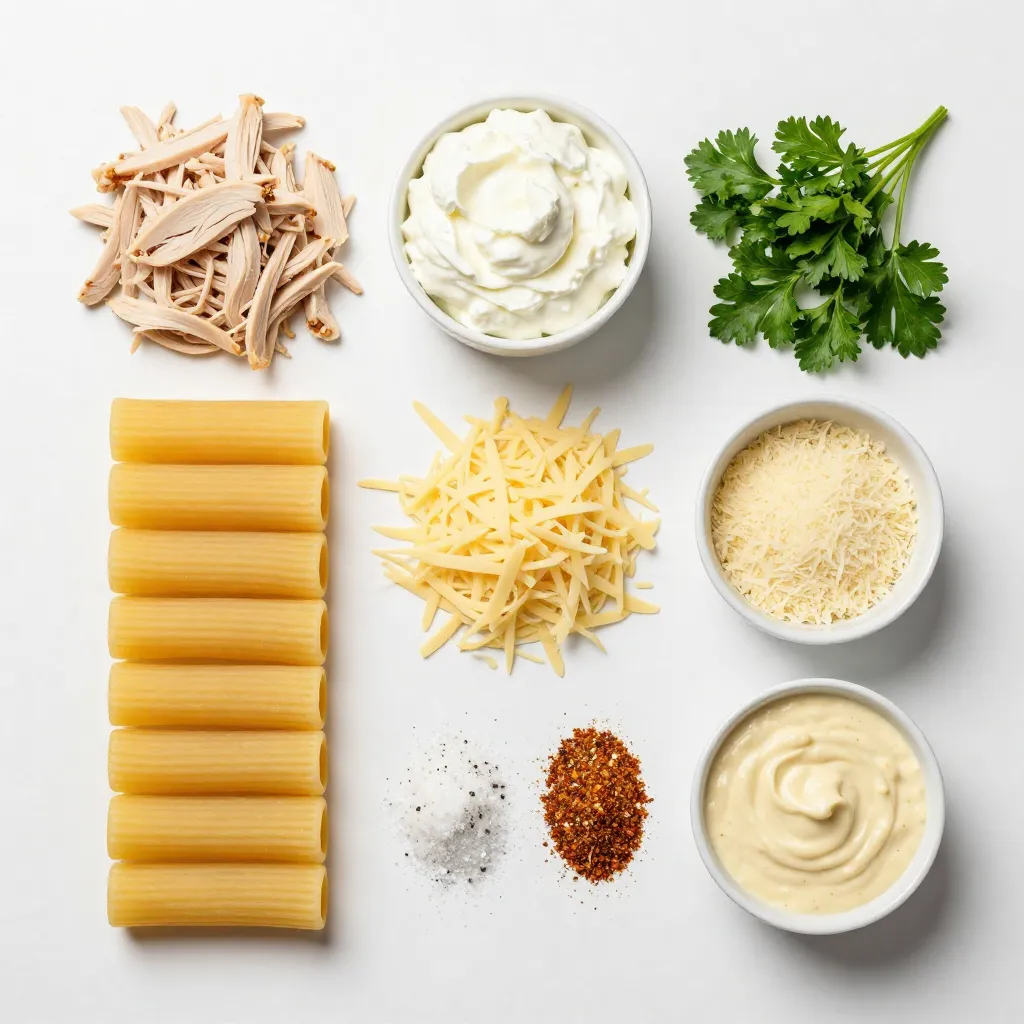
To make Chicken Alfredo Stuffed Manicotti, gather these essential ingredients:
– 12 manicotti tubes
– 2 cups cooked chicken, shredded
– 1 cup ricotta cheese
– 1 1/2 cups mozzarella cheese, shredded
– 1/2 cup grated Parmesan cheese
– 2 cups Alfredo sauce (store-bought or homemade)
– 1 teaspoon garlic powder
– 1 teaspoon Italian seasoning
– Salt and pepper to taste
– Fresh parsley, chopped (for garnish)
These ingredients come together to create a creamy and flavorful dish. The chicken adds protein and heartiness, while the cheeses bring rich flavors.
Optional Ingredients and Substitutions
You can customize your Chicken Alfredo Stuffed Manicotti with these options:
– Spinach: Add fresh or cooked spinach for a healthy twist.
– Mushrooms: Sautéed mushrooms can enhance the flavor.
– Different cheeses: Swap mozzarella for provolone or gouda for a new taste.
– Store-bought sauce: If short on time, grab a jar of your favorite Alfredo sauce.
Feel free to mix and match based on your tastes. Cooking should be fun and flexible!
Cooking Tool Requirements
To prepare your Chicken Alfredo Stuffed Manicotti, you will need:
– A large mixing bowl
– A spoon or piping bag for stuffing
– A large baking dish
– Aluminum foil
– An oven for baking the dish
Having the right tools makes the process easier. Make sure your oven is preheated to 350°F (175°C) before you start cooking for the best results.
Step-by-Step Instructions
Preheating the Oven and Preparing Filling
Start by preheating your oven to 350°F (175°C). This step is crucial. A warm oven will help cook the manicotti evenly. While the oven heats, grab a large mixing bowl. In this bowl, combine the cooked chicken, ricotta cheese, and 1 cup of shredded mozzarella cheese. Add the garlic powder, Italian seasoning, and a sprinkle of salt and pepper. Mix everything well until smooth. The filling should be rich and creamy.
Filling the Manicotti Tubes
Now it’s time to fill those manicotti tubes! You can use a small spoon or a piping bag for this task. Take one manicotti tube and carefully stuff it with the chicken and cheese mix. Make sure to pack it well, but don’t overfill to avoid spills. Repeat this step until all tubes are filled. Each tube should be nice and plump.
Assembling the Dish
Next, grab a large baking dish. Spread 1 cup of Alfredo sauce evenly at the bottom. This keeps the manicotti from sticking. Place the filled manicotti tubes in a single layer over the sauce. Pour the remaining Alfredo sauce on top, covering each tube completely. This ensures every bite is creamy and delicious. Now, sprinkle the rest of the mozzarella and Parmesan cheese over the top. Cover the dish with aluminum foil to keep moisture in. Bake this in the oven for 25 minutes.
After that, remove the foil and bake for another 10-15 minutes. You want the cheese to bubble and turn golden brown. Once done, let it cool for 5 minutes. Finally, sprinkle fresh parsley on top for a nice touch. Enjoy your Chicken Alfredo Stuffed Manicotti!
Tips & Tricks
Best Practices for Stuffing Manicotti
When you stuff manicotti, make it fun and easy. Here are my best tips:
– Use a piping bag: This makes filling each tube faster and cleaner. If you don’t have one, a small spoon works too.
– Pack the filling tightly: You want every bite to be full of flavor. Don’t be shy; fill them well!
– Keep it simple: Don’t overfill. Leave a little space to avoid spills while cooking.
How to Make Homemade Alfredo Sauce
Homemade Alfredo sauce is simple and tasty. Here’s how to whip it up:
1. Gather your ingredients: You need butter, heavy cream, garlic, and Parmesan cheese.
2. Melt the butter: In a pan over medium heat, melt 1/2 cup of butter.
3. Add garlic: Stir in 2 minced garlic cloves and cook for 1 minute.
4. Pour in cream: Slowly add 2 cups of heavy cream and let it simmer.
5. Mix in cheese: Add 1 cup of grated Parmesan cheese and stir until smooth. Season with salt and pepper to taste.
Serving Suggestions and Pairings
Serving Chicken Alfredo Stuffed Manicotti can be creative. Here are some ideas:
– Add a salad: A fresh green salad with vinaigrette pairs well. It balances the creaminess of the dish.
– Serve with garlic bread: This adds a nice crunch and flavor.
– Garnish with herbs: Sprinkle fresh parsley on top for a pop of color and taste.
With these tips, your Chicken Alfredo Stuffed Manicotti will shine in any meal! Enjoy every bite!
Pro Tips
- Choose the Right Pasta: Use manicotti tubes that are sturdy and wide enough to hold your filling. This ensures easy stuffing and prevents breakage during baking.
- Prep Ahead: You can prepare the stuffed manicotti in advance and refrigerate them before baking. Just add a few extra minutes to the baking time if cooking from cold.
- Mixing the Filling: For an extra creamy filling, consider mixing in some cream cheese or sour cream with the ricotta. This adds richness and enhances the flavor.
- Garnish with Fresh Herbs: Fresh parsley or basil not only adds a pop of color but also brightens the dish’s flavor. Scatter it just before serving for the best effect.
Variations
Vegetarian Chicken Alfredo Stuffed Manicotti
You can make a great vegetarian version of Chicken Alfredo Stuffed Manicotti. Start by swapping out the chicken for vegetables. Good options include spinach, mushrooms, or zucchini. Use the same cheese mix for that rich flavor. You can add more garlic or fresh herbs to boost the taste. This makes a hearty dish without meat, perfect for any veggie lover.
Spicy Alfredo Stuffed Manicotti
If you like heat, try a Spicy Alfredo Stuffed Manicotti. To add spice, mix crushed red pepper flakes into the Alfredo sauce. You can also add diced jalapeños or pepper jack cheese to the filling. This gives the dish a nice kick that will excite your taste buds. Adjust the spice level to fit your crowd, so everyone enjoys it.
Gluten-Free Options
For those needing gluten-free options, select gluten-free manicotti tubes. Many brands offer pasta made from rice or corn that works well. Ensure your Alfredo sauce is gluten-free, too. Homemade sauces are a safe bet, as you control the ingredients. This way, everyone can enjoy this creamy comfort meal without worry.
Storage Info
Storing Leftovers
After you enjoy your Chicken Alfredo Stuffed Manicotti, you might have some tasty leftovers. To store them, let the dish cool first. Then, transfer them to an airtight container. This keeps flavors fresh and prevents drying. You can store leftovers in the fridge for up to three days. When you want to enjoy them again, just pull them out.
Freezing Chicken Alfredo Stuffed Manicotti
If you want to save some for later, freezing is a great option. First, let the manicotti cool completely. Then, wrap each piece in plastic wrap or foil. Place them in a freezer-safe container or bag. Label it with the date for easy reference. Frozen Chicken Alfredo Stuffed Manicotti can last for up to three months. When you’re ready to eat, just thaw them in the fridge overnight before reheating.
Reheating Instructions
To reheat your Chicken Alfredo Stuffed Manicotti, you have a few choices. The best way is to use an oven. Preheat it to 350°F (175°C). Place the manicotti in a baking dish and cover it with foil. Bake for about 20 minutes until warmed through. If you’re in a hurry, you can use a microwave. Place one or two pieces on a plate and cover them with a damp paper towel. Heat for about 1-2 minutes, checking every 30 seconds. Always make sure the dish is hot all the way through before serving. Enjoy those creamy flavors once again!
FAQs
Can I use other types of pasta for this recipe?
Yes, you can use other pasta shapes. Try using shells or cannelloni. These shapes work well for stuffing. Just remember to adjust the cooking time. You want the pasta to be tender but not too soft.
How do I know when the stuffed manicotti is fully cooked?
You can tell the manicotti is done when the cheese is bubbly and golden brown. The sauce should be hot all the way through. If you want to check, insert a knife into the middle. It should feel warm, not cold.
What can I substitute for ricotta cheese?
If you want a different taste, try cottage cheese or cream cheese. Blending these can give you a smooth texture. You can also use Greek yogurt for a tangy flavor. Each option will add a unique twist to your dish.
We covered the main ingredients for Chicken Alfredo Stuffed Manicotti and highlighted optional ones. I shared step-by-step instructions, tips for perfect stuffing, and variations to try.
Remember, you can store leftovers and even freeze them. This dish is easy and fun to make. It’s always a crowd-pleaser, no matter the occasion. Get creative with flavors and make it your own. Enjoy your cookin


