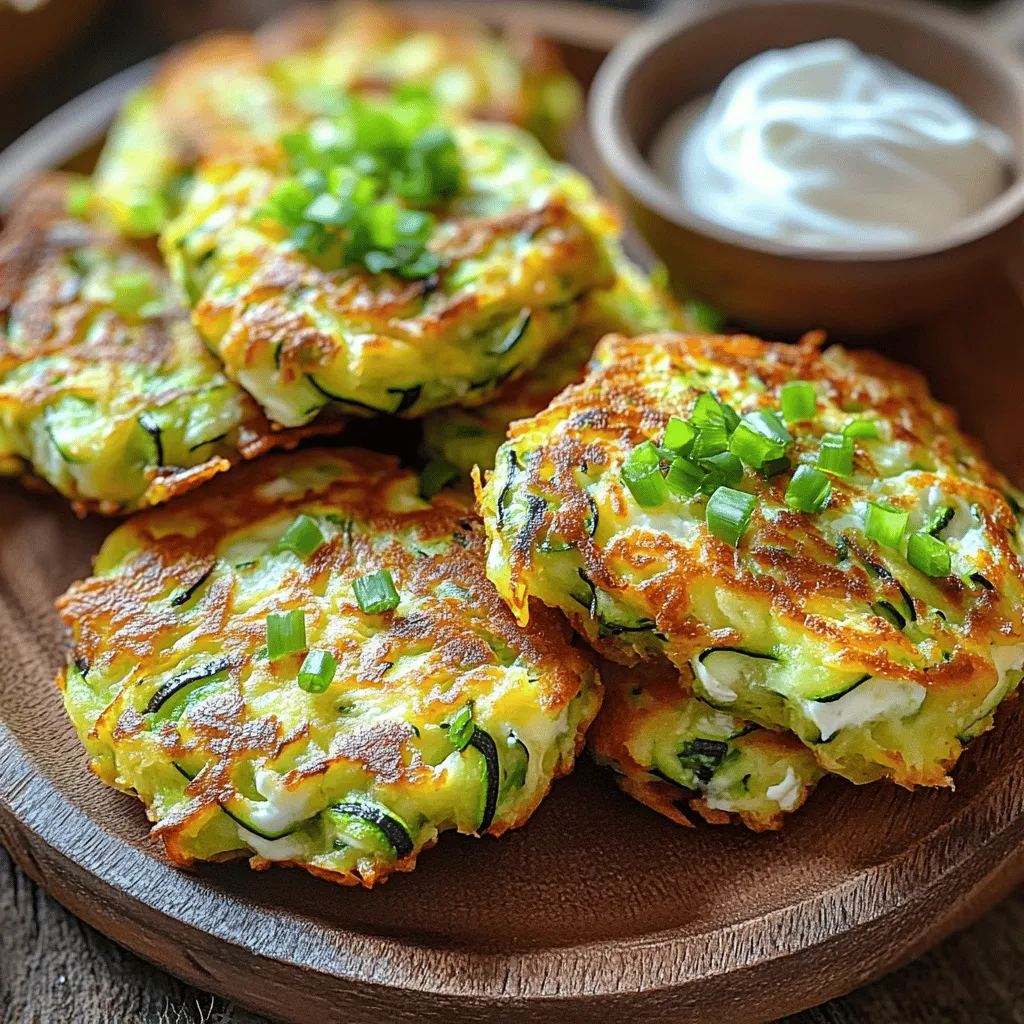
If you’re craving a tasty and simple dish, this Cheesy Zucchini Fritters recipe is for you! These golden bites are crispy, cheesy, and easy to make. Packed with flavor and nutrition, they make a perfect snack or side. I’ll share the step-by-step guide, tips for best results, and fun variations to keep things fresh. Let’s get frying and enjoy these delicious fritters together!
Ingredients
Main Ingredients for Cheesy Zucchini Fritters
To make cheesy zucchini fritters, you need these main ingredients:
– 2 medium zucchinis, grated
– 1 teaspoon salt
– 1/2 cup all-purpose flour
– 1/2 cup shredded mozzarella cheese
– 1/4 cup grated Parmesan cheese
– 1 large egg
– 2 green onions, finely chopped
– 2 cloves garlic, minced
– 1 teaspoon dried oregano
– 1/2 teaspoon black pepper
– 1/4 teaspoon red pepper flakes (optional)
– Olive oil, for frying
These ingredients come together to create a tasty and cheesy treat. The zucchini gives a fresh taste, while the cheeses add that creamy, savory goodness.
Optional Ingredients and Substitutions
You can customize your fritters with some optional ingredients. Try adding:
– Fresh herbs like parsley or basil for extra flavor.
– Other cheeses, such as cheddar or feta, for a different taste.
– Chopped bell peppers or spinach for added nutrition and color.
If you need substitutes, you can use almond flour for a gluten-free option. You can also swap the egg for a flax egg to make it vegan.
Nutritional Information
These fritters are not only delicious but also provide good nutrition. Each serving has roughly:
– Calories: 200
– Protein: 8g
– Carbohydrates: 15g
– Fiber: 2g
– Fat: 12g
Cheesy zucchini fritters are a great way to enjoy veggies while treating yourself.
Step-by-Step Instructions
Preparation of Zucchini
Start by grating the zucchinis using a box grater. After grating, place the zucchini in a clean kitchen towel. Sprinkle one teaspoon of salt over the grated zucchini. Let it rest for about 10 minutes. This step helps to draw out excess moisture. Less moisture means crispier fritters.
Mixing the Batter
Once the 10 minutes are up, twist the kitchen towel. Squeeze out as much liquid as you can from the zucchini. Transfer the drained zucchini to a large mixing bowl. Now, add the following ingredients:
– 1/2 cup all-purpose flour
– 1/2 cup shredded mozzarella cheese
– 1/4 cup grated Parmesan cheese
– 1 large egg
– 2 green onions, finely chopped
– 2 cloves garlic, minced
– 1 teaspoon dried oregano
– 1/2 teaspoon black pepper
– 1/4 teaspoon red pepper flakes (optional)
Mix everything well. Combine until you have a smooth and cohesive batter.
Cooking and Frying Techniques
Heat a skillet over medium heat. Pour enough olive oil into the pan to cover the bottom, about 2 tablespoons. Wait until the oil is hot and shimmering. This indicates it’s ready for frying.
Using a tablespoon or ice cream scoop, take about 2 tablespoons of the zucchini mixture. Gently flatten it into a fritter shape. Carefully place it into the hot skillet. Do not overcrowd the pan; this helps the fritters cook evenly.
Cook each fritter for about 3-4 minutes on one side. They should turn golden brown and crispy. Flip the fritters and cook for another 3-4 minutes on the other side. Keep an eye on the heat. Adjust if needed to prevent burning.
When they are golden brown, transfer the fritters to a plate lined with paper towels. This will absorb any extra oil. Enjoy your crispy, cheesy zucchini fritters warm. You can serve them with a light dipping sauce, like sour cream or yogurt, for extra flavor.
Tips & Tricks
Achieving Crispy Fritters
To make your fritters crispy, start by squeezing out moisture from the zucchini. Use a clean kitchen towel to drain excess liquid. This step is key to avoid soggy fritters. Next, heat your oil until it shimmers before adding the fritters. Cook them in small batches to keep the heat steady. Overcrowding can cause them to steam instead of fry. Aim for a golden brown color on each side for that perfect crunch.
Common Mistakes to Avoid
One common mistake is not draining the zucchini well. If there’s too much moisture, the fritters will fall apart. Another issue is using too much flour. Stick to the half-cup measure. Too much flour can make the fritters dense. Also, don’t skip the egg; it helps bind everything together. Lastly, keep an eye on the heat. Too high can burn the fritters, while too low can make them greasy.
Serving Suggestions and Dipping Sauces
Serve your cheesy zucchini fritters with a side of sour cream or yogurt. A light yogurt sauce adds a nice flavor. You can also try a spicy aioli for a kick. For a fresh touch, sprinkle some chopped herbs on top before serving. Try pairing these fritters with a simple salad for a balanced meal.

Variations
Vegetarian Options and Add-ins
You can make cheesy zucchini fritters even more tasty with veggie add-ins. Try adding grated carrots for sweetness. Spinach or kale can boost the nutrients. You may also mix in corn for a pop of color and flavor. For a fresh twist, add fresh herbs like basil or parsley.
Cheese Variations
Cheese is key in these fritters. While mozzarella and Parmesan work great, you can switch things up. Use feta cheese for a tangy flavor. Cheddar cheese adds a sharpness that many love. For a creamy touch, try goat cheese. Mix and match to find your favorite!
Gluten-Free Alternatives
If you need gluten-free fritters, swap out the all-purpose flour. Use almond flour or rice flour instead. These options keep the fritters light and delicious. Another choice is chickpea flour, which adds protein. Experiment to see which gluten-free option you like best.
Storage Info
How to Store Leftover Fritters
To keep your leftover fritters fresh, store them in an airtight container. Layer them with paper towels to absorb moisture. This helps prevent them from becoming soggy. Place the container in the fridge. They will stay good for up to three days. When you’re ready to enjoy them, you can reheat them easily.
Freezing Instructions
You can also freeze the fritters if you have extras. Let them cool completely first. Then, arrange them on a baking sheet in a single layer. Freeze them for about an hour. Once frozen, transfer them to a freezer-safe bag. Label the bag with the date. They can last up to three months in the freezer. This way, you have a quick meal ready anytime.
Reheating Tips
To reheat the fritters, you can use the oven or a skillet. For the oven, preheat it to 350°F (175°C). Place the fritters on a baking sheet and heat for about 10-15 minutes. If using a skillet, add a little olive oil and heat on medium. Cook each fritter for about 2-3 minutes on each side. This keeps them crispy and delicious. Enjoy your cheesy zucchini fritters hot!
FAQs
What can I use instead of zucchini?
You can use other vegetables like yellow squash or carrots. Both work well in this recipe. The key is to choose veggies with a similar water content. This helps keep your fritters from becoming too soggy. You can also try sweet potatoes for a different flavor.
Can I bake these fritters instead of frying?
Yes, you can bake these fritters! Preheat your oven to 425°F (220°C). Place the fritters on a baking sheet lined with parchment paper. Brush them lightly with olive oil. Bake for about 20 minutes, flipping halfway through. They will be less greasy and still delicious.
How long do cheesy zucchini fritters last in the fridge?
Cheesy zucchini fritters last about 3-4 days in the fridge. Be sure to store them in an airtight container for best results. You can reheat them in a skillet or oven for a crispy texture. Enjoy them as a snack or a quick meal!
In this blog post, we explored how to make cheesy zucchini fritters from start to finish. We covered key ingredients, step-by-step instructions, and useful tips to ensure the best results. Remember, achieving crispy fritters is all about the right preparation and cooking techniques. Don’t forget to try different variations and options to suit your taste. With these easy methods, you can enjoy delicious fritters today! Happy cooking and enjoy your crispy bites!


