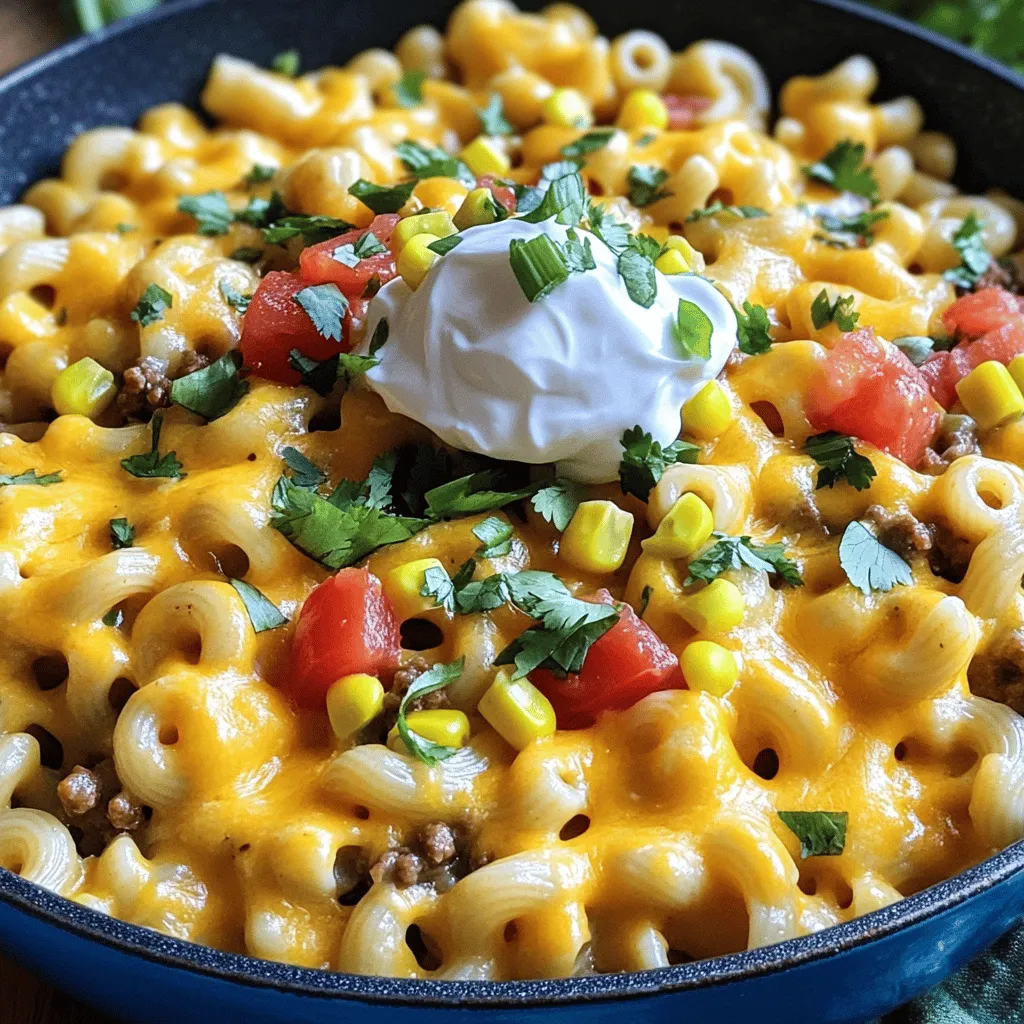
Cheesy Taco Pasta Quick and Flavorful Weeknight Meal
![- 8 oz. elbow macaroni - 1 lb. ground beef or ground turkey - 1 packet taco seasoning mix - 1 cup diced tomatoes (fresh or canned) - 1 cup canned black beans, drained and rinsed - 1 cup corn (can be frozen or canned) - 2 cups shredded cheddar cheese (divided) - 1 cup salsa (your choice of spiciness) - 1/2 cup sour cream - 1 tablespoon olive oil - Salt and pepper to taste - Chopped green onions and fresh cilantro for garnish Gather these ingredients before you start cooking. This will make the process smooth and fun! The elbow macaroni is the base of this dish. It holds the cheesy sauce very well. Ground beef or turkey adds a hearty touch. You can use either, depending on your taste. The taco seasoning mix gives the pasta that classic taco flavor. Diced tomatoes bring freshness and moisture, while black beans boost protein and fiber. Corn adds a nice sweetness. Cheddar cheese is key for that melty, gooey goodness. Salsa adds a kick; choose your preferred heat level. Sour cream makes the dish creamy and rich. Olive oil helps cook the meat and adds flavor. Finally, salt, pepper, and garnishes like green onions and cilantro make it all pop. When you have everything ready, the fun part starts! You’ll see how these simple ingredients blend into a delicious dish. For the complete recipe, check out the Full Recipe section. To start, cook the elbow macaroni. Follow the package instructions carefully. Aim for al dente texture, which means the pasta should be firm when bitten. This keeps it from getting mushy later. Once done, drain the pasta in a colander and set it aside in a large bowl. While the pasta cooks, heat the olive oil in a large skillet over medium heat. Add the ground beef or turkey. Cook for about 5-7 minutes, stirring often to break up the meat. Look for a nice brown color. After browning, drain any extra fat from the skillet. Next, add the taco seasoning mix, diced tomatoes, black beans, corn, and salsa. Stir well and let the mixture simmer for about 5 minutes. This helps the flavors come together. After simmering, gently fold the cooked macaroni into the skillet. Make sure the pasta gets well-coated with the tasty mixture. Lower the heat to low, then add 1 1/2 cups of shredded cheddar cheese. Stir until the cheese melts into a creamy coating. Remove the skillet from the heat and add the sour cream. Mix it well until fully blended. Taste your dish and add salt and pepper to your liking. For the full recipe, refer to the instructions above. Enjoy your cheesy taco pasta! To get the best taco flavor, use a high-quality taco seasoning mix. It gives a bold taste. I often mix in extra spices, like garlic powder or cumin, for depth. For a creamy texture, add the cheese slowly. Let it melt fully before adding sour cream. This step ensures a smooth, rich sauce. Garnish your cheesy taco pasta with fresh green onions and cilantro. They add color and freshness. You can also use sliced avocado or jalapeños for extra flair. For a complete meal, pair the pasta with a simple side salad or tortilla chips. The crunch complements the creamy pasta well. You can find the full recipe [here]. {{image_4}} You can change up the protein in this dish. Ground turkey is a lighter choice. Ground chicken also works well. If you prefer plant-based options, try meat substitutes made from soy or lentils. Each option gives a unique flavor, but they all blend well with taco spices. If you need gluten-free pasta, many brands offer great options. Just look for gluten-free elbow macaroni. For those avoiding dairy, you can find dairy-free cheese and sour cream at most stores. These alternatives melt nicely and keep the dish creamy. Don’t be afraid to play with flavors! Different salsas add unique twists. You can also add jalapeños for heat. Hot sauce can give it an extra kick, too. These simple changes can make your cheesy taco pasta even more exciting. For the full recipe, check out the Cheesy Taco Pasta Extravaganza. To store your Cheesy Taco Pasta, let it cool first. Place leftovers in an airtight container. This keeps the dish fresh and tasty. It will last in the fridge for about 3 to 4 days. Always check for smells or mold before eating. When you’re ready to eat, reheat the pasta on the stove. Pour the pasta into a skillet over low heat. Stir it often to ensure even heating. You can also add a splash of water or broth to keep it creamy. Microwave is another option. Use a microwave-safe dish and cover it. Heat in short bursts, stirring every minute until it’s hot. Freezing Cheesy Taco Pasta is a great way to enjoy it later. First, let it cool completely. Then, transfer it to a freezer-safe container. Make sure to leave some space for expansion. You can freeze it for up to 2 months. When you are ready to eat, defrost it overnight in the fridge. Reheat it on the stove, just like before, to keep the flavor and texture. Cheesy Taco Pasta can last for about 3 to 5 days in the fridge. To keep it fresh, store it in an airtight container. Look for signs of spoilage like a sour smell or mold. If you see either, it’s best to toss it out. Yes, you can make Cheesy Taco Pasta ahead of time. Cook it and let it cool. Then, store it in the fridge for up to 2 days before serving. When ready to eat, just reheat it in a pan or microwave. Add a splash of water or broth to keep it moist. If you don’t have elbow macaroni, you can use other pasta shapes. Options include rotini, penne, or even gluten-free pasta. Quinoa or rice can also work if you want a grain instead. Just adjust cooking times as needed. We explored a tasty Cheesy Taco Pasta recipe, packed with flavor and fun. You learned about the key ingredients, easy steps for cooking, and tips to nail that taco taste. We also talked about variations to fit your needs, storage tips, and answers to common questions. This dish is not just simple; it’s a crowd-pleaser. Enjoy cooking and sharing your delicious creation!](https://dishtreats.com/wp-content/uploads/2025/07/060fa6b2-3df9-47e4-b794-a1b6a0be3885.webp)
Looking for a meal that’s quick, tasty, and loved by everyone? Cheesy Taco Pasta checks all the boxes! With just a handful of simple ingredients, you can whip up a delightful dinner in no time. I’ll show you how to bring together cheesy goodness and taco flavors to create a satisfying dish that’ll have your family asking for seconds. Ready to dive in? Let’s make your weeknight dinners a breeze!
Ingredients
List of Ingredients
- 8 oz. elbow macaroni
- 1 lb. ground beef or ground turkey
- 1 packet taco seasoning mix
- 1 cup diced tomatoes (fresh or canned)
- 1 cup canned black beans, drained and rinsed
- 1 cup corn (can be frozen or canned)
- 2 cups shredded cheddar cheese (divided)
- 1 cup salsa (your choice of spiciness)
- 1/2 cup sour cream
- 1 tablespoon olive oil
- Salt and pepper to taste
- Chopped green onions and fresh cilantro for garnish
Gather these ingredients before you start cooking. This will make the process smooth and fun! The elbow macaroni is the base of this dish. It holds the cheesy sauce very well. Ground beef or turkey adds a hearty touch. You can use either, depending on your taste. The taco seasoning mix gives the pasta that classic taco flavor.
Diced tomatoes bring freshness and moisture, while black beans boost protein and fiber. Corn adds a nice sweetness. Cheddar cheese is key for that melty, gooey goodness. Salsa adds a kick; choose your preferred heat level. Sour cream makes the dish creamy and rich. Olive oil helps cook the meat and adds flavor. Finally, salt, pepper, and garnishes like green onions and cilantro make it all pop.
When you have everything ready, the fun part starts! You’ll see how these simple ingredients blend into a delicious dish.
Step-by-Step Instructions
Cooking the Pasta
To start, cook the elbow macaroni. Follow the package instructions carefully. Aim for al dente texture, which means the pasta should be firm when bitten. This keeps it from getting mushy later. Once done, drain the pasta in a colander and set it aside in a large bowl.
Preparing the Taco Mixture
While the pasta cooks, heat the olive oil in a large skillet over medium heat. Add the ground beef or turkey. Cook for about 5-7 minutes, stirring often to break up the meat. Look for a nice brown color. After browning, drain any extra fat from the skillet. Next, add the taco seasoning mix, diced tomatoes, black beans, corn, and salsa. Stir well and let the mixture simmer for about 5 minutes. This helps the flavors come together.
Combining Ingredients
After simmering, gently fold the cooked macaroni into the skillet. Make sure the pasta gets well-coated with the tasty mixture. Lower the heat to low, then add 1 1/2 cups of shredded cheddar cheese. Stir until the cheese melts into a creamy coating. Remove the skillet from the heat and add the sour cream. Mix it well until fully blended. Taste your dish and add salt and pepper to your liking.Enjoy your cheesy taco pasta!
Tips & Tricks
Cooking Tips
To get the best taco flavor, use a high-quality taco seasoning mix. It gives a bold taste. I often mix in extra spices, like garlic powder or cumin, for depth.
For a creamy texture, add the cheese slowly. Let it melt fully before adding sour cream. This step ensures a smooth, rich sauce.
Serving Suggestions
Garnish your cheesy taco pasta with fresh green onions and cilantro. They add color and freshness. You can also use sliced avocado or jalapeños for extra flair.
For a complete meal, pair the pasta with a simple side salad or tortilla chips. The crunch complements the creamy pasta well.
Variations
Protein Alternatives
You can change up the protein in this dish. Ground turkey is a lighter choice. Ground chicken also works well. If you prefer plant-based options, try meat substitutes made from soy or lentils. Each option gives a unique flavor, but they all blend well with taco spices.
Dietary Adjustments
If you need gluten-free pasta, many brands offer great options. Just look for gluten-free elbow macaroni. For those avoiding dairy, you can find dairy-free cheese and sour cream at most stores. These alternatives melt nicely and keep the dish creamy.
Flavor Enhancements
Don’t be afraid to play with flavors! Different salsas add unique twists. You can also add jalapeños for heat. Hot sauce can give it an extra kick, too. These simple changes can make your cheesy taco pasta even more exciting.
Storage Info
Refrigeration Guidelines
To store your Cheesy Taco Pasta, let it cool first. Place leftovers in an airtight container. This keeps the dish fresh and tasty. It will last in the fridge for about 3 to 4 days. Always check for smells or mold before eating.
Reheating Instructions
When you’re ready to eat, reheat the pasta on the stove. Pour the pasta into a skillet over low heat. Stir it often to ensure even heating. You can also add a splash of water or broth to keep it creamy. Microwave is another option. Use a microwave-safe dish and cover it. Heat in short bursts, stirring every minute until it’s hot.
Freezing Tips
Freezing Cheesy Taco Pasta is a great way to enjoy it later. First, let it cool completely. Then, transfer it to a freezer-safe container. Make sure to leave some space for expansion. You can freeze it for up to 2 months. When you are ready to eat, defrost it overnight in the fridge. Reheat it on the stove, just like before, to keep the flavor and texture.
FAQs
How long does Cheesy Taco Pasta last in the fridge?
Cheesy Taco Pasta can last for about 3 to 5 days in the fridge. To keep it fresh, store it in an airtight container. Look for signs of spoilage like a sour smell or mold. If you see either, it’s best to toss it out.
Can I make Cheesy Taco Pasta ahead of time?
Yes, you can make Cheesy Taco Pasta ahead of time. Cook it and let it cool. Then, store it in the fridge for up to 2 days before serving. When ready to eat, just reheat it in a pan or microwave. Add a splash of water or broth to keep it moist.
What can I substitute for elbow macaroni?
If you don’t have elbow macaroni, you can use other pasta shapes. Options include rotini, penne, or even gluten-free pasta. Quinoa or rice can also work if you want a grain instead. Just adjust cooking times as needed.
We explored a tasty Cheesy Taco Pasta recipe, packed with flavor and fun. You learned about the key ingredients, easy steps for cooking, and tips to nail that taco taste. We also talked about variations to fit your needs, storage tips, and answers to common questions.
This dish is not just simple; it’s a crowd-pleaser. Enjoy cooking and sharing your delicious creation!
![- 8 oz. elbow macaroni - 1 lb. ground beef or ground turkey - 1 packet taco seasoning mix - 1 cup diced tomatoes (fresh or canned) - 1 cup canned black beans, drained and rinsed - 1 cup corn (can be frozen or canned) - 2 cups shredded cheddar cheese (divided) - 1 cup salsa (your choice of spiciness) - 1/2 cup sour cream - 1 tablespoon olive oil - Salt and pepper to taste - Chopped green onions and fresh cilantro for garnish Gather these ingredients before you start cooking. This will make the process smooth and fun! The elbow macaroni is the base of this dish. It holds the cheesy sauce very well. Ground beef or turkey adds a hearty touch. You can use either, depending on your taste. The taco seasoning mix gives the pasta that classic taco flavor. Diced tomatoes bring freshness and moisture, while black beans boost protein and fiber. Corn adds a nice sweetness. Cheddar cheese is key for that melty, gooey goodness. Salsa adds a kick; choose your preferred heat level. Sour cream makes the dish creamy and rich. Olive oil helps cook the meat and adds flavor. Finally, salt, pepper, and garnishes like green onions and cilantro make it all pop. When you have everything ready, the fun part starts! You’ll see how these simple ingredients blend into a delicious dish. For the complete recipe, check out the Full Recipe section. To start, cook the elbow macaroni. Follow the package instructions carefully. Aim for al dente texture, which means the pasta should be firm when bitten. This keeps it from getting mushy later. Once done, drain the pasta in a colander and set it aside in a large bowl. While the pasta cooks, heat the olive oil in a large skillet over medium heat. Add the ground beef or turkey. Cook for about 5-7 minutes, stirring often to break up the meat. Look for a nice brown color. After browning, drain any extra fat from the skillet. Next, add the taco seasoning mix, diced tomatoes, black beans, corn, and salsa. Stir well and let the mixture simmer for about 5 minutes. This helps the flavors come together. After simmering, gently fold the cooked macaroni into the skillet. Make sure the pasta gets well-coated with the tasty mixture. Lower the heat to low, then add 1 1/2 cups of shredded cheddar cheese. Stir until the cheese melts into a creamy coating. Remove the skillet from the heat and add the sour cream. Mix it well until fully blended. Taste your dish and add salt and pepper to your liking. For the full recipe, refer to the instructions above. Enjoy your cheesy taco pasta! To get the best taco flavor, use a high-quality taco seasoning mix. It gives a bold taste. I often mix in extra spices, like garlic powder or cumin, for depth. For a creamy texture, add the cheese slowly. Let it melt fully before adding sour cream. This step ensures a smooth, rich sauce. Garnish your cheesy taco pasta with fresh green onions and cilantro. They add color and freshness. You can also use sliced avocado or jalapeños for extra flair. For a complete meal, pair the pasta with a simple side salad or tortilla chips. The crunch complements the creamy pasta well. You can find the full recipe [here]. {{image_4}} You can change up the protein in this dish. Ground turkey is a lighter choice. Ground chicken also works well. If you prefer plant-based options, try meat substitutes made from soy or lentils. Each option gives a unique flavor, but they all blend well with taco spices. If you need gluten-free pasta, many brands offer great options. Just look for gluten-free elbow macaroni. For those avoiding dairy, you can find dairy-free cheese and sour cream at most stores. These alternatives melt nicely and keep the dish creamy. Don’t be afraid to play with flavors! Different salsas add unique twists. You can also add jalapeños for heat. Hot sauce can give it an extra kick, too. These simple changes can make your cheesy taco pasta even more exciting. For the full recipe, check out the Cheesy Taco Pasta Extravaganza. To store your Cheesy Taco Pasta, let it cool first. Place leftovers in an airtight container. This keeps the dish fresh and tasty. It will last in the fridge for about 3 to 4 days. Always check for smells or mold before eating. When you’re ready to eat, reheat the pasta on the stove. Pour the pasta into a skillet over low heat. Stir it often to ensure even heating. You can also add a splash of water or broth to keep it creamy. Microwave is another option. Use a microwave-safe dish and cover it. Heat in short bursts, stirring every minute until it’s hot. Freezing Cheesy Taco Pasta is a great way to enjoy it later. First, let it cool completely. Then, transfer it to a freezer-safe container. Make sure to leave some space for expansion. You can freeze it for up to 2 months. When you are ready to eat, defrost it overnight in the fridge. Reheat it on the stove, just like before, to keep the flavor and texture. Cheesy Taco Pasta can last for about 3 to 5 days in the fridge. To keep it fresh, store it in an airtight container. Look for signs of spoilage like a sour smell or mold. If you see either, it’s best to toss it out. Yes, you can make Cheesy Taco Pasta ahead of time. Cook it and let it cool. Then, store it in the fridge for up to 2 days before serving. When ready to eat, just reheat it in a pan or microwave. Add a splash of water or broth to keep it moist. If you don’t have elbow macaroni, you can use other pasta shapes. Options include rotini, penne, or even gluten-free pasta. Quinoa or rice can also work if you want a grain instead. Just adjust cooking times as needed. We explored a tasty Cheesy Taco Pasta recipe, packed with flavor and fun. You learned about the key ingredients, easy steps for cooking, and tips to nail that taco taste. We also talked about variations to fit your needs, storage tips, and answers to common questions. This dish is not just simple; it’s a crowd-pleaser. Enjoy cooking and sharing your delicious creation!](https://dishtreats.com/wp-content/uploads/2025/07/060fa6b2-3df9-47e4-b794-a1b6a0be3885-300x300.webp)

