Cheesy Sheet Pan Chicken Quesadillas Easy Dinner Delight

To make cheesy sheet pan chicken quesadillas, gather these ingredients: - 2 cups cooked chicken, shredded - 1 cup shredded cheddar cheese - 1 cup shredded Monterey Jack cheese - 1 cup bell peppers, diced (mix of red, yellow, and green for color) - 1 small red onion, finely diced - 1 can (10 oz) diced tomatoes with green chilies, well-drained - 1 teaspoon ground cumin - 1 teaspoon garlic powder - 1 teaspoon onion powder - 1/2 teaspoon paprika - 1/4 teaspoon cayenne pepper (optional, for an extra kick) - 8 large flour tortillas - 2 tablespoons olive oil - Salt and freshly ground black pepper to taste - 1/4 cup fresh cilantro, chopped (for garnish) - Sour cream and salsa (for serving) If you want a healthier option, you can use whole wheat tortillas. For a vegetarian twist, swap chicken with black beans or mushrooms. Use dairy-free cheese if you are lactose intolerant. Always check labels for allergens to stay safe. Using fresh ingredients makes a big difference. Fresh chicken gives better flavor and texture. High-quality cheese melts smoothly and adds richness. Fresh veggies not only look good but also taste better. The right spices can elevate the entire dish. Always choose the best ingredients you can find for a delicious meal. Preheat your oven to 400°F (200°C). This heat cooks the quesadillas evenly. Line a large baking sheet with parchment paper. The parchment paper helps keep the quesadillas from sticking. It also makes cleanup easy. In a large mixing bowl, combine 2 cups of shredded chicken, 1 cup of cheddar cheese, and 1 cup of Monterey Jack cheese. Add in 1 cup of diced bell peppers and 1 small finely diced red onion. Pour in 1 can of diced tomatoes with green chilies, well-drained. This mix adds great flavor. Sprinkle in 1 teaspoon each of ground cumin, garlic powder, and onion powder. Add 1/2 teaspoon of paprika and 1/4 teaspoon of cayenne pepper for heat, if you like. Season with salt and freshly ground black pepper. Mix until everything is well combined. Lay four tortillas flat on the prepared baking sheet. Overlap them slightly if needed. Spread the chicken and cheese mixture evenly over the tortillas. Leave a small border to avoid spillage during baking. Place the remaining four tortillas on top of the filling. Press down lightly to help them stick together. Brush the tops of the tortillas with 2 tablespoons of olive oil. This gives them a golden brown finish. Bake the quesadillas in the preheated oven for 15 to 20 minutes. They are ready when the tortillas are crispy and the cheese is melted and bubbling. Once baked, let the quesadillas cool for a few minutes. Slice them into squares or wedges using a sharp knife or a pizza cutter. Serve them on a large platter. Garnish with 1/4 cup of freshly chopped cilantro. Pair with sour cream and salsa for dipping. These details make your dish look and taste great. For the full recipe, check out the section above. - Use pre-cooked chicken to save time. You can find it in stores or use leftovers. - Ready-made ingredients like shredded cheese and diced vegetables cut prep time. - Consider meal prep by making the filling ahead of time. Store it in the fridge for up to three days. - You can also freeze the filling for up to three months. Just thaw it before use. - Add spice with chili powder or jalapeños. This gives a nice kick. - Try different herbs, like oregano or cilantro, for fresh flavor. - Top with avocado or fresh salsa for added taste and color. - For vegetarians, use black beans or mushrooms instead of chicken. They pack great flavor. - Mix cheeses for a unique twist. Try pepper jack for heat or goat cheese for creaminess. - If you prefer, use a skillet or grill. Cook each quesadilla until golden brown. - For mini quesadillas, cut tortillas in half and fill them with the same mixture. Cook them on a skillet for bite-sized treats. {{image_4}} To keep your cheesy sheet pan chicken quesadillas fresh, store them properly. First, let the quesadillas cool down to room temperature. Then, wrap them tightly in plastic wrap or place them in airtight containers. You can store them in the fridge for up to three days. If you want to keep them longer, freezing is a great option. Wrap each quesadilla in foil before placing them in a freezer bag. This helps protect them from freezer burn. When it's time to enjoy your leftovers, you can reheat them in various ways. The oven is the best choice to maintain that crispy texture. Preheat your oven to 350°F (175°C) and bake the quesadillas for about 10 minutes. You can also use a skillet over medium heat, flipping them halfway through. For a quick option, use the microwave, but keep in mind the tortillas may become soft. Leftover cheesy sheet pan chicken quesadillas last for up to three days in the fridge. In the freezer, they can stay good for up to two months. To know if they have spoiled, look for a few signs. Check for any strange smells or changes in color. If the tortillas feel slimy or dry, it's best to throw them away. Always trust your senses; they can help you avoid food waste and keep your meals safe. To make these quesadillas gluten-free, use gluten-free tortillas. Look for brands made from corn or brown rice. These options offer a great taste and texture. You can also use large lettuce leaves as a wrap for a low-carb choice. Yes, you can prepare the filling up to two days in advance. Store it in an airtight container in the fridge. When ready, just assemble the quesadillas. This saves time and makes dinner easy. I love serving these quesadillas with sides like: - Guacamole - Black bean salad - Mexican rice - Fresh corn salsa These sides add flavor and make a complete meal. Absolutely! You can swap chicken with: - Ground beef - Shredded pork - Tofu for a vegetarian option Just cook the protein fully before mixing it with the other filling ingredients. This keeps the flavor and texture just right. Check out the Full Recipe for more details! In this post, we covered the ingredients, preparation, and baking of cheesy sheet pan chicken quesadillas. I shared tips for enhancing flavors and making quick meals. You learned storage tips for leftovers and answers to common FAQs. Remember, quality ingredients and proper techniques make a big difference. Enjoy experimenting with flavors and variations. Your quesadillas can be just as fun as they are tasty!

WANT TO SAVE THIS RECIPE?

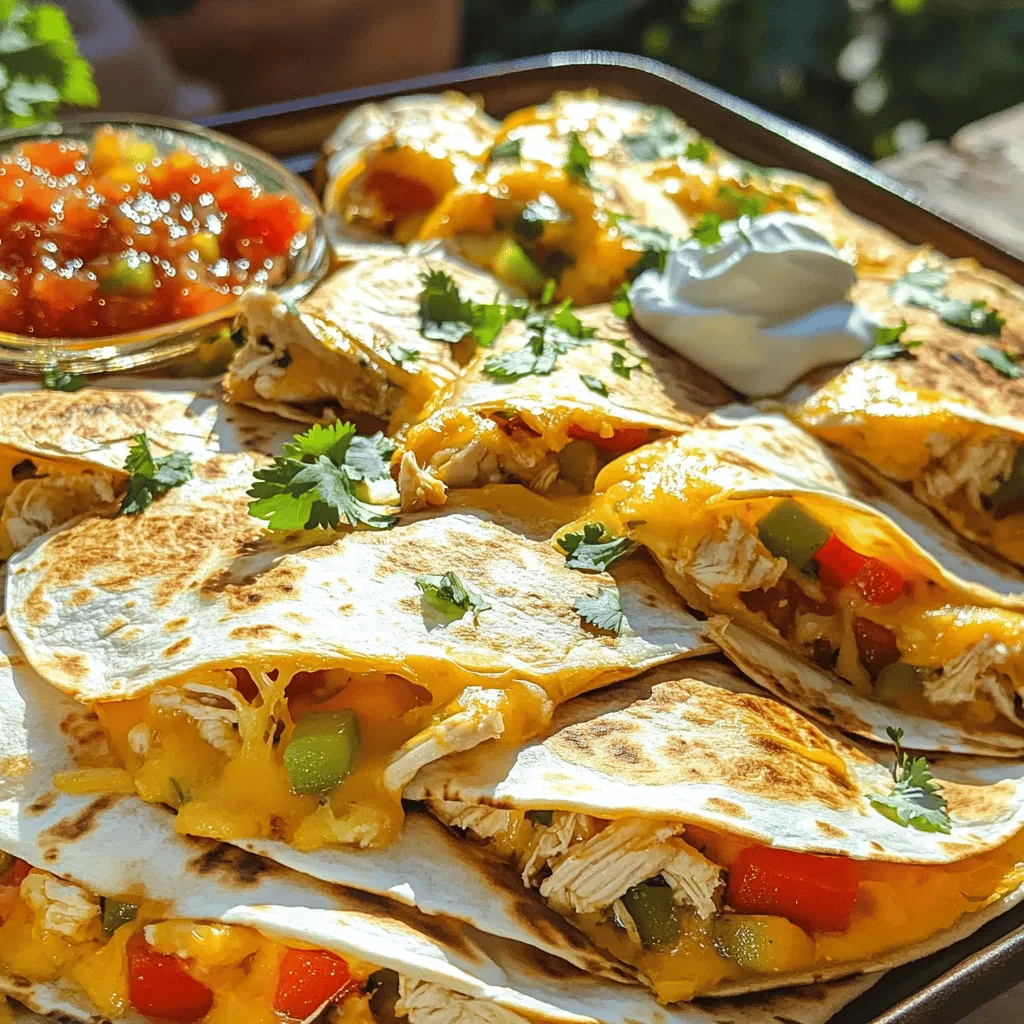
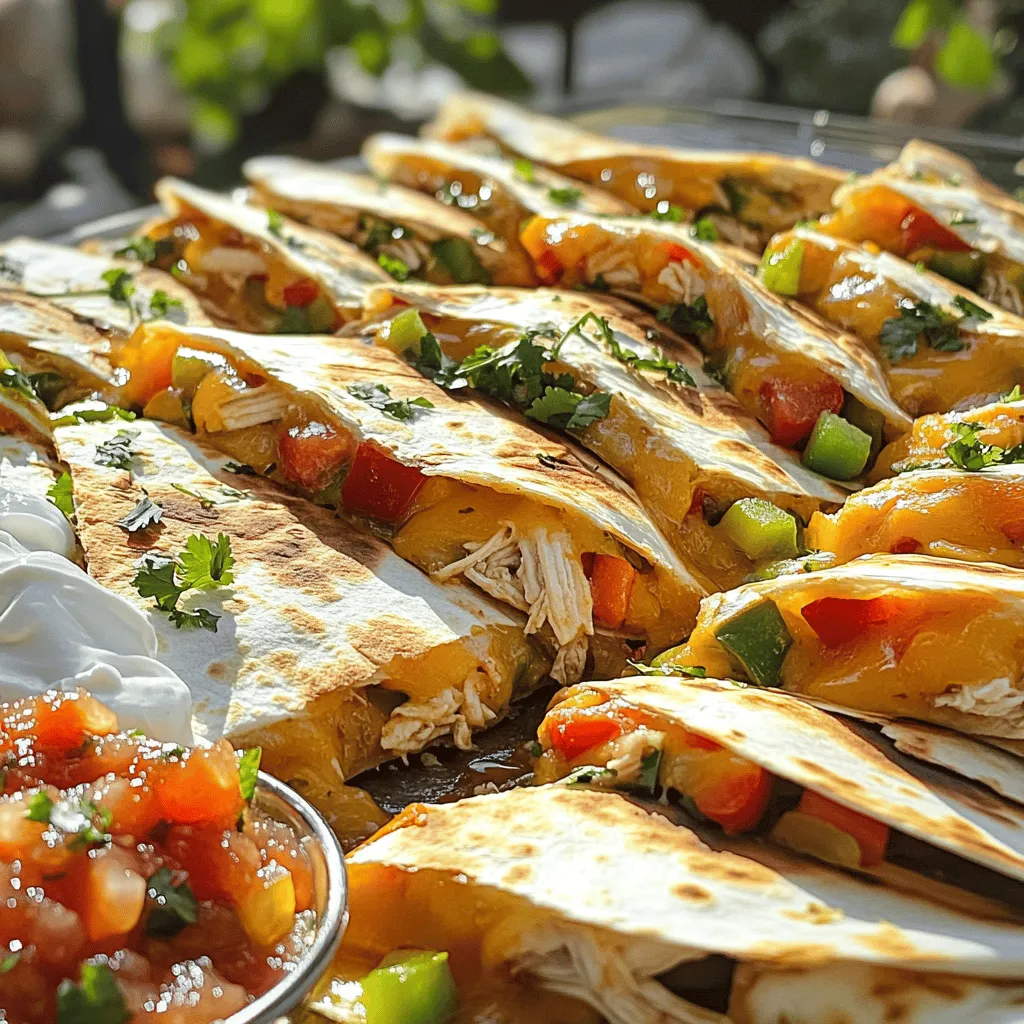
Looking for a quick and tasty dinner idea? Try my Cheesy Sheet Pan Chicken Quesadillas! These easy-to-make delights blend gooey cheese with savory chicken, all baked to crispy perfection. This recipe is perfect for busy nights and guarantees smiles around the table. Let’s dive into the ingredients and steps that make this meal a family favorite and discover tips to elevate your quesadilla game. Ready to get cooking?

Ingredients

Complete Ingredient List

To make cheesy sheet pan chicken quesadillas, gather these ingredients:

– 2 cups cooked chicken, shredded

– 1 cup shredded cheddar cheese

– 1 cup shredded Monterey Jack cheese

– 1 cup bell peppers, diced (mix of red, yellow, and green for color)

– 1 small red onion, finely diced

– 1 can (10 oz) diced tomatoes with green chilies, well-drained

– 1 teaspoon ground cumin

– 1 teaspoon garlic powder

– 1 teaspoon onion powder

– 1/2 teaspoon paprika

– 1/4 teaspoon cayenne pepper (optional, for an extra kick)

– 8 large flour tortillas

– 2 tablespoons olive oil

– Salt and freshly ground black pepper to taste

– 1/4 cup fresh cilantro, chopped (for garnish)

– Sour cream and salsa (for serving)

Suggested substitutions for dietary restrictions

If you want a healthier option, you can use whole wheat tortillas. For a vegetarian twist, swap chicken with black beans or mushrooms. Use dairy-free cheese if you are lactose intolerant. Always check labels for allergens to stay safe.

Importance of ingredient quality

Using fresh ingredients makes a big difference. Fresh chicken gives better flavor and texture. High-quality cheese melts smoothly and adds richness. Fresh veggies not only look good but also taste better. The right spices can elevate the entire dish. Always choose the best ingredients you can find for a delicious meal.

Step-by-Step Instructions

Preparation of the Oven and Baking Sheet

Preheat your oven to 400°F (200°C). This heat cooks the quesadillas evenly. Line a large baking sheet with parchment paper. The parchment paper helps keep the quesadillas from sticking. It also makes cleanup easy.

Filling Preparation

In a large mixing bowl, combine 2 cups of shredded chicken, 1 cup of cheddar cheese, and 1 cup of Monterey Jack cheese. Add in 1 cup of diced bell peppers and 1 small finely diced red onion. Pour in 1 can of diced tomatoes with green chilies, well-drained. This mix adds great flavor. Sprinkle in 1 teaspoon each of ground cumin, garlic powder, and onion powder. Add 1/2 teaspoon of paprika and 1/4 teaspoon of cayenne pepper for heat, if you like. Season with salt and freshly ground black pepper. Mix until everything is well combined.

Assembly Process

Lay four tortillas flat on the prepared baking sheet. Overlap them slightly if needed. Spread the chicken and cheese mixture evenly over the tortillas. Leave a small border to avoid spillage during baking. Place the remaining four tortillas on top of the filling. Press down lightly to help them stick together.

Baking Instructions

Brush the tops of the tortillas with 2 tablespoons of olive oil. This gives them a golden brown finish. Bake the quesadillas in the preheated oven for 15 to 20 minutes. They are ready when the tortillas are crispy and the cheese is melted and bubbling.

Serving Instructions

Once baked, let the quesadillas cool for a few minutes. Slice them into squares or wedges using a sharp knife or a pizza cutter. Serve them on a large platter. Garnish with 1/4 cup of freshly chopped cilantro. Pair with sour cream and salsa for dipping. These details make your dish look and taste great. For the full recipe, check out the section above.

Tips & Tricks

Time-Saving Hacks

– Use pre-cooked chicken to save time. You can find it in stores or use leftovers.

– Ready-made ingredients like shredded cheese and diced vegetables cut prep time.

– Consider meal prep by making the filling ahead of time. Store it in the fridge for up to three days.

– You can also freeze the filling for up to three months. Just thaw it before use.

Enhancing Flavor

– Add spice with chili powder or jalapeños. This gives a nice kick.

– Try different herbs, like oregano or cilantro, for fresh flavor.

– Top with avocado or fresh salsa for added taste and color.

Variations

Ingredient Swaps

– For vegetarians, use black beans or mushrooms instead of chicken. They pack great flavor.

– Mix cheeses for a unique twist. Try pepper jack for heat or goat cheese for creaminess.

Cooking Methods

– If you prefer, use a skillet or grill. Cook each quesadilla until golden brown.

– For mini quesadillas, cut tortillas in half and fill them with the same mixture. Cook them on a skillet for bite-sized treats.

Storage Info

Best Practices for Storing Leftovers

To keep your cheesy sheet pan chicken quesadillas fresh, store them properly. First, let the quesadillas cool down to room temperature. Then, wrap them tightly in plastic wrap or place them in airtight containers. You can store them in the fridge for up to three days. If you want to keep them longer, freezing is a great option. Wrap each quesadilla in foil before placing them in a freezer bag. This helps protect them from freezer burn.

When it’s time to enjoy your leftovers, you can reheat them in various ways. The oven is the best choice to maintain that crispy texture. Preheat your oven to 350°F (175°C) and bake the quesadillas for about 10 minutes. You can also use a skillet over medium heat, flipping them halfway through. For a quick option, use the microwave, but keep in mind the tortillas may become soft.

Shelf Life

Leftover cheesy sheet pan chicken quesadillas last for up to three days in the fridge. In the freezer, they can stay good for up to two months. To know if they have spoiled, look for a few signs. Check for any strange smells or changes in color. If the tortillas feel slimy or dry, it’s best to throw them away. Always trust your senses; they can help you avoid food waste and keep your meals safe.

FAQs

How to make Cheesy Sheet Pan Chicken Quesadillas gluten-free?

To make these quesadillas gluten-free, use gluten-free tortillas. Look for brands made from corn or brown rice. These options offer a great taste and texture. You can also use large lettuce leaves as a wrap for a low-carb choice.

Can I prepare the filling in advance?

Yes, you can prepare the filling up to two days in advance. Store it in an airtight container in the fridge. When ready, just assemble the quesadillas. This saves time and makes dinner easy.

What can I serve with Cheesy Sheet Pan Chicken Quesadillas?

I love serving these quesadillas with sides like:

– Guacamole

– Black bean salad

– Mexican rice

– Fresh corn salsa

These sides add flavor and make a complete meal.

Can I use a different protein in this recipe?

Absolutely! You can swap chicken with:

– Ground beef

– Shredded pork

– Tofu for a vegetarian option

Just cook the protein fully before mixing it with the other filling ingredients. This keeps the flavor and texture just right. Check out the Full Recipe for more details!

In this post, we covered the ingredients, preparation, and baking of cheesy sheet pan chicken quesadillas. I shared tips for enhancing flavors and making quick meals. You learned storage tips for leftovers and answers to common FAQs.

Remember, quality ingredients and proper techniques make a big difference. Enjoy experimenting with flavors and variations. Your quesadillas can be just as fun as they are tasty!

To make cheesy sheet pan chicken quesadillas, gather these ingredients: - 2 cups cooked chicken, shredded - 1 cup shredded cheddar cheese - 1 cup shredded Monterey Jack cheese - 1 cup bell peppers, diced (mix of red, yellow, and green for color) - 1 small red onion, finely diced - 1 can (10 oz) diced tomatoes with green chilies, well-drained - 1 teaspoon ground cumin - 1 teaspoon garlic powder - 1 teaspoon onion powder - 1/2 teaspoon paprika - 1/4 teaspoon cayenne pepper (optional, for an extra kick) - 8 large flour tortillas - 2 tablespoons olive oil - Salt and freshly ground black pepper to taste - 1/4 cup fresh cilantro, chopped (for garnish) - Sour cream and salsa (for serving) If you want a healthier option, you can use whole wheat tortillas. For a vegetarian twist, swap chicken with black beans or mushrooms. Use dairy-free cheese if you are lactose intolerant. Always check labels for allergens to stay safe. Using fresh ingredients makes a big difference. Fresh chicken gives better flavor and texture. High-quality cheese melts smoothly and adds richness. Fresh veggies not only look good but also taste better. The right spices can elevate the entire dish. Always choose the best ingredients you can find for a delicious meal. Preheat your oven to 400°F (200°C). This heat cooks the quesadillas evenly. Line a large baking sheet with parchment paper. The parchment paper helps keep the quesadillas from sticking. It also makes cleanup easy. In a large mixing bowl, combine 2 cups of shredded chicken, 1 cup of cheddar cheese, and 1 cup of Monterey Jack cheese. Add in 1 cup of diced bell peppers and 1 small finely diced red onion. Pour in 1 can of diced tomatoes with green chilies, well-drained. This mix adds great flavor. Sprinkle in 1 teaspoon each of ground cumin, garlic powder, and onion powder. Add 1/2 teaspoon of paprika and 1/4 teaspoon of cayenne pepper for heat, if you like. Season with salt and freshly ground black pepper. Mix until everything is well combined. Lay four tortillas flat on the prepared baking sheet. Overlap them slightly if needed. Spread the chicken and cheese mixture evenly over the tortillas. Leave a small border to avoid spillage during baking. Place the remaining four tortillas on top of the filling. Press down lightly to help them stick together. Brush the tops of the tortillas with 2 tablespoons of olive oil. This gives them a golden brown finish. Bake the quesadillas in the preheated oven for 15 to 20 minutes. They are ready when the tortillas are crispy and the cheese is melted and bubbling. Once baked, let the quesadillas cool for a few minutes. Slice them into squares or wedges using a sharp knife or a pizza cutter. Serve them on a large platter. Garnish with 1/4 cup of freshly chopped cilantro. Pair with sour cream and salsa for dipping. These details make your dish look and taste great. For the full recipe, check out the section above. - Use pre-cooked chicken to save time. You can find it in stores or use leftovers. - Ready-made ingredients like shredded cheese and diced vegetables cut prep time. - Consider meal prep by making the filling ahead of time. Store it in the fridge for up to three days. - You can also freeze the filling for up to three months. Just thaw it before use. - Add spice with chili powder or jalapeños. This gives a nice kick. - Try different herbs, like oregano or cilantro, for fresh flavor. - Top with avocado or fresh salsa for added taste and color. - For vegetarians, use black beans or mushrooms instead of chicken. They pack great flavor. - Mix cheeses for a unique twist. Try pepper jack for heat or goat cheese for creaminess. - If you prefer, use a skillet or grill. Cook each quesadilla until golden brown. - For mini quesadillas, cut tortillas in half and fill them with the same mixture. Cook them on a skillet for bite-sized treats. {{image_4}} To keep your cheesy sheet pan chicken quesadillas fresh, store them properly. First, let the quesadillas cool down to room temperature. Then, wrap them tightly in plastic wrap or place them in airtight containers. You can store them in the fridge for up to three days. If you want to keep them longer, freezing is a great option. Wrap each quesadilla in foil before placing them in a freezer bag. This helps protect them from freezer burn. When it's time to enjoy your leftovers, you can reheat them in various ways. The oven is the best choice to maintain that crispy texture. Preheat your oven to 350°F (175°C) and bake the quesadillas for about 10 minutes. You can also use a skillet over medium heat, flipping them halfway through. For a quick option, use the microwave, but keep in mind the tortillas may become soft. Leftover cheesy sheet pan chicken quesadillas last for up to three days in the fridge. In the freezer, they can stay good for up to two months. To know if they have spoiled, look for a few signs. Check for any strange smells or changes in color. If the tortillas feel slimy or dry, it's best to throw them away. Always trust your senses; they can help you avoid food waste and keep your meals safe. To make these quesadillas gluten-free, use gluten-free tortillas. Look for brands made from corn or brown rice. These options offer a great taste and texture. You can also use large lettuce leaves as a wrap for a low-carb choice. Yes, you can prepare the filling up to two days in advance. Store it in an airtight container in the fridge. When ready, just assemble the quesadillas. This saves time and makes dinner easy. I love serving these quesadillas with sides like: - Guacamole - Black bean salad - Mexican rice - Fresh corn salsa These sides add flavor and make a complete meal. Absolutely! You can swap chicken with: - Ground beef - Shredded pork - Tofu for a vegetarian option Just cook the protein fully before mixing it with the other filling ingredients. This keeps the flavor and texture just right. Check out the Full Recipe for more details! In this post, we covered the ingredients, preparation, and baking of cheesy sheet pan chicken quesadillas. I shared tips for enhancing flavors and making quick meals. You learned storage tips for leftovers and answers to common FAQs. Remember, quality ingredients and proper techniques make a big difference. Enjoy experimenting with flavors and variations. Your quesadillas can be just as fun as they are tasty!

Cheesy Sheet Pan Chicken Quesadillas

Satisfy your cravings with these Cheesy Sheet Pan Chicken Quesadillas! This easy recipe combines juicy shredded chicken, melty cheese, and vibrant veggies all baked to golden perfection. Perfect for family dinners or gatherings, these quesadillas are sure to impress. Explore the full recipe to learn how to whip up this cheesy delight in just 35 minutes. Click through now for mouthwatering details and make mealtime a hit!

Ingredients
  

2 cups cooked chicken, shredded

1 cup shredded cheddar cheese

1 cup shredded Monterey Jack cheese

1 cup bell peppers, diced (mix of red, yellow, and green for color)

1 small red onion, finely diced

1 can (10 oz) diced tomatoes with green chilies, well-drained

1 teaspoon ground cumin

1 teaspoon garlic powder

1 teaspoon onion powder

1/2 teaspoon paprika

1/4 teaspoon cayenne pepper (optional, for an extra kick)

8 large flour tortillas

2 tablespoons olive oil

Salt and freshly ground black pepper to taste

1/4 cup fresh cilantro, chopped (for garnish)

Sour cream and salsa (for serving)

Instructions
 

Preheat the Oven: Start by preheating your oven to 400°F (200°C). Line a large baking sheet with parchment paper to prevent sticking.

    Prepare the Filling: In a large mixing bowl, combine the shredded chicken with the cheddar cheese, Monterey Jack cheese, diced bell peppers, red onion, and the drained diced tomatoes. Sprinkle in the ground cumin, garlic powder, onion powder, paprika, and optional cayenne pepper. Season generously with salt and freshly ground black pepper, then mix thoroughly until all ingredients are well incorporated.

      Assemble the Quesadillas: Lay four tortillas flat on the prepared baking sheet, overlapping slightly if necessary to cover the surface completely.

        Spread the Mixture: Evenly distribute the chicken and cheese mixture over the tortillas, leaving a small border around the edges to prevent spillage during baking.

          Top with Tortillas: Gently place the remaining four tortillas on top of the filling, pressing down lightly to help them adhere to the mixture below.

            Add Olive Oil: Brush the tops of the tortillas with olive oil for that perfect golden brown finish during baking.

              Bake: Place the baking sheet in the preheated oven and bake for 15–20 minutes, or until the tortillas are golden and crispy, while the cheese is melty and bubbling.

                Slice and Serve: Once baked, remove the sheet from the oven and allow it to cool for a couple of minutes. Using a sharp knife or a pizza cutter, slice the quesadilla into squares or wedges.

                  Garnish: Before serving, sprinkle the quesadilla slices with freshly chopped cilantro for a burst of color and flavor.

                    Prep Time: 15 minutes | Total Time: 35 minutes | Servings: 4–6

                      - Serving Suggestions: Serve your cheesy quesadillas with a generous side of sour cream and salsa. For an eye-catching presentation, arrange the quesadilla slices on a large platter, garnished with extra cilantro and lime wedges for a refreshing touch. Enjoy your delicious creation!

                        WANT TO SAVE THIS RECIPE?

                        Related Posts