Cheesy Sheet Pan Chicken Quesadillas Easy and Quick
![When you make cheesy sheet pan chicken quesadillas, you need the right ingredients for the best taste. Here’s what you will need: - Shredded chicken options - 2 cups cooked chicken, shredded (rotisserie chicken works wonderfully) - Cheese varieties - 1 cup shredded cheddar cheese - 1 cup shredded Monterey Jack cheese - 1/2 cup cream cheese, softened - 1/4 cup sour cream - Vegetables and other mix-ins - 1 medium red bell pepper, diced - 1 medium green bell pepper, diced - 1 small red onion, finely chopped - 1 tablespoon taco seasoning - 8 large flour tortillas - 1 tablespoon olive oil - Fresh cilantro, chopped (for garnish) - Salsa, for serving - Avocado or guacamole, for serving These ingredients blend together to create a flavor-packed meal. Using rotisserie chicken saves time and adds great taste. The mix of cheddar and Monterey Jack gives a creamy, melty texture. Adding bell peppers and onions adds crunch and freshness. The taco seasoning gives it that extra kick. Feel free to experiment with your favorite veggies and cheese. This recipe is versatile and allows you to customize it to your liking. For the full recipe, check out the details above. Set your oven to 400°F (200°C). This heat helps the quesadillas cook evenly. Grab a large baking sheet and line it with parchment paper. This step is key because it keeps the quesadillas from sticking. Plus, it makes clean-up a breeze. In a big bowl, mix your ingredients well. You will need cooked chicken, cheddar cheese, Monterey Jack cheese, cream cheese, sour cream, diced red and green bell peppers, chopped red onion, and taco seasoning. The mixture should be smooth and creamy. Look for a texture that is spreadable but not runny. This helps keep the filling inside the tortillas. On a flat surface, lay down four tortillas. Spread the chicken mixture evenly on each one. Make sure to reach the edges so every bite is tasty. Then, place another tortilla on top of each filled one. Press down gently. This helps them stick together and hold the filling in. Once your quesadillas are ready, move them to the baking sheet. Brush the tops with olive oil. This adds flavor and helps them turn golden brown. Bake in your preheated oven for 15-20 minutes. Look for a nice golden color and melted cheese inside. These signs tell you they are done. After baking, take the quesadillas out and let them cool for a few minutes. This makes slicing easier. Cut each quesadilla into quarters for serving. Aim for about 4-6 servings, depending on your crowd. These quesadilla wedges are perfect for sharing! Avoiding Soggy Tortillas To keep your tortillas crisp, avoid overfilling them. Less is more! Also, use the right amount of olive oil on top. This will help them brown nicely. Always make sure to bake them until they are golden brown. Best Types of Tortillas to Use For the best texture, I recommend using large flour tortillas. They hold the filling well and become soft when baked. Corn tortillas can work too, but they may crack more easily. Pairing with Dipping Sauces Serve your quesadillas with a variety of dips. Salsa is a classic choice. You can also offer guacamole and sour cream. These add creaminess and flavor. Garnishes for Presentation To make your dish look great, sprinkle fresh cilantro on top. You can also add sliced jalapeños for a pop of color. This makes your quesadillas look fancy and appetizing. Adjusting the Recipe If you have a big group, you can easily double the recipe. Just make sure to use a larger baking sheet. This way, you can cook more quesadillas at once. Time-Saving Tips Use rotisserie chicken for quick prep. It saves time and adds great flavor. You can also chop your veggies ahead of time. This keeps the cooking quick and easy. To see the full recipe, check out the [Full Recipe]. {{image_4}} Alternative Proteins You can switch the chicken for other proteins. Try shredded beef or cooked shrimp. For a lighter option, use turkey. If you prefer plant-based meals, chickpeas or tofu work well too. Different Cheese Combos Cheese is key to quesadillas. You can mix different cheeses for fun flavors. Pepper Jack adds spice, while gouda gives a smoky touch. Experiment with cream cheese and feta for creamy bites. Adding Spices or Herbs Spice up your quesadillas! Add chili powder or cumin for warmth. Fresh herbs like cilantro or parsley brighten flavors. A squeeze of lime gives a fresh zing. Incorporating Beans or Corn Beans and corn boost nutrition and flavor. Black beans add protein, while corn brings sweetness. Mix them into your filling for a hearty twist. Gluten-Free Options To make this dish gluten-free, swap flour tortillas for corn ones. Always check labels to ensure they meet your needs. You can also serve the filling on lettuce wraps. Vegetarian Adjustments For a vegetarian version, skip the chicken. Use mushrooms or zucchini for a meaty texture. Add more beans and veggies to keep it filling. For the full recipe, check the [Full Recipe]. To store your cheesy sheet pan chicken quesadillas, let them cool first. Wrap them tightly in plastic wrap or foil. You can also place them in an airtight container. This keeps them fresh and tasty. - Shelf Life: When stored properly, quesadillas last up to 3 days in the fridge. After that, they may lose flavor and freshness. If you want to save some for later, freezing is great! - How to Freeze Quesadillas: First, cool them completely. Then, wrap each quesadilla in plastic wrap. Place them in a freezer-safe bag or container. This helps prevent freezer burn. - Reheating Tips for Best Results: To reheat, thaw overnight in the fridge. Then, bake them at 350°F (175°C) for about 10 minutes. This makes them warm and crispy again. Don't let any filling go to waste! - Creative Ways to Use Leftovers: You can add leftover filling to salads or burritos. Mix it with scrambled eggs for a tasty breakfast. - Recipes Using Leftover Filling: Try using the filling in omelets or as a topping for nachos. You can also use it in stuffed peppers for a fun twist. For more details on making this dish, check out the [Full Recipe]. To make this dish gluten-free, swap out regular flour tortillas for gluten-free ones. Many brands offer great taste and texture. You can also check for taco seasoning that is gluten-free. This way, you keep all the flavor without the gluten. Yes, you can use raw chicken. Just make sure to cook it first. You can bake or grill the chicken until it reaches 165°F (75°C). Shred the cooked chicken before mixing it with the other ingredients. This keeps your quesadillas safe and tasty. To reheat quesadillas, use the oven or a skillet. Preheat the oven to 350°F (175°C) and bake for about 10 minutes. If using a skillet, heat it over medium heat. Cook for 2-3 minutes on each side until warm and crispy. This way, you keep the texture nice. Look for a golden brown color on the outside. You should also see melted cheese oozing out from the edges. A crispy texture means they are ready to enjoy. Let them cool for a few minutes after baking before slicing. Quesadillas pair well with many sides. You can serve them with salsa or guacamole for dipping. A fresh salad or some Mexican rice adds a nice touch too. Black beans are another great side option. These sides enhance your meal and make it even more fun to eat. You now have all the tools to make great chicken quesadillas. We covered essential ingredients and step-by-step instructions. Use the tips to avoid soggy tortillas and serve with tasty dips. Don’t forget to explore variations to suit your taste. Store any leftovers properly for future meals. Whether for a quiet dinner or a crowd, you’re ready to impress. Enjoy your cooking and have fun creating delicious quesadillas!](https://dishtreats.com/wp-content/uploads/2025/07/9e515845-1856-4bb5-82ee-80ca33afd87d.webp)
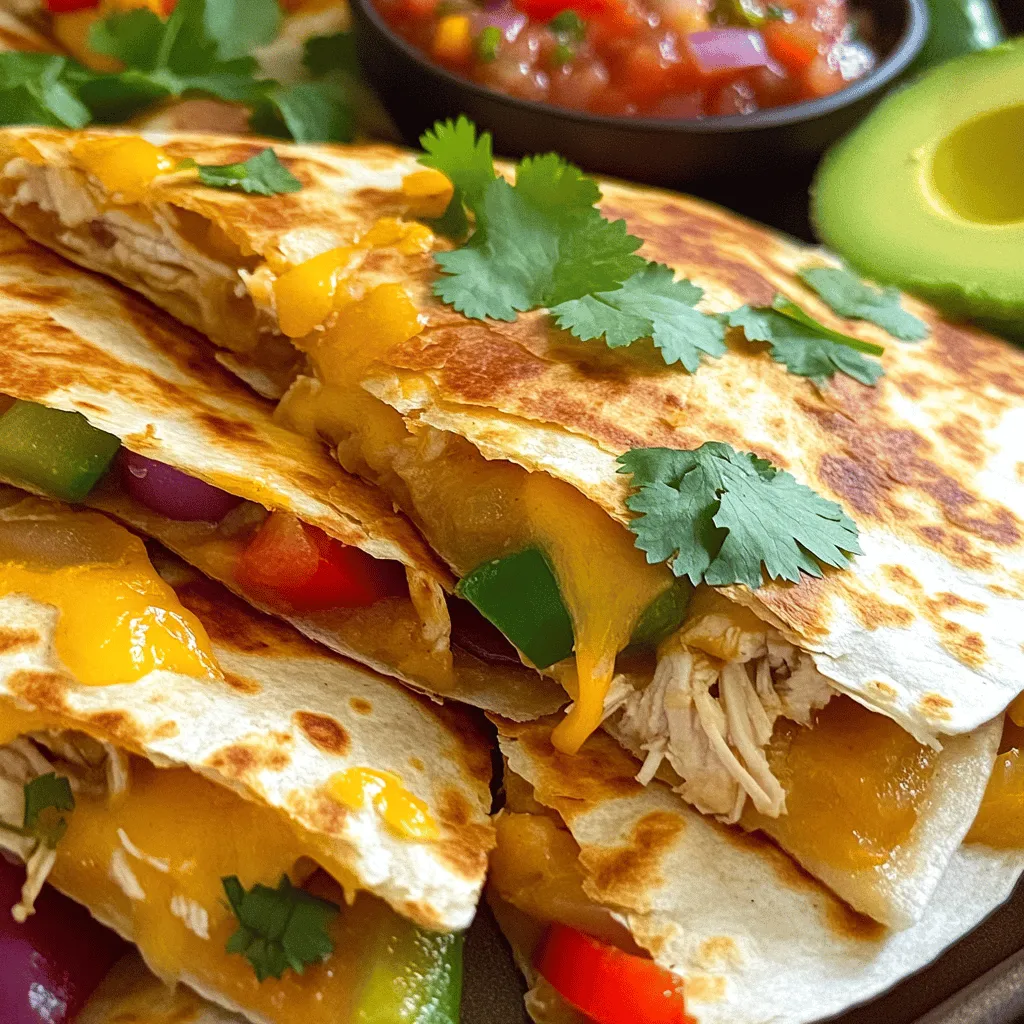
If you’re craving a quick and tasty meal, these Cheesy Sheet Pan Chicken Quesadillas are your answer! They combine savory chicken, gooey cheese, and your favorite veggies all in one easy dish. You can whip them up in no time, making them perfect for busy weeknights or a fun gathering. Let’s dive into this simple recipe that guarantees cheesy satisfaction and big flavors!
Ingredients
When you make cheesy sheet pan chicken quesadillas, you need the right ingredients for the best taste. Here’s what you will need:
- Shredded chicken options
- 2 cups cooked chicken, shredded (rotisserie chicken works wonderfully)
- Cheese varieties
- 1 cup shredded cheddar cheese
- 1 cup shredded Monterey Jack cheese
- 1/2 cup cream cheese, softened
- 1/4 cup sour cream
- Vegetables and other mix-ins
- 1 medium red bell pepper, diced
- 1 medium green bell pepper, diced
- 1 small red onion, finely chopped
- 1 tablespoon taco seasoning
- 8 large flour tortillas
- 1 tablespoon olive oil
- Fresh cilantro, chopped (for garnish)
- Salsa, for serving
- Avocado or guacamole, for serving
These ingredients blend together to create a flavor-packed meal. Using rotisserie chicken saves time and adds great taste. The mix of cheddar and Monterey Jack gives a creamy, melty texture. Adding bell peppers and onions adds crunch and freshness. The taco seasoning gives it that extra kick.
Feel free to experiment with your favorite veggies and cheese. This recipe is versatile and allows you to customize it to your liking.
Step-by-Step Instructions
Preheat and Prepare
Set your oven to 400°F (200°C). This heat helps the quesadillas cook evenly. Grab a large baking sheet and line it with parchment paper. This step is key because it keeps the quesadillas from sticking. Plus, it makes clean-up a breeze.
Mixing the Filling
In a big bowl, mix your ingredients well. You will need cooked chicken, cheddar cheese, Monterey Jack cheese, cream cheese, sour cream, diced red and green bell peppers, chopped red onion, and taco seasoning. The mixture should be smooth and creamy. Look for a texture that is spreadable but not runny. This helps keep the filling inside the tortillas.
Assembling the Quesadillas
On a flat surface, lay down four tortillas. Spread the chicken mixture evenly on each one. Make sure to reach the edges so every bite is tasty. Then, place another tortilla on top of each filled one. Press down gently. This helps them stick together and hold the filling in.
Baking Instructions
Once your quesadillas are ready, move them to the baking sheet. Brush the tops with olive oil. This adds flavor and helps them turn golden brown. Bake in your preheated oven for 15-20 minutes. Look for a nice golden color and melted cheese inside. These signs tell you they are done.
Final Steps
After baking, take the quesadillas out and let them cool for a few minutes. This makes slicing easier. Cut each quesadilla into quarters for serving. Aim for about 4-6 servings, depending on your crowd. These quesadilla wedges are perfect for sharing!
Tips & Tricks
Perfecting Your Quesadilla
Avoiding Soggy Tortillas
To keep your tortillas crisp, avoid overfilling them. Less is more! Also, use the right amount of olive oil on top. This will help them brown nicely. Always make sure to bake them until they are golden brown.
Best Types of Tortillas to Use
For the best texture, I recommend using large flour tortillas. They hold the filling well and become soft when baked. Corn tortillas can work too, but they may crack more easily.
Serving Suggestions
Pairing with Dipping Sauces
Serve your quesadillas with a variety of dips. Salsa is a classic choice. You can also offer guacamole and sour cream. These add creaminess and flavor.
Garnishes for Presentation
To make your dish look great, sprinkle fresh cilantro on top. You can also add sliced jalapeños for a pop of color. This makes your quesadillas look fancy and appetizing.
Cooking for a Crowd
Adjusting the Recipe
If you have a big group, you can easily double the recipe. Just make sure to use a larger baking sheet. This way, you can cook more quesadillas at once.
Time-Saving Tips
Use rotisserie chicken for quick prep. It saves time and adds great flavor. You can also chop your veggies ahead of time. This keeps the cooking quick and easy.
Variations
Ingredient Swaps
Alternative Proteins
You can switch the chicken for other proteins. Try shredded beef or cooked shrimp. For a lighter option, use turkey. If you prefer plant-based meals, chickpeas or tofu work well too.
Different Cheese Combos
Cheese is key to quesadillas. You can mix different cheeses for fun flavors. Pepper Jack adds spice, while gouda gives a smoky touch. Experiment with cream cheese and feta for creamy bites.
Flavor Enhancements
Adding Spices or Herbs
Spice up your quesadillas! Add chili powder or cumin for warmth. Fresh herbs like cilantro or parsley brighten flavors. A squeeze of lime gives a fresh zing.
Incorporating Beans or Corn
Beans and corn boost nutrition and flavor. Black beans add protein, while corn brings sweetness. Mix them into your filling for a hearty twist.
Dietary Modifications
Gluten-Free Options
To make this dish gluten-free, swap flour tortillas for corn ones. Always check labels to ensure they meet your needs. You can also serve the filling on lettuce wraps.
Vegetarian Adjustments
For a vegetarian version, skip the chicken. Use mushrooms or zucchini for a meaty texture. Add more beans and veggies to keep it filling.
Storage Info
Refrigeration
To store your cheesy sheet pan chicken quesadillas, let them cool first. Wrap them tightly in plastic wrap or foil. You can also place them in an airtight container. This keeps them fresh and tasty.
- Shelf Life: When stored properly, quesadillas last up to 3 days in the fridge. After that, they may lose flavor and freshness.
Freezing Instructions
If you want to save some for later, freezing is great!
- How to Freeze Quesadillas: First, cool them completely. Then, wrap each quesadilla in plastic wrap. Place them in a freezer-safe bag or container. This helps prevent freezer burn.
- Reheating Tips for Best Results: To reheat, thaw overnight in the fridge. Then, bake them at 350°F (175°C) for about 10 minutes. This makes them warm and crispy again.
Leftover Ideas
Don’t let any filling go to waste!
- Creative Ways to Use Leftovers: You can add leftover filling to salads or burritos. Mix it with scrambled eggs for a tasty breakfast.
- Recipes Using Leftover Filling: Try using the filling in omelets or as a topping for nachos. You can also use it in stuffed peppers for a fun twist.
FAQs
How do I make Cheesy Sheet Pan Chicken Quesadillas gluten-free?
To make this dish gluten-free, swap out regular flour tortillas for gluten-free ones. Many brands offer great taste and texture. You can also check for taco seasoning that is gluten-free. This way, you keep all the flavor without the gluten.
Can I use raw chicken instead of cooked?
Yes, you can use raw chicken. Just make sure to cook it first. You can bake or grill the chicken until it reaches 165°F (75°C). Shred the cooked chicken before mixing it with the other ingredients. This keeps your quesadillas safe and tasty.
What’s the best way to reheat quesadillas?
To reheat quesadillas, use the oven or a skillet. Preheat the oven to 350°F (175°C) and bake for about 10 minutes. If using a skillet, heat it over medium heat. Cook for 2-3 minutes on each side until warm and crispy. This way, you keep the texture nice.
How do I know when the quesadillas are done baking?
Look for a golden brown color on the outside. You should also see melted cheese oozing out from the edges. A crispy texture means they are ready to enjoy. Let them cool for a few minutes after baking before slicing.
What can I serve with Quesadillas?
Quesadillas pair well with many sides. You can serve them with salsa or guacamole for dipping. A fresh salad or some Mexican rice adds a nice touch too. Black beans are another great side option. These sides enhance your meal and make it even more fun to eat.
You now have all the tools to make great chicken quesadillas. We covered essential ingredients and step-by-step instructions. Use the tips to avoid soggy tortillas and serve with tasty dips. Don’t forget to explore variations to suit your taste. Store any leftovers properly for future meals. Whether for a quiet dinner or a crowd, you’re ready to impress. Enjoy your cooking and have fun creating delicious quesadillas!
![When you make cheesy sheet pan chicken quesadillas, you need the right ingredients for the best taste. Here’s what you will need: - Shredded chicken options - 2 cups cooked chicken, shredded (rotisserie chicken works wonderfully) - Cheese varieties - 1 cup shredded cheddar cheese - 1 cup shredded Monterey Jack cheese - 1/2 cup cream cheese, softened - 1/4 cup sour cream - Vegetables and other mix-ins - 1 medium red bell pepper, diced - 1 medium green bell pepper, diced - 1 small red onion, finely chopped - 1 tablespoon taco seasoning - 8 large flour tortillas - 1 tablespoon olive oil - Fresh cilantro, chopped (for garnish) - Salsa, for serving - Avocado or guacamole, for serving These ingredients blend together to create a flavor-packed meal. Using rotisserie chicken saves time and adds great taste. The mix of cheddar and Monterey Jack gives a creamy, melty texture. Adding bell peppers and onions adds crunch and freshness. The taco seasoning gives it that extra kick. Feel free to experiment with your favorite veggies and cheese. This recipe is versatile and allows you to customize it to your liking. For the full recipe, check out the details above. Set your oven to 400°F (200°C). This heat helps the quesadillas cook evenly. Grab a large baking sheet and line it with parchment paper. This step is key because it keeps the quesadillas from sticking. Plus, it makes clean-up a breeze. In a big bowl, mix your ingredients well. You will need cooked chicken, cheddar cheese, Monterey Jack cheese, cream cheese, sour cream, diced red and green bell peppers, chopped red onion, and taco seasoning. The mixture should be smooth and creamy. Look for a texture that is spreadable but not runny. This helps keep the filling inside the tortillas. On a flat surface, lay down four tortillas. Spread the chicken mixture evenly on each one. Make sure to reach the edges so every bite is tasty. Then, place another tortilla on top of each filled one. Press down gently. This helps them stick together and hold the filling in. Once your quesadillas are ready, move them to the baking sheet. Brush the tops with olive oil. This adds flavor and helps them turn golden brown. Bake in your preheated oven for 15-20 minutes. Look for a nice golden color and melted cheese inside. These signs tell you they are done. After baking, take the quesadillas out and let them cool for a few minutes. This makes slicing easier. Cut each quesadilla into quarters for serving. Aim for about 4-6 servings, depending on your crowd. These quesadilla wedges are perfect for sharing! Avoiding Soggy Tortillas To keep your tortillas crisp, avoid overfilling them. Less is more! Also, use the right amount of olive oil on top. This will help them brown nicely. Always make sure to bake them until they are golden brown. Best Types of Tortillas to Use For the best texture, I recommend using large flour tortillas. They hold the filling well and become soft when baked. Corn tortillas can work too, but they may crack more easily. Pairing with Dipping Sauces Serve your quesadillas with a variety of dips. Salsa is a classic choice. You can also offer guacamole and sour cream. These add creaminess and flavor. Garnishes for Presentation To make your dish look great, sprinkle fresh cilantro on top. You can also add sliced jalapeños for a pop of color. This makes your quesadillas look fancy and appetizing. Adjusting the Recipe If you have a big group, you can easily double the recipe. Just make sure to use a larger baking sheet. This way, you can cook more quesadillas at once. Time-Saving Tips Use rotisserie chicken for quick prep. It saves time and adds great flavor. You can also chop your veggies ahead of time. This keeps the cooking quick and easy. To see the full recipe, check out the [Full Recipe]. {{image_4}} Alternative Proteins You can switch the chicken for other proteins. Try shredded beef or cooked shrimp. For a lighter option, use turkey. If you prefer plant-based meals, chickpeas or tofu work well too. Different Cheese Combos Cheese is key to quesadillas. You can mix different cheeses for fun flavors. Pepper Jack adds spice, while gouda gives a smoky touch. Experiment with cream cheese and feta for creamy bites. Adding Spices or Herbs Spice up your quesadillas! Add chili powder or cumin for warmth. Fresh herbs like cilantro or parsley brighten flavors. A squeeze of lime gives a fresh zing. Incorporating Beans or Corn Beans and corn boost nutrition and flavor. Black beans add protein, while corn brings sweetness. Mix them into your filling for a hearty twist. Gluten-Free Options To make this dish gluten-free, swap flour tortillas for corn ones. Always check labels to ensure they meet your needs. You can also serve the filling on lettuce wraps. Vegetarian Adjustments For a vegetarian version, skip the chicken. Use mushrooms or zucchini for a meaty texture. Add more beans and veggies to keep it filling. For the full recipe, check the [Full Recipe]. To store your cheesy sheet pan chicken quesadillas, let them cool first. Wrap them tightly in plastic wrap or foil. You can also place them in an airtight container. This keeps them fresh and tasty. - Shelf Life: When stored properly, quesadillas last up to 3 days in the fridge. After that, they may lose flavor and freshness. If you want to save some for later, freezing is great! - How to Freeze Quesadillas: First, cool them completely. Then, wrap each quesadilla in plastic wrap. Place them in a freezer-safe bag or container. This helps prevent freezer burn. - Reheating Tips for Best Results: To reheat, thaw overnight in the fridge. Then, bake them at 350°F (175°C) for about 10 minutes. This makes them warm and crispy again. Don't let any filling go to waste! - Creative Ways to Use Leftovers: You can add leftover filling to salads or burritos. Mix it with scrambled eggs for a tasty breakfast. - Recipes Using Leftover Filling: Try using the filling in omelets or as a topping for nachos. You can also use it in stuffed peppers for a fun twist. For more details on making this dish, check out the [Full Recipe]. To make this dish gluten-free, swap out regular flour tortillas for gluten-free ones. Many brands offer great taste and texture. You can also check for taco seasoning that is gluten-free. This way, you keep all the flavor without the gluten. Yes, you can use raw chicken. Just make sure to cook it first. You can bake or grill the chicken until it reaches 165°F (75°C). Shred the cooked chicken before mixing it with the other ingredients. This keeps your quesadillas safe and tasty. To reheat quesadillas, use the oven or a skillet. Preheat the oven to 350°F (175°C) and bake for about 10 minutes. If using a skillet, heat it over medium heat. Cook for 2-3 minutes on each side until warm and crispy. This way, you keep the texture nice. Look for a golden brown color on the outside. You should also see melted cheese oozing out from the edges. A crispy texture means they are ready to enjoy. Let them cool for a few minutes after baking before slicing. Quesadillas pair well with many sides. You can serve them with salsa or guacamole for dipping. A fresh salad or some Mexican rice adds a nice touch too. Black beans are another great side option. These sides enhance your meal and make it even more fun to eat. You now have all the tools to make great chicken quesadillas. We covered essential ingredients and step-by-step instructions. Use the tips to avoid soggy tortillas and serve with tasty dips. Don’t forget to explore variations to suit your taste. Store any leftovers properly for future meals. Whether for a quiet dinner or a crowd, you’re ready to impress. Enjoy your cooking and have fun creating delicious quesadillas!](https://dishtreats.com/wp-content/uploads/2025/07/9e515845-1856-4bb5-82ee-80ca33afd87d-300x300.webp)