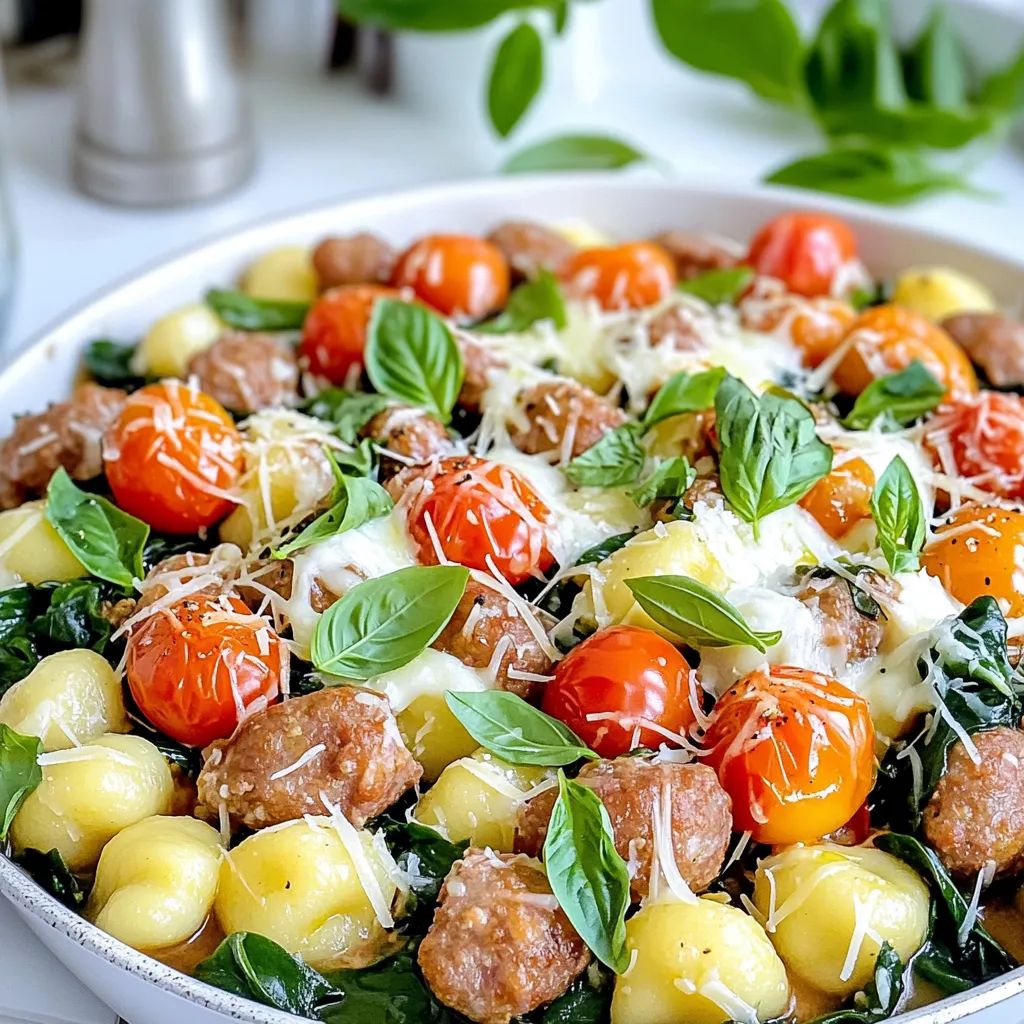
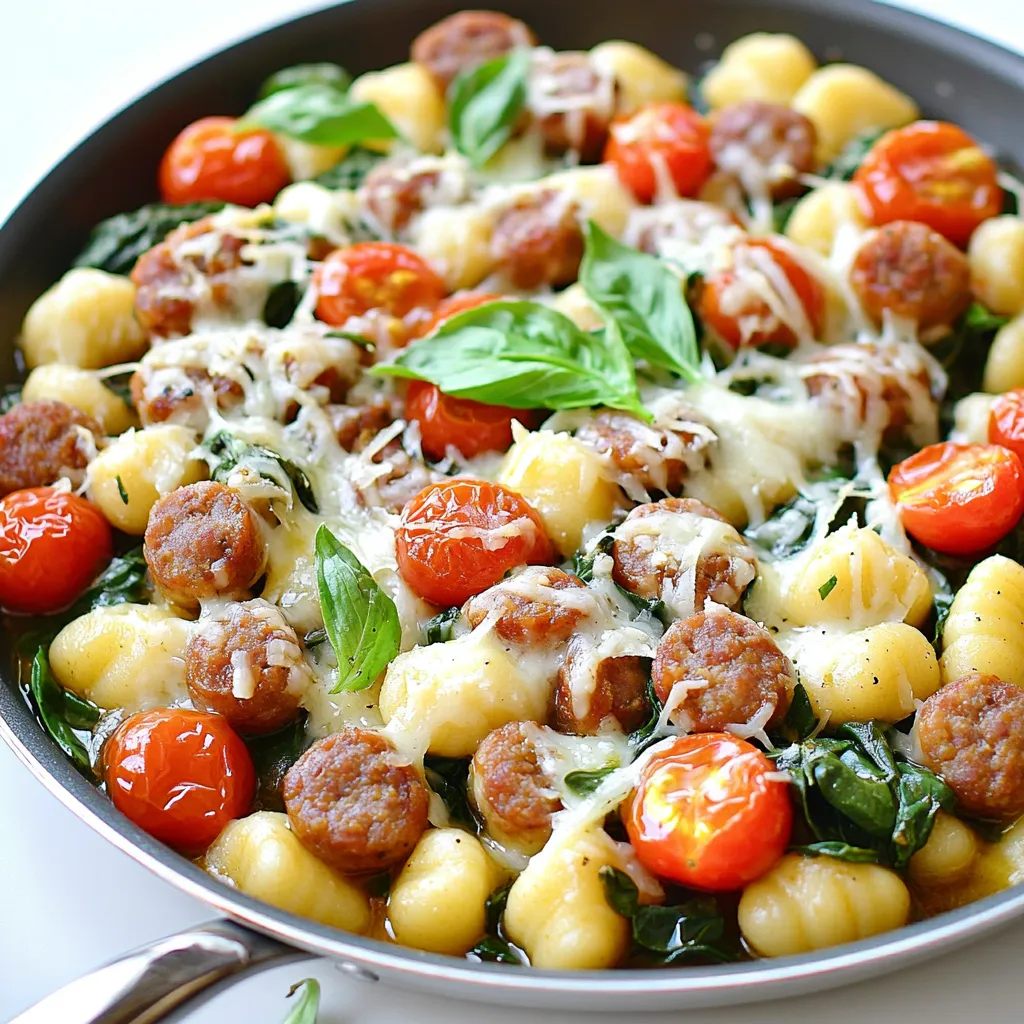
If you’re looking for a quick and tasty dinner, my Cheesy Sausage Gnocchi One Pan is perfect! This recipe is simple, packed with flavor, and ready in no time. Imagine juicy Italian sausage, tender gnocchi, and gooey cheese, all cooked in one pan. I’ll guide you step-by-step, ensuring you create a cozy meal that warms hearts. Let’s dive into this delightful dish that’s sure to impress!
Ingredients
Main Ingredients
– 1 pound Italian sausage (mild or spicy)
– 1 (16 oz) package of gnocchi (store-bought or homemade)
– 2 cups cherry tomatoes, halved
– 1 cup baby spinach leaves
Cheese Selection
– 1 cup shredded mozzarella cheese
– 1/2 cup grated Parmesan cheese
Pantry Staples
– 2 tablespoons extra-virgin olive oil
– 2 cloves garlic, minced
– 1 teaspoon Italian seasoning blend
– 1/2 teaspoon red pepper flakes (optional, for heat)
The main ingredients set the stage for this dish. The Italian sausage gives it a rich flavor. You can choose between mild and spicy, depending on your taste. Gnocchi, either store-bought or homemade, creates a soft texture. Cherry tomatoes add a burst of freshness, while baby spinach brings color and nutrients.
Cheese is the star in this recipe. Shredded mozzarella melts well and creates that gooey texture we love. Grated Parmesan adds a salty bite that makes everything taste better.
Don’t forget the pantry staples. Extra-virgin olive oil is key for cooking the sausage. Minced garlic brings in a wonderful aroma. The Italian seasoning blend adds depth, while red pepper flakes give an optional kick.
These ingredients come together to create a dish that’s comforting and packed with flavors.
Step-by-Step Instructions
Preparing the Sausage
Start by heating two tablespoons of olive oil in a large skillet over medium heat. Once the oil is hot, add one pound of Italian sausage. Choose either mild or spicy, based on your taste. Use a spatula to break apart the sausage as it cooks. This helps it brown evenly. Cook for about 6-8 minutes, stirring now and then until the sausage is browned and fully cooked.
Adding Flavorful Ingredients
Next, add two cloves of minced garlic to the skillet. Stir for about 30 seconds until it smells amazing. Then, toss in two cups of halved cherry tomatoes. Cook this mixture for 2-3 minutes. You want the tomatoes to soften and release their juices. This step adds great flavor to the dish.
Cooking the Gnocchi
Now it’s time to add the gnocchi. You can use one 16 oz package of store-bought gnocchi or make your own. Gently stir the gnocchi into the skillet. Pour in enough water to just cover the gnocchi, about 2-3 cups. Sprinkle in one teaspoon of Italian seasoning, along with salt and freshly cracked black pepper. If you like some heat, add half a teaspoon of red pepper flakes. Mix everything well.
Finishing Touches
Let the mixture come to a gentle simmer. Cover the pan with a lid and cook for about 5-7 minutes. This will help the gnocchi become tender. Stir occasionally to keep it from sticking. Once the gnocchi is cooked, remove the lid. Fold in one cup of baby spinach until it wilts. Then, sprinkle one cup of shredded mozzarella cheese and half a cup of grated Parmesan cheese over the top. Cover again for a few minutes to let the cheese melt.
Serving the Dish
Once the cheese is melted and gooey, taste the dish. Adjust the seasoning with more salt and pepper if needed. Remove the pan from heat. Spoon the cheesy gnocchi onto plates. Garnish with fresh basil or parsley leaves for a lovely touch. This dish is sure to impress!
Tips & Tricks
Cooking Techniques
To avoid sticking in the pan, use a non-stick skillet. Make sure you heat the olive oil before adding the sausage. This helps create a barrier and keeps it from clinging to the bottom. Stir the sausage often while it cooks. This breaks it apart and helps it brown evenly.
For even cooking, spread the gnocchi across the skillet. Ensure they have space and aren’t overcrowded. Stir gently when simmering to prevent sticking. Keep the heat on medium-low, so nothing burns while cooking.
Ingredient Substitutions
If you want alternatives for sausage, try ground turkey or chicken. They offer a lighter flavor but still taste great. For a vegetarian option, use plant-based sausage or mushrooms. Both add depth without meat.
For cheese variations, consider using sharp cheddar or creamy Gouda. They can change the taste and richness of your dish. Mixing different cheeses can also create a fun flavor profile.
Flavor Enhancements
To elevate the dish, add fresh herbs like basil or parsley. They bring a fresh taste that brightens the meal. You can also use dried oregano or thyme for added flavor.
Adding extra veggies can give your dish more color and nutrients. Zucchini, bell peppers, or peas work well. You can also mix in some cooked chicken or shrimp for added protein, making your meal heartier.
Variations
Vegetarian Option
You can make this dish vegetarian by replacing sausage with plant-based options. Look for meatless sausages at your grocery store. They add great flavor without the meat. You can choose spicy or mild versions, just like regular sausage. This keeps the dish rich and tasty. Add extra herbs to boost the flavor.
Different Cheeses
Cheese is key in this recipe. While mozzarella and Parmesan work well, you can explore other options. Try using Gouda for a smoky taste or cheddar for a sharp kick. Each cheese will change the dish’s flavor. Mix and match to find your favorite combo. Stronger cheeses can add depth to the dish, so have fun with it!
Seasonal Additions
You can make this dish more vibrant by adding seasonal vegetables. In summer, toss in zucchini or bell peppers. They pair well with the tomatoes and spinach. In winter, consider using hearty vegetables like kale or butternut squash. Adjust your veggies based on what’s fresh. This not only boosts nutrition but also keeps the dish exciting all year round!
Storage Info
Leftover Storage
To store your Cheesy Sausage Gnocchi, let it cool down first. Place leftovers in a container with a tight lid. This helps keep the dish fresh and tasty. Store it in the fridge for up to three days. If you want to enjoy it later, freezing is a good option.
Freezing Instructions
To freeze portions of the dish, let it cool completely. Then, scoop it into freezer-safe bags or containers. Remove as much air as you can. Label the bags with the date. You can freeze it for up to three months. When ready to eat, thaw it overnight in the fridge. For quick thawing, you can also use the microwave.
Reheating Techniques
For reheating, you can use the stove or the microwave. On the stove, heat a pan over medium heat. Add a splash of water or broth to keep it moist. Stir until hot and bubbly. In the microwave, place it in a microwave-safe bowl. Cover it with a damp paper towel. Heat in short bursts, stirring in between, until it’s warm. This helps keep the cheese melty and the gnocchi soft.
FAQs
How long does it take to make Cheesy Sausage Gnocchi One Pan?
You can whip up this dish in about 30 minutes. It takes around 10 minutes to prep. Then, it cooks for about 20 minutes. This quick time makes it perfect for busy nights.
Can I use frozen gnocchi for this recipe?
Yes, you can use frozen gnocchi! Just add it directly to the pan without thawing. You may need to cook it a little longer. Frozen gnocchi can still taste great and saves time.
How can I make this dish spicier?
To add more heat, use spicy Italian sausage. You can also add more red pepper flakes. Consider including chopped jalapeños or even hot sauce for extra kick. Adjust to your taste!
Is this dish suitable for meal prep?
Absolutely! This dish works well for meal prep. You can cook it ahead and store it in the fridge for about three days. Just reheat it on the stove or in the microwave when you are ready to eat.
This dish blends tasty ingredients like sausage, gnocchi, and cheese. You can customize it easily. Try different cheeses or veggies based on the season. Leftovers are simple to store and reheat. Whether you enjoy cooking or want quick meals, this recipe works for you. With these tips and tricks, you’re all set to impress at dinner. Enjoy making delightful meals that friends and family will love!


