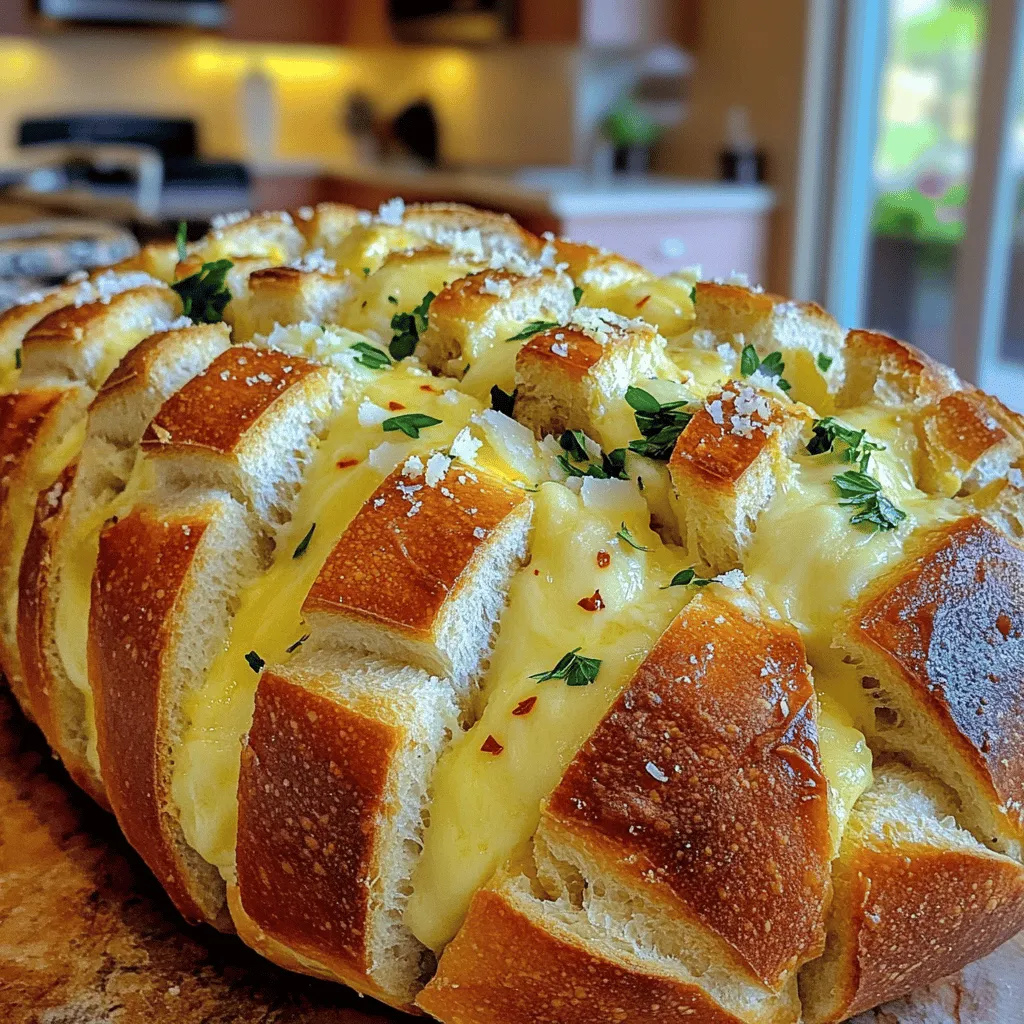
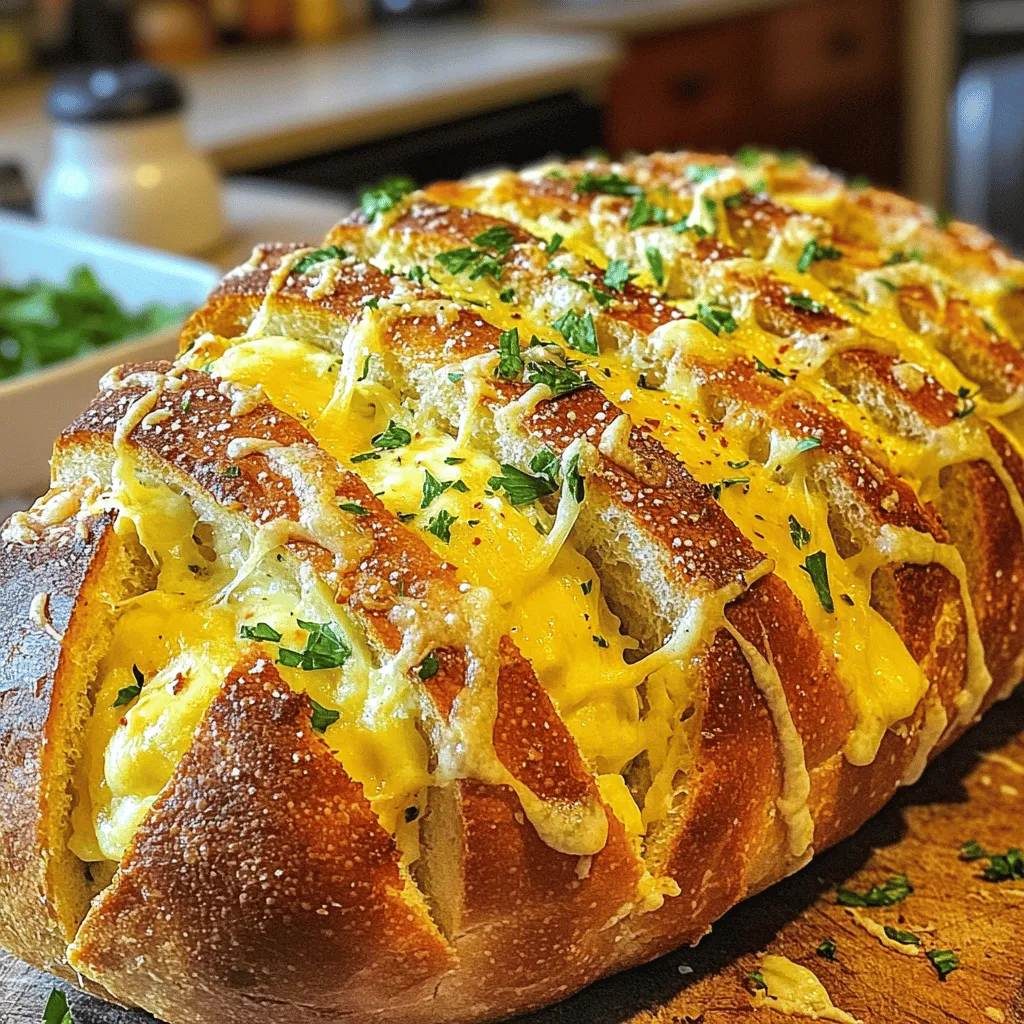
Are you ready for a snack that combines cheese, garlic, and warmth? My Cheesy Pull Apart Garlic Bread is an irresistible delight, perfect for any gathering or cozy night in. With just a few simple ingredients, you can create a dish that pulls apart easily and tastes amazing. Follow me as we explore the best tips, tricks, and variations to make your cheesy bread dreams come true!
Ingredients
Main Ingredients
– 1 large loaf of crusty sourdough or Italian bread
– 1/2 cup unsalted butter, melted
– 4 cloves of garlic, finely minced
– 2 cups shredded mozzarella cheese
– 1/2 cup freshly grated Parmesan cheese
Optional Add-ins
– 1 teaspoon dried oregano
– 1 teaspoon dried parsley
– 1/2 teaspoon red pepper flakes
Garnishing and Serving Suggestions
– Fresh parsley, chopped for garnish
– Best pairings with cheesy pull-apart garlic bread
Cheesy pull-apart garlic bread starts with a great loaf of bread. I love using sourdough or Italian bread because they have a crusty outside and a soft inside. This helps hold all the gooey cheese and butter.
For the rich taste, I use unsalted butter. Melting it makes mixing easy. The garlic is key here. I chop four cloves finely. This gives the bread a strong garlic flavor. If you want a kick, add red pepper flakes.
Next, we get cheesy! I use two cups of shredded mozzarella. It melts beautifully and pulls apart well. I also add half a cup of grated Parmesan for depth and tang.
You can also mix in dried herbs like oregano and parsley. They boost the bread’s flavor. Once baked, I like to sprinkle fresh parsley on top. It adds a nice color and freshness.
Now, you have a solid list of ingredients for this delicious recipe.Enjoy making this tasty treat!
Step-by-Step Instructions
Preparation Steps
– Preheat the oven to 375°F (190°C).
– Slice the loaf of bread in a grid pattern without cutting through.
First, let’s get that oven nice and warm. Preheating it ensures our bread bakes evenly. Next, grab your loaf of crusty sourdough or Italian bread. Carefully slice it in a grid. Make deep cuts, about one inch apart, but don’t cut all the way through. This step helps the bread pull apart easily later.
Mixing Ingredients
– Combine melted butter with garlic and herbs.
– Prepare the cheese mixture.
Now, let’s make the garlic butter. In a bowl, mix the melted butter, minced garlic, oregano, and parsley. If you like heat, add red pepper flakes. Stir well. This mix will give your bread a tasty kick. Next, prepare the cheese. In another bowl, combine shredded mozzarella and grated Parmesan. This cheesy mix will make each bite creamy and delicious.
Baking the Bread
– Drizzle the garlic butter into the cuts.
– Stuff the cheese mixture into the cuts.
– Bake covered in foil and then uncovered until golden and bubbly.
Take your garlic butter and drizzle it into the cuts of your bread. Make sure every part gets coated. Then, stuff the cheese mixture into those same cuts. Be generous! Wrap the stuffed loaf in aluminum foil and place it on a baking sheet. Bake it in the preheated oven for about 15 minutes. This melts the cheese nicely. After 15 minutes, carefully remove the foil. Bake uncovered for an extra 10-15 minutes. Watch for that beautiful golden color and bubbling cheese.
Enjoy the aroma filling your kitchen as it bakes! You have just created cheesy pull-apart garlic bread that is sure to impress.
Tips & Tricks
Best Practices
To make cheesy pull-apart garlic bread, start with slicing the bread correctly. Use a serrated knife and cut deep lines without cutting all the way through. Create a grid pattern by cutting both horizontally and vertically, about one inch apart. This helps the garlic butter and cheese seep into every bite.
Next, for even butter distribution, pour the garlic butter mix into a small bowl. Use a pastry brush to spread the butter into each cut. Make sure you reach every nook and cranny. This ensures a burst of flavor in every piece.
Cheese Choices
While mozzarella and Parmesan are classic choices, you can try other cheeses too. Cheddar adds a sharp taste, while gouda brings a smoky flavor. Feta offers a crumbly texture and a tangy twist. Mixing different cheeses can make your bread unique and fun.
Using various cheeses can change the taste and texture of your bread. Each cheese melts differently, giving you gooey, stretchy bites or a rich, creamy texture.
Enhancing Flavor
Want to boost the flavor? Add herbs or spices to the garlic butter. Fresh basil or thyme can add a fresh twist. You can also sprinkle in some Italian seasoning for a more robust taste.
Don’t forget about veggies or meats. Chopped spinach, sun-dried tomatoes, or even crispy bacon can elevate your cheesy bread. Feel free to experiment and find your favorite combination.
Variations
Flavor Profiles
You can switch up the flavors for your cheesy pull-apart garlic bread. One fun idea is to add heat. You could turn it into spicy cheese pull-apart bread. Just add more red pepper flakes. This will give your bread a nice kick.
Another great twist is the Mediterranean flavor. You can add olives and sun-dried tomatoes. These ingredients bring a burst of flavor and color. The mix of garlic, cheese, and these extras makes every bite exciting.
Ingredient Alternatives
If you need gluten-free options, use gluten-free bread. There are many types available. Look for brands that have good texture and taste.
For those who want a plant-based meal, try vegan cheese substitutes. Many brands make great melting cheeses. You can still enjoy that gooey goodness without dairy.
Serving Styles
Mini pull-apart bread is perfect for parties. You can make small-sized versions. These bite-sized pieces are fun and easy to share.
Cheesy pull-apart bread also works as an appetizer. It can be a tasty side dish with your meals. Serve it warm, and watch people enjoy pulling it apart. This dish is always a crowd-pleaser.
Storage Info
Short-Term Storage
To store leftover cheesy garlic bread, wrap it tightly in foil or plastic wrap. This helps keep it fresh. Place it in the fridge for up to three days. To reheat, preheat your oven to 350°F (175°C). Unwrap the bread and place it on a baking sheet. Bake for about 10-15 minutes. This method keeps the texture soft and the cheese melty.
Long-Term Storage
For long-term storage, you can freeze cheesy pull-apart garlic bread. Wrap it tightly in plastic wrap, then in foil. This prevents freezer burn. It can last up to three months in the freezer. To thaw, move it to the fridge for several hours or overnight. For reheating, preheat your oven to 350°F (175°C) and bake for 20-25 minutes. This keeps the bread warm and cheesy.
Shelf Life
You can keep cheesy pull-apart garlic bread for about three days in the fridge. If frozen, it lasts for up to three months. Always check for signs of spoilage before eating. If it smells off or looks strange, it’s best to toss it.
FAQs
What is the best bread to use for pull-apart garlic bread?
The best bread for cheesy pull-apart garlic bread is a large loaf of crusty sourdough or Italian bread. These breads have a nice crust and soft inside. They hold up well to the butter and cheese. You want a bread that pulls apart easily and soaks in flavor.
Can I prepare cheesy pull-apart garlic bread ahead of time?
Yes, you can prepare it ahead of time. Assemble the bread and the filling. Wrap it tightly in plastic wrap or foil. Store it in the fridge for up to 24 hours. When ready to bake, just pop it in the oven. This makes it easy for parties!
How do I avoid soggy garlic bread?
To avoid soggy garlic bread, make sure to follow these tips:
– Use fresh bread, not stale.
– Do not soak the bread in butter.
– Drizzle the garlic butter; do not drown it.
– Bake it uncovered for a nice crisp crust.
This will keep your bread light and airy.
Can I add other ingredients like bacon or vegetables?
Absolutely! Adding ingredients like bacon or vegetables can boost flavor. You might add cooked bacon pieces or sautéed spinach. Just be sure to chop them finely. Mix them in with the cheese for a tasty twist. It makes the bread even more fun to eat!
What should I serve with cheesy pull-apart garlic bread?
Cheesy pull-apart garlic bread pairs well with many dishes. Try serving it with:
– Warm marinara sauce for dipping.
– A fresh salad for a light meal.
– Soups like tomato basil or minestrone.
These sides balance the bread’s richness and add variety.
Cheesy pull-apart garlic bread is a simple and tasty treat. You learned how to choose the right bread, mix flavors, and bake it perfectly. Options like adding herbs, spices, or different cheeses can make it unique. You can even try new twists and make mini versions for fun. Don’t forget how to store leftovers well for later. Enjoy making this dish as a side or appetizer at your next gathering. Share it with friends, and watch them enjoy every cheesy bite!


