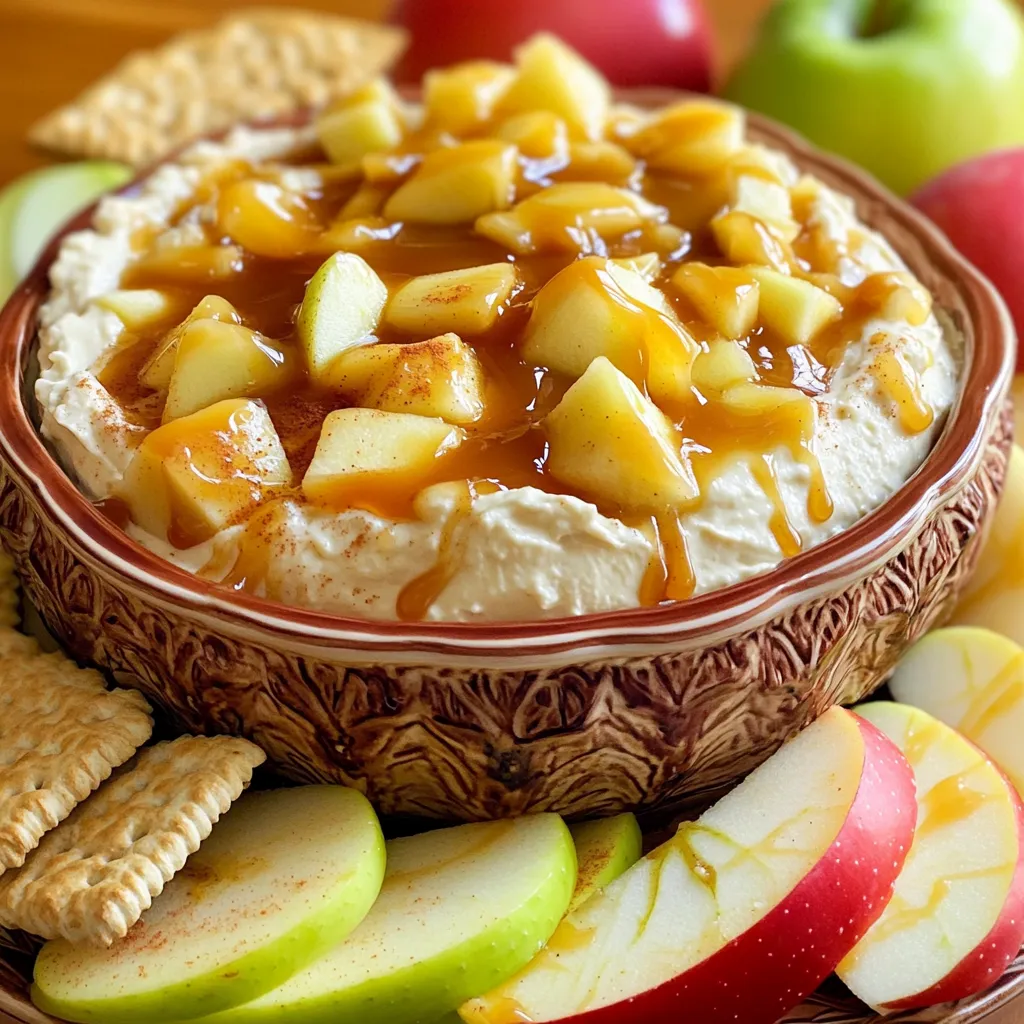
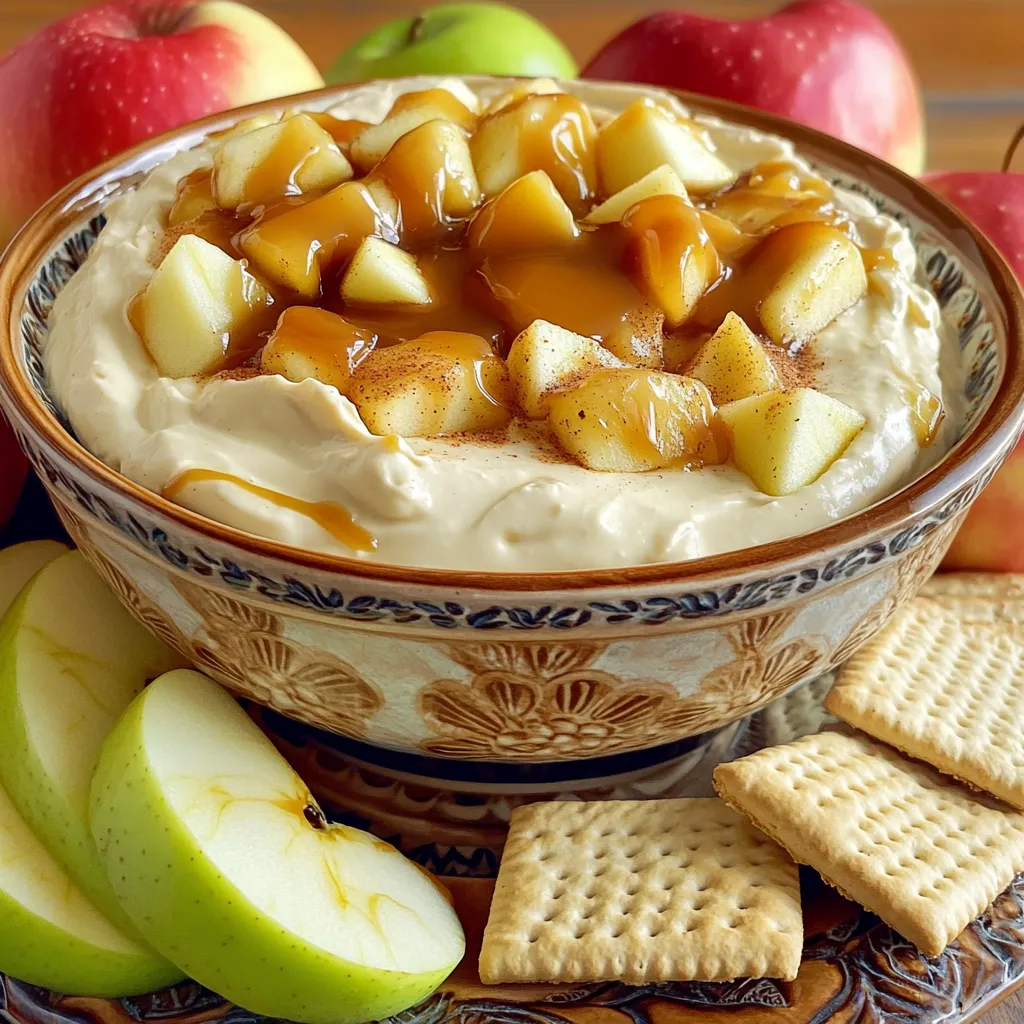
If you love sweet and creamy snacks, you’ll adore this Caramel Apple Cream Cheese Dip! It’s easy to make and perfect for sharing. With just a few simple ingredients like cream cheese, caramel sauce, and fresh apples, you can whip up a treat that everyone will love. Whether you serve it at parties or enjoy it on a cozy night in, this dip is a must-try. Let’s dive into how to create this luscious snack!
Ingredients
Main Ingredients
– 8 oz cream cheese, softened to room temperature
– ½ cup brown sugar, packed
– ½ cup powdered sugar, sifted
– 1 teaspoon pure vanilla extract
– ½ cup caramel sauce (reserve a little for drizzling)
– 1 apple, cored and diced (Granny Smith is ideal for its tartness)
– ½ teaspoon ground cinnamon
Optional Ingredients
– ½ cup toffee bits (optional, for added crunch)
– Sliced apples for dipping
– Graham crackers for dipping
Kitchen Tools Needed
– Medium mixing bowl
– Hand mixer or whisk
– Serving bowl
The main ingredients make this dip creamy and sweet. Cream cheese adds richness. Brown sugar gives a deep flavor, while powdered sugar adds light sweetness. Vanilla extract enhances all the flavors. The caramel sauce makes the dip taste like a treat. Granny Smith apples add a nice tart crunch. Ground cinnamon brings warmth.
For extra crunch, toffee bits are great. You can use sliced apples and graham crackers as dippers.
You will need a medium mixing bowl to blend everything. A hand mixer or whisk helps mix the ingredients smoothly. Use a serving bowl to present the dip beautifully. This dip is simple to make and perfect for any gathering.
Step-by-Step Instructions
Preparing the Cream Cheese Mixture
Softening Cream Cheese
Start by taking your cream cheese out of the fridge. Let it sit at room temperature for about 10 minutes. Softening makes it easy to blend.
Mixing in Sugars and Vanilla
In a medium bowl, combine the softened cream cheese, brown sugar, powdered sugar, and vanilla extract. Use a hand mixer or a whisk. Mix until the blend is smooth and creamy. Ensure there are no lumps. This mixture should be thick and rich.
Incorporating Caramel and Apples
Folding in Caramel Sauce
Next, take your caramel sauce and fold it into the cream cheese mixture. Use a spatula to gently mix it in. Be sure to save a little caramel for drizzling later. This step adds a sweet layer to your dip.
Mixing in Diced Apples and Cinnamon
Now, add the diced apples and ground cinnamon. If you like, toss in toffee bits for extra crunch. Gently mix everything together until well combined. The apples add a fresh taste, while the cinnamon brings warmth.
Serving Preparation
Chilling the Dip
Scoop the dip into your favorite serving bowl. Cover it with plastic wrap and place it in the fridge. Chill for about 30 minutes. This helps the flavors blend and taste even better.
Garnishing Tips
Before serving, drizzle the reserved caramel sauce on top. For a nice finish, sprinkle a bit of cinnamon. You can also arrange apple slices around the bowl. This makes the dish look inviting and fun. Now, it’s ready for everyone to enjoy!
Tips & Tricks
Serving Suggestions
– Ideal Pairings for the Dip
This dip pairs well with sliced apples and graham crackers. You can also try it with pretzels for a salty-sweet mix. Serve the dip with fresh fruit for a colorful platter. Guests love the crunchy texture of apples with the creamy dip.
– Best Occasions to Serve
You can serve this dip at parties, picnics, or family gatherings. It’s perfect for fall festivities or holiday get-togethers. Kids love it, so it works well for birthday parties too.
Customization Ideas
– Adding Flavors or Toppings
You can add a pinch of nutmeg or a splash of maple syrup for extra flavor. Try mixing in chocolate chips for a sweet twist. Consider topping it with chopped nuts or toffee bits for crunch. A sprinkle of cinnamon on top adds a nice touch.
– Using Different Types of Apples
While Granny Smith apples are great for tartness, you can use Fuji or Honeycrisp apples for sweetness. These apples hold up well and add great flavor. Experiment with a mix of apples for a fun taste.
Making Ahead of Time
– Preparation and Storage Tips
You can make this dip a day in advance. Just cover it tightly and store it in the fridge. This allows the flavors to blend nicely. Before serving, give it a quick stir, and drizzle more caramel sauce on top.
Variations
Healthier Alternatives
– Using Greek Yogurt instead of Cream Cheese
Greek yogurt can make this dip lighter. It offers a tangy flavor and creamy texture. Simply swap the cream cheese for an equal amount of Greek yogurt. This change cuts calories and adds protein.
– Sugar Substitutes
If you want a lower sugar dip, use sugar substitutes. Stevia or monk fruit sweetener works well. Just use half the amount of sweetener compared to sugar. This keeps the taste sweet without extra calories.
Flavor Enhancements
– Adding Peanut Butter or Nutella
For a twist, mix in peanut butter or Nutella. Just two tablespoons will add rich flavor. Peanut butter gives a nutty taste, while Nutella adds chocolatey goodness. Both options make the dip even more decadent.
– Different Spice Blends
Spice it up with different flavors. Try adding nutmeg or pumpkin spice for a seasonal touch. Just a pinch can change the whole profile of the dip. Experiment and find your favorite blend.
Dipping Options
– Alternative Dipping Snacks
While apples and graham crackers shine, you can use other snacks. Try pretzels for a salty crunch or vanilla wafers for a sweet contrast. Each option brings a new taste experience.
– Pairing with Other Fruits
Don’t stop at apples! Use pears, bananas, or strawberries for dipping. Each fruit adds a unique flavor and texture. This makes your snack platter colorful and fun.
Storage Info
Refrigerating the Dip
To keep your caramel apple cream cheese dip fresh, use an airtight container. Glass or plastic containers both work well. The dip stays good in the fridge for about 3 to 5 days. Make sure to cover it tightly to avoid any drying out.
Freezing Tips
Can You Freeze Caramel Apple Cream Cheese Dip?
Yes, you can freeze this dip. However, the texture may change slightly when thawed. It’s best to enjoy it fresh.
How to Thaw Properly
To thaw, place the dip in the fridge overnight. This gentle method helps maintain its creamy texture. Avoid microwaving, as it can make the dip grainy.
Leftover Ideas
Reusing the Dip in Other Recipes
If you have leftovers, try using the dip as a filling for crepes or spread on toast. You can also mix it into yogurt for a sweet snack.
Creative Serving Suggestions for Leftovers
Serve the dip as a topping for pancakes or waffles. Add it to a fruit salad for extra flavor. It’s a versatile treat you can enjoy in many ways.
FAQs
What can I use if I don’t have caramel sauce?
If you don’t have caramel sauce, you can use several alternatives. Try melted chocolate or honey for a sweet touch. Maple syrup also works well. You can even mix brown sugar with a bit of water to make a quick syrup. These options can still give that sweet flavor.
Can I make this dip vegan?
Yes, you can make this dip vegan. Use vegan cream cheese instead of regular cream cheese. Maple syrup can replace the brown and powdered sugars. Choose a vegan caramel sauce or make your own with coconut cream and dates. This way, everyone can enjoy the dip!
How long can I keep the dip in the fridge?
You can store the dip in the fridge for about three days. Keep it in an airtight container to maintain freshness. If you notice any changes in smell or texture, it’s best to toss it. Always check before serving to ensure food safety.
What’s the best apple to use for this dip?
Granny Smith apples are my top choice for this dip. They are tart and crunchy. This tartness balances the sweet flavors of the dip. Other good options include Honeycrisp and Fuji apples. Both add a nice sweetness and texture that complements the dip perfectly.
In this blog post, I covered how to make a delicious caramel apple cream cheese dip. We explored the main and optional ingredients, from cream cheese to diced apples. I shared step-by-step instructions to help you craft the dip easily. We also discussed tips for serving, customizing, and storing your dip. As you try it out, remember that you can adjust flavors and ingredients to suit your taste. Your friends and family will love this treat, so enjoy every bite!


