Caprese Stuffed Portobellos Fresh and Flavorful Dish

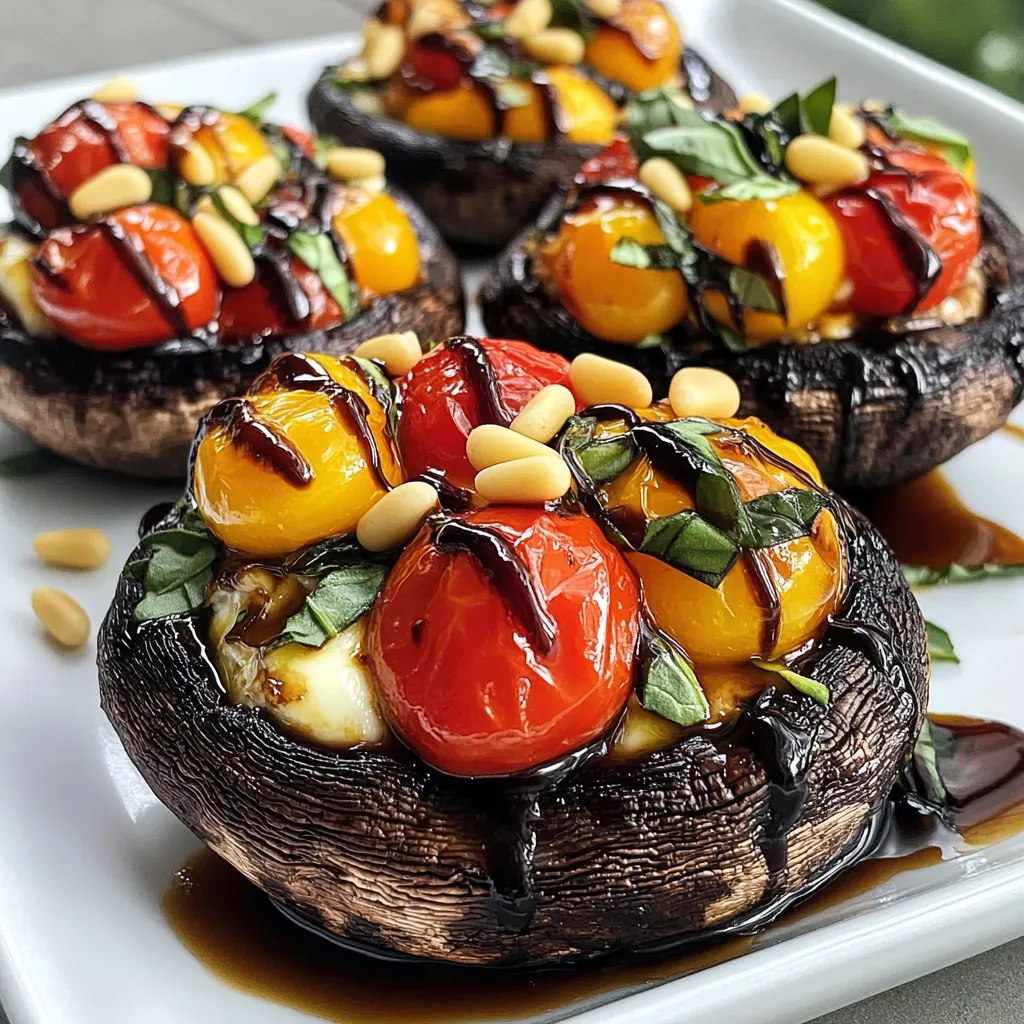
If you’re looking for a fresh and flavorful dish, you’ve come to the right place! Caprese Stuffed Portobellos combine juicy mushrooms with vibrant tomatoes, creamy mozzarella, and fragrant basil. This recipe is simple, quick, and bursting with taste. Perfect as a main or a side, these stuffed mushrooms are sure to impress. Let’s dive in and create a dish that looks as good as it tastes!
Why I Love This Recipe
- Fresh Ingredients: The combination of fresh basil, cherry tomatoes, and mozzarella creates a burst of flavor that is simply irresistible.
- Easy to Prepare: This recipe comes together quickly, making it perfect for a weeknight dinner or an elegant appetizer for guests.
- Nutritious and Light: Stuffed portobello mushrooms are a healthy alternative to heavier dishes, while still being satisfying and delicious.
- Customizable: You can easily modify the filling ingredients based on your preferences or what you have on hand, making it versatile.
Ingredients
Main Ingredients
- 4 large portobello mushrooms
- 2 cups cherry tomatoes
- 1 cup fresh mozzarella balls
- 1 cup fresh basil leaves
Additional Ingredients
- 3 tablespoons balsamic glaze
- 2 tablespoons extra virgin olive oil
- 1 teaspoon garlic powder
- Salt and black pepper to taste
- 1/4 cup pine nuts
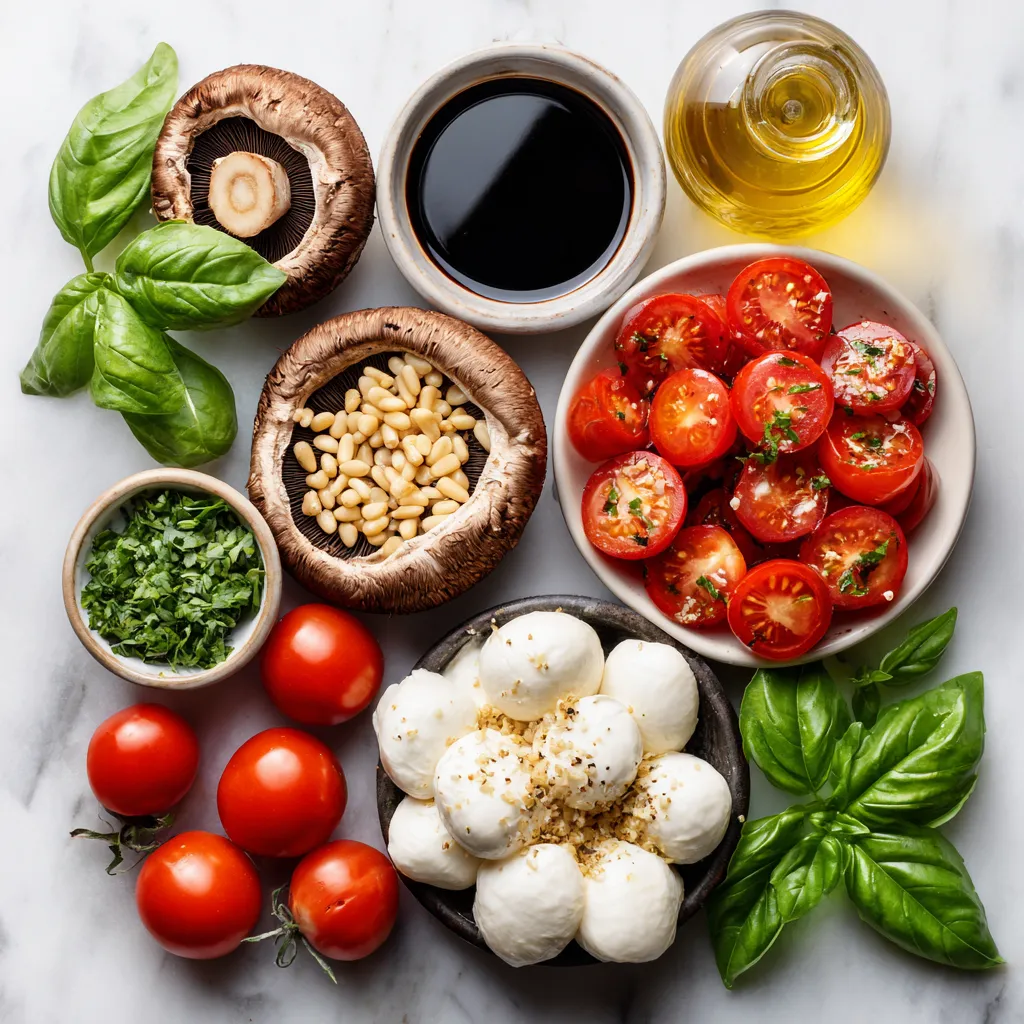
The main ingredients for Caprese stuffed portobellos are simple yet fresh. You start with four large portobello mushrooms. These mushrooms are meaty and hold the filling well. Next, you need two cups of cherry tomatoes. Halve them for a burst of flavor. Then, grab a cup of fresh mozzarella balls, also known as bocconcini. These tiny balls melt beautifully. Lastly, have a cup of fresh basil leaves ready. Chop most of them, but keep a few whole for garnish.
For the additional ingredients, balsamic glaze is key. Three tablespoons will add a nice tang. You also need two tablespoons of extra virgin olive oil to enrich the filling. One teaspoon of garlic powder gives a lovely flavor. Don’t forget salt and black pepper to taste. Finally, toast a quarter cup of pine nuts for crunch.
When you gather these ingredients, you set yourself up for a tasty dish. Each item plays a role in creating fresh and flavorful stuffed portobellos.

Step-by-Step Instructions
Preheat and Prep
- Preheat the oven to 375°F (190°C).
- Clean the portobello mushrooms with a damp cloth to remove dirt.
- Remove the stems and place the mushrooms gill side up on a baking sheet.
Make the Filling
- In a bowl, combine the halved cherry tomatoes, mozzarella balls, and chopped basil.
- Add olive oil, garlic powder, salt, and pepper.
- Mix gently until all ingredients blend well.
Stuff and Bake
- Spoon the tomato and mozzarella mix into each portobello cap.
- Press down lightly to fill them well.
- Drizzle balsamic glaze over the stuffed mushrooms.
- Bake for 20-25 minutes, until mushrooms are tender and cheese is bubbly.
Toast the Pine Nuts
- Heat a dry skillet over medium heat.
- Add the pine nuts and toast for 3-4 minutes.
- Stir continuously until they turn golden brown to avoid burning.
Final Touches
- Once baked, remove the mushrooms from the oven.
- Sprinkle toasted pine nuts on top and garnish with whole basil leaves.
- Serve warm for a tasty appetizer or light meal.
Tips & Tricks
Choosing Fresh Ingredients
To make the best Caprese Stuffed Portobellos, start with fresh portobello mushrooms. Look for mushrooms that are firm and smooth. Their color should be dark brown and not too wrinkled. Avoid any that have dark spots or are slimy. Fresh mushrooms have a rich, earthy smell.
For cherry tomatoes, choose ones that are bright and firm. Ripe tomatoes should feel slightly soft but not mushy. Their color should be deep red, indicating sweetness. Fresh mozzarella balls, or bocconcini, should be plump and moist. Look for ones packed in water for the best taste.
Enhancing Flavor
You can boost the flavor of your dish by adding herbs or spices. Fresh oregano or thyme pairs well with the Caprese theme. A pinch of red pepper flakes can add some heat. Consider using fresh garlic instead of garlic powder for a stronger taste.
Balsamic glaze adds a sweet tang. Drizzle just the right amount over your mushrooms. Too much can overpower the other flavors. Aim for a thin line over each stuffed mushroom to enhance without overwhelming.
Serving Suggestions
Caprese Stuffed Portobellos work great as a side or main dish. Serve them with a light salad or garlic bread for a complete meal. For a heartier option, add grilled chicken or quinoa on the side.
Wine lovers can enjoy a crisp Pinot Grigio with this dish. Its acidity balances the flavors well. A light red wine like Chianti also pairs nicely, enhancing the rich taste of the mushrooms.
Pro Tips
- Choose Fresh Ingredients: Use the freshest tomatoes and basil for the best flavor. The quality of these ingredients will significantly enhance your dish.
- Don’t Overstuff: While it might be tempting to pack the filling tightly, leave a little space for the cheese to melt and bubble for that perfect texture.
- Experiment with Cheeses: Try using different cheese varieties like goat cheese or feta for a unique twist on the traditional Caprese flavor profile.
- Serve Immediately: These stuffed mushrooms are best enjoyed fresh out of the oven. Serve them warm to fully appreciate the melted cheese and vibrant flavors.

Variations
Vegetarian and Vegan Options
For a vegan twist, you can swap mozzarella for vegan cheese. Look for brands made from nuts or soy. They melt well and taste great. You can also use cashew cream as a creamy filling. It adds a rich texture and flavor. For a vegetarian option, try adding spinach or artichokes. Both vegetables give your dish a fresh flair.
Flavor Enhancements
Want to bring extra flavor? Add bell peppers or zucchini to the filling. They add crunch and color. You can also mix in cooked quinoa or lentils for protein. For a unique touch, drizzle your mushrooms with flavored oils. Garlic-infused or herb oils can deepen the taste of your dish. They elevate each bite.
Gluten-Free and Low-Carb Options
To make this dish keto-friendly, skip the balsamic glaze or use a low-sugar version. You can also add more cheese to enhance flavor without carbs. For gluten-free options, ensure the balsamic glaze is gluten-free. You can serve these mushrooms on a bed of greens instead of bread. This keeps your meal light and healthy.
Storage Info
Refrigeration
To store leftovers, let the Caprese Stuffed Portobellos cool to room temp. Place them in an airtight container. This keeps them fresh longer. Use containers made of glass or BPA-free plastic. They are sturdy and seal well, preventing air from getting in.
Freezing Tips
Yes, you can freeze Caprese Stuffed Portobellos! To freeze, wrap each mushroom tightly in plastic wrap. Then, place them in a freezer-safe bag. Label the bag with the date. When you are ready to eat, thaw them in the fridge overnight before reheating. This helps maintain their flavor and texture.
Reheating Instructions
To reheat, use an oven set at 350°F (175°C). Place the stuffed mushrooms on a baking sheet. Cover them with foil to keep them moist. Heat for about 15-20 minutes. This method keeps the mushrooms tender and the cheese melty. Avoid using a microwave, as it can make them soggy. Enjoy your tasty leftovers!
FAQs
What can I substitute for mozzarella?
If you don’t have mozzarella, use shredded cheese like provolone or gouda. You could also try vegan cheese if you prefer a plant-based option. Ricotta works well for a creamy texture, too. These cheeses will change the taste, but they still taste great.
Can I make this recipe ahead of time?
Yes, you can prep the mushrooms and filling a day before. Clean the mushrooms, and mix the filling as directed. Store them separately in the fridge. When you’re ready, stuff the mushrooms and bake them. This saves time and keeps things easy.
Is this recipe suitable for meal prep?
Absolutely! Caprese Stuffed Portobellos fit well in meal prep. You can make a batch and store them in the fridge. Just reheat them when you’re ready to eat. They make a healthy, quick lunch or dinner option.
How do I know when the mushrooms are fully cooked?
Watch for the mushrooms to be tender and the cheese to melt. The tops should be bubbly and slightly golden. You can also poke a fork in one to check if it feels soft. This means they are ready to serve.
Caprese Stuffed Portobellos offer a fresh and simple meal option. With portobello mushrooms, cherry tomatoes, and mozzarella, you create a colorful dish that’s full of flavor. Remember to choose fresh ingredients for the best results. You can also customize the recipe with vegan options or different herbs. Properly store leftovers, or freeze them for later use. This dish works well for meal prep, too. Enjoy experimenting with variations and making this recipe your ow

Caprese Stuffed Portobellos
Ingredients
- 4 large portobello mushrooms, stems removed
- 2 cups cherry tomatoes, halved
- 1 cup fresh mozzarella balls (bocconcini), halved
- 1 cup fresh basil leaves, chopped
- 3 tablespoons balsamic glaze
- 2 tablespoons extra virgin olive oil
- 1 teaspoon garlic powder
- to taste salt and freshly ground black pepper
- 1 quarter cup pine nuts, toasted
Instructions
- Preheat your oven to 375°F (190°C).
- Gently clean the portobello mushrooms using a damp cloth to remove any dirt. Carefully remove the stems and place the mushrooms, gill side up, on a parchment-lined baking sheet.
- In a large mixing bowl, combine the halved cherry tomatoes, mozzarella balls, and chopped basil. Drizzle in the olive oil, sprinkle in the garlic powder, and season with salt and pepper. Mix gently until all the ingredients are evenly coated and combined.
- Generously spoon the tomato and mozzarella mixture into each portobello cap, pressing down lightly to ensure they are filled well.
- Carefully drizzle the balsamic glaze over each stuffed mushroom, ensuring an even coating for added flavor.
- Place the baking sheet in the preheated oven and bake for 20-25 minutes. The mushrooms should be tender, and the cheese should be slightly melted and bubbly.
- While the mushrooms are baking, heat a dry skillet over medium heat. Add the pine nuts and toast them for 3-4 minutes, stirring continuously until they turn golden brown. Be vigilant to prevent burning.
- Once the mushrooms are done baking, remove them from the oven. Sprinkle the toasted pine nuts over the top and garnish with the reserved whole basil leaves. Serve warm for a delightful appetizer or a light main dish.


![To make a tasty avocado corn salad, gather these ingredients: - 2 ripe avocados, diced into bite-sized cubes - 1 cup sweet corn (freshly grilled or canned, drained) - 1 cup cherry tomatoes, halved for a juicy burst - 1 red bell pepper, diced finely for crunch - 1/4 cup red onion, finely chopped for sharpness - 1/4 cup fresh cilantro, chopped for herbal freshness - Juice of 2 limes for tanginess - 2 tablespoons extra virgin olive oil for richness - 1 teaspoon ground cumin for warmth - Salt and freshly cracked pepper to taste Using good-quality ingredients makes a big difference. Choose ripe avocados that yield slightly when pressed. This means they are soft and ready to eat. Fresh corn adds a sweet touch. If you use canned corn, drain it well to keep the salad fresh. Opt for vibrant cherry tomatoes and a crunchy red bell pepper, both of which enhance the salad's look and taste. Fresh cilantro can elevate the flavor, so use it if you like its taste. If you have allergies or preferences, you can easily swap some ingredients. Try using lime juice from one lemon instead. For those with onion allergies, you can skip the red onion or use green onions. If you are not a fan of cilantro, parsley works well too. For a creamier texture, consider adding a bit of Greek yogurt. This makes the salad rich while keeping it fresh. For the complete recipe, check out the [Full Recipe]. To make the avocado corn salad, start by gathering all your ingredients. You need ripe avocados, sweet corn, cherry tomatoes, red bell pepper, red onion, cilantro, lime juice, olive oil, cumin, salt, and pepper. First, take a large bowl. Add the diced avocados and the corn. If you use canned corn, drain it well. Mix these two gently to spread the sweetness of the corn. Next, add the halved cherry tomatoes, diced red bell pepper, and finely chopped red onion. These ingredients give your salad a bright look and a tasty crunch. After that, sprinkle the chopped cilantro over everything. This adds a fresh flavor that brightens the dish. Now, grab a small bowl. Whisk the lime juice, olive oil, cumin, and a pinch of salt and pepper together. This dressing will tie all the flavors in the salad. Pour the dressing over the salad mixture. Use a spatula or wooden spoon to mix everything gently. Be careful not to mash the avocados. Finally, taste your salad. You might want to add more salt or lime juice based on your taste. When mixing, go slow. You want to keep the avocados intact. Over-mixing can turn them mushy. Use a light hand and fold the ingredients together. This keeps your salad looking fresh and colorful. If you notice some pieces are not coated well, you can add a bit more dressing. Just drizzle it slowly and mix again. This helps every bite to burst with flavor. For the best taste, let your salad sit for about 10 minutes at room temperature. This allows the flavors to blend. If you serve it right away, the tastes might not be as strong. After resting, your salad will be ready to eat. Enjoy it fresh for lunch or as a side with dinner. For the full recipe, click here. To select ripe avocados, look for a dark green color. Gently squeeze the avocado; it should feel firm but yield slightly. Avoid any that feel mushy. A ripe avocado should have a smooth skin without dark spots. If you find unripe avocados, leave them at room temperature for a few days. Once ripe, use them within a day or two for best taste. Grilling fresh corn adds a smoky flavor that enhances your salad. Start by husking the corn and removing all silk. Brush the kernels with oil to prevent sticking. Place the corn directly on a hot grill for about 10 minutes. Turn it every few minutes until it’s tender and has grill marks. This method caramelizes the sugars, making the corn sweeter and more delicious. To enhance your salad's flavor, adjust the seasonings to your taste. Start with lime juice and olive oil, then add cumin for warmth. If you prefer a kick, include a pinch of chili powder or chopped jalapeños. Fresh herbs can also brighten the dish. Always taste and adjust as you go. Remember, a little salt can go a long way in bringing out flavors. For more detailed instructions, check the Full Recipe. {{image_4}} You can boost the protein in your avocado corn salad easily. Adding chicken or shrimp makes it more filling. Grilled chicken breast works well; just chop it into bite-sized pieces. For shrimp, try sautéing or grilling them until they are pink. Both options blend nicely with the salad's flavors. You can also use canned chickpeas for a plant-based choice. Just rinse and add them directly for a hearty twist. The dressing can change the whole taste of your salad. A simple lime vinaigrette adds a refreshing zing. Just whisk lime juice, olive oil, salt, and pepper together. For a creamy dressing, mix yogurt with lime juice and cumin. This gives a nice tang and creaminess. You could also try a cilantro-lime dressing for extra flavor. Feel free to experiment with different dressings to find your favorite. Using seasonal ingredients makes your salad even better. In summer, fresh peaches or strawberries add a sweet touch. In fall, diced apples or pears give crunch and sweetness. You can also swap the corn for roasted butternut squash in winter. This keeps your salad fresh and exciting all year. Think about what’s in season for tasty swaps that match the flavors of your dish. For the complete recipe, check out the [Full Recipe]. To store leftover avocado corn salad, use an airtight container. This keeps the air out and helps avoid spoilage. Place the salad in the fridge right after serving. It tastes better cold and stays fresh longer. If you have extra dressing, store it separately to keep the salad crisp. The salad will last about 2 days in the fridge. The avocados may brown, but the taste remains good. Corn and tomatoes hold well for a bit longer. If you used canned corn, it can stay fresh for 3 to 4 days. Always check for any off smells before eating leftovers. To keep avocados fresh, store them whole until you're ready to use them. If you've cut an avocado, squeeze some lime juice on it. The acid helps slow browning. Cover it tightly with plastic wrap or place it in an airtight container. This way, you can enjoy your avocado longer without losing its bright color. To stop avocados from browning, use lime juice. The acid slows down oxidation. You can also store cut avocados with the pit in. Cover them tightly with plastic wrap. This keeps air out and helps maintain their color. Yes, you can prepare the salad in advance. However, add the avocados right before serving. This keeps them fresh and green. If you store it for later, put plastic wrap directly on the surface. This minimizes air exposure and keeps the salad tasty. Look for fresh corn with bright green husks. The kernels should feel plump and firm. If using canned corn, choose a brand with low sodium. Drain and rinse it well to remove extra salt. This will help the corn taste fresh and sweet in your salad. Enjoy the crunch and sweetness! For the complete recipe, check out the Avocado Corn Salad Delight. In this blog post, we covered how to make a delicious avocado corn salad. We explored the best ingredients, tips for preparation, and ways to enhance flavor. You can mix and match based on your taste and needs. Remember to store leftovers properly to keep them fresh. With easy swaps and answers to common questions, you’ll create a great dish every time. Now, you have everything you need to impress your family and friends with your new salad skills. Enjoy making your own special version!](https://dishtreats.com/wp-content/uploads/2025/07/333f1f81-7d50-4cc6-bd3d-a33e08904fb9-768x768.webp)


![To make loaded Greek fries, you need fresh and tasty ingredients. Here’s what you need: - 4 large Russet potatoes - 1/4 cup olive oil - 1 teaspoon garlic powder - 1 teaspoon paprika - Salt and pepper to taste - 1 cup crumbled feta cheese - 1 cup cherry tomatoes, halved - 1/2 cup Kalamata olives, pitted and sliced - 1/2 cucumber, diced - 1/4 red onion, finely chopped - Fresh parsley, chopped for garnish - 1/2 cup tzatziki sauce You can get creative with your fries! Here are some tasty toppings to try: - Sliced jalapeños for heat - Chopped bell peppers for crunch - Grilled chicken or lamb for protein - Avocado for creaminess Season your fries to boost flavor! Here are some ideas: - Oregano adds a nice herbal flavor. - Lemon zest gives a fresh, zesty touch. - Red pepper flakes can spice things up. - Dill pairs well with tzatziki and adds brightness. These ingredients and toppings make loaded Greek fries a fun and easy dish. You can mix and match to fit your taste. Enjoy cooking with this Full Recipe! To start, wash four large Russet potatoes. Make sure to scrub them well. Next, cut the potatoes into thin fries, about 1/4 inch thick. This size helps them cook evenly. Place the cut fries in a large bowl. Drizzle 1/4 cup of olive oil over them. Add 1 teaspoon of garlic powder and 1 teaspoon of paprika. Sprinkle salt and pepper to taste. Toss the fries. Make sure every fry gets coated well. Now it's time to bake. Preheat your oven to 425°F (220°C). Spread the seasoned fries on a baking sheet lined with parchment paper. Try to keep them in one layer. This helps them get crispy. Bake for 25 to 30 minutes. Remember to flip them halfway through. Look for a golden brown color when they are done. While the fries bake, prepare the toppings. In a medium bowl, mix 1 cup of halved cherry tomatoes, 1/2 cup of sliced Kalamata olives, 1/2 diced cucumber, and 1/4 cup of finely chopped red onion. Drizzle a bit of olive oil over this mix. Add salt and pepper to taste, then gently combine. When the fries are ready, pull them out of the oven. Immediately sprinkle 1 cup of crumbled feta cheese on top. Next, add your prepared veggie mix. Finally, add a generous dollop of tzatziki sauce on top. For a nice finish, sprinkle chopped fresh parsley for color. Enjoy your Loaded Greek Fries! You can find the full recipe [here]. To make the best fries, start with the right potatoes. I prefer Russet potatoes for their starchiness. Cut your fries thin, around 1/4 inch thick. This helps them cook evenly and get crispy. Soak the cut fries in cold water for at least 30 minutes. This removes extra starch and aids crispiness. After soaking, dry them well with a towel. Coat the fries with olive oil and seasonings. Bake at 425°F (220°C) for 25-30 minutes. Remember to flip them halfway through for an even crunch. Great flavor makes all the difference. I love using garlic powder and paprika for a warm, savory taste. Add salt and pepper to taste. You can also try adding dried oregano or thyme for a Greek touch. Don't be afraid to experiment! Mix your favorite spices into the oil before coating the fries. This will infuse flavor right into the fries. For an extra kick, add some chili powder or cayenne pepper. Presentation matters when serving Loaded Greek Fries. Serve them on a large platter for a fun look. Drizzle extra Tzatziki sauce over the top for a creamy touch. Use fresh parsley to add color and freshness. You can also add slices of lemon for a pop of brightness. For easy serving, provide toothpicks or small forks. This makes it fun for guests to enjoy! For the full recipe, check out the detailed instructions above. {{image_4}} You can make Loaded Greek Fries vegetarian by skipping the meat toppings. The base is already rich with flavor. Use extra toppings like roasted red peppers or artichoke hearts. You can also add a variety of cheeses, like goat cheese or mozzarella, for a creamy twist. These options keep the dish hearty and satisfying. If you want to add protein, consider grilled chicken or shrimp. Both pair well with the Greek flavors. Gyro meat is another great choice. Cook it until it's crispy and flavorful. You can also try chickpeas for a plant-based protein. They add a nice crunch and boost the nutrition. Different regions of Greece offer unique flavors. From the island of Crete, you can add capers and mint for a fresh taste. In the north, try adding smoked paprika for depth. From the Peloponnese, olives and citrus zest can give a bright flavor. Mix and match these ingredients for your own twist on Loaded Greek Fries. For the full recipe, check out the complete guide on Loaded Greek Fries. To keep your loaded Greek fries fresh, let them cool first. Place them in an airtight container. If you have toppings like tomatoes or cucumbers, store them separately. This keeps everything crisp. When you want to enjoy your leftovers, preheat your oven to 375°F (190°C). Spread the fries on a baking sheet. Heat for about 10-15 minutes until hot and crispy. Avoid microwaving them, as this can make them soggy. These loaded Greek fries last about 2-3 days in the fridge. Make sure they are in an airtight container. If you notice any change in smell or texture, it’s best to toss them. Enjoy them fresh for the best taste! I recommend using Russet potatoes for Loaded Greek Fries. They are starchy and fluffy, which gives you that nice, crispy texture when baked. Their skin adds a great crunch, too. Yukon Gold potatoes also work well. They are creamier, which can add a different taste. Yes, you can prepare the fries ahead of time! Cut the potatoes and soak them in water to keep them fresh. This step removes some starch and helps them crisp up better. When you are ready to cook, just dry them off and season them. Bake them fresh for the best taste. Loaded Greek Fries go well with many dishes. They are great alongside grilled meats like chicken or lamb. You can serve them with a fresh Greek salad for a light meal. They also pair nicely with tzatziki, which adds a cool contrast to the warm fries. Enjoy them as a fun snack at gatherings or parties! For a complete experience, check out the Full Recipe to guide you through making these tasty fries. Loaded Greek fries are a fun dish packed with flavors. We explored key ingredients, optional toppings, and tasty seasonings. I shared step-by-step instructions to prepare and bake your fries, then assemble them perfectly. I offered tips for crispy fries and smart presentation ideas. You can even customize your dish with vegetarian options or protein toppings from various Greek regions. Finally, I outlined storage tips to keep leftovers fresh. Enjoy making these fries; they are sure to impress everyone!](https://dishtreats.com/wp-content/uploads/2025/06/9c6541bd-b31d-423a-b196-3f6ab3dd7c20-768x768.webp)

