Caprese Stuffed Avocados Fresh and Flavorful Meal

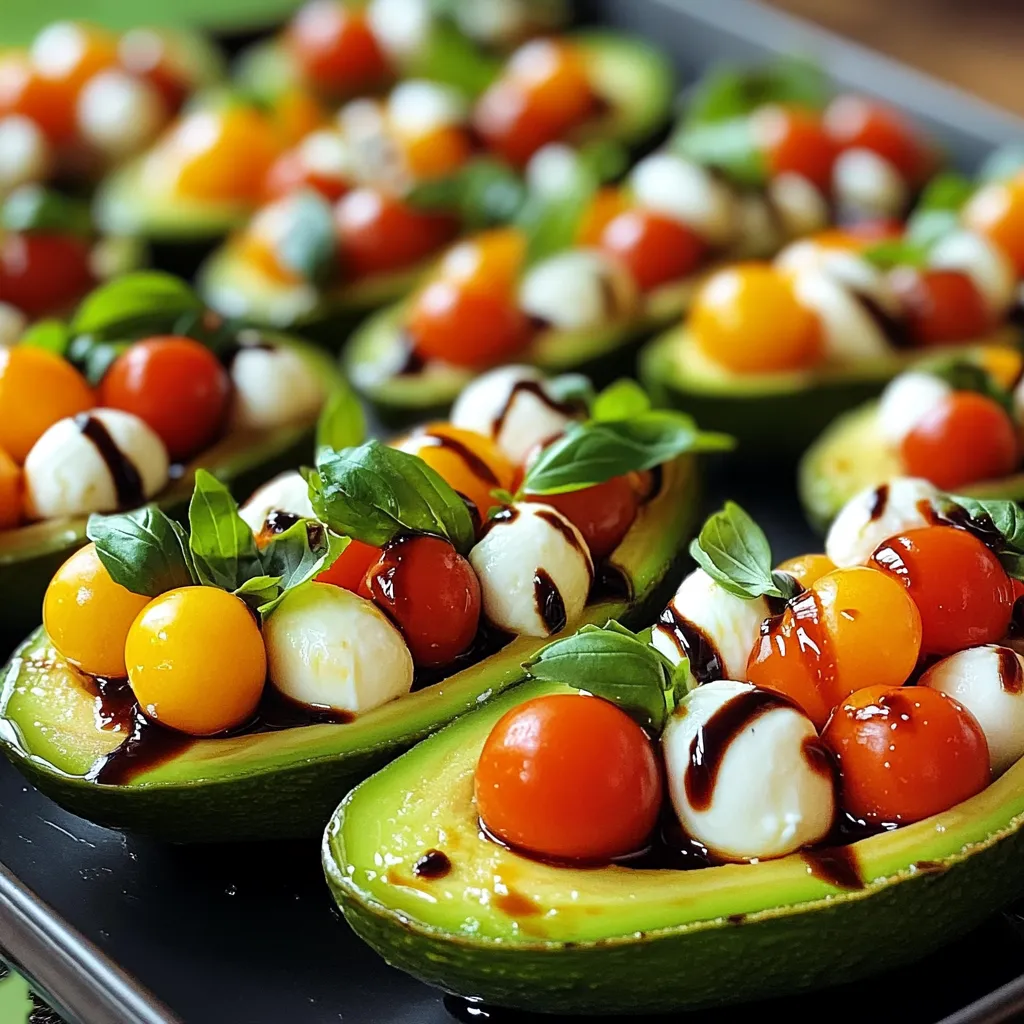
Are you looking for a fresh and flavorful meal? Caprese Stuffed Avocados are packed with taste and nutrients. Simple yet elegant, this dish combines ripe avocados, juicy cherry tomatoes, and creamy mozzarella. It makes a perfect appetizer or light main course. In this post, I’ll share everything you need to create this delicious recipe at home. Get ready to impress your family and friends with a healthy burst of flavor!
Ingredients
List of Ingredients
- 2 ripe avocados
- 1 cup cherry tomatoes, halved
- 1 cup fresh mozzarella balls, halved or cubed
- 1/4 cup fresh basil leaves, roughly chopped
- 2 tablespoons balsamic glaze
- 1 tablespoon extra virgin olive oil
- Salt and freshly ground black pepper to taste
Nutritional Information
Each serving of Caprese stuffed avocados offers around 400 calories. This meal provides healthy fats from avocados and protein from mozzarella. You get a good amount of vitamins A and C from tomatoes and basil, too. The combination supports heart health and boosts your immune system.
Tips for Selecting Avocados
To pick ripe avocados, gently squeeze them. They should feel soft but not mushy. Look for dark green skin, which often means ripeness. Avoid any with large dents or brown spots. If they’re not ripe, leave them on the counter for a few days. Enjoy your fresh Caprese stuffed avocados!
Step-by-Step Instructions
Preparation Steps
1. Start with two ripe avocados. Cut each one in half lengthwise. Be careful not to cut too deep.
2. Gently remove the pit from each avocado half. Use a spoon to scoop out a little flesh, making space for the filling.
3. In a mixing bowl, combine 1 cup of halved cherry tomatoes and 1 cup of halved or cubed mozzarella.
4. Add 1/4 cup of roughly chopped basil leaves to the bowl.
5. Drizzle 1 tablespoon of extra virgin olive oil and 2 tablespoons of balsamic glaze into the mix.
6. Sprinkle in salt and pepper to taste. Toss the mixture gently to coat everything well.
7. Use a spoon to fill each avocado half with the Caprese mixture. Make sure to pack it in nicely.
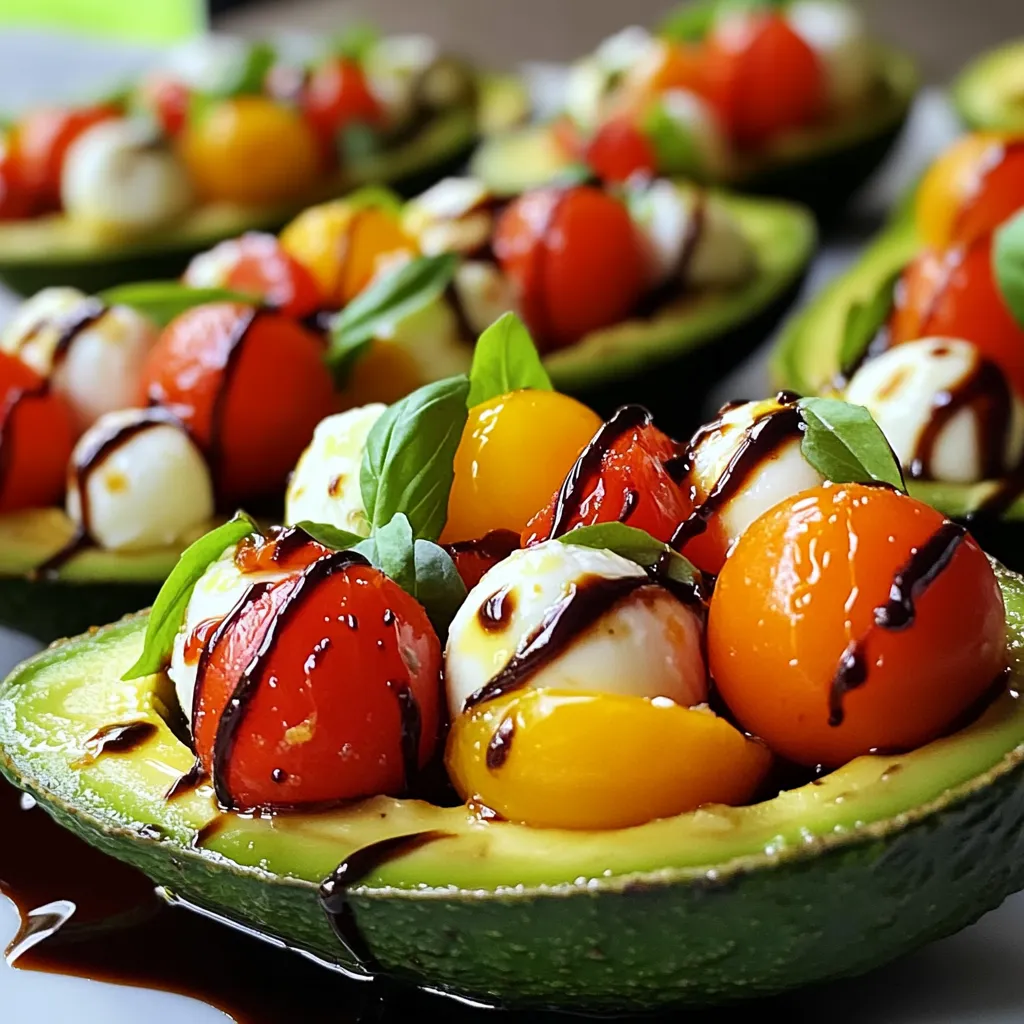
8. For an extra touch, drizzle more balsamic glaze over the stuffed avocados. This adds flavor and looks great.
Serving Suggestions
- Serve the Caprese Stuffed Avocados on a colorful platter.
- Garnish with extra basil leaves or a sprinkle of coarse sea salt.
- This adds a nice pop of color and makes the dish look fancy.
Making Ahead
You can prepare the filling in advance. Just keep it in the fridge until you are ready to fill the avocados. This keeps the flavors fresh. You can also stuff the avocados a few hours ahead of time. Just add a bit of lemon juice to prevent browning. Enjoy your tasty meal!
Tips & Tricks
Common Mistakes to Avoid
When making Caprese stuffed avocados, avoid overripe avocados. They can be too mushy. Also, be careful not to cut the avocados too deep when removing the pit. This can lead to messy halves. Make sure to mix the filling gently. If you mash it too much, the colors and textures will blend together. Finally, serve them right away for the best taste.
Enhancing the Flavor
You can boost the taste of your dish with a few simple additions. Try adding a dash of garlic powder or a squeeze of lemon juice. Both enhance the fresh flavors. For a spicy kick, include red pepper flakes. If you like a richer taste, swap balsamic glaze for a flavored one, like fig or raspberry. Fresh herbs like oregano or thyme can also elevate the dish.
Tools and Equipment
Here are some essential tools to make your cooking easier:
- A sharp knife for cutting avocados.
- A spoon for scooping out the flesh.
- A mixing bowl for combining the filling.
- Measuring spoons for precise ingredient amounts.
- A cutting board to protect your surfaces.
These tools will help you work efficiently and keep your kitchen tidy.

Variations
Ingredient Substitutions
You can change a few ingredients in Caprese stuffed avocados to suit your taste. If you want a different cheese, try feta or goat cheese. These cheeses offer a tangy flavor that works well with the tomatoes. For a twist on the dressing, use pesto instead of balsamic glaze. It adds a fresh herbal note.
You can also swap the cherry tomatoes with diced bell peppers or cucumbers. These veggies give a nice crunch. Remember, the key is to keep the flavors bright and fresh. You can mix and match until you find your perfect combo!
Dietary Modifications
Making this dish fit special diets is easy! For a vegan version, replace mozzarella with vegan cheese or leave it out. Use a drizzle of olive oil and lemon juice for added flavor. You can also enjoy the dish gluten-free since all the ingredients are naturally gluten-free.
If you are on a low-carb diet, skip the tomatoes or use fewer of them. You can add more basil and olive oil for a tasty option. This way, you keep it light and healthy without losing flavor.
Seasonal Additions
Incorporating seasonal ingredients can give your Caprese stuffed avocados a fresh twist. In summer, add fresh corn or zucchini for a sweet crunch. In fall, try adding roasted butternut squash for a warm, cozy feel. Seasonal fruits like peaches or nectarines also work well in summer.
You can experiment with herbs too. Swap basil for mint in the summer or thyme in the fall. Each season brings new flavors to explore! Enjoy creating your own unique version of this dish.
Storage Info
Best Practices for Storing Remaining Avocados
To store leftover stuffed avocados, cover them tightly with plastic wrap. This wrap keeps air out and helps prevent browning. You can also sprinkle a little lemon juice on the exposed avocado flesh. This adds flavor and slows down oxidation. If you store them in an airtight container, that works too. Just make sure to use them within a day or two for the best taste.
Chilling the Dish
If you want to chill your Caprese stuffed avocados, place them in the fridge for about ten minutes. This cools them down and enhances the flavors. The balsamic glaze will thicken a bit, making it even tastier. For a refreshing bite, serve them straight from the fridge. Just don’t chill them too long or the avocados may lose their creamy texture.
Reheating Instructions
Reheating stuffed avocados is tricky. I don’t recommend microwaving them, as the heat can change their texture. Instead, if you have leftovers, enjoy them cold. If you prefer them warm, try placing them in a preheated oven at a low temperature. Heat them for just a few minutes. Keep an eye on them to avoid overcooking. Enjoying them cold or warm keeps your meal safe and delicious!
FAQs
Can I make Caprese Stuffed Avocados ahead of time?
Yes, you can prep the filling ahead. Mix the tomatoes, mozzarella, basil, olive oil, and balsamic glaze. Store this mix in a container for up to a day. Cut the avocados just before serving to keep them fresh. If the avocado sits too long, it will brown quickly.
What can I serve with Caprese Stuffed Avocados?
These stuffed avocados pair well with several dishes. Here are a few ideas:
- A crisp green salad
- Grilled chicken or shrimp
- Crusty bread or garlic bread
- Pasta with a light sauce
- A refreshing drink, like lemonade or iced tea
Each option complements the fresh flavors of the Caprese stuffed avocados.
How long do stuffed avocados last in the fridge?
Stuffed avocados are best fresh. If stored, eat them within one day. The avocado may brown, but you can minimize this by covering them tightly. If you notice browning, just scoop off the top layer. Always check for any off smells before eating leftovers.
In this post, we explored the vibrant world of Caprese Stuffed Avocados. We covered essential ingredients, preparation steps, and tips to enhance flavors. Selecting ripe avocados is key for taste. Remember to avoid common mistakes and consider variations for dietary needs. Store leftovers correctly to keep them fresh. With these insights, you are ready to enjoy and impress with this delicious dish. Dive in, get creative, and savor every bite. Enjoy the fresh, healthy flavors that Caprese Stuffed Avocados bring to your table!


. Start by peeling your sweet potatoes. Use a vegetable peeler for nice, even strips. Next, dice them into 1-inch cubes. This size helps them cook well. In a large bowl, toss the diced sweet potatoes with olive oil. Add smoked paprika, garlic powder, salt, and black pepper. Mix until every piece is coated. This step brings out the flavor. Preheat your oven to 400°F (200°C). This hot oven ensures crispy edges. Spread the seasoned sweet potatoes on a baking sheet. Make sure they are in a single layer for even cooking. Roast for 20-25 minutes. Stir halfway through to help with browning. The sweet potatoes should be tender and slightly caramelized when done. In a large skillet, combine the roasted sweet potatoes with black beans, corn, and diced tomatoes. Gently stir until everything is heated through. This mix creates a hearty base. Now, sprinkle the shredded cheddar cheese on top. Allow it to melt for about 3-5 minutes. Cover the skillet with a lid to speed up melting if needed. Once the cheese is melted, remove the skillet from heat. Top with jalapeños, green onions, and diced avocado. These additions add color and flavor. Finally, garnish with fresh cilantro. If you like, add a dollop of sour cream or Greek yogurt for creaminess. Serve your loaded sweet potato nacho skillet hot and enjoy the burst of flavors! For the complete cooking process, check the Full Recipe. To boost the flavor, consider adding different spices. You can use cumin or chili powder for a warm kick. A dash of cayenne pepper can also add heat. If you love fresh herbs, cilantro is perfect here. It adds a bright taste that pairs well with sweet potatoes. You can also try fresh parsley or green onions for a twist. Using a cast iron skillet can give your dish a nice crisp. It heats evenly and retains warmth well. If you prefer a non-stick pan, that works too. Just make sure your sweet potatoes do not stick. For even cooking, keep the heat steady. Stir often to prevent burning and ensure all ingredients meld nicely. For a great look, serve the skillet right at the table. This gives a rustic feel and makes sharing easy. You can add some colorful toppings, like diced avocado and sliced jalapeños. A sprinkle of cilantro adds fresh green color. For an extra crunch, serve with tortilla chips on the side. This adds texture and makes it even more fun to eat. Check out the Full Recipe for more serving ideas. {{image_4}} For a vegetarian or vegan touch, you can swap out the cheese. Try cashew cheese or nutritional yeast for a cheesy flavor without dairy. You can also pile on more plant-based toppings. Consider adding sautéed mushrooms, bell peppers, or even spinach. These ingredients add texture and boost nutrition. If you need gluten-free options, this dish is already a great choice. Sweet potatoes, beans, and veggies are naturally gluten-free. Just ensure any toppings or sauces are gluten-free too. For those who want high-protein variations, add cooked quinoa or lentils. You can also use a plant-based protein like tempeh or tofu. This way, you’ll keep the meal filling and nutritious. You can change the flavor profile by adding sweet or savory twists. Try mixing in some cinnamon or maple syrup for a sweet kick. This creates a unique balance with the savory ingredients. For international twists, consider adding spices from around the world. A sprinkle of taco seasoning gives a Mexican flair. Or, use curry powder for an Indian vibe. These simple changes can transform your loaded sweet potato nacho skillet. For the complete recipe, see [Full Recipe]. When storing your loaded sweet potato nacho skillet, let it cool first. This step helps avoid moisture buildup, which can make your dish soggy. Use an airtight container to keep it fresh. If stored properly, it lasts in the fridge for up to four days. To reheat leftovers, use a skillet for the best results. Heat on medium-low to keep the texture. Stir gently as you warm it up to avoid burning. Avoid the microwave if you can; it can make the dish soggy. If you must use it, heat in short bursts and stir often. You can freeze your loaded sweet potato nacho skillet for later use. Portion it into freezer-safe containers, leaving some space for expansion. It stays good for up to three months in the freezer. When ready to eat, thaw it in the fridge overnight before reheating. This keeps the flavors intact and the texture nice. You can use butternut squash or pumpkin. They have a similar texture and taste. Both options provide a nice sweetness. You can also try regular potatoes if you want a different flavor. Yes, you can prep some of the ingredients before. Roast the sweet potatoes a day ahead. Store them in the fridge. You can also mix the black beans, corn, and tomatoes in advance. Just heat everything up when ready to serve. To melt cheese evenly, use freshly shredded cheese. It melts better than pre-shredded cheese. Spread the cheese in an even layer on top of the skillet. Cover the skillet for a couple of minutes. This traps heat and helps the cheese melt smoothly. You can use many toppings for loaded nachos. Some popular choices include jalapeños, green onions, and diced avocado. For a twist, add pickled red onions or fresh salsa. Don't forget sour cream or Greek yogurt for creaminess. You can get creative and mix your favorite toppings! In this blog post, we explored how to create a delicious dish with sweet potatoes, black beans, and cheese. You learned about ingredient choices, measurements, and smart substitutions. I shared tips on roasting sweet potatoes and combining ingredients perfectly. We looked at variations for different diets and how to store leftovers. Remember, making this dish fun and flavorful is easy. Use the ideas provided to customize your meal, ensuring it fits your taste. Enjoy your cooking and make it a family favorite!](https://dishtreats.com/wp-content/uploads/2025/07/3c3c8a5c-337a-4892-8590-75b37c5e13f0-768x768.webp)


. How to select ripe avocados To choose ripe avocados, look for dark green skin. Gently squeeze without applying too much pressure. A ripe avocado gives slightly. Avoid any that feel too soft or have dark spots. Storing leftover salad To keep leftovers fresh, store them in an airtight container. Place a piece of plastic wrap directly on the salad before sealing. This helps keep the avocados from browning. Additional spices or herbs You can add spices like smoked paprika or cayenne for extra flavor. Fresh herbs like parsley or basil can also brighten the salad. Experiment with what you like to create your perfect mix. Adjusting the heat level If you want more heat, add more jalapeño or a splash of hot sauce. For a milder version, skip the jalapeño or remove the seeds. Adjust to your taste! Presentation ideas For a fun presentation, layer the salad in a clear bowl. This shows off all the bright colors. You can also serve it in individual bowls or mason jars for a neat look. Pairing with other dishes This salad pairs well with grilled chicken, fish, or tacos. You can also serve it as a light lunch or side dish at a barbecue. It adds a fresh touch to any meal. {{image_4}} You can easily change this salad to fit your taste. Adding protein is one great option. Grilled chicken or shrimp works well here. It adds heartiness and flavor. You can also mix in seasonal vegetables. Try diced cucumbers in summer or roasted butternut squash in fall. These add color and texture. You can make this salad vegan by skipping the feta cheese. The other ingredients are already plant-based. It still tastes great without it. If you need a gluten-free version, you’re in luck! This salad is naturally gluten-free. All the ingredients fit a gluten-free diet, so enjoy without worry. For a twist on the dressing, use a yogurt-based option. This adds creaminess without extra fat. It’s a fun change from the classic vinaigrette. You can also try different vinaigrettes. A balsamic or honey mustard vinaigrette can change the flavor. Experiment to find your favorite! For the full recipe, check out the delicious avocado and black bean salad. To keep your avocado and black bean salad fresh, store it in an airtight container. This helps prevent oxidation and keeps flavors intact. Make sure the container is clean and dry before adding the salad. You can also squeeze a little extra lime juice on top. This adds a nice flavor and helps slow browning. I do not recommend freezing this salad. The texture of avocados changes when frozen. You may end up with mushy avocados and watery beans. If you want to save some for later, consider storing the ingredients separately. You can freeze black beans or corn, but mix them fresh with avocado when serving. This salad is best served cold or at room temperature. If you must reheat it, do it gently. Place it in a microwave-safe bowl and heat in short bursts. Stir it often to avoid cooking the avocado. However, reheating is not necessary, as the flavors shine best when fresh. For more details, check the Full Recipe. To keep avocados fresh, use lemon or lime juice. The acid slows browning. Also, store cut avocados in an airtight container. You can cover them with plastic wrap, pressing it against the flesh to limit air exposure. If you leave the pit in the avocado, it helps too. Yes, you can prepare the salad ahead. However, add the avocados and dressing just before serving. This way, they stay fresh. You can chop all the other ingredients earlier. Store them in the fridge to keep them cool. If you want to switch the black beans, try chickpeas or kidney beans. They both add protein and flavor. You could also use grilled chicken or shrimp for a meaty option. If you prefer a vegan choice, lentils are great too. Yes, this salad is gluten-free. All the ingredients are safe for those with gluten issues. If you choose to add any extras, like croutons, check their labels to ensure they are gluten-free. This blog post covered a vibrant salad packed with healthy ingredients. You learned how to prepare fresh avocados, black beans, and various veggies. I shared tips for making the perfect dressing and assembling the salad without mushing the avocados. Remember, customizing the salad allows for everyone’s taste. Keep it fresh, explore new flavors, and enjoy! Healthy eating can be fun and delicious. Take these ideas and make your salad unique.](https://dishtreats.com/wp-content/uploads/2025/06/59c4ae36-0ebd-4eac-932b-d71541cf887d-768x768.webp)