Cajun Alfredo Shrimp Pasta Flavorful Family Feast

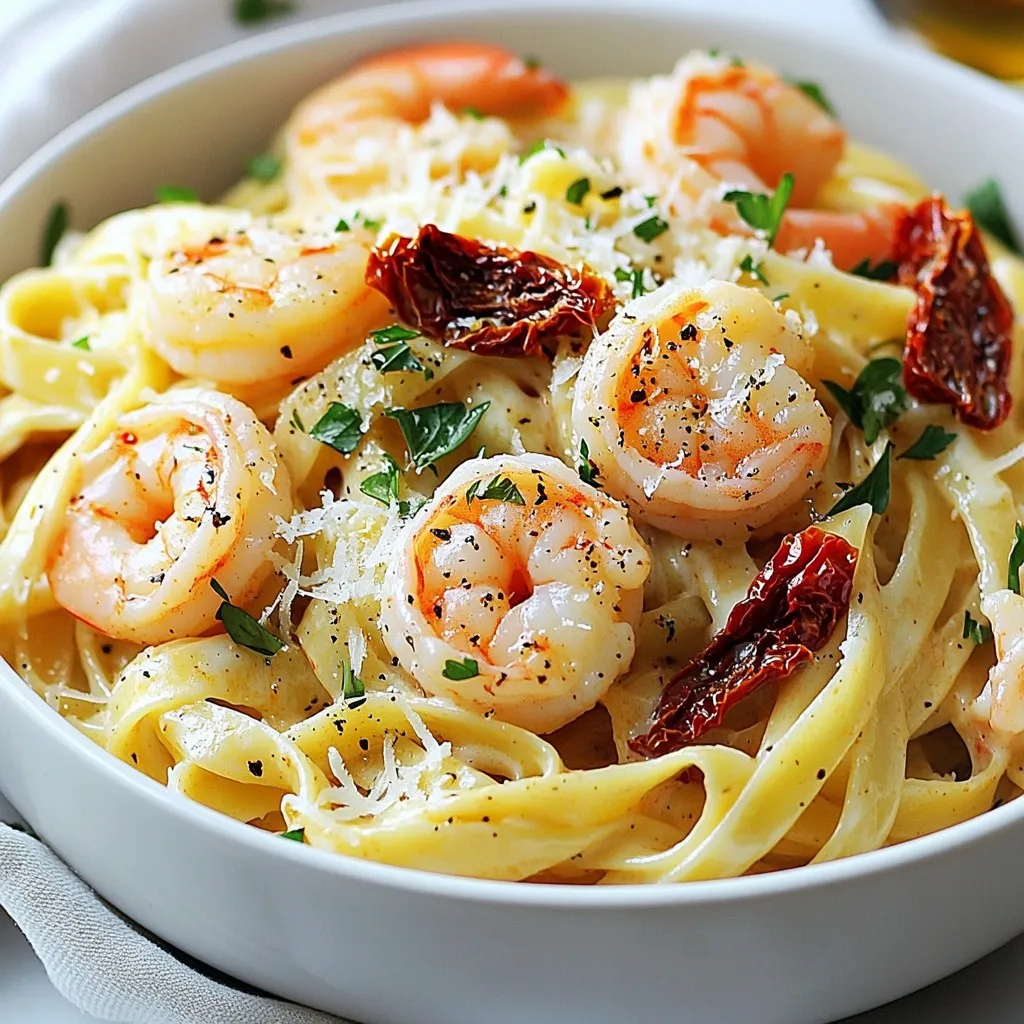
Are you ready to spice up family dinner night? This Cajun Alfredo Shrimp Pasta is not just a meal; it’s a flavorful feast that your loved ones will rave about. Packed with fresh shrimp, creamy sauce, and a kick of Cajun seasoning, this dish is quick to make and full of deliciousness. Let’s dive into the fun of cooking this tasty recipe together!
Why I Love This Recipe
- Bold Flavors: This dish beautifully combines the creamy richness of Alfredo sauce with the spicy kick of Cajun seasoning, creating a delightful balance that excites the palate.
- Quick and Easy: With a total preparation time of just 30 minutes, this recipe is perfect for a weeknight dinner or when you want to impress guests without spending hours in the kitchen.
- Versatile Ingredients: Using shrimp and sun-dried tomatoes, this pasta dish allows for customization. You can easily swap in your favorite proteins or vegetables to suit your taste.
- Beautiful Presentation: Served in deep bowls with fresh parsley and Parmesan, this dish not only tastes great but also looks visually stunning, making it ideal for special occasions.
Ingredients
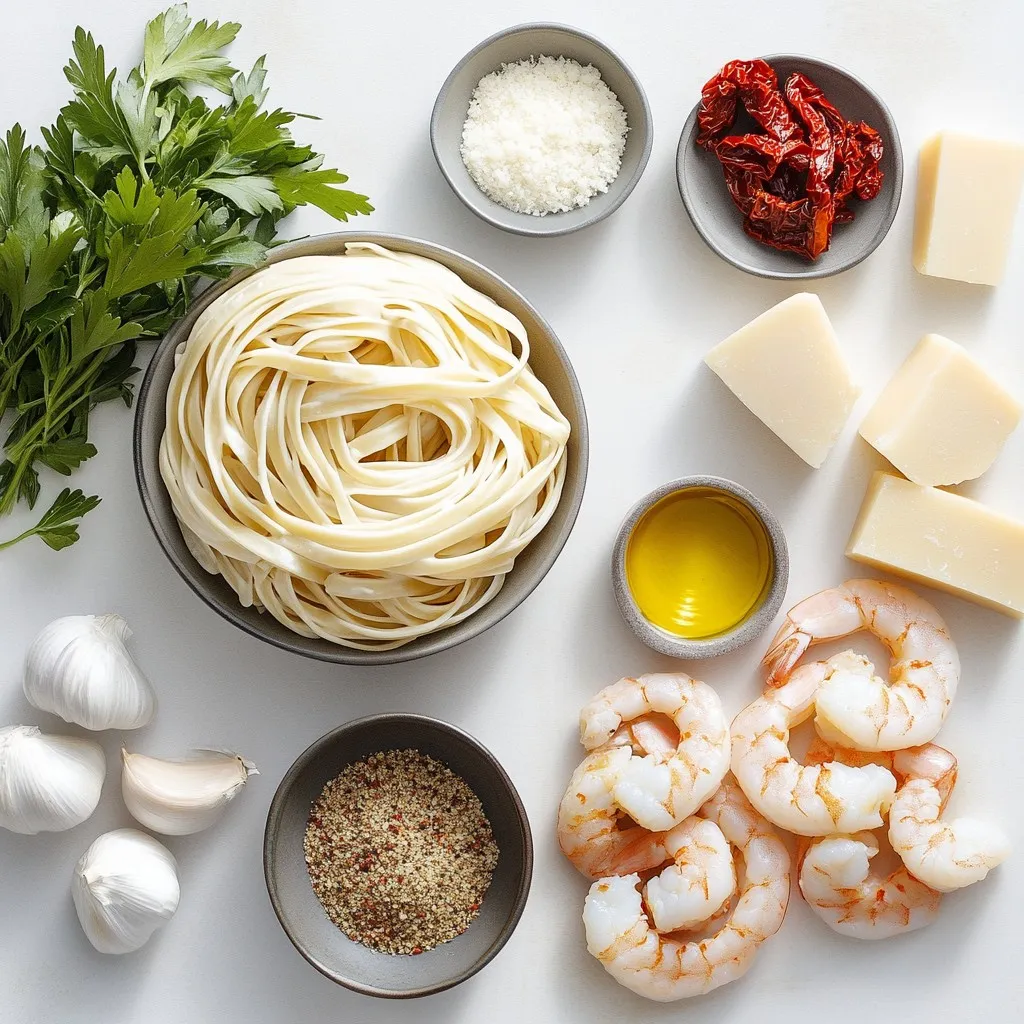
To make a delicious Cajun Alfredo Shrimp Pasta, gather these fresh ingredients:
- 8 ounces fettuccine pasta
- 1 pound large shrimp, peeled and deveined
- 2 tablespoons Cajun seasoning
- 2 tablespoons olive oil
- 3 cloves garlic, minced
- 1 cup heavy cream
- 1 cup freshly grated Parmesan cheese
- 1/2 cup sun-dried tomatoes, chopped
- 1/2 cup freshly chopped parsley
- Salt and pepper to taste
- Optional: Red pepper flakes for an extra kick
Each ingredient plays a vital role in building flavors. The fettuccine provides a hearty base, while the shrimp adds protein and a slight sweetness. Cajun seasoning gives a warm, spicy kick. Olive oil is essential for sautéing, keeping the dish rich. Garlic brings aromatic depth. Heavy cream and Parmesan create a luxurious sauce, making the pasta creamy and decadent. Sun-dried tomatoes add tang, and parsley gives a fresh finish.
For those who love heat, red pepper flakes can elevate the dish. Adjust the amount to fit your taste. This mix of ingredients ensures a flavorful family feast that is sure to impress!

Step-by-Step Instructions
Cooking the Pasta
Start by boiling water. Use a large pot and add salt. Bring it to a rolling boil. Add 8 ounces of fettuccine pasta. Cook it according to the package instructions. This usually takes about 8-10 minutes until it is al dente. Once done, drain the pasta. Remember to save about 1 cup of the pasta water for later. Set the drained pasta aside.
Seasoning the Shrimp
Take 1 pound of peeled and deveined shrimp. In a mixing bowl, add 2 tablespoons of Cajun seasoning. Toss the shrimp well, ensuring each piece gets a nice coat of the spicy seasoning. This step brings the flavors alive.
Cooking the Shrimp
Heat 2 tablespoons of olive oil in a large skillet over medium-high heat. Once the oil is ready, add the seasoned shrimp in a single layer. Cook them for 2-3 minutes on each side. They should turn pink and opaque when done. After cooking, remove the shrimp from the skillet and set them aside on a plate.
Making the Alfredo Sauce
In the same skillet, keep the heat at medium. Add 3 cloves of minced garlic and sauté for about 30 seconds. Be careful not to burn the garlic. Next, pour in 1 cup of heavy cream, stirring gently. Let it simmer for 3-5 minutes until it thickens slightly.
Incorporating Cheese
Now, gradually sprinkle in 1 cup of freshly grated Parmesan cheese. Keep stirring until the cheese melts and the sauce becomes creamy. If it looks too thick, add some of the reserved pasta water until you reach the right consistency.
Combining Ingredients
Add the cooked fettuccine, chopped sun-dried tomatoes, and the sautéed shrimp back into the skillet. Toss everything together gently. Make sure the pasta is well coated with the rich Alfredo sauce.
Final Seasoning and Garnishing
Season the dish with salt and pepper to taste. If you enjoy some heat, add red pepper flakes. Just before serving, mix in 1/2 cup of freshly chopped parsley. This adds a burst of color and flavor to your dish.
Tips & Tricks
Cooking Tips
To perfectly cook fettuccine pasta, start with a large pot of salted water. Bring it to a rolling boil. Once boiling, add the fettuccine. Cook it as per the package directions, usually around 8 to 10 minutes. The pasta should be al dente, meaning it’s firm to the bite. Before you drain the pasta, save about 1 cup of the cooking water. This water can help adjust the sauce later.
Now, let’s achieve that creamy Alfredo sauce. After cooking the shrimp, keep using the same skillet. Lower the heat and add minced garlic. Sauté it for about 30 seconds until fragrant. Then, pour in the heavy cream. Let it simmer for 3 to 5 minutes. Stir in freshly grated Parmesan cheese slowly. Keep stirring until it melts and becomes smooth. If it’s too thick, add a little of the reserved pasta water.
Serving Suggestions
For a great presentation, serve Cajun Alfredo Shrimp Pasta in deep bowls. This adds a rustic feel. Top each serving with extra parsley and a sprinkle of Parmesan cheese. You can also add lemon wedges on the side. This not only looks nice but gives a fresh splash of flavor when guests squeeze it over their pasta.
Flavor Enhancements
Want to add some spice? Use red pepper flakes. They can give your dish an extra kick. Just sprinkle them in while seasoning the dish. Start with a small amount, then taste it. You can always add more if you like it hotter! This simple addition can elevate the flavors and make your Cajun Alfredo Shrimp Pasta even more exciting.
Pro Tips
- Fresh Ingredients: Always use fresh shrimp and high-quality Parmesan cheese for the best flavor in your Alfredo sauce.
- Cook Pasta Al Dente: Make sure to cook the fettuccine just until al dente, as it will continue to cook slightly when mixed with the hot sauce.
- Customize Spice Level: Adjust the amount of Cajun seasoning and red pepper flakes according to your taste preference for a milder or spicier dish.
- Leftover Sauce: If you have leftover Alfredo sauce, it can be refrigerated and used within a few days. Simply reheat gently and adjust with a splash of cream or pasta water.

Variations
Seafood Alternatives
You can swap shrimp for chicken or fish in this dish. Chicken breast works well. Just cut it into bite-sized pieces and season like you would the shrimp. Cook it until it’s golden brown. For fish, use a firm type like salmon or cod. Cook it gently to avoid breaking apart. Both options blend nicely with the creamy sauce.
Vegetarian Option
To make a vegetarian Cajun Alfredo Pasta, skip the shrimp entirely. Use mushrooms or zucchini instead. Slice them up and sauté them until tender. This adds a savory depth and texture. You can also add more sun-dried tomatoes for extra flavor. Use vegetable broth in place of heavy cream for a lighter touch.
Ingredient Swaps
If you’re looking for lighter alternatives, you can swap heavy cream with half-and-half or a plant-based milk. For cheese, try nutritional yeast for a dairy-free version. You can also use a vegan cheese that melts well. These swaps keep your pasta creamy and delicious without the extra calories.
Storage Info
Storing Leftovers
To keep your Cajun Alfredo Shrimp Pasta fresh, store it in an airtight container. Place it in the fridge within two hours after serving. This helps prevent bacteria growth. The pasta will stay good for about 3 days. When you store it, try to keep the shrimp and pasta mixed with the sauce. This keeps the flavors intact.
Reheating Instructions
When you’re ready to enjoy leftovers, reheat the pasta gently. Use a skillet over low heat. Add a splash of cream or reserved pasta water to keep it moist. Stir often to prevent sticking. Heat until the shrimp is warm, but be careful not to overcook it. This keeps the shrimp tender and juicy.
Freezing Tips
If you want to save Cajun Alfredo Shrimp Pasta for later, freezing is a great option. First, let the pasta cool completely. Then, place it in a freezer-safe container. Make sure to leave some space for expansion. It can last for up to 3 months in the freezer. When ready to eat, thaw it in the fridge overnight. Reheat it on the stove, just like before, for the best taste and texture.
FAQs
How can I make Cajun Alfredo Shrimp Pasta spicier?
To add more spice, use extra Cajun seasoning. You can also sprinkle red pepper flakes in the sauce or on top. For a bold kick, add diced jalapeños or fresh chopped chili peppers. Adjust to your taste!
Can I use frozen shrimp for this recipe?
Yes, you can use frozen shrimp. Just make sure to thaw them first. Place the shrimp in cold water for about 15 minutes. Pat them dry before seasoning and cooking. This helps them cook evenly.
How do I know when the shrimp are fully cooked?
Shrimp are done when they turn pink and opaque. This usually takes about 2-3 minutes on each side. If they curl into a “C” shape, they are perfectly cooked. Avoid overcooking to keep them tender.
What type of pasta works best for this dish?
Fettuccine is the best choice for this recipe. Its wide shape holds the creamy sauce well. You can also use linguine or penne if you prefer. Just make sure to cook it al dente for the best texture.
Can this dish be made dairy-free?
Yes, you can make it dairy-free. Replace heavy cream with coconut milk or a dairy-free cream alternative. Use nutritional yeast instead of Parmesan cheese for a cheesy flavor. This way, everyone can enjoy it!
In this blog post, we explored how to make a delicious Cajun Alfredo Shrimp Pasta. We covered each ingredient and its role in the dish, along with step-by-step cooking instructions. I shared tips for perfecting your pasta and sauce, plus variations if you want to switch things up. Lastly, I discussed how to store and reheat leftovers effectively. Enjoy this vibrant dish that mixes flavors, texture, and comfort. You will love making it for friends and famil

Cajun Alfredo Shrimp Pasta
Ingredients
- 8 ounces fettuccine pasta
- 1 pound large shrimp, peeled and deveined
- 2 tablespoons Cajun seasoning
- 2 tablespoons olive oil
- 3 cloves garlic, minced
- 1 cup heavy cream
- 1 cup freshly grated Parmesan cheese
- 0.5 cup sun-dried tomatoes, chopped
- 0.5 cup freshly chopped parsley
- Salt and pepper to taste
- Optional: Red pepper flakes for an extra kick
Instructions
- Cook the Pasta: Bring a large pot of salted water to a rolling boil. Add the fettuccine and cook according to the package instructions until al dente, typically about 8-10 minutes. Drain the pasta, saving about 1 cup of the cooking water for later use. Set the drained pasta aside.
- Season the Shrimp: In a mixing bowl, combine the peeled and deveined shrimp with Cajun seasoning. Toss well to ensure each shrimp is evenly coated with the spice blend.
- Sauté the Shrimp: Heat olive oil in a large skillet over medium-high heat. Once hot, add the seasoned shrimp to the skillet in a single layer. Cook the shrimp for 2-3 minutes on each side or until they turn pink and opaque. Once cooked, remove the shrimp from the skillet and set aside on a plate.
- Prepare the Alfredo Sauce: Using the same skillet (don’t clean it), reduce the heat to medium. Add the minced garlic and sauté for about 30 seconds or until fragrant, being careful not to burn it. Pour in the heavy cream, stirring gently, and let it simmer lightly for 3-5 minutes until slightly thickened.
- Incorporate Cheese: Gradually sprinkle in the grated Parmesan cheese while continuously stirring. Keep stirring until the cheese is fully melted and the sauce is creamy. If the sauce appears too thick, gradually add some reserved pasta water until you reach your desired consistency.
- Combine All Ingredients: Add the cooked fettuccine, chopped sun-dried tomatoes, and sautéed shrimp back into the skillet. Toss everything together gently, ensuring the pasta is generously coated in the rich Alfredo sauce.
- Season and Garnish: Season the dish with salt and pepper to taste. For those who like heat, sprinkle in some red pepper flakes. Just before serving, remove the skillet from heat and mix in the freshly chopped parsley to add a burst of color and flavor.


![- 2 cups cooked chicken, shredded - 4 cups mixed salad greens - 1 cup cherry tomatoes - 1 cup corn - 1 ripe avocado - 1/2 cup red onion - 1 cup shredded cheddar cheese - 1/2 cup ranch dressing - BBQ sauce - Salt and freshly ground black pepper - Crispy tortilla strips, fresh cilantro leaves When making BBQ Ranch Chicken Salad, start with fresh, quality ingredients. The chicken brings protein and heartiness. I love using shredded chicken that is moist and flavorful. Mixed salad greens add crunch and color. You can choose your favorites like romaine, arugula, or baby spinach. Cherry tomatoes bring sweetness. Always cut them in half to make them easy to eat. Corn adds a pop of sweetness too, and you can use canned or fresh. I prefer fresh corn when it’s in season for the best taste. The avocado adds creaminess. A ripe avocado makes the salad smooth and rich. Red onion gives a nice bite. Keep it thinly sliced so it does not overpower. Shredded cheddar cheese adds a delightful sharpness, making each bite even tastier. The ranch dressing is creamy and tangy, tying everything together. Pair it with BBQ sauce for a smoky flavor boost. This combo is truly delicious. For seasoning, use salt and freshly ground black pepper. These simple touches really enhance the flavors. Lastly, crispy tortilla strips add a fun crunch. Fresh cilantro leaves not only look great but also add a fresh taste. You can find the full recipe [Full Recipe]. Enjoy mixing these ingredients for a vibrant, tasty salad! - Combine shredded chicken with BBQ sauce. - Use a large bowl for easy mixing. - Season with salt and black pepper to taste. - Mix until the chicken is fully coated. This step is key. The BBQ sauce gives the chicken a sweet and smoky flavor. It makes the salad pop with taste. - Create the salad base with mixed greens. - Spread the greens evenly in a large bowl. - Layer fresh ingredients: tomatoes, corn, avocado, and onion. - Arrange each ingredient for a colorful look. The vibrant colors make the salad appealing. Each bite brings a different taste, making it fun to eat! - Top with BBQ chicken and cheddar cheese. - Spoon the chicken evenly over the fresh veggies. - Drizzle with ranch dressing, adjusting to your liking. - Toss gently with clean hands or tongs to mix. This salad is now ready to impress! The creamy ranch dressing and savory chicken blend perfectly. Check the [Full Recipe] for more tips! To make your BBQ Ranch Chicken Salad shine, adjust the ranch dressing to your taste. If you love creamy flavors, add more dressing. For a lighter touch, use less. This lets you control how rich the salad feels. Make sure all ingredients mix well. This way, each bite has a bit of everything. An even spread of chicken, veggies, and cheese creates balance. For a lovely presentation, serve the salad in individual bowls or on a large platter. This makes it easy for everyone to take their share. Add some cilantro leaves and crispy tortilla strips on top. These toppings not only look great but also add flavor and crunch. A colorful display of greens and toppings makes the salad more appealing. Feel free to experiment with different seasonings. A dash of chili powder can add a nice kick. You might also try garlic powder or smoked paprika for depth. Also, think about adding extra ingredients for more variety. Black beans, diced peppers, or even fresh corn can bring new tastes. Each addition offers a chance to create your perfect salad blend. For more details on making this delicious salad, check out the Full Recipe. {{image_4}} You can easily change the protein in this salad. If you want a different taste, use pulled pork or tofu instead of chicken. Both options add great flavor. For a seafood twist, grilled shrimp works well. The shrimp adds a nice, light touch to the salad. While ranch dressing is a favorite, you can swap it out. Blue cheese dressing gives a strong flavor. A vinaigrette adds a tangy kick that brightens the salad. You can also make your own dressing blends. Mix yogurt with herbs for a fresh taste. Don't be afraid to add more veggies. Bell peppers, cucumbers, and radishes give a nice crunch. You can also roast vegetables like zucchini or carrots. Roasting adds a warm, rich taste that contrasts nicely with the cool salad. For a full recipe, check out the BBQ Ranch Chicken Salad with a Crunchy Twist. Store your BBQ Ranch Chicken Salad in an airtight container. This keeps it fresh and tasty. For best results, eat it within 2-3 days. The longer it sits, the soggier it may get. If you want to freeze some, consider freezing the chicken separately. This helps keep the chicken tasty when you eat it later. Avoid freezing the salad with dressing. The dressing makes the greens soggy, and nobody likes that! To refresh your leftovers, toss them with fresh greens. This adds crunch and makes it feel new again. If you want to reheat the BBQ chicken, do it separately. This keeps it warm without making the salad wilt. To make BBQ Ranch Chicken Salad, follow these simple steps: 1. Prepare the BBQ Chicken: Mix shredded chicken with BBQ sauce in a big bowl. Add salt and black pepper. Stir until the chicken is well coated. 2. Build the Salad Base: In another large bowl, spread the mixed greens evenly. This is your salad's base. 3. Layer Fresh Ingredients: Add halved cherry tomatoes, corn, diced avocado, and sliced red onion on top of the greens. This creates a colorful layer. 4. Top with BBQ Chicken: Spoon the BBQ chicken evenly over the fresh layers. This ensures every bite has flavor. 5. Add Creamy Cheese: Sprinkle shredded cheddar cheese over the salad. Let it melt slightly into the warm chicken. 6. Drizzle with Dressing: Pour ranch dressing over the salad. Adjust the amount to fit your taste. 7. Toss Gently: Use clean hands or tongs to mix everything. Make sure the ranch dressing coats all the ingredients. 8. Taste Test: Before serving, taste the salad. Add more salt or black pepper if needed. 9. Add Crunch and Garnish: Top with crispy tortilla strips and fresh cilantro for a nice finish. This process makes a delicious and colorful salad. For the complete recipe, check the Full Recipe above. Yes, you can prep this salad ahead of time. Here are some tips: - Cook the Chicken: You can cook and shred the chicken a day in advance. Store it in the fridge with BBQ sauce. - Chop Veggies: Cut the vegetables, like tomatoes and onions, a few hours before serving. Keep them in airtight containers. - Store Dressing Separately: Keep the ranch dressing separate until serving. This keeps the greens fresh and crisp. - Combine Before Serving: Mix everything together just before you eat. This keeps your salad from becoming soggy. This BBQ Ranch Chicken Salad goes great with several side dishes. Here are some ideas: - Crusty Bread: A nice loaf of bread pairs well and adds a hearty touch. - Chips: Tortilla chips or potato chips add crunch and fun. - Fruit Salad: A fresh fruit salad adds sweetness and a refreshing taste. - Grilled Veggies: Grilled vegetables complement the salad's flavors. - Coleslaw: A crunchy coleslaw gives a nice contrast to the salad. These sides enhance your BBQ Ranch Chicken Salad experience. Enjoy! We explored a tasty BBQ Ranch Chicken Salad. You learned about the main and optional ingredients, along with step-by-step instructions for making it. You also picked up tips for perfecting the salad and ideas for variations. Don’t forget to check the storage info for leftovers. This salad is easy to adjust, making it a fun dish for everyone. Enjoy this recipe and make it your own!](https://dishtreats.com/wp-content/uploads/2025/07/4c564630-ecab-497d-8bae-b951c19ef4f1-768x768.webp)