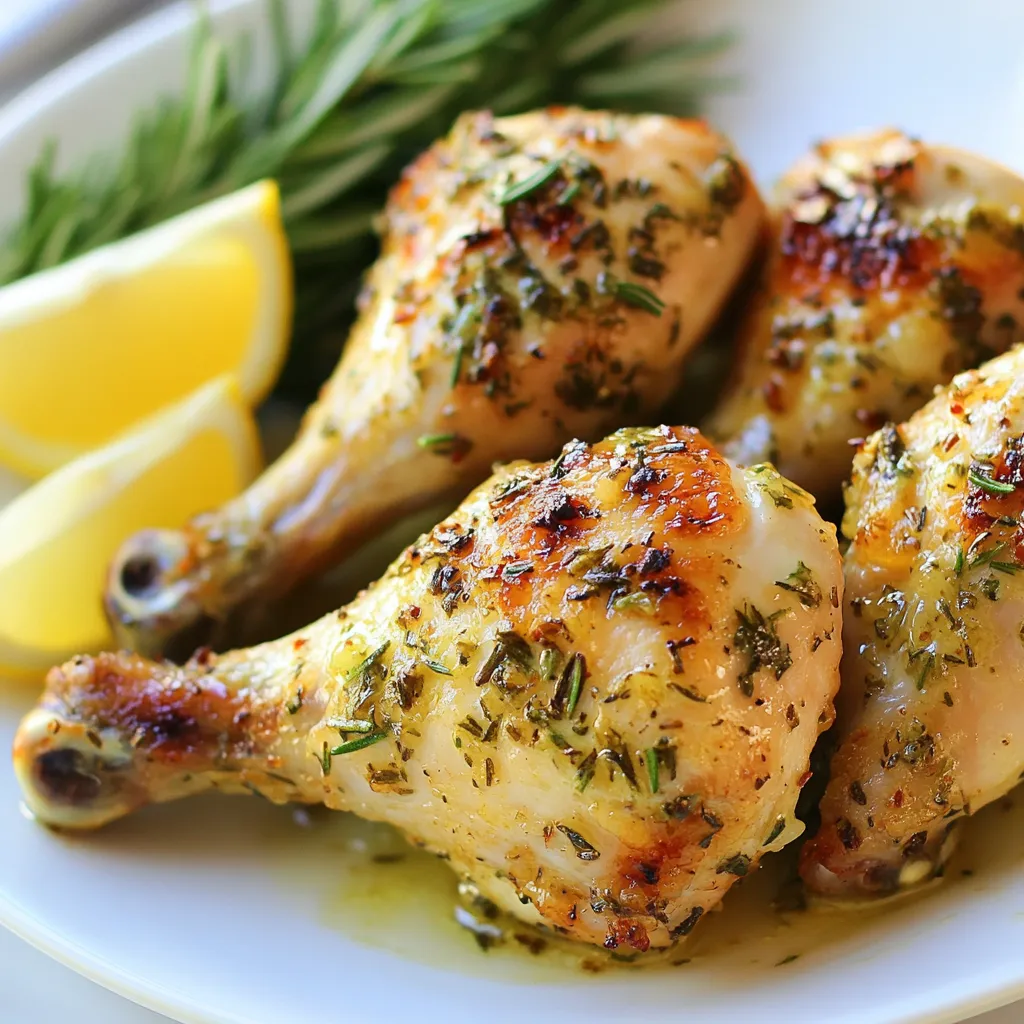
Are you ready to elevate your dinner game? My Buttery Herb Chicken Drumsticks are a flavorful delight that will impress everyone at your table. With juicy meat and a rich herb blend, this dish is perfect for any occasion. Follow my simple steps and create a mouthwatering meal that’s easy to prepare and hard to resist. Let’s dive into the tasty details and make your next meal unforgettable!
Why I Love This Recipe
- Simple Preparation: The recipe requires minimal ingredients and steps, making it perfect for a quick weeknight dinner.
- Flavorful Experience: The combination of buttery herbs and spices creates a rich and savory flavor that satisfies the taste buds.
- Crispy Skin Delight: Baking the drumsticks at a high temperature ensures a deliciously crispy skin that everyone loves.
- Versatile Serving: These drumsticks can be served with various sides or as part of a picnic spread, making them a versatile dish for any occasion.
Ingredients
Main Ingredients
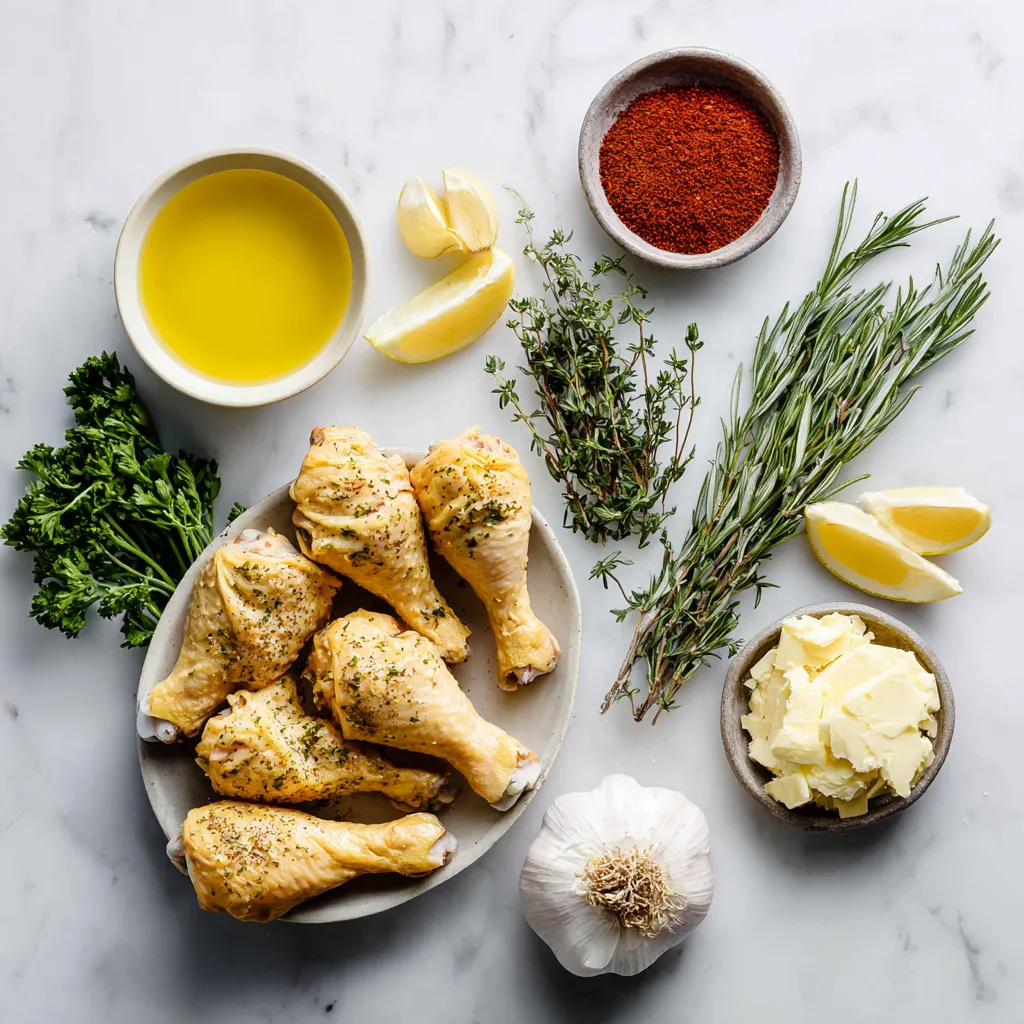
– 8 chicken drumsticks
– 1/2 cup unsalted butter, melted
– 2 tablespoons extra virgin olive oil
– 1 tablespoon fresh rosemary, finely chopped
– 1 tablespoon fresh thyme, finely chopped
– 1 tablespoon fresh parsley, finely chopped
The heart of this dish is the chicken drumsticks. They are juicy and tender when cooked well. The butter adds rich creaminess. Olive oil helps make the skin crisp. Fresh herbs bring bright flavors that lift the dish. Rosemary, thyme, and parsley work perfectly together.
Seasoning and Flavor Enhancers
– 4 cloves of garlic, finely minced
– 1 teaspoon paprika (smoked paprika for extra flavor recommended)
– Sea salt and freshly cracked black pepper, to taste
Garlic adds a strong and savory taste. Paprika adds a subtle smokiness. Salt and pepper are essential to enhance all the flavors. Together, these seasonings create a tasty balance that makes everyone want more.
Serving Suggestions
– Fresh lemon wedges
– Additional garnish ideas
Serving the drumsticks with lemon wedges brings a nice zesty touch. A squeeze of lemon brightens the dish and adds freshness. You can also garnish with extra herbs for color. A rustic wooden board makes for a lovely presentation. Your guests will be impressed!
Step-by-Step Instructions
Preparation Steps
– Preheat your oven to 425°F (220°C). This hot oven helps get the skin crispy.
– Line a baking sheet with aluminum foil or parchment paper. This makes cleanup easy.
Mixing the Herb Mixture
– In a large bowl, pour in the melted butter and olive oil.
– Add minced garlic, chopped rosemary, thyme, parsley, paprika, sea salt, and black pepper.
– Mix everything well. Use a whisk or spoon until all the herbs and spices blend into a fragrant mixture.
– Toss the chicken drumsticks in the bowl. Make sure each drumstick gets a nice coating of that buttery herb mix.
Baking the Drumsticks
– Arrange the coated drumsticks on the baking sheet. Give them space so they can cook evenly.
– Place the baking sheet in the oven and bake for 35-40 minutes.
– Flip the drumsticks halfway through cooking. This helps them brown nicely on all sides.
– They are ready when they turn golden brown and reach 165°F (75°C) inside.
– After baking, let them rest for about 5 minutes. This helps keep them juicy.
– Serve warm with fresh lemon wedges. A squeeze of lemon adds a nice touch!
Tips & Tricks
Ensuring Perfectly Cooked Drumsticks
The best way to know when chicken is done is by checking its internal temperature. You want your drumsticks to reach 165°F (75°C). This ensures they are safe to eat and juicy.
Resting time is also key. After cooking, let the drumsticks rest for about 5 minutes. This helps keep the juices inside, making each bite tasty.
Enhancing Flavor Profiles
If you want to switch up the herbs, try using dill, basil, or even tarragon. Each herb brings a unique taste to your dish.
You can also explore other seasoning ideas. Try adding a pinch of cayenne for some heat or a bit of honey for sweetness. Both can add exciting layers to the flavor.
Presentation Ideas
For serving, arrange the drumsticks on a rustic wooden board or a nice platter. This makes your meal look inviting and special.
Garnish with extra fresh herbs for color. A few lemon wedges add a bright touch and help with flavor. You can even place sprigs of rosemary around to enhance the aroma before your first bite.
Pro Tips
- Use Room Temperature Chicken: Allow your chicken drumsticks to sit at room temperature for about 30 minutes before cooking. This helps them cook more evenly and results in juicier meat.
- Marinate for Extra Flavor: If time permits, marinate the drumsticks in the buttery herb mixture for a few hours or overnight in the refrigerator. This allows the flavors to penetrate the meat more deeply.
- Check for Crispiness: For extra crispy skin, broil the drumsticks for the last 2-3 minutes of cooking. Keep a close eye to prevent burning!
- Experiment with Herbs: Feel free to mix and match the herbs based on your preference. Oregano, basil, or even a pinch of chili flakes can add a unique twist to the flavor profile.
Variations
Different Cooking Methods
You can cook buttery herb chicken drumsticks in various ways. Each method gives a unique taste and texture.
– Grilling options: Grilling drumsticks adds a smoky flavor. Preheat your grill to medium heat. Brush the drumsticks with the herb mixture. Cook for about 30 minutes, turning often, until they reach 165°F.
– Air frying alternatives: Air frying makes the skin crispy. Set your air fryer to 400°F. Place the coated drumsticks in the basket in a single layer. Cook for 25-30 minutes, flipping halfway through.
Flavor Infusions
You can spice up your buttery herb chicken drumsticks easily.
– Adding spice variations: For a kick, add cayenne pepper to the herb mix. Start with a half teaspoon and adjust to your taste. This gives a nice heat without overpowering the dish.
– Ingredients for a sweet glaze: Mix honey or maple syrup into the herb mixture for a sweet touch. This balances the savory flavors and adds a lovely shine to the chicken.
Dietary Modifications
You can adjust the recipe to fit different dietary needs.
– Making it gluten-free: This recipe is already gluten-free. Just be sure your paprika and other seasonings are labeled gluten-free.
– Adjusting for low-fat preferences: Use less butter or substitute with olive oil. You can also remove the skin from the drumsticks to cut down on fat while still keeping it tasty.
Storage Info
Storing Leftovers
To keep your buttery herb chicken drumsticks fresh, follow these steps:
– Refrigeration: Allow the drumsticks to cool completely. Place them in an airtight container. Store in the fridge for up to 3 days.
– Freezing: If you want to keep them longer, wrap each drumstick in plastic wrap. Then, place them in a freezer bag. They can last up to 3 months in the freezer.
Reheating Tips
When it’s time to enjoy your leftovers, here’s how to do it right:
– Oven Method: Preheat your oven to 350°F (175°C). Place the drumsticks on a baking sheet. Heat for about 15-20 minutes until warm.
– Microwave Method: Use a microwave-safe dish. Cover the drumsticks with a damp paper towel. Heat in 30-second intervals until warm. This helps keep them tender.
Shelf Life
How long can you keep those tasty drumsticks?
– Refrigerated: They last for about 3 days in the fridge.
– Frozen: When frozen, they stay good for about 3 months.
Watch out for these signs of spoilage:
– Smell: If they smell off, it’s best to toss them.
– Texture: If they feel slimy, do not eat them.
– Color: If the color changes significantly, it’s time to let go.
FAQs
How do you make chicken drumsticks crispy?
To make chicken drumsticks crispy, start with high heat. Preheat your oven to 425°F (220°C). Use a mix of melted butter and olive oil for coating. This helps the skin crisp up. Space the drumsticks apart on the baking sheet. This allows hot air to circulate around them. Flip the drumsticks halfway through cooking. This ensures even browning. The skin will turn golden and crunchy.
Can I marinate the drumsticks overnight?
Yes, you can marinate the drumsticks overnight. This step enhances the flavors greatly. Combine the melted butter, oil, garlic, and herbs. Coat the drumsticks in this mix. Place them in a sealed bag or bowl. Refrigerate them overnight. The longer they soak, the more flavor they absorb. Just remember to let them come to room temperature before baking.
What are the best side dishes to serve with buttery herb chicken drumsticks?
Great side dishes complement buttery herb chicken drumsticks. Consider these options:
– Roasted vegetables like carrots or Brussels sprouts
– Creamy mashed potatoes for a classic feel
– A fresh garden salad for a light touch
– Garlic bread to soak up the buttery sauce
– Steamed rice or quinoa for a hearty addition
These sides balance the dish well and create a complete meal.
In this post, we covered how to make tasty chicken drumsticks with simple steps. We looked at key ingredients like fresh herbs, garlic, and butter. You learned how to prepare, season, and bake them perfectly. We also shared helpful tips for variations and storing leftovers. Cooking should be fun and easy. Now, you can impress your friends and family with your dish. Keep experimenting with flavors and enjoy every bit


