Broccoli Cheddar Soup Slow Cooker Creamy Delight
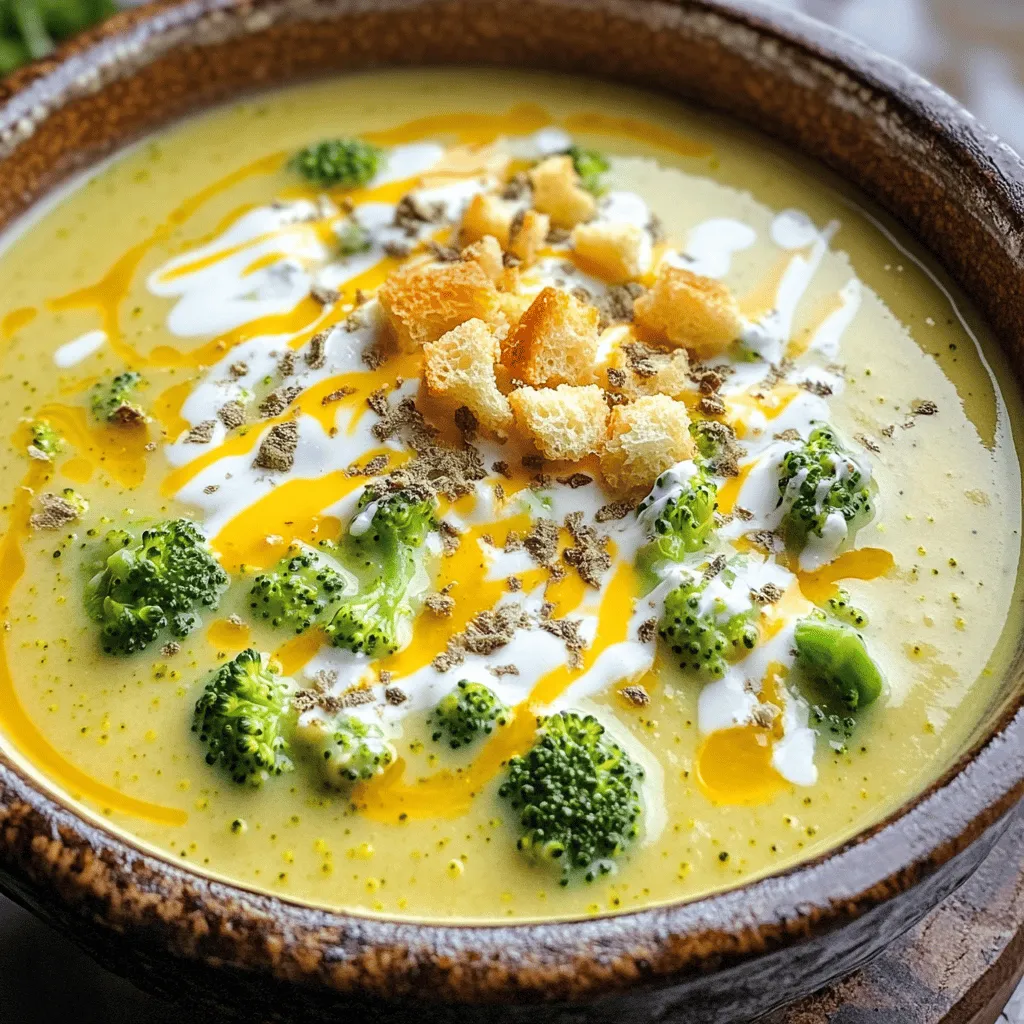
Craving a warm, comforting meal? Broccoli Cheddar Soup made in a slow cooker is your answer! This creamy delight is simple to make and packs a flavor punch. With fresh broccoli, rich cheddar, and just a hint of Dijon, you’ll love how easy it is to prepare. Let’s dive into the ingredients and steps to create this heartwarming dish that will impress your family and warm your soul!
Ingredients
Comprehensive List of Ingredients
- 4 cups fresh broccoli florets
- 1 medium onion, finely diced
- 3 cloves garlic, minced
- 4 cups vegetable broth
- 2 cups sharp cheddar cheese, freshly shredded
- 1 cup heavy cream (or use full-fat coconut milk for a lighter, dairy-free option)
- 1 teaspoon Dijon mustard for added depth
- 1 teaspoon dried thyme for aromatic flavor
- Salt and freshly ground black pepper to taste
- 2 tablespoons extra virgin olive oil
- Optional: Toasted croutons and additional shredded cheese for topping
Gather these ingredients to make a warm, creamy soup. Fresh broccoli florets are key for taste and texture. Diced onion adds sweetness, while minced garlic brings depth. Vegetable broth forms the base, giving the soup a rich flavor.
Sharp cheddar cheese melts into creamy goodness, making each bite delightful. You can choose heavy cream for a rich finish or coconut milk for a lighter option. Dijon mustard gives a subtle kick, while dried thyme adds warmth.
Season it well with salt and pepper. Extra virgin olive oil ensures the onions sauté perfectly. For fun, add croutons and cheese on top when serving. This adds crunch and extra flavor, making your soup even better!
Step-by-Step Instructions
Preparing the Base
Start by heating 2 tablespoons of extra virgin olive oil in a large skillet over medium heat.
Add 1 medium onion, finely diced, and sauté it until it turns translucent, about 5 minutes.
Next, add 3 cloves of minced garlic to the skillet. Sauté until fragrant, which should take about 1 minute.
Slow Cooker Assembly
Now, transfer the sautéed onion and garlic mixture to the slow cooker.
Add 4 cups of fresh broccoli florets, 4 cups of vegetable broth, and 1 teaspoon of Dijon mustard.
Sprinkle in 1 teaspoon of dried thyme and a pinch of salt and pepper. Stir everything to combine well.
Cooking Time and Blending
Set your slow cooker to cook on low for 4-5 hours or on high for 2-3 hours.
You want the broccoli to be tender and easily pierced with a fork.
Once cooked, use an immersion blender to blend the soup until smooth. You can also use a countertop blender, but do it in batches.
Final Touches
After blending, return the smooth soup to the slow cooker if needed.
Stir in 1 cup of heavy cream and 2 cups of freshly shredded sharp cheddar cheese.
Mix until the cheese melts into the soup and everything is creamy.
Taste your soup and adjust the seasonings with more salt and pepper, if needed.
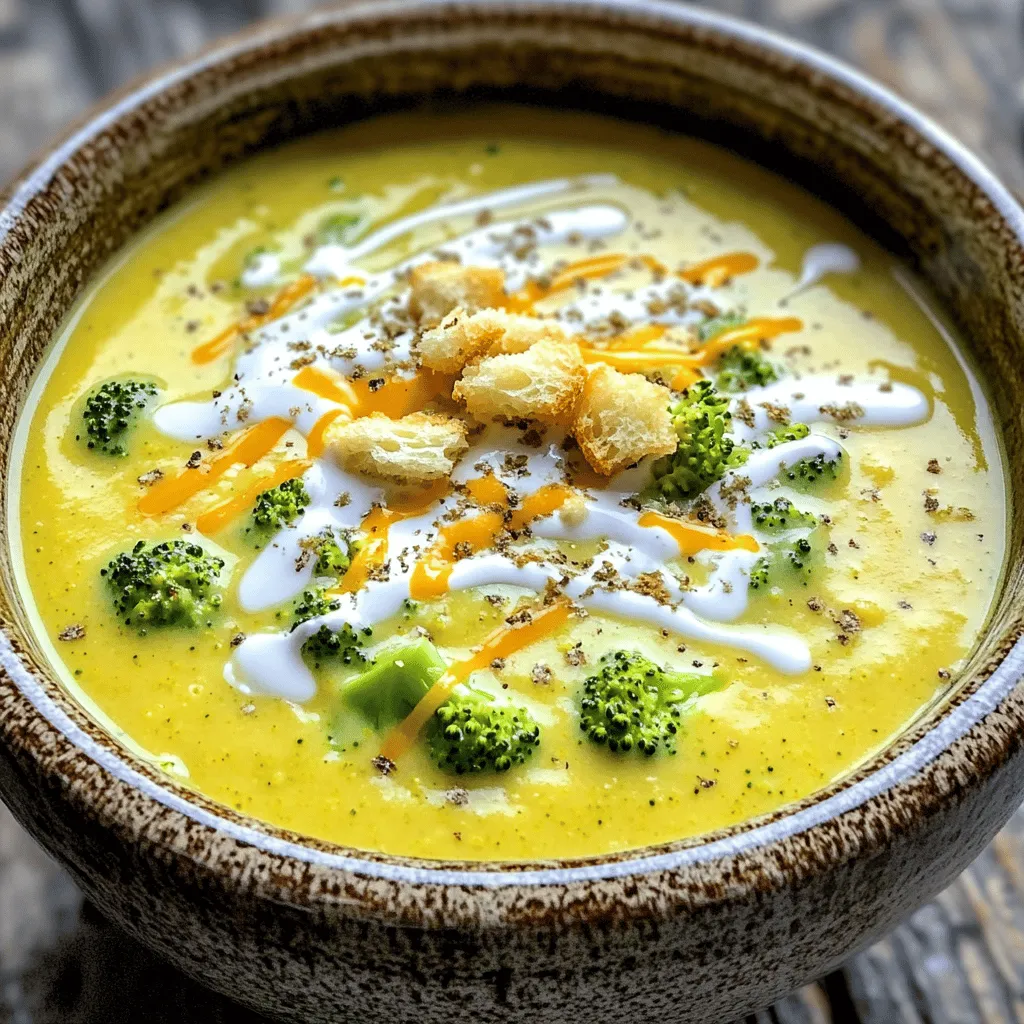
For a delightful finish, ladle the soup into bowls and top with toasted croutons and extra cheese.
Tips & Tricks
Achieving the Creamiest Texture
To get the creamiest texture, always shred your cheese. Pre-shredded cheese has additives that affect melting. Freshly shredded cheese melts better and creates a smoother soup. Use a box grater or food processor for quick shredding.
When blending, I recommend using an immersion blender. It makes blending easy and keeps your soup in one pot. If you use a countertop blender, be careful. Fill it only halfway to avoid spills. Blend until the soup is completely smooth for that creamy delight.
Enhancing Flavor
To boost flavor, add spices like garlic powder or onion powder. Fresh herbs like parsley or chives add brightness. You can also try a pinch of nutmeg for warmth.
For added depth, consider mixing in a splash of lemon juice. This brightens the soup and balances the creaminess. You can also add cooked bacon or ham for a savory touch. These small changes can make a big difference in taste.
Serving Suggestions
Pair your soup with crusty bread like sourdough or a baguette. The crispy texture complements the creamy soup perfectly. You can also serve it with a grilled cheese sandwich for a classic combo.
For presentation, ladle the soup into rustic bowls. Top with croutons and extra cheese. Add a sprinkle of fresh herbs like thyme or parsley for color. This makes your dish look as good as it tastes!
Variations
Dairy-Free Version
You can make this soup dairy-free easily. Start by swapping heavy cream with full-fat coconut milk. This creamy option keeps the soup rich. For cheese, use a dairy-free cheddar or nutritional yeast. Both options provide a nice flavor without dairy.
Additional Vegetable Options
Want to boost the nutrition? Add veggies like carrots and celery. These add flavor and texture. Just chop them small so they cook well. If you add more veggies, check the cooking time. You might need an extra 30 minutes on low for everything to get tender.
Spicy Twist
Do you love heat? Adding chili flakes or hot sauce can give your soup a kick. Mix them in when you add the broccoli. For a crunchy spice, serve with spicy croutons on top. This adds an exciting twist to your creamy delight.
Storage Info
Proper Cooling and Storing
Let your soup cool down to room temperature before putting it in the fridge. This helps keep it fresh. Use an airtight container to store the soup. Make sure the lid fits snugly to prevent air from getting in. This way, your soup stays tasty and safe.
Freezing Tips
To freeze the soup, let it cool completely first. Pour it into freezer-safe containers. Leave some space at the top, as the soup will expand when frozen. You can keep it in the freezer for up to three months for the best taste. When you’re ready to eat, thaw it in the fridge overnight.
Reheating Instructions
To reheat, use the stove or microwave. If using the stove, heat it on low and stir often. This prevents sticking and helps keep the creaminess. If using the microwave, heat it in short bursts. Stir in between to make sure it heats evenly. Enjoy your warm, creamy broccoli cheddar soup!
FAQs
Can I use frozen broccoli for the recipe?
Yes, you can use frozen broccoli. It saves time and is easy to find. Just make sure to thaw it before adding it to the slow cooker. This helps it cook evenly and blend well.
How long can I store leftover soup?
You can store leftover soup in the fridge for about three to four days. Make sure to use an airtight container. If you want to keep it longer, consider freezing it. It can last for up to three months in the freezer.
Is it possible to add protein to this soup?
Absolutely! You can add cooked chicken, turkey, or even beans for protein. Just mix them in when you add the cream and cheese. This makes the soup heartier and more filling.
What can I serve with broccoli cheddar soup?
I love serving this soup with crusty bread or a fresh salad. Grilled cheese sandwiches also pair well. They add crunch and flavor to your meal.
Can I use other types of cheese?
Yes, you can use different cheeses! Gouda, mozzarella, or Monterey Jack all work well. Each cheese gives a unique taste, so feel free to experiment to find your favorite.
This blog post covered how to make a delicious broccoli cheddar soup from scratch. We explored the key ingredients and the step-by-step method for preparation using a slow cooker. I shared tips for achieving the creamiest texture and enhancing flavors. You can also try tasty variations and proper storage methods to keep your soup fresh. Making this soup is both easy and rewarding. Enjoy your cooking journey, and savor every warm bowl!


![- 1 block firm tofu, thoroughly drained and pressed - 1 cup jasmine rice - 2 tablespoons Sriracha sauce The firm tofu acts as the main protein. It absorbs flavors well and provides a hearty bite. Jasmine rice, with its fluffy texture, makes a great base. Sriracha sauce adds the spicy kick, balancing heat and taste. - 1 cup broccoli florets, fresh or frozen - 1 red bell pepper, thinly sliced - ½ cup carrots, julienned or matchstick-cut Broccoli florets add crunch and color. The red bell pepper brings sweetness and a pop of color. Carrots add a nice crunch and a bit of earthiness. Together, they create a vibrant mix that enhances the dish. - 1 tablespoon soy sauce (preferably low-sodium) - 1 tablespoon sesame oil - Fresh cilantro, for garnish Soy sauce brings umami depth. Sesame oil adds a nutty flavor that complements the spice. Fresh cilantro brightens the dish, giving it a fresh finish. This combo of flavors makes each bite exciting. For the full recipe, check out the complete guide. To start, cut the pressed tofu into 1-inch cubes. This size helps the tofu cook evenly. Next, toss the cubes in a bowl with cornstarch. Make sure every piece is coated. This coating is key for a crispy finish when you cook it. Pressing the tofu is vital. It removes excess water, allowing better flavor absorption and texture. Bring vegetable broth to a boil in a medium saucepan. Add the jasmine rice and stir it once. Cover the pan, reduce the heat, and let it simmer for about 15 minutes. This method infuses flavor into the rice. Once the liquid absorbs, fluff the rice with a fork. This step keeps the rice light and airy, which balances the dish. Heat vegetable oil in a large skillet over medium-high heat. Carefully add the cornstarch-coated tofu cubes in a single layer. Fry them for about 8-10 minutes, turning occasionally. You want all sides to turn golden brown and crispy. Once done, transfer the tofu to a plate lined with paper towels. This helps absorb any excess oil. In the same skillet, add the broccoli, red bell pepper, and carrots. Stir-fry the veggies for 4-5 minutes. You want them tender but still bright and colorful. This keeps their nutrients intact. Add the sliced green onions for the last minute. Their fresh taste adds a nice crunch to the mix. In a small bowl, whisk together the Sriracha sauce, soy sauce, sesame oil, and honey (or maple syrup). Mix until well blended. This sauce brings all the flavors together. If you like it spicier, add more Sriracha. For a milder version, reduce the amount. Now, it’s time to put it all together! Divide the fluffy jasmine rice into bowls. Top it with the spicy tofu and vegetable mix. For a polished finish, sprinkle sesame seeds and fresh cilantro on top. This adds flavor and a pop of color to your bowl. For the full recipe, refer back to the main section. Enjoy your Spicy Sriracha Tofu Bowl! To make crispy tofu, you need to press it well. Start by wrapping the block of firm tofu in a clean kitchen towel. Place a heavy object, like a cast iron pan, on top for about 20-30 minutes. This helps remove excess moisture. Next, coat the tofu cubes with cornstarch. Use about 2 tablespoons, ensuring each piece is covered. This coating creates a crunchy texture when cooked. Not everyone enjoys the same heat. If you want less spice, use only 1 tablespoon of Sriracha. You can also mix Sriracha with a bit of honey or ketchup to mellow the heat. For a different flavor, try other sauces. Chili garlic sauce or sweet chili sauce can work well too. Experiment with these options to find what you like best. To save time, prep your ingredients ahead of time. You can chop the vegetables and store them in the fridge for up to three days. Cook the rice and tofu in advance, too. Store them separately in airtight containers. This way, you can quickly assemble your Spicy Sriracha Tofu Bowl when you’re ready to eat. Enjoy the convenience of quick meals without sacrificing taste! For the full recipe, check out the Spicy Sriracha Tofu Bowl. {{image_4}} You can switch the tofu for other protein sources. Tempeh is a great choice. It has a nutty flavor and holds up well in stir-fries. Seitan is another tasty option. It mimics the texture of meat nicely. If you prefer meat, chicken or shrimp work well too. Chicken adds a mild taste, while shrimp brings a sweet, briny flavor. Both cook quickly, making your meal even faster. Feel free to change the vegetables based on the season. In spring, try snap peas or asparagus. In summer, zucchini and bell peppers shine. Winter vegetables like Brussels sprouts and kale add heartiness. You can also use frozen veggies. They save time and are often just as nutritious as fresh ones. Just make sure to thaw and drain excess water before cooking. If you need a gluten-free option, swap soy sauce for tamari. Tamari has a similar flavor but is gluten-free. For the rice, try quinoa or cauliflower rice. Both options are nutritious and add a unique texture to your bowl. Quinoa is protein-rich, while cauliflower rice is low in carbs and calories. These swaps ensure everyone can enjoy this spicy dish! For the complete recipe, check the [Full Recipe]. To keep your spicy Sriracha tofu bowl fresh, store leftovers in an airtight container. Place the bowl in the fridge within two hours of cooking. This helps keep the food safe. Your leftovers can last for up to four days in the fridge. To reheat the tofu without losing its crispness, use an oven or a skillet. If using an oven, preheat it to 350°F (175°C). Place the tofu on a baking sheet for about 10-15 minutes. If using a skillet, heat over medium heat for about 5-7 minutes, turning the tofu occasionally. This keeps it crispy and delicious. You can freeze cooked bowls if you want to save some for later. Place the cooled bowl in a freezer-safe container. It can stay frozen for up to three months. To thaw, move the bowl to the fridge overnight. Reheat it in the oven or a skillet as mentioned above. This way, you can enjoy your spicy Sriracha tofu bowl anytime! For the full recipe, check the earlier sections. To make the Spicy Sriracha Tofu Bowl vegan, swap honey for maple syrup. This simple change keeps the dish sweet and plant-based. Also, check that all products you use are vegan-friendly. For example, ensure your soy sauce is made without animal products. Yes, you can use brown rice. However, remember that brown rice takes longer to cook. It usually needs about 40-50 minutes, while jasmine rice only takes around 15 minutes. Brown rice has a nuttier taste and chewier texture. So, it can change the feel of your bowl. If you don’t have Sriracha, several substitutes work well. You can use chili garlic sauce or sambal oelek for a similar heat. You can also make a homemade version by mixing hot sauce, garlic, and a bit of sugar. This gives you control over the flavor. The spice level of this dish depends on the amount of Sriracha you use. One tablespoon adds mild heat, while two tablespoons ramp up the spice. To adjust heat to your taste, start with less and add more if you like it spicier. Always taste as you go. You can serve this bowl with a side of edamame or a fresh salad. They add nice contrast and extra crunch. For more flavor, drizzle extra Sriracha or sesame oil on top. You can also add lime juice for a zesty touch. Enjoy your meal! For the full recipe, check out the Spicy Sriracha Tofu Bowl details above. You learned how to make a tasty Spicy Sriracha Tofu Bowl. We covered each ingredient and how to prepare them. From cooking the rice to achieving crispy tofu, each step matters. Remember to adjust spices to suit your taste. Feel free to swap in different proteins or veggies to keep it fresh. Store leftovers well to enjoy later. This bowl is not just good; it’s fun to make and share. Enjoy your cooking adventure!](https://dishtreats.com/wp-content/uploads/2025/07/ee3e23f0-fb80-42df-ace0-60219f206871-768x768.webp)
