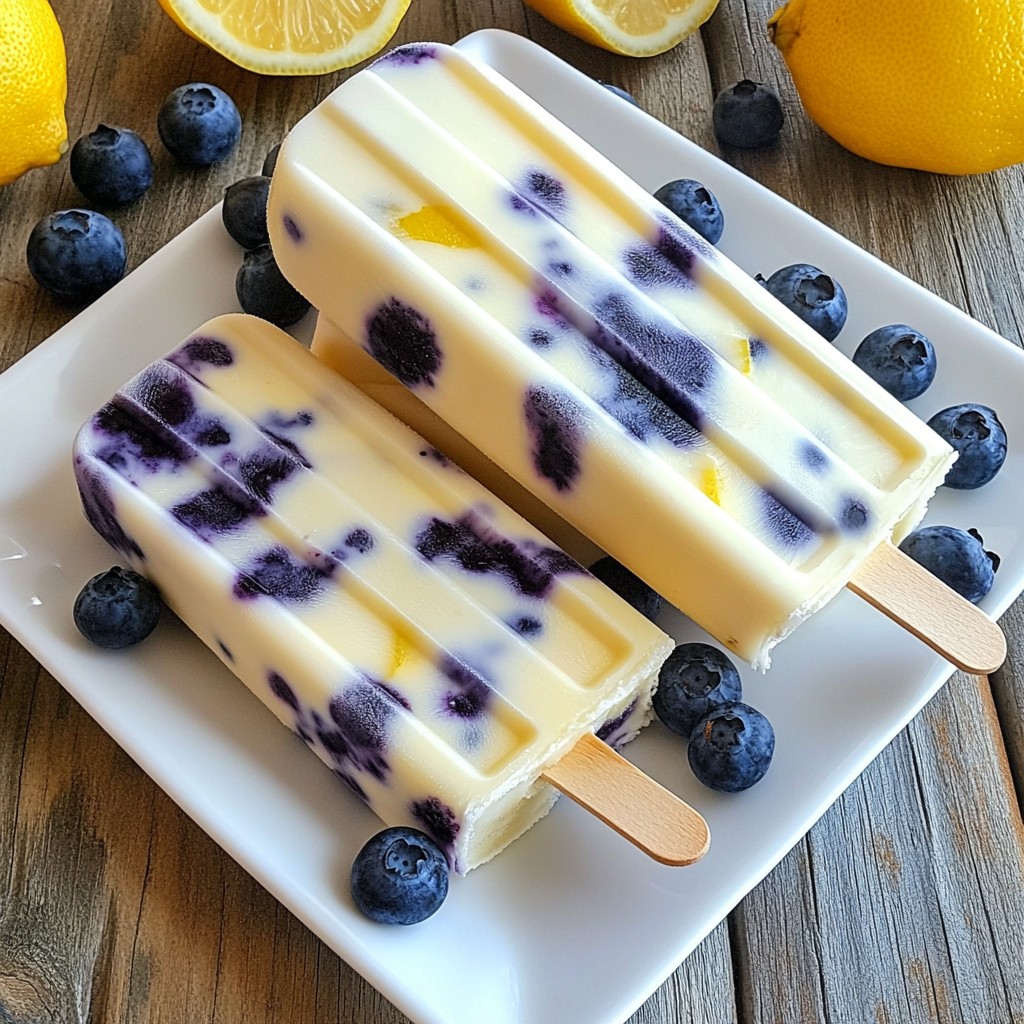
Looking for a cool summer snack? Try my Blueberry Lemon Yogurt Popsicles! They’re easy to make, tasty, and packed with healthy ingredients. Fresh blueberries blend with creamy Greek yogurt and a zesty hint of lemon. In just a few simple steps, you’ll create a refreshing treat that will make your summer even sweeter. Let’s dive into the ingredients and get started on this fun recipe!
Why I Love This Recipe
- Refreshing Flavor: The combination of blueberries and lemon creates a bright, refreshing flavor that’s perfect for hot summer days.
- Healthy Treat: Made with Greek yogurt and natural sweeteners, these popsicles are a healthier alternative to store-bought frozen treats.
- Easy to Make: With just a few simple ingredients and minimal prep time, these popsicles are incredibly easy to whip up.
- Customizable: Feel free to experiment with different fruits or sweeteners to create your own unique flavor combinations!
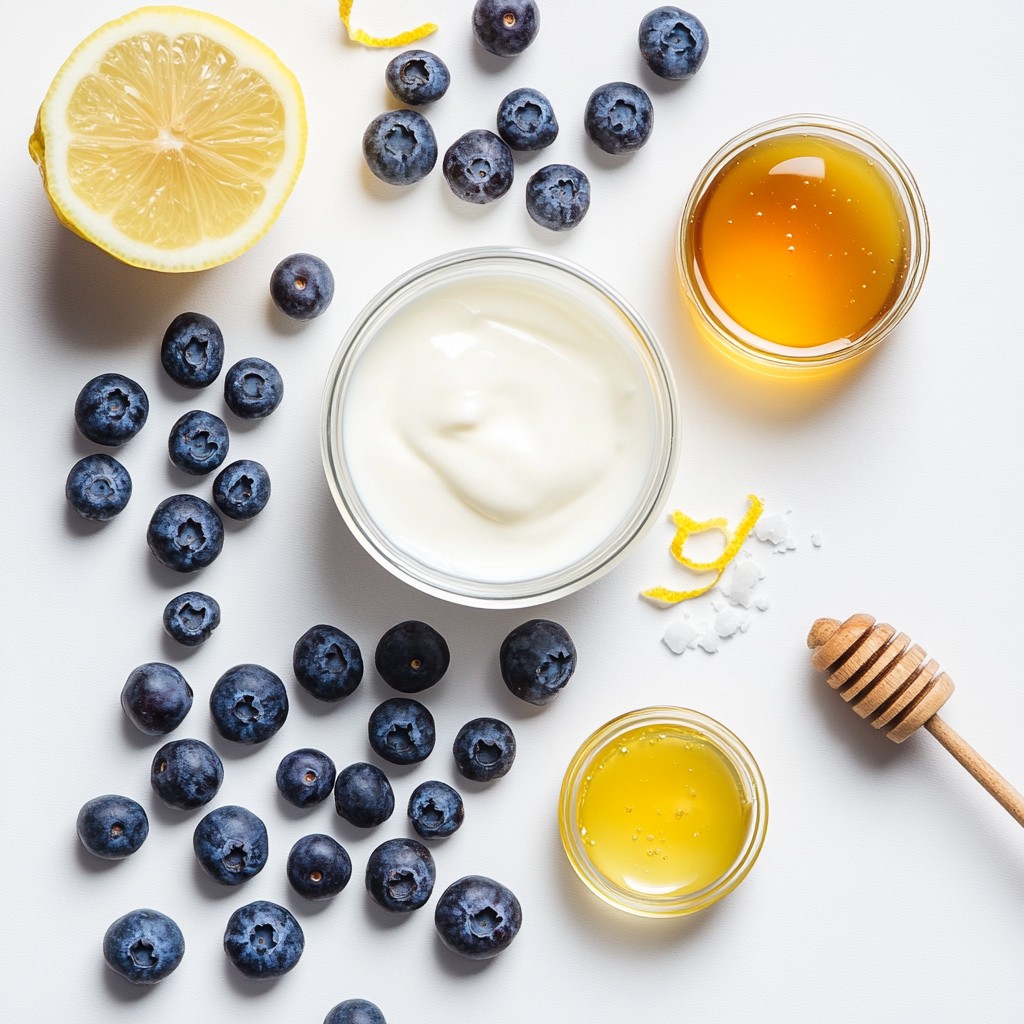
Ingredients
Fresh Blueberries
For this recipe, you need 2 cups of fresh blueberries. These berries are sweet and juicy. They add a bright color and flavor to your popsicles. I always rinse them well to get rid of dirt. You can also set aside a few for decoration. This gives your popsicles a fun look.
Greek Yogurt and Sweeteners
You will need 1 cup of plain Greek yogurt. This yogurt gives a creamy texture. It also adds protein, making the popsicles more filling. Next, add 1/2 cup of honey or maple syrup. Both sweeteners work well. Honey gives a nice flavor, while maple syrup is great for a vegan option. Lastly, include 1/2 teaspoon of vanilla extract for a warm note and a pinch of salt to balance the sweetness.
Citrus Elements
For a zesty kick, you need 1/4 cup of freshly squeezed lemon juice. The lemon juice makes the popsicles bright and refreshing. Don’t forget the zest of 1 lemon! This adds an extra burst of citrus flavor. The zest makes each bite even more delicious.
Step-by-Step Instructions
Preparing the Blueberries
To start, rinse the fresh blueberries well under cold water. This cleans off dirt and debris. After rinsing, gently pat them dry with a clean towel. If you want some extra color, set aside a few blueberries for later. These will look great in your popsicles.
Blending the Mixture
Next, you will blend the mixture. In a high-speed blender, add the rinsed blueberries, Greek yogurt, honey, lemon juice, lemon zest, vanilla, and a pinch of salt. Blend on high speed until it’s smooth and creamy. If you like some texture, stop blending when it’s mostly mixed. This way, you keep some whole blueberries in the mix.
Filling the Popsicle Molds
Now it’s time to fill the molds. Carefully pour the blueberry yogurt mixture into each mold. Fill them about three-quarters full. This leaves space for the mixture to expand when it freezes. For a fun touch, drop a few reserved blueberries into each mold.
Inserting Sticks and Freezing
Once your molds are filled, insert popsicle sticks into the center of each one. Make sure they stand upright and do not touch the mixture. Now, place the molds in the freezer. Let them freeze for at least 4 to 6 hours until solid.
Unmolding and Serving
When you’re ready to enjoy your popsicles, take the molds out of the freezer. Run warm water over the outside of each mold for a few seconds. This helps loosen the popsicles. Gently pull on the sticks to remove the popsicles. Serve them right away and enjoy this cool treat!
Tips & Tricks
Achieving the Perfect Texture
To get the best texture, blend the mixture just right. You want it creamy, but some whole blueberries can add fun bites. If you blend too much, it turns into a smooth puree. Aim for a nice balance.
Serving Suggestions
When it's time to serve, think about presentation. Place the popsicles on a colorful platter. You can add a slice of lemon next to each one for a bright look. Drizzling some honey on top can make them sweeter and more appealing.
Garnishing Ideas
Garnishing can take your popsicles to the next level. Set aside a few fresh blueberries before blending. Once you fill the molds, drop these reserved berries in for added color. You can also sprinkle some lemon zest on top before serving for a nice touch.
Pro Tips
- Choose the Right Blueberries: For the best flavor, select ripe, sweet blueberries. Look for plump, firm berries with a deep blue color and a silvery sheen.
- Adjust Sweetness: Depending on the tartness of your blueberries and personal preference, feel free to adjust the amount of honey or maple syrup.
- Add Some Texture: If you prefer a chunkier texture, reserve some blueberries and fold them into the mixture after blending instead of blending them all in.
- Experiment with Flavors: Get creative! Try adding other fruits like strawberries or peaches, or mix in some herbs like mint for a refreshing twist.
Variations
Alternative Fruit Combinations
You can switch up the fruit in these popsicles. Try strawberries, peaches, or raspberries. Each fruit brings its own taste. For a tangy kick, mix in some kiwi. Just blend the fruit with the yogurt and lemon like before. You can even layer different fruits in the molds for a fun look!
Vegan and Dairy-Free Options
To make these popsicles vegan, swap Greek yogurt for coconut yogurt. Use maple syrup instead of honey. This keeps the sweet taste while making it dairy-free. The creamy coconut flavor blends well with lemon and blueberries. You won’t miss the dairy!
Flavor Enhancements
Add some extra flavor to your popsicles. A dash of cinnamon or nutmeg can make a difference. You can also try adding a splash of almond extract for a nutty flavor. If you want more zing, add more lemon juice or zest. These small changes can turn a good treat into something great!
Storage Info
Best Practices for Freezing
To freeze your blueberry lemon yogurt popsicles, use good molds. Choose molds made of silicone or plastic. They help release the pops easily. Fill each mold three-quarters full to allow space for expansion. After filling, insert the sticks straight in the center. This keeps them stable while freezing.
How to Store Leftover Popsicles
If you have extra popsicles, wrap them well. Use plastic wrap or foil to cover each popsicle. You can also place them in a zip-top bag. Be sure to remove air to prevent freezer burn. Store them in the freezer for easy access on hot days.
Shelf Life and Quality Tips
These popsicles can last in the freezer for up to two months. However, for the best taste, eat them within a month. After that, they may lose flavor and texture. Always check for ice crystals before enjoying. If they look dry or icy, it’s best to discard them.
FAQs
Can I use frozen blueberries?
Yes, you can use frozen blueberries. They work well in this recipe. Just add them to the blender without thawing. This keeps the popsicles cold and refreshing. Frozen berries might make the mixture a bit thicker, so blend until smooth.
What can I substitute for Greek yogurt?
If you need a substitute for Greek yogurt, try regular yogurt or dairy-free options. Coconut yogurt or almond yogurt can be good choices. Just make sure they are plain and unsweetened. This keeps the taste balanced and delicious.
How long do the popsicles take to freeze?
These popsicles take about 4 to 6 hours to freeze. Make sure they are completely solid before you try to remove them. If they are not frozen enough, they may break when you pull them out.
Can I make these without added sugar?
Yes, you can make these pops without added sugar. Use ripe bananas or applesauce for sweetness. This option makes the popsicles healthy and still tasty. Adjust the amount to fit your taste buds.
Are there any health benefits to these ingredients?
Yes, these ingredients are healthy! Blueberries are full of antioxidants that help your body. Greek yogurt gives you protein and good bacteria for your gut. Lemons add vitamin C, which boosts your immune system. Enjoying these popsicles is a refreshing way to stay healthy!
This blog post walked you through making tasty blueberry popsicles. You learned about key ingredients, like fresh blueberries and Greek yogurt. I shared step-by-step instructions, plus tips for that perfect texture. You also discovered fun variations and how to store your creations.
Enjoy making these popsicles! They are simple, healthy, and fun to share with friends and family.