Blueberry Almond Overnight Oats Healthy and Simple

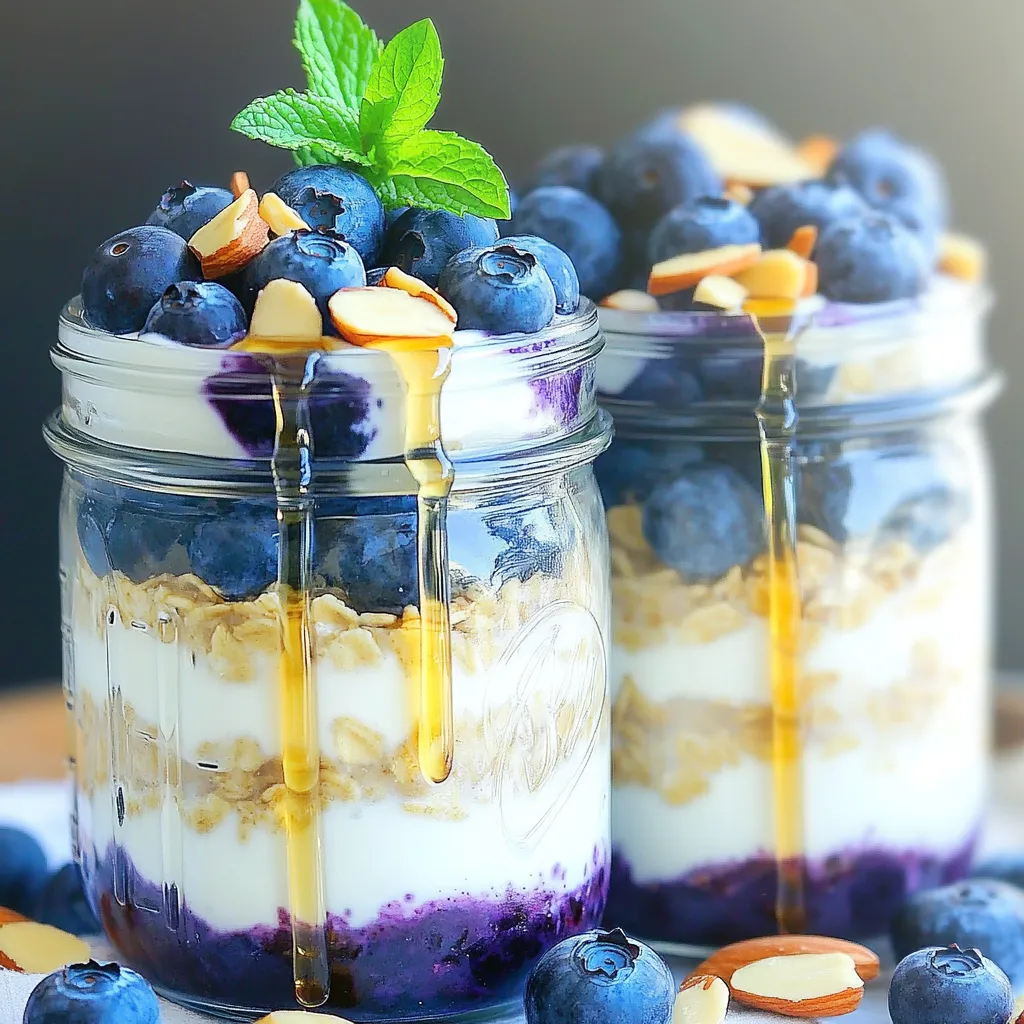
Looking for a quick and healthy breakfast? Blueberry Almond Overnight Oats are your solution! Packed with nutrients and bursting with flavor, they’re easy to make. In this post, I’ll guide you through simple ingredients and steps to create this morning delight. You’ll learn tips and tricks to customize it just for you. Get ready to enjoy a nutritious meal that keeps you full and satisfied all morning!
Ingredients
List of Ingredients
- 1 cup rolled oats
- 2 cups unsweetened almond milk
- 1/2 cup plain Greek yogurt
- 1 cup fresh blueberries (or thawed frozen blueberries)
- 1/4 cup chopped almonds
- 2 tablespoons maple syrup (or honey)
- 1 tablespoon chia seeds
- 1 teaspoon vanilla extract
- A pinch of salt
Ingredient Measurements
This recipe makes four servings. Each serving is a hearty, healthy option. You can adjust the amounts as needed for more or fewer servings. Use a measuring cup for the oats and almond milk. A kitchen scale helps if you want precision.
Health Benefits of Key Ingredients
- Rolled oats: They are full of fiber, which helps with digestion. Fiber keeps you full longer, too.
- Almond milk: This milk is low in calories and high in vitamin E. It’s great for your skin and heart health.
- Greek yogurt: Packed with protein, it helps build muscles and keeps your bones strong.
- Blueberries: These berries are rich in antioxidants. They support brain health and lower the risk of heart disease.
- Chopped almonds: They provide healthy fats, protein, and fiber. This helps keep your energy steady.
- Chia seeds: These tiny seeds are full of omega-3 fatty acids. They help reduce inflammation and improve heart health.
- Maple syrup or honey: These natural sweeteners add flavor without processed sugars. They also have some nutrients.
Each of these ingredients contributes to a balanced meal. You get energy, nutrients, and taste all in one bowl. Enjoy this simple dish for breakfast or a snack!
Step-by-Step Instructions
Preparation Method
Start by gathering your ingredients. You need rolled oats, almond milk, Greek yogurt, and vanilla extract. In a large bowl, combine these ingredients. Use a whisk or a spoon to mix them well. Aim for a smooth and even texture. Next, add maple syrup and chia seeds. Stir gently to blend everything together.
Mixing and Combining Ingredients
Now it’s time to add the fun stuff! Carefully fold in the fresh blueberries and chopped almonds. This adds flavor and crunch. Remember to save some blueberries and almonds for topping later. Portion the mixture into four mason jars or airtight containers. Make sure each jar has fruit and nuts equally.
Tips for Portioning
To achieve the best portions, use a measuring cup. Fill each jar to the same level. This ensures everyone gets the same amount. Always seal the jars tightly. Refrigerate them overnight or for at least 4-6 hours. This soaking time makes the oats creamy and delicious. When you’re ready to eat, give it a gentle stir before serving. Top with the reserved blueberries and almonds. Enjoy your tasty breakfast!
Tips & Tricks
How to Achieve the Best Texture
To get the best texture in your Blueberry Almond Overnight Oats, use rolled oats. They soak up the liquid well and stay creamy. Mix the oats with almond milk and Greek yogurt. This blend helps create a thick, smooth base. Chia seeds also help. They expand and add a nice creaminess. Remember to let the oats sit overnight. This soaking time is key for soft, tasty oats.
Common Mistakes to Avoid
One common mistake is using quick oats. They can turn mushy and lose texture. Another mistake is not measuring the liquid. Too little liquid makes the oats dry. Too much makes them soupy. Also, don’t skip the resting time. If you eat them right away, they won’t be as creamy. Lastly, be gentle when folding in the blueberries. This keeps them whole and juicy.
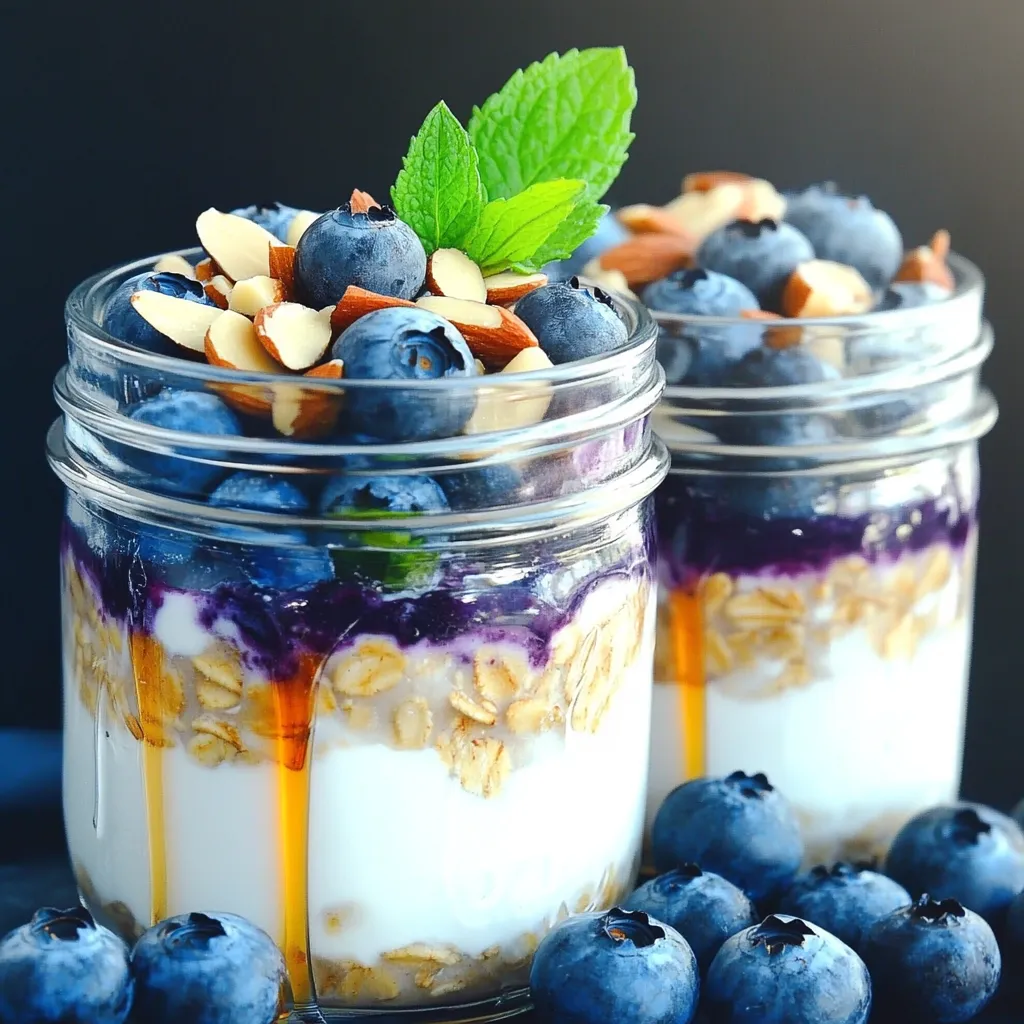
Serving Suggestions
Serve your oats in clear jars to show off their colors. Top them with extra blueberries and almonds for crunch. A drizzle of maple syrup adds sweetness and shine. For a fresh touch, add a sprig of mint. If you want a warm option, heat the jar in the microwave for 30 seconds. Enjoy your oats chilled or warm, whichever you prefer!

Variations
Alternative Ingredients
You can switch up the fruits in your oats. Try strawberries, raspberries, or bananas. Each fruit adds its own taste and color. You can also use different milks. Coconut milk adds a rich flavor. Oat milk is another great choice for creaminess.
Flavor Additions
Want to spice things up? Add a pinch of cinnamon or nutmeg. These spices warm up the taste. You can also mix in cocoa powder for a chocolate twist. If you like it sweeter, try agave syrup or brown sugar. Just remember to adjust the amount to your liking.
Dietary Modifications
For a vegan option, skip the Greek yogurt. Use a plant-based yogurt instead. Make sure it’s unsweetened to keep the balance. If you’re nut-free, swap out the almonds for seeds like sunflower or pumpkin. These keep the crunch without the nuts.
Storage Info
Proper Storage Techniques
After making Blueberry Almond Bliss overnight oats, place them in airtight containers. I love using mason jars for this. They keep the oats fresh and look great! Make sure to seal the jars tightly. If you have leftovers, this will keep them tasty and safe.
Shelf Life of Overnight Oats
When stored in the fridge, these oats can last up to five days. I recommend eating them within three days for the best taste. The flavors will blend together, making each bite even better.
Reheating Instructions
If you like warm oats, you can heat them up. Just take off the lid and pop the jar in the microwave for about 30 seconds. Stir it well after heating. If it’s not warm enough, heat it for another 10 seconds. Enjoy them warm or cold!
FAQs
How long do overnight oats last?
Overnight oats last about 3 to 5 days in the fridge. This makes them perfect for meal prep. After a few days, they may lose some texture but still taste great. Always check for any signs of spoilage before eating.
Can I use frozen blueberries?
Yes, you can use frozen blueberries. Just make sure to thaw them first. Thawed berries mix well with the oats. They add flavor and nutrition just like fresh ones. You might notice a softer texture, but they still taste amazing.
What can I substitute for Greek yogurt?
If you want a substitute for Greek yogurt, try regular yogurt or plant-based yogurt. Coconut yogurt is a great choice for a dairy-free option. You can also use silken tofu for a creamy texture. Each option will change the taste a bit, but they all work well.
Are overnight oats gluten-free?
Yes, overnight oats can be gluten-free. Just use certified gluten-free oats. Many rolled oats may contain gluten from cross-contamination. Always check labels to ensure they are safe for a gluten-free diet. This way, everyone can enjoy this healthy breakfast.
This article covered the key ingredients for overnight oats, their health benefits, and step-by-step instructions for making them. We discussed helpful tips for the best texture and common mistakes to avoid. You learned about variations, storage tips, and answers to frequently asked questions.
Overnight oats are easy and fun to make. They can fit into your diet, taste great, and save you time. Now, you have all the tools to create your own delicious versions! Enjoy your healthy eating journey.


![To make your chocolate chip banana bread, you need these key ingredients: - 2 ripe bananas, thoroughly mashed - 1/3 cup coconut oil, melted - 1 teaspoon pure vanilla extract - 1/2 cup packed brown sugar - 1/4 cup granulated sugar - 2 large eggs at room temperature - 1 teaspoon baking soda - 1/4 teaspoon fine salt - 1 1/2 cups all-purpose flour - 1/2 cup semi-sweet or dark chocolate chips - 1/4 cup walnuts or pecans, chopped (optional) Each ingredient plays a vital role in crafting a moist and tasty loaf. Ripe bananas add sweetness and moisture. Coconut oil gives a rich flavor and a soft texture. The sugars create that perfect crust while the eggs help bind everything together. You can personalize your chocolate chip banana bread with fun add-ins. Here are some ideas: - Chopped nuts for crunch - Dried fruits like cranberries or raisins - A sprinkle of cinnamon for warmth - Peanut butter or nutella swirls for extra richness Feel free to mix and match! These add-ins can bring new flavors and textures to your bread. Using high-quality ingredients makes a big difference. Choose ripe bananas; they should be spotty and soft. Fresh eggs bring richness and flavor. Use pure vanilla extract for the best taste. For the oils, opt for organic coconut oil if possible. Quality flour helps create the right texture. Remember, great ingredients lead to great results! For the full recipe, check out the [Full Recipe]. Start by preheating your oven to 350°F (175°C). This step is crucial for even baking. Next, grab a 9x5 inch loaf pan. Lightly grease it with cooking spray or butter. You can also use parchment paper to line the pan. This makes removing the banana bread easier. In a large mixing bowl, take 2 ripe bananas and mash them well. You want them smooth with no lumps. Then, add 1/3 cup of melted coconut oil. Mix them together until they blend into a creamy base. This combination gives your bread moisture and flavor. Add 1 teaspoon of pure vanilla extract, 1/2 cup of packed brown sugar, and 1/4 cup of granulated sugar to the banana mix. Stir until it’s smooth. Now, crack in 2 large eggs. Mix well after each egg. Then, sprinkle 1 teaspoon of baking soda and 1/4 teaspoon of fine salt over the mix. Stir gently. Next, sift in 1 1/2 cups of all-purpose flour. Fold it in carefully. Don’t overmix; this keeps your loaf tender. Finally, gently fold in 1/2 cup of semi-sweet or dark chocolate chips. If you like, add 1/4 cup of chopped nuts too. Pour the batter into your prepared loaf pan. Smooth the top with a spatula. Place it in the oven and bake for 55-65 minutes. It’s done when a toothpick comes out clean or with a few crumbs. Let the bread cool in the pan for 10 minutes. Then, carefully move it to a wire rack to cool completely. This cooling step helps set the flavors. For the full recipe, refer to the section above. To get the best texture, use ripe bananas. The riper, the better! They must be soft and spotty. This way, you get a sweet and moist bread. Mash them well to avoid lumps. Mix ingredients gently after adding the flour. Over-mixing can make your bread tough. Aim for a light, fluffy loaf. Keep your banana bread fresh by wrapping it tightly. You can use plastic wrap or foil. Store it at room temperature for up to four days. If you want it to last longer, place it in the fridge for about a week. To keep it even longer, freeze it. Slice it before freezing for easy serving. Just make sure to wrap each slice well. Serve your chocolate chip banana bread warm. It tastes best right out of the oven! Add some butter on top for richness. You can also sprinkle powdered sugar for a sweet touch. For extra fun, top with fresh banana slices or more chocolate chips. This makes it look pretty and taste even better! For the complete recipe, check out the Full Recipe section in this article. {{image_4}} You can enjoy chocolate chip banana bread without gluten. Use a gluten-free flour blend. This blend works well as a one-to-one substitute. Make sure it has xanthan gum. This helps bind the ingredients. The flavor stays rich and delicious. Just follow the same steps as in the Full Recipe. You will love the texture and taste. For a vegan version, swap eggs for flax eggs. To make a flax egg, mix one tablespoon of flaxseed meal with three tablespoons of water. Let it sit for a few minutes to thicken. Use non-dairy milk and coconut oil as well. This keeps the bread moist and soft. You can still add chocolate chips, just choose dairy-free ones. You can add your favorite spices for extra flavor. Cinnamon and nutmeg pair well with bananas. A pinch of each can make a big difference. You can also try almond or coconut extract. These extracts add depth. Experiment to find your favorite combo. Each twist makes the bread unique and fun. To keep your chocolate chip banana bread fresh, store it at room temperature. Wrap it tightly in plastic wrap or foil. This helps keep moisture in. Place it in a cool, dry spot, away from direct sunlight. If you prefer, you can also use an airtight container. This will help maintain its soft texture and rich flavor. Freezing is a great option if you want to save some for later. First, let the banana bread cool completely. Then, wrap it tightly in plastic wrap, followed by aluminum foil. This extra layer prevents freezer burn. You can freeze it for up to three months. When you're ready to enjoy it, simply thaw it in the fridge overnight. Reheating banana bread can bring back its lovely warmth. You can use a toaster oven or a conventional oven. Preheat your oven to 350°F (175°C). Slice the bread and place it on a baking sheet. Heat for about 5-10 minutes. If you want a softer texture, cover it with foil. You can also pop a slice in the microwave for about 10-15 seconds. Enjoy it warm for a cozy treat! Your chocolate chip banana bread is done when a toothpick comes out clean. Insert it in the center. If it has a few crumbs, that is fine too. The bread usually bakes for 55-65 minutes. The top should look golden brown. Yes, you can substitute some ingredients. For example, use olive oil instead of coconut oil. You can also swap brown sugar for maple syrup. Make sure to adjust the amounts as needed for the best results. Chocolate chip banana bread lasts about 3-4 days at room temperature. Store it in an airtight container. For longer storage, keep it in the fridge for a week. You can also freeze it for up to 3 months. You can use applesauce or mashed bananas as egg substitutes. Use 1/4 cup of applesauce or 1/2 banana for each egg. Both options keep the bread moist and flavorful. This chocolate chip banana bread stands out because of its rich flavors. The combination of ripe bananas and chocolate chips creates a sweet treat. Using coconut oil adds a subtle depth to the taste. The option to add nuts gives extra texture. You can find the complete recipe in the Full Recipe section. This blog post covered how to make delicious chocolate chip banana bread. We discussed key ingredients, optional add-ins, and the importance of ingredient quality. I shared step-by-step instructions to guide you through the baking process. We explored tips for the perfect texture, storage methods, and fun variations like gluten-free and vegan options. With these insights, you can easily bake this treat and impress everyone. Enjoy your baking journey!](https://dishtreats.com/wp-content/uploads/2025/06/ff2d306f-7b8f-4bb2-a8a5-5e2882fba681-768x768.webp)

![- 1 cup all-purpose flour - 1 cup whole wheat flour - 1 tablespoon baking powder - 1/2 teaspoon baking soda - 1/4 teaspoon salt I love using both all-purpose and whole wheat flour. The all-purpose flour gives the muffins a light texture. The whole wheat adds a nutty flavor and a bit of extra fiber. Mixing these flours helps balance taste and nutrition. - 1 cup plain Greek yogurt - 1/2 cup granulated sugar - 1/4 cup honey - 2 large eggs - 1 teaspoon vanilla extract - Zest of 1 lemon - Juice of 1 lemon Greek yogurt is key for moisture. It makes the muffins rich and creamy. The combination of sugar and honey gives a nice sweetness. The eggs help bind everything together. Lemon juice and zest brighten the flavor, making each bite fresh and zesty. - 1 cup fresh or frozen blueberries - 2 tablespoons melted coconut oil or butter Blueberries are the star of this recipe. They burst with flavor and add a great texture. You can use fresh or frozen. If you use frozen, they still work well! The melted coconut oil or butter adds richness, but you can skip it if you prefer a lighter muffin. You can find the full recipe for these delightful muffins online. Happy baking! First, preheat your oven to 375°F (190°C). This step is key for even baking. Next, prepare your muffin tin by lining it with paper liners or greasing the cups. This helps with easy muffin removal later. Now, let’s mix the dry ingredients. In a large bowl, combine: - 1 cup all-purpose flour - 1 cup whole wheat flour - 1 tablespoon baking powder - 1/2 teaspoon baking soda - 1/4 teaspoon salt Whisk these dry ingredients well. Make sure there are no lumps. In another bowl, add the wet ingredients. You will need: - 1 cup plain Greek yogurt - 1/2 cup granulated sugar - 1/4 cup honey - 2 large eggs - 1 teaspoon vanilla extract - Zest of 1 lemon - Juice of 1 lemon Whisk these until smooth. This helps blend all the flavors together. Now, it’s time to combine the two mixtures. Gently fold the wet ingredients into the dry ones using a spatula. Stir slowly. This helps keep your muffins light and fluffy. Don’t overmix! Overmixing makes the muffins dense. Once you see a few floury spots, stop mixing. Next, it’s time for the blueberries. Add: - 1 cup fresh or frozen blueberries - 2 tablespoons melted coconut oil or butter Fold these in gently. You want to keep the blueberries whole for bursts of flavor. Now, scoop the batter into your prepared muffin cups. Fill each cup about two-thirds full. This allows space for the muffins to rise. Place the muffin tin in your preheated oven. Bake for 18-20 minutes. To check for doneness, insert a toothpick into the center of a muffin. If it comes out clean, they are ready! After baking, let the muffins cool in the tin for about 5 minutes. This helps them set. Then, move them to a wire rack to cool completely. These steps will lead you to a batch of delicious Blueberry Lemon Yogurt Muffins. For the complete recipe, see [Full Recipe]. To get the best muffins, do not overmix the batter. Mixing too much can make the muffins tough. When you mix, just combine until you see no dry flour. This way, your muffins stay light and fluffy. When folding in the blueberries, do it gently. If you stir too hard, the berries will burst and color the batter. Just use a spatula and fold them in lightly. This keeps the berries whole and gives you lovely pops of flavor in each bite. You can add even more flavor to your muffins. Consider adding lemon zest for a bright taste. You might like to include nuts, like walnuts or pecans, for crunch. When it comes to blueberries, fresh berries taste great, but frozen ones work too. If you use frozen berries, do not thaw them first. This helps keep your batter cold, giving you a better rise. Using the right tools helps a lot. A non-stick muffin tin is your best bet. You can also use paper liners for easy cleanup. For mixing, a large bowl works well. I suggest a sturdy spatula for folding the batter. This combo makes mixing fun and easy. With the right tools, your baking will be smooth and enjoyable. For the full recipe, check out the details above. {{image_4}} You can make these muffins gluten-free. Simply replace the all-purpose flour with a gluten-free flour blend. Many blends work well, so pick one you like. Just ensure it has a good balance of starches and protein to mimic regular flour. This way, you can enjoy the same tasty muffins without the gluten. Want to mix it up? Try adding chocolate chips or walnuts for a delightful twist. They add a nice crunch and richness. You can also use other fruits like raspberries or cranberries. They pair well with the lemon and blueberry flavors. Each fruit adds its own unique taste, making each batch special. You can switch up the yogurt too. Use flavored yogurts like vanilla or lemon for extra taste. If you prefer dairy-free options, there are many great alternatives available. Look for coconut or almond-based yogurts. They keep the muffins moist and tasty, making it fun to experiment with flavors. For the full recipe, check out the details above. To keep your blueberry lemon yogurt muffins fresh, store them in an airtight container. This will keep them moist and tasty. You can keep them at room temperature for up to three days. If you want them to last longer, put them in the fridge. They can stay fresh for about a week in the refrigerator. Freezing muffins is a great way to keep them longer. To freeze, let the muffins cool completely. Then, wrap each muffin in plastic wrap. Place them in a freezer bag or container. This method helps prevent freezer burn. You can enjoy them for up to three months. When you're ready to eat a frozen muffin, take it out and let it sit at room temperature for about 30 minutes. For a warm treat, heat it in the microwave for 15-20 seconds. This will make it soft and delicious again. Blueberry lemon yogurt muffins are perfect for any time of day. I love having them for breakfast or as a snack. They also make a great dessert. To make it even better, try pairing these muffins with yogurt or a drizzle of honey. This adds a nice touch and enhances the flavor. Enjoy your muffins fresh from the oven or at room temperature! If you want to explore more recipes, check out the Full Recipe for even more delicious ideas. Blueberry lemon yogurt muffins stay fresh for about 2 to 3 days at room temperature. Keep them in an airtight container to maintain their moisture. If you store them in the fridge, they can last for up to a week. Just make sure to seal them well to prevent them from drying out. Yes, you can easily swap ingredients. If you want less sugar, use less granulated sugar or honey. For flour, you can mix all-purpose flour with whole wheat flour or use a gluten-free blend. You can also use flavored yogurt instead of plain yogurt for a fun taste twist. If your muffins turn out dense, check your mixing technique. Overmixing can cause this issue. Make sure to mix just until combined. You can also try adding a bit more baking powder or soda to lighten the texture. Lastly, ensure your ingredients are fresh, especially baking powder. To make these muffins healthier, reduce the sugar by a third. You can also replace some all-purpose flour with whole wheat flour to add fiber. Adding oats or ground flaxseed can boost nutrition without changing the flavor much. Enjoy these muffins while keeping health in mind! For the full recipe, refer to the earlier section. This blog post covered how to make delicious Blueberry Lemon Yogurt Muffins. We explored ingredients, step-by-step instructions, and tips for perfect texture. Variations like gluten-free options and different mix-ins add fun twists. Proper storage helps keep your muffins fresh. These muffins are a tasty way to enjoy healthy snacks or breakfast. Remember, baking is about having fun and experimenting. Enjoy every bite!](https://dishtreats.com/wp-content/uploads/2025/06/d36ee35c-287f-4b25-b661-333d5a68e192-768x768.webp)