Best Ever Lemon Blueberry Muffins Delightful Recipe

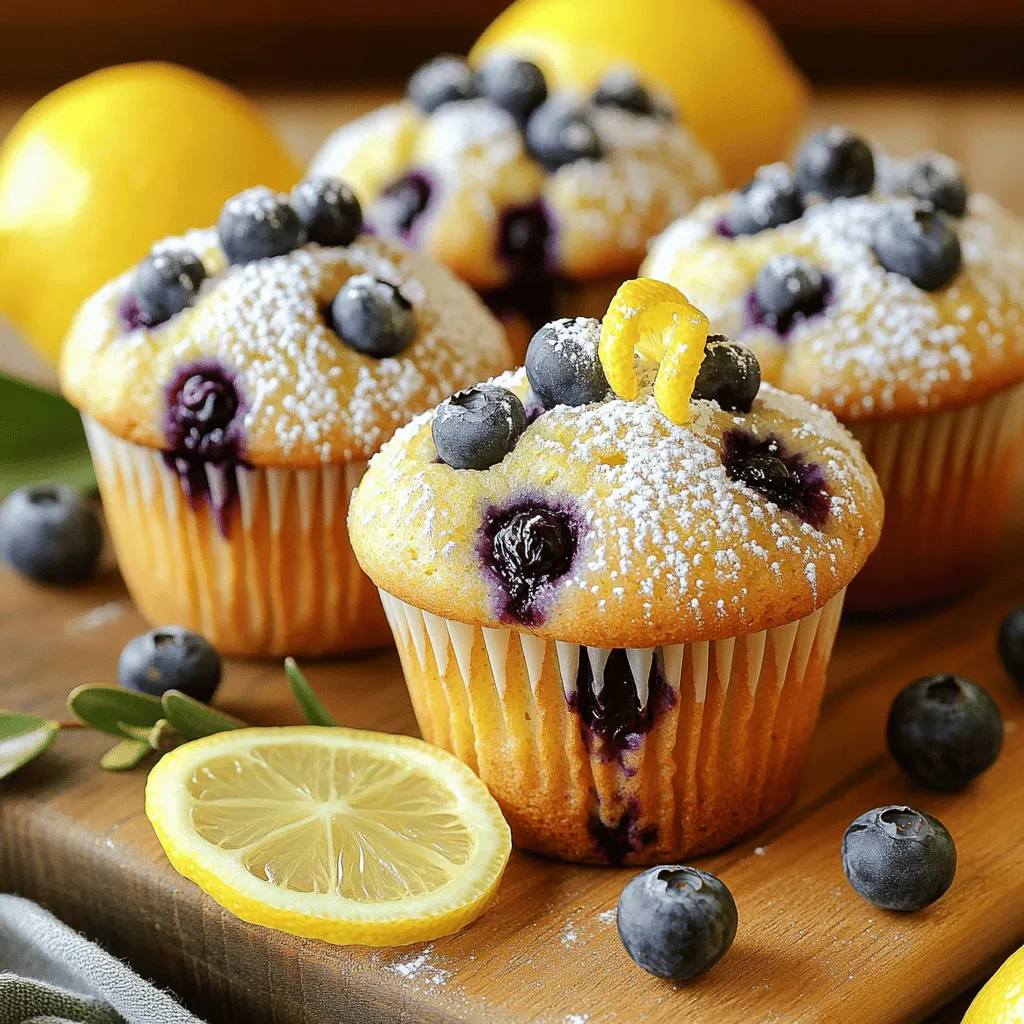
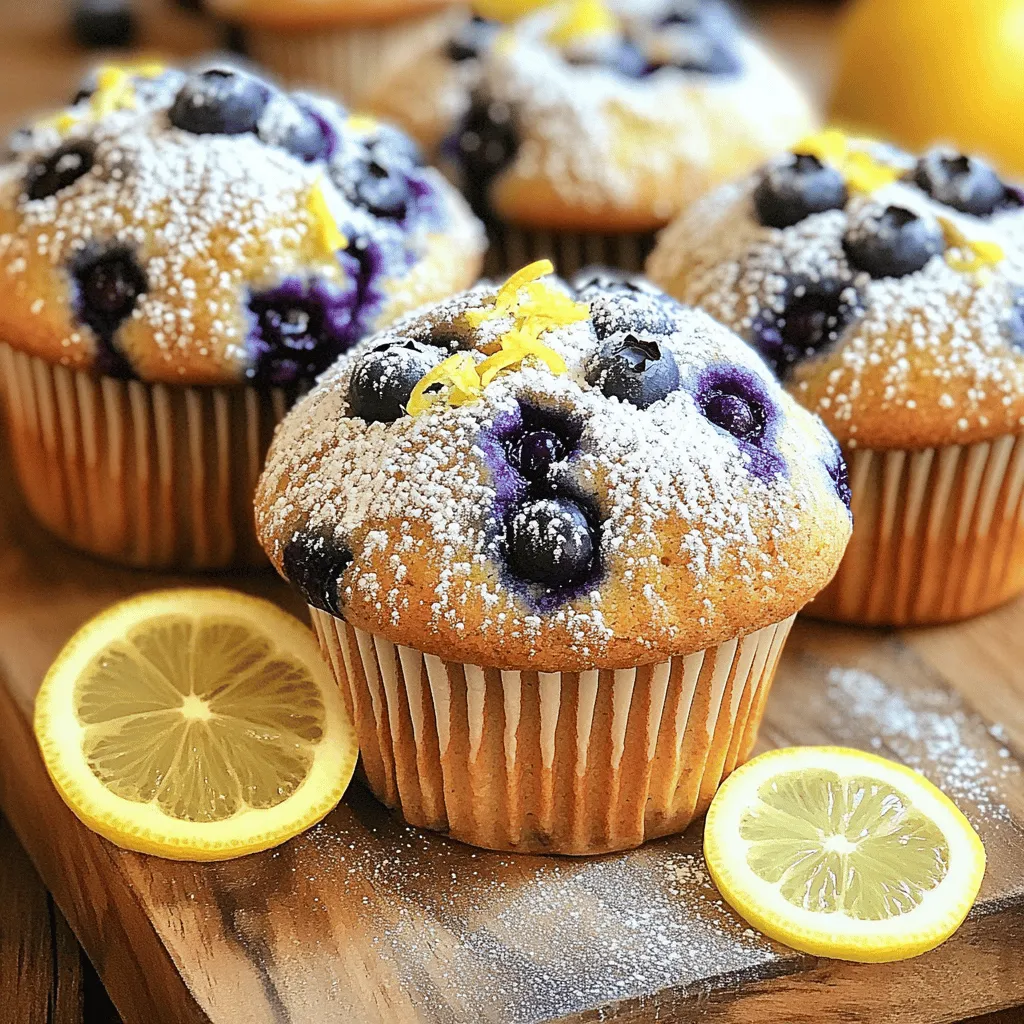
Imagine biting into a warm, fluffy muffin filled with juicy blueberries and a zesty lemon burst. In this post, I’ll share my best-ever Lemon Blueberry Muffins recipe that will delight your taste buds. With simple ingredients and easy steps, you can whip up these delicious treats in no time. Whether for breakfast or a snack, these muffins will soon be your favorite! Let’s get baking!
Ingredients
To make the best ever lemon blueberry muffins, gather these simple ingredients. Each one plays a key role in creating the perfect blend of flavors and textures.
- 2 cups all-purpose flour
- 1 cup granulated sugar
- 1 tablespoon baking powder
- ½ teaspoon baking soda
- ½ teaspoon salt
- ¾ cup buttermilk (or substitute with ¾ cup milk mixed with 1 tablespoon vinegar for a homemade buttermilk)
- ½ cup unsalted butter, melted
- 2 large eggs
- Zest and juice of 1 lemon
- 1 teaspoon vanilla extract
- 1 ½ cups fresh blueberries (frozen blueberries work great if fresh are not available)
- 2 tablespoons coarse sugar (optional topping)
These ingredients create a moist muffin with a bright lemon flavor and sweet blueberries. The combination of buttermilk and butter makes the muffins tender and rich. The lemon zest adds a fresh aroma, while the blueberries give pops of sweetness in every bite.
Step-by-Step Instructions
Preparing the Muffin Batter
1. First, preheat your oven to 375°F (190°C). This ensures even baking.
2. Next, prepare your muffin tin. You can use paper liners or grease it lightly with non-stick spray.
3. In a large bowl, combine these dry ingredients:
- 2 cups all-purpose flour
- 1 cup granulated sugar
- 1 tablespoon baking powder
- ½ teaspoon baking soda
- ½ teaspoon salt
Whisk them together until blended.
4. In another medium bowl, mix your wet ingredients:
- ¾ cup buttermilk
- ½ cup melted unsalted butter
- 2 large eggs
- Zest of 1 lemon
- 2 tablespoons fresh lemon juice
- 1 teaspoon vanilla extract
Stir until smooth.
Combining Ingredients
5. Now, pour the wet mixture into the dry bowl. Use a spatula to gently mix them. Don’t overmix; it’s okay if there are lumps.
6. Carefully fold in 1 ½ cups fresh blueberries. Be gentle to keep them intact.
Baking the Muffins
7. Fill each muffin cup about two-thirds full. This gives space for the muffins to rise.
8. If you want, sprinkle 2 tablespoons of coarse sugar on top for a sweet crunch.
9. Place the muffin tin in the oven and bake for 18-22 minutes. Check doneness by inserting a toothpick. It should come out clean.
After baking, let them cool for about 5 minutes in the pan. Then move them to a wire rack.Enjoy your homemade lemon blueberry muffins!
Tips & Tricks
Achieving the Perfect Muffin Texture
To get the best muffin texture, do not overmix the batter. When you mix too much, muffins can become tough and dry. Stir the batter until the dry and wet ingredients are just combined. A few lumps are okay; they will smooth out during baking.
When choosing blueberries, look for plump and firm berries. Fresh blueberries are best, but frozen ones work well too. If using frozen, do not thaw them before adding. This keeps the muffins from turning blue.
Flavor Enhancements
You can add nuts or spices for extra flavor. Chopped walnuts or pecans add a nice crunch. A pinch of cinnamon or nutmeg can give a warm taste. This adds variety to your muffins.
If you want a sweeter touch, try different sweeteners. Honey or maple syrup can replace some sugar. Just remember, these may change the muffin’s texture.
Presentation Suggestions
Serve your muffins warm for the best taste. A sprinkle of powdered sugar on top looks pretty. You can also add a slice of lemon for color and flavor.
Pair these muffins with a glass of cold milk. A cup of herbal tea also makes a great match. Enjoying them this way makes every bite special.

Variations
Seasonal Flavor Swaps
You can change the fruit in these muffins to make them your own. Raspberries and strawberries are great options. They add a nice sweetness and tartness. Try using orange zest and juice instead of lemon for a fresh twist. Each season brings new fruits, so feel free to experiment!
Dietary Adaptations
Making these muffins fit your diet is easy. To make them gluten-free, swap all-purpose flour with a gluten-free blend. Look for one that works well in baking. For a vegan version, use plant-based milk and replace eggs with flaxseed meal or applesauce. These swaps keep the muffins moist and tasty.
Storage Info
Best Methods for Storing Muffins
Storing your lemon blueberry muffins correctly keeps them fresh and tasty. For short-term storage, place them at room temperature. A sealed container or a plastic bag works well. Keep them away from heat and moisture. They will stay good for about 2 to 3 days this way.
If you want longer shelf life, freezing is the best option. Wrap each muffin tightly in plastic wrap, then place them in a freezer bag. This helps prevent freezer burn. You can freeze them for up to three months. Just make sure to label the bag with the date.
Reheating Instructions
To enjoy your muffins warm, reheating is key. The best way is to use a microwave. Place a muffin on a microwave-safe plate and heat it for about 10 to 15 seconds. This method keeps the muffin soft and warm.
For a crispier texture, use an oven. Preheat your oven to 350°F (175°C). Place the muffins on a baking sheet for about 5 to 10 minutes. This method revives their original texture. Always check to avoid overcooking. Enjoy your muffins as if they just came out of the oven!
FAQs
How do I make homemade buttermilk?
To make homemade buttermilk, combine ¾ cup of milk with 1 tablespoon of vinegar or lemon juice. Let it sit for about 5-10 minutes. This will create a thick, tangy mixture. You can use this in your muffins instead of store-bought buttermilk. It’s a great way to save money and use what you have at home.
Can I use frozen blueberries instead?
Yes, you can use frozen blueberries! They are easy to find and often cheaper. Here are some tips:
- Do not thaw the blueberries; add them directly to the batter.
- Frozen blueberries may color the batter a bit more, which is normal.
- They can add moisture and keep your muffins nice and juicy.
What can I do if my muffins are too dense?
If your muffins are dense, it might be due to overmixing. Here are some tips to fix this:
- Mix the batter just until combined; some lumps are okay.
- Make sure your baking powder is fresh. Old baking powder may not rise well.
- You can add a bit more liquid if the batter seems too thick.
How can I tell when muffins are done baking?
You can tell muffins are done by looking for these signs:
- The tops should be golden brown.
- A toothpick inserted in the center should come out clean.
- The edges will pull away slightly from the muffin tin.
These tips will help you create the best lemon blueberry muffins ever.
You learned how to make delicious blueberry muffins. With the right ingredients, steps, and tips, you can bake fluffy, tasty muffins. Remember to not overmix the batter for the best texture. Check your muffins for doneness with a toothpick. Try different flavors and adaptations to keep it fresh. Store leftovers properly to enjoy later. Baking is fun, and these muffins are sure to impress! Now, it’s your turn to hit the kitchen and create something special. Enjoy every bite!


. Start by peeling your sweet potatoes. Use a vegetable peeler for nice, even strips. Next, dice them into 1-inch cubes. This size helps them cook well. In a large bowl, toss the diced sweet potatoes with olive oil. Add smoked paprika, garlic powder, salt, and black pepper. Mix until every piece is coated. This step brings out the flavor. Preheat your oven to 400°F (200°C). This hot oven ensures crispy edges. Spread the seasoned sweet potatoes on a baking sheet. Make sure they are in a single layer for even cooking. Roast for 20-25 minutes. Stir halfway through to help with browning. The sweet potatoes should be tender and slightly caramelized when done. In a large skillet, combine the roasted sweet potatoes with black beans, corn, and diced tomatoes. Gently stir until everything is heated through. This mix creates a hearty base. Now, sprinkle the shredded cheddar cheese on top. Allow it to melt for about 3-5 minutes. Cover the skillet with a lid to speed up melting if needed. Once the cheese is melted, remove the skillet from heat. Top with jalapeños, green onions, and diced avocado. These additions add color and flavor. Finally, garnish with fresh cilantro. If you like, add a dollop of sour cream or Greek yogurt for creaminess. Serve your loaded sweet potato nacho skillet hot and enjoy the burst of flavors! For the complete cooking process, check the Full Recipe. To boost the flavor, consider adding different spices. You can use cumin or chili powder for a warm kick. A dash of cayenne pepper can also add heat. If you love fresh herbs, cilantro is perfect here. It adds a bright taste that pairs well with sweet potatoes. You can also try fresh parsley or green onions for a twist. Using a cast iron skillet can give your dish a nice crisp. It heats evenly and retains warmth well. If you prefer a non-stick pan, that works too. Just make sure your sweet potatoes do not stick. For even cooking, keep the heat steady. Stir often to prevent burning and ensure all ingredients meld nicely. For a great look, serve the skillet right at the table. This gives a rustic feel and makes sharing easy. You can add some colorful toppings, like diced avocado and sliced jalapeños. A sprinkle of cilantro adds fresh green color. For an extra crunch, serve with tortilla chips on the side. This adds texture and makes it even more fun to eat. Check out the Full Recipe for more serving ideas. {{image_4}} For a vegetarian or vegan touch, you can swap out the cheese. Try cashew cheese or nutritional yeast for a cheesy flavor without dairy. You can also pile on more plant-based toppings. Consider adding sautéed mushrooms, bell peppers, or even spinach. These ingredients add texture and boost nutrition. If you need gluten-free options, this dish is already a great choice. Sweet potatoes, beans, and veggies are naturally gluten-free. Just ensure any toppings or sauces are gluten-free too. For those who want high-protein variations, add cooked quinoa or lentils. You can also use a plant-based protein like tempeh or tofu. This way, you’ll keep the meal filling and nutritious. You can change the flavor profile by adding sweet or savory twists. Try mixing in some cinnamon or maple syrup for a sweet kick. This creates a unique balance with the savory ingredients. For international twists, consider adding spices from around the world. A sprinkle of taco seasoning gives a Mexican flair. Or, use curry powder for an Indian vibe. These simple changes can transform your loaded sweet potato nacho skillet. For the complete recipe, see [Full Recipe]. When storing your loaded sweet potato nacho skillet, let it cool first. This step helps avoid moisture buildup, which can make your dish soggy. Use an airtight container to keep it fresh. If stored properly, it lasts in the fridge for up to four days. To reheat leftovers, use a skillet for the best results. Heat on medium-low to keep the texture. Stir gently as you warm it up to avoid burning. Avoid the microwave if you can; it can make the dish soggy. If you must use it, heat in short bursts and stir often. You can freeze your loaded sweet potato nacho skillet for later use. Portion it into freezer-safe containers, leaving some space for expansion. It stays good for up to three months in the freezer. When ready to eat, thaw it in the fridge overnight before reheating. This keeps the flavors intact and the texture nice. You can use butternut squash or pumpkin. They have a similar texture and taste. Both options provide a nice sweetness. You can also try regular potatoes if you want a different flavor. Yes, you can prep some of the ingredients before. Roast the sweet potatoes a day ahead. Store them in the fridge. You can also mix the black beans, corn, and tomatoes in advance. Just heat everything up when ready to serve. To melt cheese evenly, use freshly shredded cheese. It melts better than pre-shredded cheese. Spread the cheese in an even layer on top of the skillet. Cover the skillet for a couple of minutes. This traps heat and helps the cheese melt smoothly. You can use many toppings for loaded nachos. Some popular choices include jalapeños, green onions, and diced avocado. For a twist, add pickled red onions or fresh salsa. Don't forget sour cream or Greek yogurt for creaminess. You can get creative and mix your favorite toppings! In this blog post, we explored how to create a delicious dish with sweet potatoes, black beans, and cheese. You learned about ingredient choices, measurements, and smart substitutions. I shared tips on roasting sweet potatoes and combining ingredients perfectly. We looked at variations for different diets and how to store leftovers. Remember, making this dish fun and flavorful is easy. Use the ideas provided to customize your meal, ensuring it fits your taste. Enjoy your cooking and make it a family favorite!](https://dishtreats.com/wp-content/uploads/2025/07/3c3c8a5c-337a-4892-8590-75b37c5e13f0-768x768.webp)


![- 1 lb boneless, skinless chicken breast, thinly sliced - 1 large bell pepper (red or yellow), sliced into strips - 1 cup broccoli florets, cut into bite-sized pieces - 1 cup snap peas, trimmed - 1 medium carrot, julienned - 1/4 cup low-sodium soy sauce - 1 tablespoon honey - 1 tablespoon rice vinegar - 2 tablespoons sesame oil, divided - 3 cloves garlic, finely minced - 1 tablespoon fresh ginger, finely minced - Sesame seeds for garnish - 3 green onions, chopped (white and green parts kept separate) Using these ingredients, you can create a dish that bursts with flavor. Each element adds its own unique taste. The chicken breast serves as a great protein base. Bell peppers and broccoli contribute crunch and color. Snap peas and carrots add sweetness and texture. When you use sesame oil, garlic, and ginger, you create a rich aroma. These cooking essentials infuse the dish with depth. Finally, the sesame seeds and green onions provide a delightful finish. They enhance the dish's look and add a touch of brightness. For the full recipe, check the detailed instructions. Heat a large skillet or wok over medium-high heat. Add 1 tablespoon of sesame oil. When the oil shimmers, add the thinly sliced chicken. Season it with salt and pepper. Cook the chicken for 5-7 minutes. Stir it often until golden brown and fully cooked. Once done, remove the chicken from the skillet and set it aside. In the same skillet, add the second tablespoon of sesame oil. Let it heat up. Then, add the minced ginger and garlic. Sauté these for about 30 seconds. This step helps unlock their amazing flavors. Now, add the sliced bell pepper, broccoli florets, snap peas, and julienned carrot to the skillet. Stir-fry the vegetables for 4-5 minutes. You want them tender but still crisp. This keeps the dish colorful and crunchy. Return the cooked chicken to the skillet with the vegetables. In a separate small bowl, mix the soy sauce, honey, and rice vinegar. Whisk these until they blend well. Pour this sauce evenly over the chicken and veggies in the skillet. Stir everything together gently. Bring the mixture to a simmer over medium heat. This helps combine all the flavors and makes the dish more delicious. Next, slowly add the cornstarch slurry to the stir-fry. Stir constantly as you add it. Cook for 1-2 more minutes until the sauce thickens to your liking. This gives the dish a nice glossy finish. Remove the skillet from the heat. Add the chopped green tops of the green onions. Toss everything gently to combine. Serve the stir-fry on plates. Sprinkle sesame seeds on top for extra crunch. Enjoy this delightful meal! For the full recipe, you can refer to the earlier sections. For the best chicken stir-fry, use boneless, skinless chicken breast. Thinly slice it for quick cooking. This cut stays tender and soaks up flavors well. Heat your skillet over medium-high heat. This helps sear the chicken quickly, locking in moisture. Want to spice things up? Try adding a dash of red pepper flakes for heat. You can also mix in a splash of hoisin sauce for extra sweetness. Serve this stir-fry with jasmine rice or noodles. Both options soak up the sauce nicely. To plate your dish, start with a mound of rice in the center. Arrange the chicken and veggies around it. This creates a beautiful, colorful display. For garnish, sprinkle sesame seeds and chopped green onions on top. This adds a nice crunch and fresh flavor. For the full recipe, click here: [Full Recipe]. {{image_4}} You can easily change the protein in this dish. If you don’t like chicken, try these options: - Pork: Thinly sliced pork loin works well. - Beef: Flank steak adds great flavor. - Tofu: Firm tofu is perfect for a vegetarian option. - Shrimp: Quick-cooking shrimp gives a seafood twist. For vegetarian or vegan options, stick with tofu or tempeh. These protein sources soak up flavors well and add a nice texture. If you use tofu, press it to remove excess water for better frying. You can swap vegetables based on what’s in season or what you like best. Here are some great choices: - Zucchini: Adds a nice crunch and color. - Mushrooms: They bring an earthy flavor. - Asparagus: Great for spring dishes. - Cauliflower: A fun way to add some fiber. Mixing different veggies can also create a more colorful dish. Try to use at least three different kinds for variety. Adjust the sauce to match your taste. If you like it sweeter, add more honey. For a spicier kick, toss in some red pepper flakes. You can also switch vinegars. Here are some options: - Apple cider vinegar: It gives a fruity flavor. - Balsamic vinegar: Adds depth and sweetness. - White vinegar: For a sharper taste. Experimenting with these changes makes the dish your own. Don’t be afraid to try new flavors! For the full recipe, check the original instructions. To store leftovers, let the stir-fry cool down first. Place it in an airtight container. This keeps it fresh for up to three days in the fridge. When you're ready to eat, just take out the portion you want. If you want to freeze the stir-fry, use a freezer-safe bag or container. Remove as much air as possible to prevent freezer burn. You can freeze it for up to three months. Remember, some veggies may lose crunch when thawed, so choose your mix carefully. To reheat, the best method is on the stovetop. Add a splash of water or broth to keep it moist. Heat it over medium until hot. If you prefer the microwave, use a microwave-safe dish. Cover it with a damp paper towel to keep steam in. This helps maintain the texture and flavor. You can make this dish your own by adding personal touches. Try using different vegetables like zucchini or bok choy. You can also swap chicken for shrimp or tofu. Add your favorite nuts for a crunchy texture. Experiment with spicy sauces to kick up the heat. Each change can give you a new dish! Yes, frozen vegetables work well in this stir-fry. They save time and are easy to use. However, keep in mind that they may cook faster than fresh ones. You might need to adjust your cooking time. Aim for 3-4 minutes instead of 4-5 minutes for the veggies to stay crisp. Stir-fry goes great with several side dishes. Serve it with steamed jasmine rice for a classic touch. You can also pair it with brown rice for a healthier option. Noodles, like soba or rice noodles, also work well. Add a simple side salad for freshness and extra crunch. Absolutely! This sesame ginger chicken stir-fry is perfect for meal prep. Cook a big batch and divide it into containers. It stores well in the fridge for up to three days. To reheat, use a microwave or skillet. Just be sure to add a splash of water to keep it moist. To make this dish healthier, try a few simple swaps. Use less oil, or replace it with cooking spray. Choose low-sodium soy sauce to cut down on salt. Add more vegetables to increase fiber and nutrients. You can also cut back on honey for fewer calories. This blog post covered how to make a tasty Sesame Ginger Chicken Stir-Fry. We discussed key ingredients like chicken, fresh veggies, and flavorful sauces. I shared step-by-step cooking instructions, along with tips to enhance flavor and presentation. We also explored variations for dietary needs and the best ways to store leftovers. In summary, stir-fry is easy, fun, and flexible. You can customize it to suit your tastes. Enjoy making this dish your own, and share it with friends and family!](https://dishtreats.com/wp-content/uploads/2025/06/887f9040-7330-4bb7-a0e7-766c5efe9124-768x768.webp)

![- 8 oz rotini or fusilli pasta - 1 cup cherry tomatoes, halved - 1 cucumber, diced - 1 cup Kalamata olives, pitted and halved - 1/2 red onion, finely chopped - 1 bell pepper, diced - 1 cup feta cheese, crumbled - 1/4 cup fresh parsley, chopped - 1/4 cup extra virgin olive oil - 3 tablespoons red wine vinegar - 1 teaspoon dried oregano - Salt and pepper, to taste - Substitute red wine vinegar with apple cider vinegar - Add other vegetables like bell peppers or spinach This salad bursts with color and flavor. The main ingredients bring freshness. Each bite is full of crunch and zest. The pasta holds the dressing well, creating a tasty mix. The dressing is simple but packs a punch. Extra virgin olive oil adds richness. Red wine vinegar gives a tangy taste. Dried oregano adds a hint of earthiness. Salt and pepper enhance all the flavors. Want to mix it up? Try adding apple cider vinegar instead of red wine vinegar. You can also throw in extra veggies like spinach. This salad is flexible and lets your creativity shine. For the full recipe, check out the Zesty Greek Pasta Salad with Feta & Olives. To start, bring salted water to a rolling boil. Add 8 ounces of rotini or fusilli pasta. Cook for 8-10 minutes until al dente. Once cooked, drain the pasta in a colander. Rinse it under cold water to stop the cooking. Set the drained pasta aside for later. While your pasta cooks, wash and chop your vegetables. Use 1 cup of cherry tomatoes, 1 cucumber, 1/2 red onion, and 1 bell pepper. Dice these into bite-sized pieces. Also, chop 1/4 cup of fresh parsley. Once chopped, place all the vegetables into a large mixing bowl. This creates a colorful and fresh base for your salad. Now it’s time to mix things! Add the cooled pasta and 1 cup of Kalamata olives to the bowl of vegetables. This combination adds a nice salty flavor. In a separate bowl, prepare the dressing. Mix together 1/4 cup of olive oil, 3 tablespoons of red wine vinegar, and 1 teaspoon of dried oregano. Add salt and pepper to taste. Whisk until well combined. Drizzle the dressing over the pasta and vegetable mixture. Gently fold in 1 cup of crumbled feta cheese. Make sure all the ingredients are evenly coated with the dressing. This step is key for great flavor in every bite. Cover the salad with plastic wrap or a lid. Place it in the refrigerator for 30 minutes. This chilling time helps the flavors meld together. You can serve your pasta salad cold or at room temperature. For the full recipe, check out the details above. Serve your Greek pasta salad in a vibrant bowl for visual appeal. A colorful dish draws people in. You can also use individual plates for a fresh look. Garnish each serving with extra feta and parsley. This adds a pop of color and flavor. Let your salad chill longer in the fridge. This helps the flavors blend and deepen. If you love herbs, try adding basil or dill. Fresh herbs boost the taste and aroma. Prep your ingredients in advance. Chop vegetables and cook the pasta ahead of time. This makes assembly quick and easy. When storing leftovers, use an airtight container. It keeps the salad fresh and tasty for days. For the best flavor, consume within three to five days. {{image_4}} There are many fun ways to switch up your Easy Greek Pasta Salad. Try a Mediterranean twist for a new taste. Here are some ideas: - Add sun-dried tomatoes for a sweet, tangy flavor. - Toss in artichoke hearts for extra texture. - For protein, add grilled chicken or chickpeas. Both options make it filling. If you need to change the recipe for your diet, here are some tips: - Use gluten-free pasta to make it gluten-free. - For a vegan option, skip the feta cheese or try a vegan substitute. Enjoy seasonal ingredients by mixing in fresh veggies: - In summer, add zucchini for a crunchy touch. - Use roasted vegetables for deeper flavors. Roasting brings out their natural sweetness. These variations keep your Easy Greek Pasta Salad fresh and exciting! Check out the [Full Recipe] for the base you can customize. To keep your Easy Greek Pasta Salad fresh, place it in an airtight container. You can store it in the refrigerator for about 3-5 days. This salad tastes best when you enjoy it fresh. I do not recommend freezing this salad. Freezing can change its texture, making it less enjoyable. If you prepare a large batch, store the dressing separately. This keeps the flavors bright and fresh. This pasta salad is best served cold. However, you can also enjoy it at room temperature. Before serving, gently toss the salad. This helps mix the flavors evenly throughout. For the full recipe, check back to the beginning. Yes, it can be prepared a day in advance for flavor enhancement. This allows all the tastes to blend and become more rich. Just keep it in the fridge until you are ready to serve. You can use vegan feta or other cheese alternatives. This makes the dish suitable for various diets. You might want to try a creamy cheese for a nice texture. Yes, it’s perfect for picnics and potlucks if kept properly chilled. The fresh ingredients hold up well. Just pack it in a cooler or insulated bag to keep it fresh. Consider adding grilled chicken, shrimp, or canned chickpeas. These options make the salad more filling. They also add great taste and texture to the mix. This salad combines fresh pasta with vibrant vegetables, feta, and a simple dressing. Using easy steps, you can create a delightful dish that's perfect for any gathering. Remember, you can adjust flavors and ingredients to fit your taste. Meal prep helps save time, and eating fresh is best. Enjoy your colorful pasta salad, whether at a picnic or a family dinner!](https://dishtreats.com/wp-content/uploads/2025/06/42921458-26d8-4100-967d-b17bfbbdb796-768x768.webp)