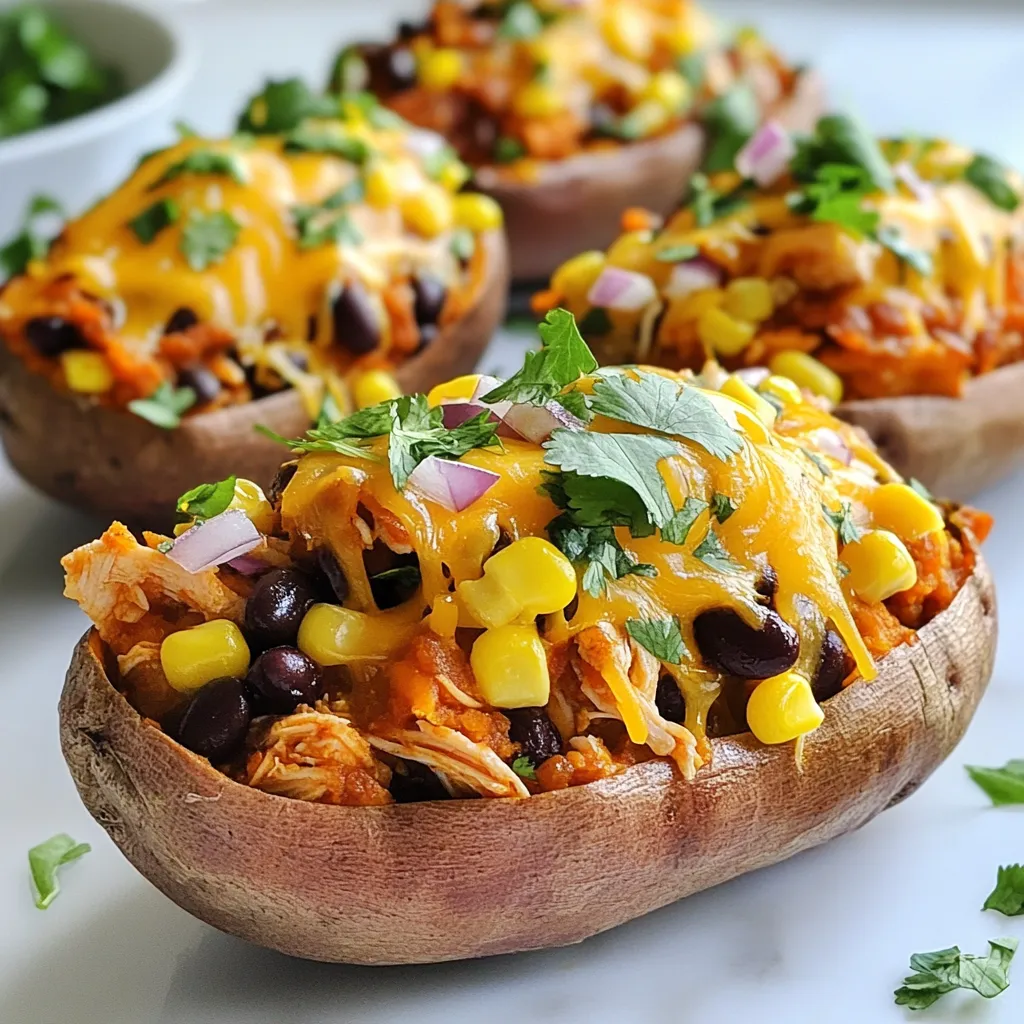
If you love bold flavors and healthy meals, BBQ Chicken Stuffed Sweet Potatoes are a must-try! These tasty bites combine sweet, smoky, and savory elements that leave your taste buds wanting more. Perfect for busy weeknights or fun gatherings, they’re packed with protein and fiber. I’ll guide you step-by-step, sharing tips and variations to make your meal uniquely yours. Let’s dive into this flavorful delight!
Why I Love This Recipe
- Nutritious and Satisfying: Sweet potatoes are packed with vitamins and fiber, making this dish not only delicious but also a healthy choice for your meals.
- Easy to Prepare: This recipe comes together quickly, with minimal prep time. It’s perfect for busy weeknights when you want something hearty without spending hours in the kitchen.
- Flavorful Combination: The mix of BBQ chicken, corn, and black beans creates an explosion of flavors that everyone will love. It’s a great way to use leftover chicken!
- Customizable: You can easily adapt this recipe to suit your taste preferences by adding different toppings or using a variety of sauces, making it versatile for any occasion.
Ingredients
List of Ingredients
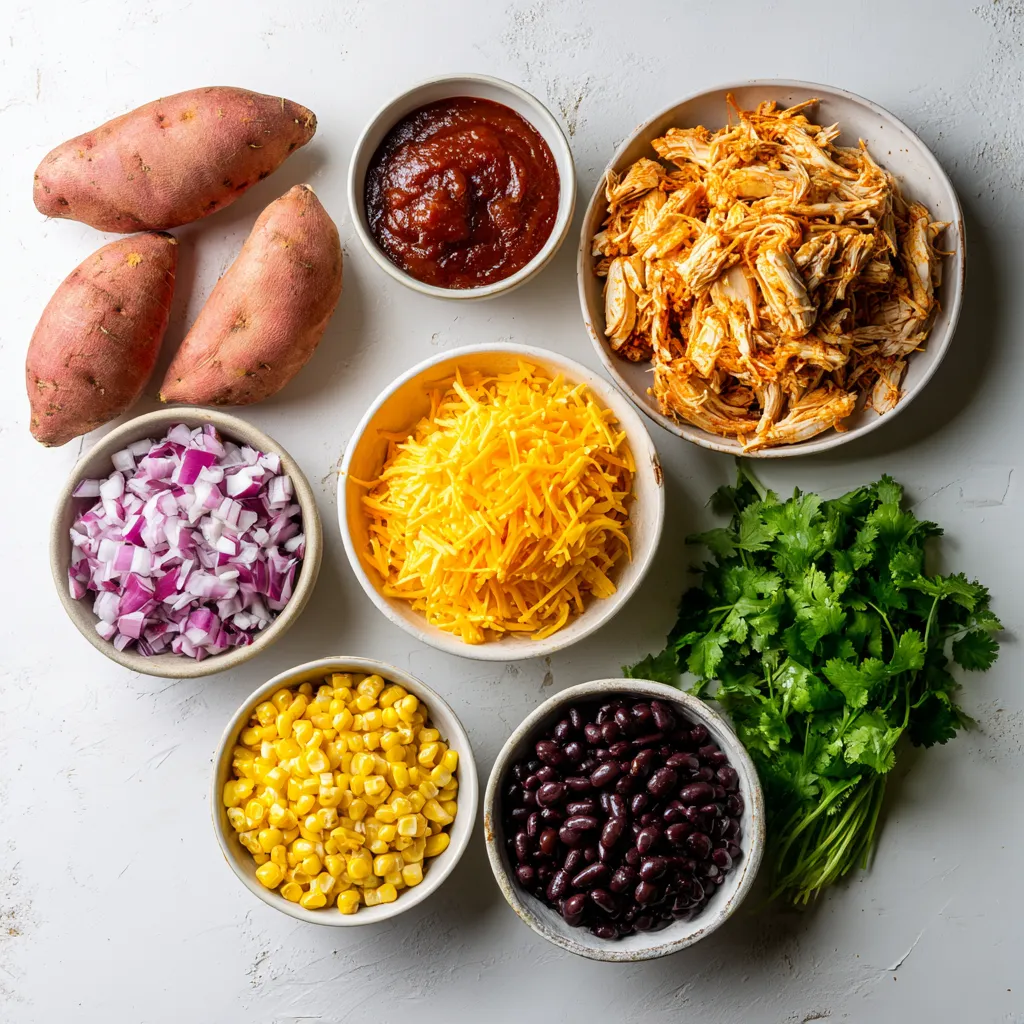
– 4 medium sweet potatoes
– 2 cups cooked shredded chicken
– 1 cup of your favorite BBQ sauce
– 1 cup corn kernels (canned or frozen)
– 1 cup black beans, rinsed and drained
– 1 cup shredded cheddar cheese
– 1/2 cup red onion, finely chopped
– 1/4 cup fresh cilantro, chopped (for garnish)
– Salt and pepper, to taste
– 1-2 tablespoons olive oil
In BBQ Chicken Stuffed Sweet Potatoes, each ingredient plays a key role. The sweet potatoes provide a soft, sweet base. This pairs well with the savory BBQ chicken. I love to use cooked shredded chicken because it’s easy and quick. The BBQ sauce adds a rich flavor that makes the dish pop.
Corn kernels add a nice crunch and sweetness. Black beans bring protein and a hearty feel. Shredded cheddar cheese melts beautifully on top, giving a gooey finish. Red onion adds a sharp bite, while cilantro gives a fresh taste. You can adjust salt and pepper to your liking.
Optional Add-Ins
– Diced jalapeños for heat
– Greek yogurt or sour cream for creaminess
– Other cheeses like Monterey Jack or mozzarella
Optional add-ins let you customize your dish. If you like spice, add diced jalapeños. For a creamy touch, Greek yogurt or sour cream works great. You can also switch cheeses to suit your taste.
Dietary Considerations
– Gluten-free options
– Dairy-free variations
These stuffed sweet potatoes can fit many diets. They are naturally gluten-free, making them a safe choice. If you need a dairy-free option, use vegan cheese or skip the cheese altogether. Feel free to mix and match ingredients to fit your needs.
Step-by-Step Instructions
Preparing the Sweet Potatoes
– Preheat oven to 400°F (200°C).
– Wash the sweet potatoes under cool water. Poke holes with a fork.
– Rub each potato with olive oil. This helps them bake well.
Baking Process
– Bake the sweet potatoes for 45-55 minutes until tender.
– Check by piercing them with a fork. They should feel soft.
– Let them cool slightly for easier handling.
Making the BBQ Chicken Filling
– In a bowl, mix shredded chicken and BBQ sauce.
– Add corn, black beans, and chopped onion.
– Season with salt and pepper to taste. Stir until mixed well.
Stuffing the Sweet Potatoes
– Slice each sweet potato down the center.
– Use a fork to fluff the insides gently.
– Spoon the BBQ chicken mixture into each potato.
– Top with shredded cheddar cheese for extra flavor.
Final Baking
– Return the stuffed potatoes to the oven. Bake for 10-15 minutes.
– Wait until the cheese is melted and bubbly.
– Garnish with fresh cilantro before serving for a fresh touch.
Tips & Tricks
Preparation Tips
– To bake sweet potatoes perfectly, preheat your oven to 400°F (200°C).
– Wash the potatoes and poke holes with a fork for steam to escape.
– Rub them with olive oil and sprinkle with salt for extra flavor.
– Place sweet potatoes on a baking sheet lined with parchment paper.
– If you dislike wrapping, parchment paper makes clean-up a breeze.
Flavor Enhancements
– To add more flavor, consider garlic powder or smoked paprika.
– You can also use spicy BBQ sauce for a kick.
– Try pairing the BBQ sauce with a hint of honey for sweetness.
– Fresh lime juice adds a zesty contrast to the savory filling.
Cooking Tools
– Use a sturdy baking sheet for even heat distribution.
– A sharp knife is great for slicing the baked potatoes.
– A mixing bowl helps combine ingredients for the filling well.
– Consider using a fork for fluffing the sweet potato insides.
– A measuring cup is handy for portioning the BBQ sauce and cheese.
Pro Tips
- Choosing Sweet Potatoes: Select sweet potatoes that are firm and free of blemishes for the best flavor and texture.
- Enhancing BBQ Flavor: For an extra kick, consider adding a dash of smoked paprika or cayenne pepper to the BBQ chicken mixture.
- Optimal Cheese Melt: Use freshly shredded cheese instead of pre-packaged for a creamier melt and better flavor.
- Make-Ahead Option: Pre-bake the sweet potatoes and prepare the filling ahead of time. Assemble and bake just before serving for a quick meal.
Variations
Protein Alternatives
You can switch up the protein in this dish. Turkey works well instead of chicken. Just cook and shred it like chicken. For a fun twist, try plant-based chicken too. It gives you that great BBQ taste without meat. This makes the dish veggie-friendly. You can also go fully vegetarian or vegan. Use a mix of beans and grains for protein. Quinoa or lentils can fill the sweet potatoes nicely.
Different Flavor Profiles
Want to mix things up? Try an Asian twist! Use teriyaki sauce instead of BBQ sauce. It adds a sweet and savory flavor. For a kick, go Southwest style. Use chipotle sauce for a smoky taste. You can even add spices like cumin or paprika. This gives the dish a whole new vibe. Don’t be afraid to get creative!
Serving Suggestions
Toppings can elevate your stuffed sweet potatoes. Sliced avocado adds creaminess and flavor. A squeeze of lime juice gives a zesty touch. You can also sprinkle some fresh cilantro on top for color. Side dishes can enhance your meal too. A fresh salad pairs well with the sweet potatoes. You can also serve grilled veggies or corn on the side. These add great texture and flavor to your plate.
Storage Info
Storing Leftovers
To store your BBQ chicken stuffed sweet potatoes, let them cool first. Place them in an airtight container. This helps keep them fresh. You can store them in the fridge for up to four days. If you want to save them longer, freezing is a great option.
Reheating Tips
When reheating, you have two main options: the microwave or the oven. The microwave is quick but can make the sweet potatoes soggy. To avoid this, use the oven for better texture. Preheat your oven to 350°F (175°C). Place the stuffed sweet potatoes on a baking sheet. Heat for about 15-20 minutes until warm.
Freezing Instructions
To freeze stuffed sweet potatoes, pack them carefully. Wrap each one in plastic wrap, then place them in a freezer bag. Make sure to remove as much air as possible. They can stay in the freezer for up to three months. When ready to eat, thaw them overnight in the fridge. You can also use the microwave’s defrost setting for a quicker option.
FAQs
Can I make these BBQ Chicken Stuffed Sweet Potatoes ahead of time?
Yes, you can prepare these stuffed sweet potatoes ahead of time. Bake the sweet potatoes and allow them to cool. Then, stuff them with the BBQ chicken mixture. Store them in the fridge for up to two days. When ready to eat, just reheat in the oven until warm. This saves time and makes for an easy meal later.
What can I substitute for sweet potatoes?
If you don’t have sweet potatoes, you can use regular potatoes or even butternut squash. Both will work well. Just make sure to adjust the cooking time. Regular potatoes may take longer to bake, while butternut squash will cook faster.
How do I know when sweet potatoes are fully cooked?
To check if sweet potatoes are cooked, insert a fork into them. They should feel soft and tender. If the fork goes in easily, they are ready. If they still feel hard, give them more time in the oven.
Can I use different types of chicken?
Absolutely! You can use any cooked chicken you have. Rotisserie chicken works great, or you can use shredded turkey. For a meat-free option, try using shredded jackfruit or tofu for a different flavor.
What to serve with BBQ Chicken Stuffed Sweet Potatoes?
These stuffed sweet potatoes pair well with a fresh salad or grilled veggies. You can also serve them with extra BBQ sauce on the side. If you want something creamy, a dollop of Greek yogurt or sour cream adds a nice touch.
These BBQ Chicken Stuffed Sweet Potatoes are easy and fun to make. You learned how to prepare the filling, bake the sweet potatoes, and store leftovers. You can choose your favorite proteins and flavors. With options for dietary needs and tasty variations, this dish fits many tastes. I hope you’ll try it soon and enjoy every bite! Remember, cooking is about creativity and having fun in the kitche


