
Looking for a fresh twist on taco night? Try my BBQ Cauliflower Tacos! They’re packed with flavor and super easy to make. You only need a few simple ingredients like cauliflower, BBQ sauce, and tortillas. Plus, I’ll share tips for awesome toppings and ways to personalize your tacos. Join me as we dive into this tasty, plant-based treat that everyone will love. Let’s get cooking!
Ingredients
Main Ingredients
– 1 medium head of cauliflower, cut into bite-sized florets
– 1 cup BBQ sauce, your choice
– 1 tablespoon olive oil
– 8 small corn tortillas
Seasoning Ingredients
– 1 teaspoon smoked paprika
– 1 teaspoon garlic powder
– Salt and pepper to taste
Fresh Toppings
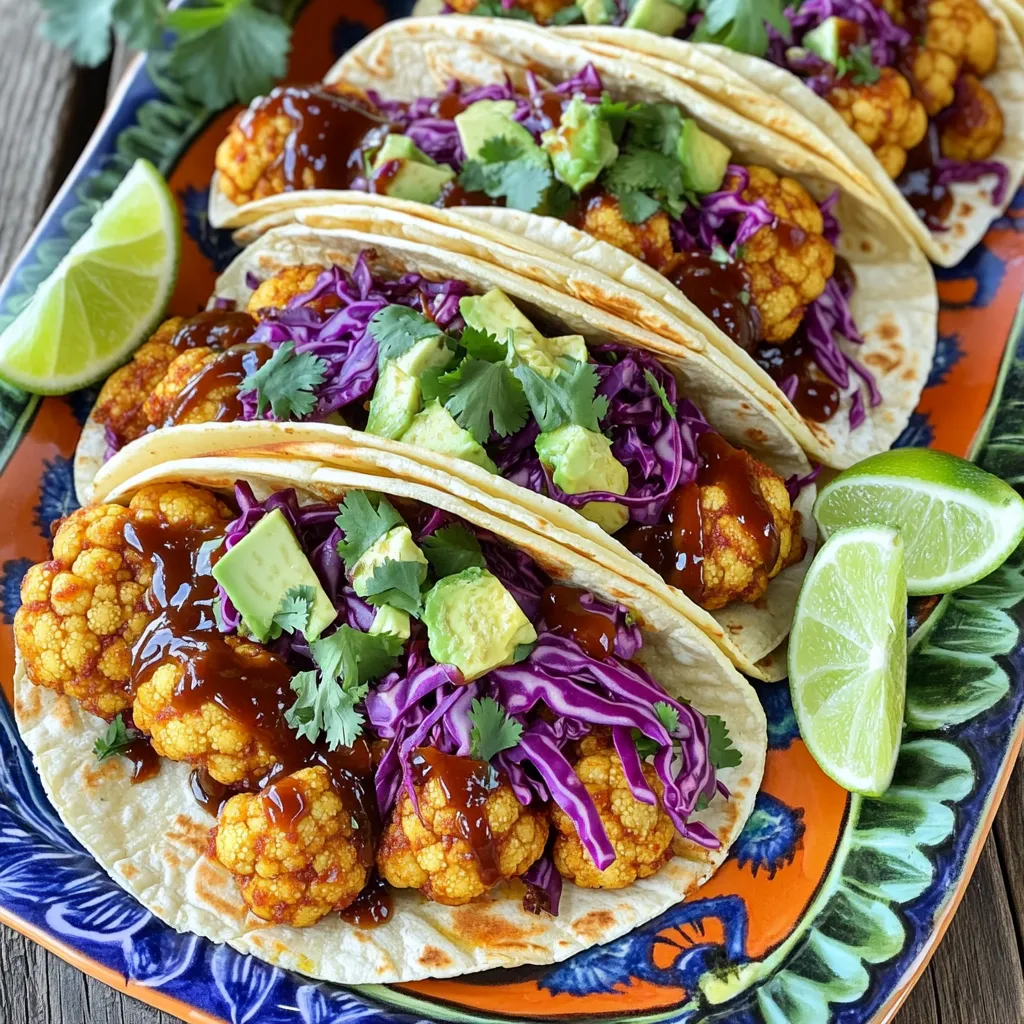
– 1 cup shredded red cabbage
– ½ cup ripe avocado, diced
– ¼ cup fresh cilantro, chopped
– Lime wedges
I choose cauliflower as the star of this dish. It is a great meat substitute. You can cut it into small, bite-sized pieces for easy eating. I love using BBQ sauce that you enjoy most. This makes the tacos taste great. Olive oil helps the seasoning stick well to the cauliflower.
For the seasoning, I use smoked paprika and garlic powder. They add a nice, deep flavor. Salt and pepper boost the taste of the veggies.
Fresh toppings make these tacos pop! Shredded red cabbage adds crunch. Diced avocado gives a creamy texture. Fresh cilantro brings a bright taste. And don’t forget the lime wedges! They add a zesty finish that brings everything together.
Gather these ingredients, and you are ready to make BBQ cauliflower tacos that are flavorful and easy!
Step-by-Step Instructions
Prepping the Oven and Cauliflower
– Preheat the oven to 425°F (220°C). Line a baking sheet with parchment paper for easy cleanup.
– Cut the medium head of cauliflower into bite-sized florets. Place them in a large mixing bowl.
Baking the Cauliflower
– Drizzle the florets with olive oil. Add smoked paprika, garlic powder, salt, and pepper. Toss to coat each floret evenly.
– Spread the seasoned cauliflower in a single layer on the baking sheet. Bake for about 20 minutes, flipping them halfway. They should be tender and slightly crispy when done.
Assembling the Tacos
– Remove the cauliflower from the oven and drizzle BBQ sauce over it. Toss gently to coat each piece well. Return to the oven for an extra 10 minutes to caramelize.
– While the cauliflower bakes, heat a dry skillet over medium heat. Warm the corn tortillas for about 30 seconds on each side until soft and pliable.
– To assemble, place a spoonful of BBQ cauliflower on each tortilla. Top with shredded red cabbage and diced avocado for crunch and creaminess.
– Finally, sprinkle fresh cilantro on top and add lime wedges for a zesty finish. Enjoy your delicious, flavorful tacos!
Tips & Tricks
Perfecting Flavor
To make your BBQ cauliflower tacos shine, start with even seasoning. Coat each floret well with olive oil, smoked paprika, garlic powder, salt, and pepper. This step is key to great taste. You want every bite to burst with flavor. As for BBQ sauce, choose one you love. A sweet and tangy sauce pairs really well with cauliflower. If you like heat, opt for a spicy BBQ sauce. You can also make your own sauce for a personal touch.
Taco Assembly Techniques
When it comes to folding your tacos, warm tortillas are your best friend. Use a dry skillet to heat them for about 30 seconds on each side. This makes them soft and easy to fold. For assembly, start with BBQ cauliflower, then add red cabbage for crunch. Top it off with diced avocado for creaminess. To make your tacos look nice, arrange them on a colorful platter. Place lime wedges around for a pop of color and easy access.
Serving Recommendations
For sides, consider a fresh salad or chips with salsa. These pair well with the richness of the tacos. You could also serve a light coleslaw for added crunch. As for drinks, a cold beer or sparkling water with lime works great. If you prefer something non-alcoholic, try iced tea with lemon. These drinks will balance the flavors of your tacos and make your meal feel complete.
Variations
Vegetarian and Vegan Options
You can easily make BBQ cauliflower tacos vegetarian or vegan. For a vegetarian twist, try using a creamy ranch dressing instead of BBQ sauce. For a vegan option, ensure your sauce is without meat products. You can also add other vegetables to boost flavor and nutrition. Consider adding bell peppers, zucchini, or corn. These veggies pair well with the smoky BBQ taste.
Flavor Enhancements
Want a spicy kick? Add a teaspoon of cayenne pepper to your seasoning mix. You can also try a spicy BBQ sauce or drizzle sriracha on top. For more flavor, try toppings like pickled jalapeños or fresh salsa. These toppings can turn your tacos into a flavor explosion.
Different Taco Styles
Mix things up with different tortillas. You can use flour tortillas for a softer bite. For a healthier choice, try lettuce wraps instead of tortillas. You can also make breakfast tacos by adding scrambled eggs and hot sauce. This gives you a whole new way to enjoy BBQ cauliflower!
Storage Info
Refrigeration Guidelines
Store leftover tacos in an airtight container. This keeps them fresh for up to three days. If you have leftover BBQ cauliflower, store it separately. This helps keep the tortillas from getting soggy. Use a glass or plastic container with a secure lid. Make sure to cool the food before sealing it.
Reheating Tips
To reheat cauliflower, use the oven or a skillet. Set your oven to 350°F (175°C) and bake for about 10 minutes. If using a skillet, heat on medium until warm, stirring occasionally. For tortillas, warm them in a dry skillet for 30 seconds on each side. This will keep them soft and flexible.
Freezing Options
You can freeze BBQ cauliflower before adding it to the tacos. Place it in a freezer-safe bag after cooling. It stays good for about three months. When you’re ready to eat, thaw it in the fridge overnight. Then, reheat as mentioned above. Do not freeze tortillas, as they may become dry.
FAQs
What are BBQ Cauliflower Tacos?
BBQ Cauliflower Tacos are a fun, tasty dish. They use roasted cauliflower coated in BBQ sauce as the main filling. This dish comes from the growing trend of plant-based meals. Cauliflower provides a great texture and absorbs flavors well.
Can I make this recipe ahead of time?
Yes, you can prepare this recipe ahead. Roast the cauliflower and store it in the fridge. Just reheat it when you’re ready to serve. You can also warm the tortillas in advance. This makes for an easy meal prep option.
What types of BBQ sauce work best?
Choose your favorite BBQ sauce for this recipe. A sweet sauce works well if you like a rich taste. If you prefer something spicy, go for a spicy BBQ sauce. You can even mix different sauces for a unique flavor.
How do I make these tacos gluten-free?
To make BBQ Cauliflower Tacos gluten-free, use corn tortillas. They are naturally gluten-free and add great flavor. Check the package to ensure they are labeled gluten-free. This way, everyone can enjoy your delicious tacos!
In this blog post, we explored how to make BBQ cauliflower tacos. We covered essential ingredients, step-by-step instructions, and tips for perfect flavor. I shared ideas for variations, storage info, and answered common questions.
These tacos are easy to make and packed with flavor. Try them for your next meal or gathering. Enjoy creating your own tasty twist!


