Bakery-Style Cinnamon Pecan Coffee Cake Delight

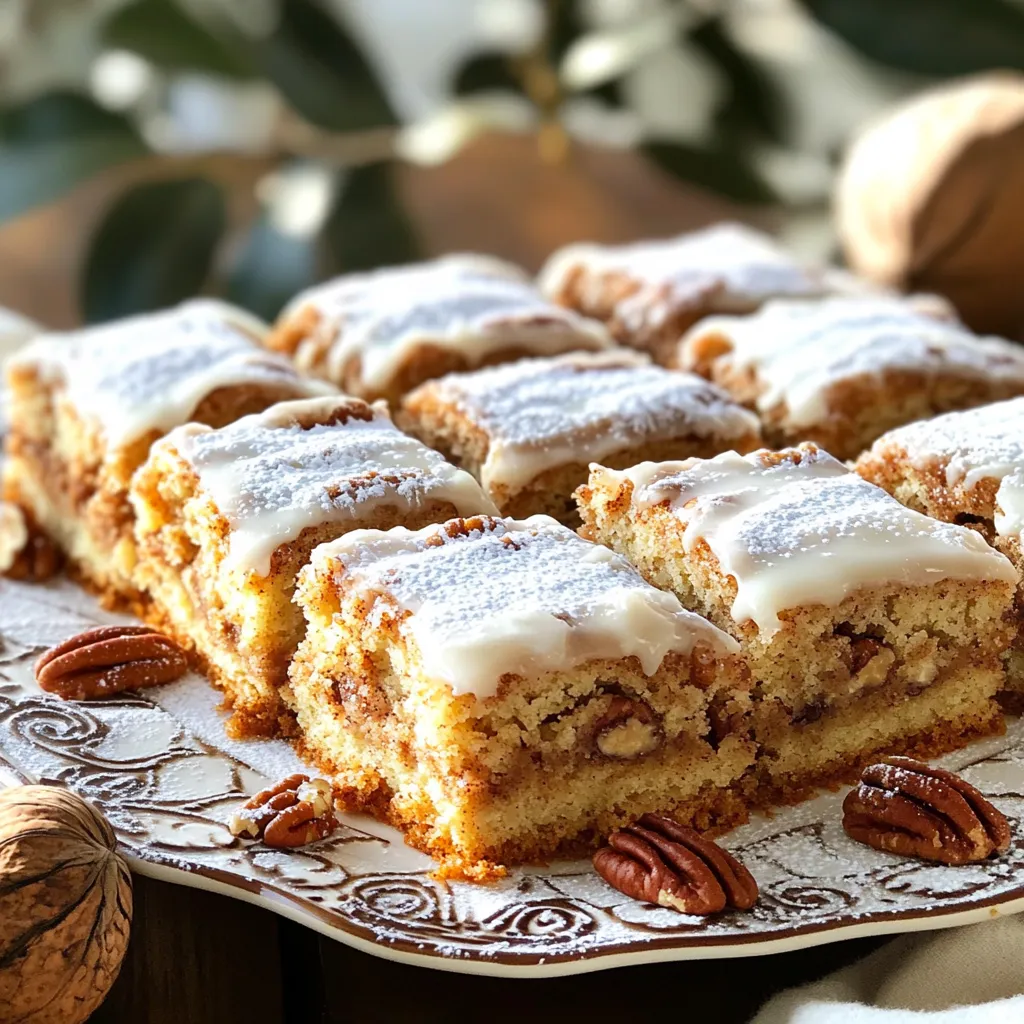
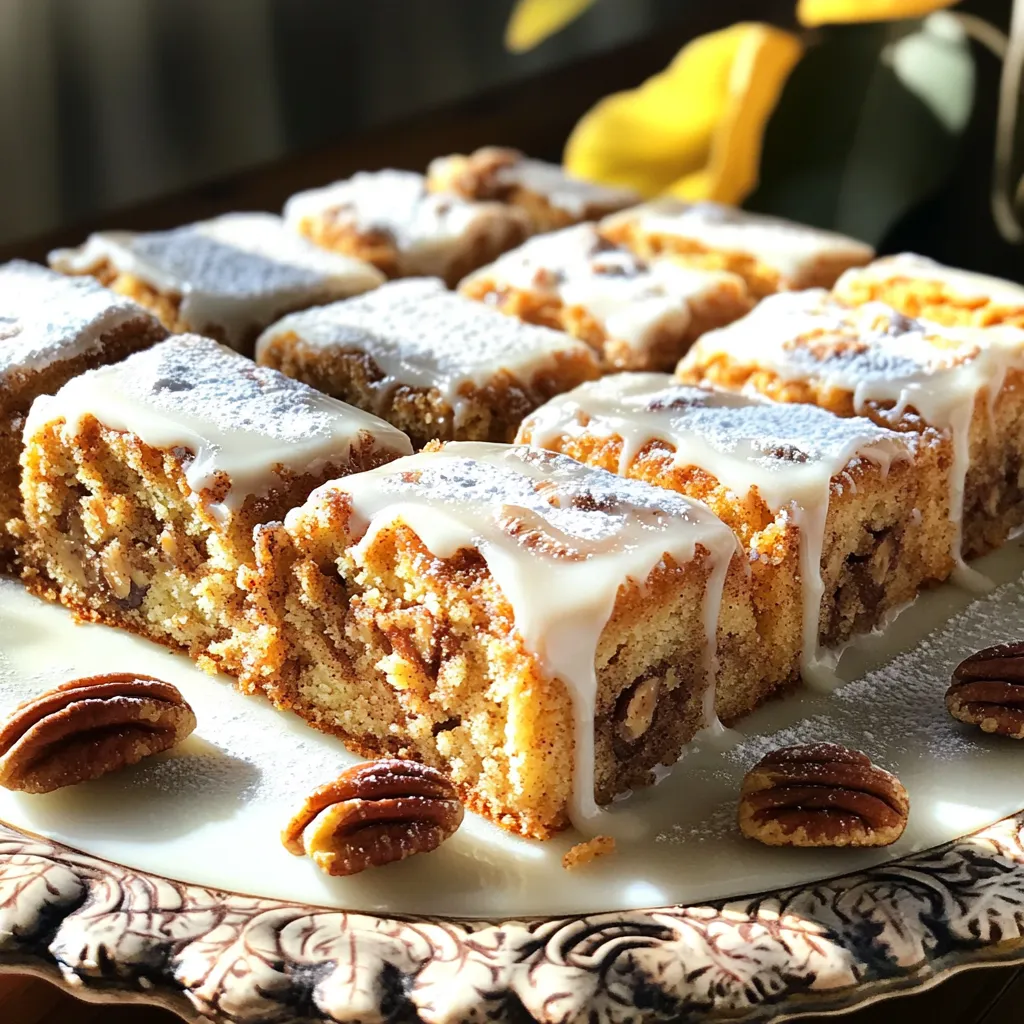
If you love the smell of fresh coffee cake wafting through a bakery, get ready! My Bakery-Style Cinnamon Pecan Coffee Cake Delight brings that cozy warmth right to your kitchen. With a fluffy texture and a sweet cinnamon pecan filling, this cake is perfect for breakfast or snack time. Plus, I’ll walk you through each easy step to ensure your cake turns out perfect every time. Let’s dive in!
Ingredients
Main Ingredients for Coffee Cake
To create your bakery-style cinnamon pecan coffee cake, gather these essential items:
- 2 cups all-purpose flour
- 1 cup granulated sugar
- 1/2 cup unsalted butter, softened
- 1 cup buttermilk, at room temperature
- 2 large eggs, at room temperature
- 1 tablespoon baking powder
- 1 teaspoon baking soda
- 1 teaspoon vanilla extract
- 1/2 teaspoon salt
These ingredients come together to form a rich, moist cake. The butter and sugar provide a sweet base, while the buttermilk keeps it tender.
Cinnamon Pecan Filling Components
Now, let’s make the filling that adds depth to our cake. You will need:
- 1/2 cup brown sugar, packed tightly
- 1 tablespoon ground cinnamon
- 1 cup pecans, chopped coarsely
This mixture gives a warm flavor with a nice crunch. The brown sugar and cinnamon blend perfectly with the pecans.
Glaze Ingredients
To finish off your coffee cake, prepare this simple glaze:
- 1 cup powdered sugar
- 2 tablespoons milk
- 1/2 teaspoon vanilla extract
This glaze adds a sweet touch. It melts into the warm cake and creates a beautiful finish.
Step-by-Step Instructions
Preheat the Oven and Prepare the Pan
Start by preheating your oven to 350°F (175°C). Grease a 9×13 inch baking pan with butter or use vegetable spray. You can also line it with parchment paper. This makes it easy to remove the cake later.
Making the Cinnamon Pecan Filling
In a small bowl, mix 1/2 cup of packed brown sugar, 1 tablespoon of ground cinnamon, and 1 cup of chopped pecans. Stir until all ingredients blend well. Set this bowl aside for later.
Preparing the Cake Batter
In a large bowl, cream together 1/2 cup of softened unsalted butter and 1 cup of granulated sugar using an electric mixer. Beat on medium speed for about 3-5 minutes. The mixture should look light and fluffy.
Next, add 2 large eggs one at a time, mixing well after each. Then, stir in 1 teaspoon of vanilla extract. Gradually add 1 cup of room-temperature buttermilk. Mix until everything is well combined.
Layering the Batter
Pour half of the cake batter into your prepared pan. Spread it evenly across the bottom. Now, sprinkle half of the cinnamon pecan filling over this layer. Carefully pour the remaining batter on top, spreading it evenly. Finally, add the rest of the filling on top of the last batter layer.
Baking Time and Testing
Place the pan in the oven and bake for 30-35 minutes. To check if it’s done, insert a toothpick into the center. If it comes out clean, the cake is ready.
Tips & Tricks
Baking Techniques for a Fluffy Cake
To bake a fluffy cake, cream the butter and sugar well. This step adds air. Use room temperature ingredients; they blend better. When mixing dry and wet ingredients, stir gently. A few lumps are okay. Overmixing can make the cake dense. Bake at the right temperature for even cooking.
Ingredient Substitutions for Dietary Needs
If you need dairy-free options, use plant-based butter and almond milk. For gluten-free cakes, try a gluten-free flour blend. You can swap granulated sugar for coconut sugar for a healthier choice. If you want it egg-free, use flaxseed meal mixed with water. Each change can alter the taste, so test your mix.
How to Ensure Even Baking
To achieve even baking, preheat your oven fully. Place the pan in the center of the oven. This helps with hot air flow. Rotate the pan halfway through baking for consistent heat. Use a toothpick to check doneness; it should come out clean when the cake is done.

Variations
Chocolate Chip Cinnamon Pecan Coffee Cake
You can easily add chocolate chips to this recipe. Mix in one cup of semi-sweet chocolate chips into the batter. The rich chocolate pairs well with the warm cinnamon and crunchy pecans. This twist gives the coffee cake a delightful sweetness and texture.
Gluten-Free Version
For a gluten-free option, swap all-purpose flour with a gluten-free blend. Use a blend that includes xanthan gum for the best texture. The cake will still be soft and moist, while everyone can enjoy it.
Adding Fruit for Extra Flavor
Adding fruit can elevate your coffee cake. Chopped apples or ripe bananas work great. Mix one cup of chopped fruit into the batter for added moisture. You could also sprinkle berries on top of the filling. This adds a burst of flavor and color to your cake.
Storage Info
How to Properly Store Leftover Cake
To keep your coffee cake fresh, let it cool first. Then, wrap it tightly in plastic wrap or foil. You can also store it in an airtight container. This way, it stays moist and tasty. Keep it at room temperature for up to three days. If you live in a humid place, store it in the fridge for better results.
Freezing Instructions for Long-Term Storage
If you have more cake than you can eat, freezing is a great option. First, slice the cake into pieces. Wrap each piece in plastic wrap tightly. Then, place all wrapped pieces in a freezer bag. Squeeze out the air before sealing. This cake can last in the freezer for up to three months. When you’re ready, just take out a piece and let it thaw at room temperature.
Best Practices for Reheating
To enjoy your cake warm, preheat your oven to 350°F (175°C). Place the cake on a baking sheet. Heat it for about 10-15 minutes. Check it often to avoid drying it out. If you want a quick fix, you can use a microwave. Heat a slice for about 15-20 seconds. Just be careful not to overheat it. Enjoy your warm coffee cake with a cup of coffee!
FAQs
Can I use regular milk instead of buttermilk?
Yes, you can use regular milk. To mimic buttermilk, add one tablespoon of vinegar or lemon juice to a cup of milk. Let it sit for five minutes. This makes a great substitute for your cake.
How do I know when the coffee cake is done baking?
Check the cake at 30 minutes. Insert a toothpick in the center. If it comes out clean, the cake is done. If it has batter on it, bake for a few more minutes.
What can I use instead of pecans in the filling?
You can use walnuts or almonds. Both add a nice crunch and flavor. If you want a nut-free option, try using rolled oats or a mix of brown sugar and cinnamon.
How long will the coffee cake stay fresh?
The cake will stay fresh for about three days at room temperature. If you store it in the fridge, it can last up to a week. For longer storage, freeze it for up to three months.
You learned about the key ingredients and steps to make a delicious coffee cake. We covered the filling, glaze, and baking techniques needed for fluffiness. You also discovered fun variations and smart ways to store the cake. Remember, feel free to swap ingredients to meet your needs. Coffee cake can adapt to your taste! Enjoy baking and sharing this treat with others. Your kitchen can create great memories with this recipe!


![To make crispy sweet and sour chicken, you need some key ingredients. Here’s what to gather: - 1 lb (450g) chicken breast, cut into bite-sized pieces - 1 cup cornstarch - 2 large eggs, beaten - Oil for frying - Salt and black pepper to taste These ingredients form the base of your dish. The chicken gives protein, while cornstarch creates that crispy texture. Eggs help the cornstarch stick to the chicken. Adding vibrant colors and fresh flavors is easy with the right vegetables and fruits. Here’s what you’ll need: - 1 cup bell peppers, chopped (mix of colors for visual appeal) - 1 cup pineapple chunks (fresh or canned) - 1 cup onion, chopped - 3 cloves garlic, minced The bell peppers and onions add crunch and sweetness. Pineapple brings a juicy burst of flavor. Garlic adds depth to the dish. The sweet and sour sauce makes this dish memorable. Gather these components: - 1/2 cup ketchup - 1/4 cup apple cider vinegar - 1/4 cup brown sugar - 2 tablespoons soy sauce - 1 tablespoon cornstarch mixed with 2 tablespoons water (for slurry) This sauce balances sweetness and tang. Ketchup gives a rich base, while apple cider vinegar adds a zesty kick. Brown sugar enhances the sweetness, and soy sauce adds umami. The cornstarch slurry thickens the sauce perfectly. For the full recipe, check out the complete list of steps to follow. Happy cooking! Start by seasoning the chicken pieces with salt and pepper. This simple step adds great flavor. Next, dredge each piece in cornstarch. Make sure to shake off any extra cornstarch. This helps create a nice, crispy crust. After that, dip the chicken pieces into the beaten eggs. This coating will help the cornstarch stick well. In a large skillet, heat oil over medium-high heat. You want the oil to shimmer before adding the chicken. Fry the chicken in batches. Avoid crowding the pan to keep the chicken crispy. Cook each piece for about 4-5 minutes per side. When golden brown, use a slotted spoon to remove the chicken. Place it on paper towels to drain any excess oil. Lower the heat to medium. In the same pan, add chopped onions and bell peppers. Sauté them for about 3-4 minutes or until soft. This brings out their sweetness. Then, add minced garlic and cook for another minute. The aroma will fill your kitchen and make your mouth water. In a bowl, whisk together the sauce ingredients: ketchup, apple cider vinegar, brown sugar, and soy sauce. Combine these until smooth. Pour this sweet and tangy sauce over the sautéed vegetables. Stir gently to mix everything together. The colors and smells will be inviting. Raise the heat slightly and bring the sauce to a gentle simmer. This helps blend the flavors. Once it simmers, add pineapple chunks for sweetness. Then, mix the cornstarch slurry and pour it in. Stir continuously until the sauce thickens, which takes about 2-3 minutes. You want it to coat the chicken well. Add the crispy chicken back into the pan. Carefully fold it into the thickening sauce. Toss everything gently to coat each piece of chicken. Once warmed through, the dish is ready to serve. For a great presentation, plate it over fluffy rice or steamed quinoa. You can also garnish it with sesame seeds and green onions for extra flair. To get that perfect crispy texture, start with your oil. Heat it well, around 350°F (175°C) is ideal. If the oil isn't hot enough, your chicken will soak up oil and get soggy. Fry the chicken in batches to avoid crowding. This keeps the oil temperature steady. Once fried, place the chicken on paper towels. This helps drain off any extra oil. For a twist on the classic sauce, try adding a splash of orange juice. It brightens the flavor. You can also swap brown sugar with honey for a different sweetness. Using fresh ginger in your sauce will give an extra kick. Remember to taste as you mix. Adjust salt and pepper to suit your taste buds. Presentation makes your dish look more appealing. Serve your crispy sweet and sour chicken over fluffy white rice or quinoa. Sprinkle sesame seeds on top for crunch. Finely chopped green onions add a pop of color. You can even add a few slices of fresh pineapple on the side for a tropical touch. This will make your meal look vibrant and inviting. {{image_4}} You can switch up the protein in this dish. Shrimp works great and cooks fast. Just sauté it until it turns pink. Tofu is another good option. Use firm tofu for the best texture. Cut it into cubes and fry until golden. Pork also fits well. Use pork tenderloin or chops, cut into bite-sized pieces. Each protein adds its own flavor, keeping things exciting. You can mix in different veggies for added nutrition. Broccoli is a great choice. It adds a nice crunch and color. Carrots give a sweet flavor and vibrant look. Snap peas are another fun option. They stay crisp and add a pop of freshness. Feel free to combine any of these for a colorful plate. It makes your meal more appealing and nutritious. You can easily tweak the sauce to match your taste. If you like heat, add some red pepper flakes or sriracha. This will spice up the dish nicely. For sweetener options, you can swap brown sugar for honey or maple syrup. This change adds a different flavor twist. Adjust the acidity by adding more vinegar or a squeeze of lime juice. Each change can create a new experience with this classic dish. For the full recipe, check out the detailed instructions earlier. After enjoying your crispy sweet and sour chicken, store any leftovers in an airtight container. This keeps the dish fresh for up to three days. Before storing, let the chicken cool down to room temperature. This prevents condensation, which can make the chicken soggy. If you have sauce left over, store it separately to keep the chicken crispy. To freeze your crispy sweet and sour chicken, place it in a freezer-safe container or bag. Make sure to remove as much air as possible. This helps avoid freezer burn. It can stay good for about one month. When you're ready to eat, thaw it overnight in the fridge. For the best taste and texture, reheat your chicken in an oven. Preheat the oven to 350°F (175°C). Spread the chicken on a baking sheet and cover with foil. Heat for about 15-20 minutes or until warm. This method helps keep the chicken crispy. You can also reheat it in a skillet over medium heat. Just add a splash of water to the pan to create steam, which helps warm it without drying out. Enjoy your leftovers just as much as the first time! To make crispy sweet and sour chicken, start with these steps: 1. Prep Chicken: Cut chicken breast into bite-sized pieces. Season with salt and pepper. Dredge in cornstarch, then coat in beaten eggs. 2. Fry Chicken: Heat oil in a skillet over medium-high heat. Fry chicken pieces until golden brown, about 4-5 minutes per side. Drain on paper towels. 3. Sauté Vegetables: Lower heat and add chopped onion and bell peppers to the same pan. Cook for 3-4 minutes. Add minced garlic and cook for another minute. 4. Prepare Sauce: Mix ketchup, apple cider vinegar, brown sugar, and soy sauce in a bowl. Pour this mixture over the vegetables in the pan. 5. Thicken Sauce: Bring the sauce to a gentle simmer. Add pineapple chunks and cornstarch slurry. Stir until the sauce thickens, about 2-3 minutes. 6. Combine Chicken and Sauce: Add the fried chicken back into the pan. Toss gently to coat the chicken in the sauce. 7. Serve: Let the dish rest for a minute. Serve it over rice or quinoa for a complete meal. Yes, you can prepare some parts in advance. Cook the chicken and the sauce ahead of time. Store them separately in airtight containers in the fridge. You can keep the chicken for up to three days. The sauce will last about a week. When ready to serve, reheat the chicken and sauce together in a pan. This keeps the chicken crispy and the sauce fresh. Yes, you can make a vegetarian version! Use tofu instead of chicken. Press the tofu to remove excess moisture, then cut it into cubes. Coat and fry the tofu pieces just like you would with chicken. You can also use seitan or tempeh for a similar texture. The sauce remains the same, giving you that sweet and sour flavor. I love serving crispy sweet and sour chicken with steamed rice or quinoa. You can also pair it with: - Fried rice - Noodles - Steamed broccoli - A fresh cucumber salad These sides complement the dish well and add color to your plate. Enjoy your meal! For the complete recipe, check the [Full Recipe]. Crispy sweet and sour chicken is a delightful dish. We explored key ingredients, cooking methods, and tips for perfecting it. You learned how to achieve that crispy texture and enhance flavors. Remember, try different proteins and veggies for variety. Proper storage keeps leftovers fresh. This dish is not only tasty but also versatile. Enjoy making and sharing it with friends and family. Let your kitchen creativity shine with this classic recipe!](https://dishtreats.com/wp-content/uploads/2025/05/ffc138cc-1bdb-4282-b515-13f85bd5dbd6-768x768.webp)
