Baked Garlic Parmesan Chicken Wings Flavorful Delight

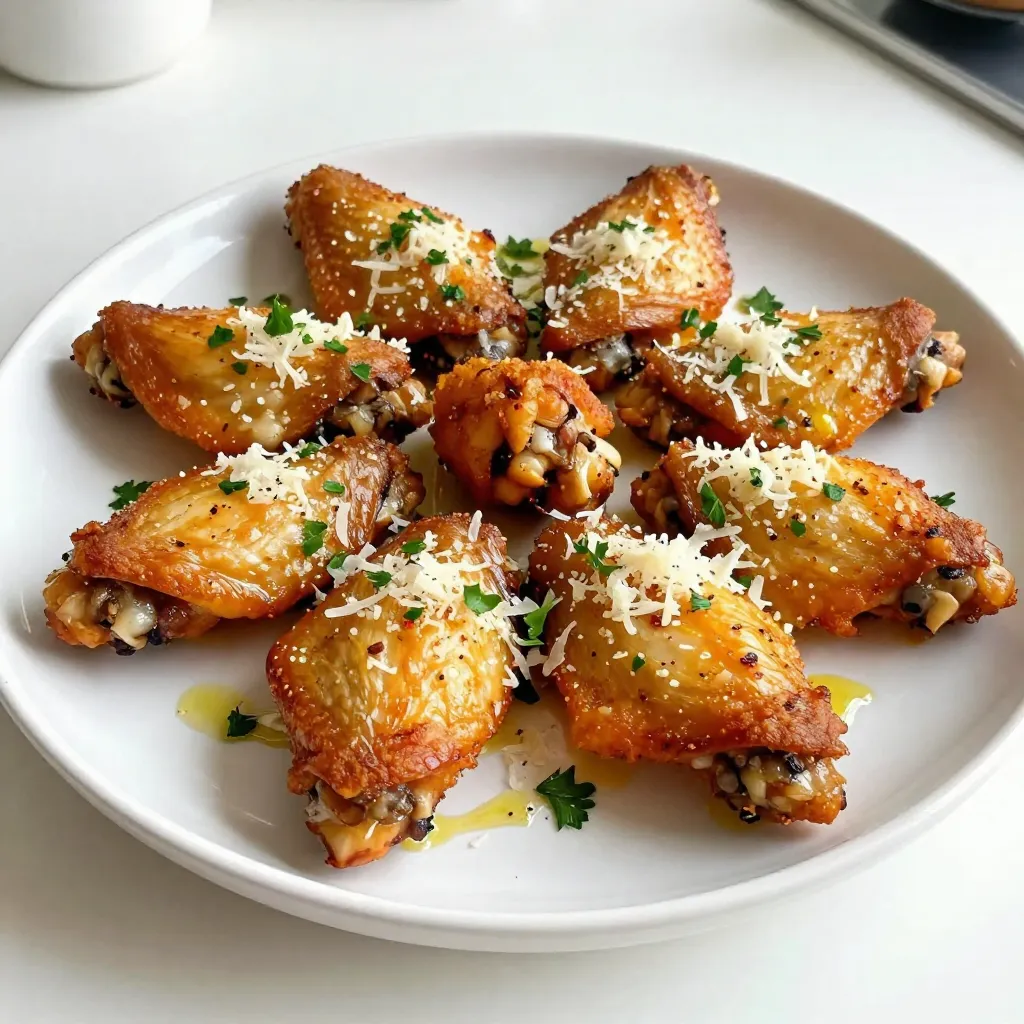
Are you ready to elevate your snack game? Baked Garlic Parmesan Chicken Wings deliver big flavor with less fuss. This recipe is simple, tasty, and perfect for parties or movie nights. With just a few ingredients and easy steps, you can impress your friends and family. Let’s dive into the delicious details and bring these crispy, cheesy wings to your table!
Why I Love This Recipe
- Delicious Flavor Combination: The blend of garlic and Parmesan creates an irresistible flavor that elevates the classic chicken wing experience.
- Crispy Texture: Using a wire rack allows for optimal air circulation, ensuring every wing is perfectly crispy without the need for frying.
- Easy to Prepare: This recipe requires minimal prep time, making it a quick and convenient option for busy weeknights or game day gatherings.
- Customizable Heat: With the option to add red pepper flakes, you can easily adjust the spice level to suit your taste preferences.
Ingredients
List of Ingredients
- 2 lbs chicken wings
- 4 tablespoons extra virgin olive oil
- 6 cloves garlic, finely minced
- 1 teaspoon garlic powder
- 1 teaspoon onion powder
- 1 teaspoon smoked paprika
- ½ teaspoon freshly cracked black pepper
- ½ teaspoon sea salt
- ¾ cup finely grated Parmesan cheese
- 2 tablespoons fresh parsley, finely chopped (for garnish)
- Optional: Red pepper flakes for an extra kick
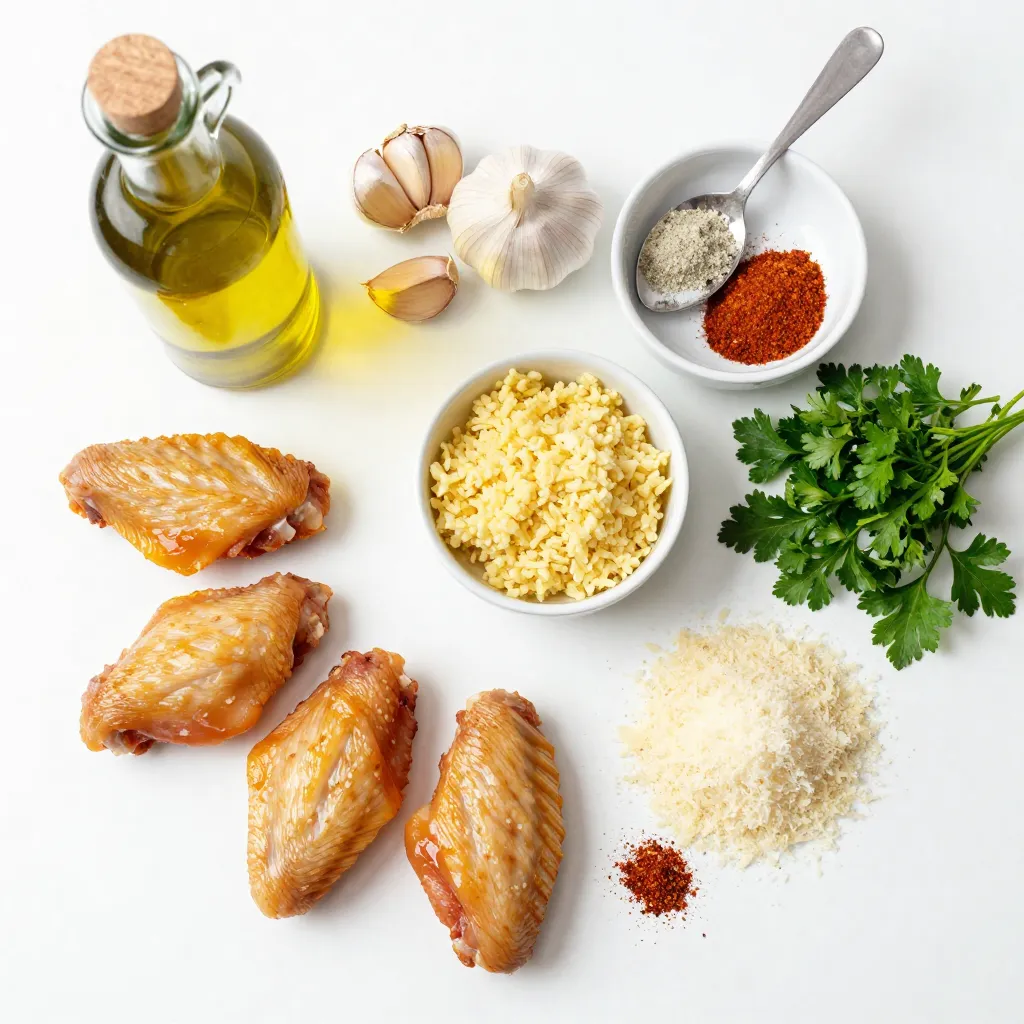
To make Baked Garlic Parmesan Chicken Wings, you need simple, fresh ingredients. Start with two pounds of chicken wings. I prefer using whole wings for the best flavor.
Next, gather your seasonings and oils. Extra virgin olive oil adds richness. Garlic is the star, with both fresh minced garlic and garlic powder enhancing the taste. Onion powder gives a sweet depth, while smoked paprika adds warmth. Don’t forget black pepper and sea salt for balance.
For the finishing touch, use finely grated Parmesan cheese. It melts beautifully and adds a salty, nutty flavor. Fresh parsley brightens the dish and adds color. If you like a little heat, sprinkle some red pepper flakes as an option.
With these ingredients on hand, you are ready to create a flavorful delight that will impress anyone who tries it!

Step-by-Step Instructions
Preheating the Oven
Start by preheating your oven to 400°F (200°C). This temperature helps the wings become crispy. Line a baking sheet with aluminum foil. This makes cleanup easy. Place a wire rack on top of the baking sheet. The rack allows hot air to flow around the wings.
Preparing the Wings
Take 2 lbs of chicken wings and use paper towels to pat them dry. This step is key for crispiness. If the wings are wet, they will steam instead of bake. Make sure they are fully dry for the best result.
Seasoning the Wings
In a large bowl, drizzle 4 tablespoons of extra virgin olive oil over the wings. Add 6 minced garlic cloves, 1 teaspoon of garlic powder, 1 teaspoon of onion powder, 1 teaspoon of smoked paprika, ½ teaspoon of black pepper, and ½ teaspoon of sea salt. Use your hands or a spatula to toss the wings well. Ensure every wing is coated with oil and spices. This mix gives the wings great flavor.
Baking the Wings
Arrange the seasoned wings in a single layer on the wire rack. Bake them in the preheated oven for 40-45 minutes. Flip the wings halfway through cooking. This step helps them cook evenly. When done, they should be golden brown and crispy.
Adding the Parmesan
Five minutes before the wings finish baking, take them out. Generously sprinkle ¾ cup of finely grated Parmesan cheese over each wing. Make sure to cover them well. Return the wings to the oven. Let the cheese melt and get slightly crispy, which takes about 5 minutes.
Garnishing and Serving
Once baking is complete, take the wings out and let them rest for about 2 minutes. Before serving, sprinkle with 2 tablespoons of fresh parsley for color. If you like heat, add red pepper flakes for extra kick. Serve the wings hot on a large platter. Enjoy with dipping sauces like ranch or blue cheese.
Tips & Tricks
Achieving Maximum Crispiness
To get your wings super crispy, follow these steps:
- Pat the chicken wings dry with paper towels. This removes moisture.
- Use a wire rack on your baking sheet. This allows air to flow around the wings.
- Bake at 400°F (200°C). This high heat helps create a crunchy texture.
- Flip the wings halfway through baking for even crisping.
Recommended Cooking Techniques
For the best results, consider these techniques:
- Always preheat your oven beforehand. This ensures the wings cook evenly.
- Use olive oil to coat the wings. This helps the seasonings stick well.
- Sprinkle Parmesan cheese near the end of baking. This gives a nice, golden layer.
Serving Suggestions and Pairings
When it’s time to serve, think about these ideas:
- Present the wings on a large platter. Add fresh parsley for color.
- Include dipping sauces like ranch or blue cheese. They add creamy contrast.
- Serve with lime or lemon wedges. Their zest balances the flavors nicely.
- Pair with a side of celery sticks for crunch and freshness.
Pro Tips
- Pat the Wings Dry: Make sure to dry the chicken wings thoroughly with paper towels before seasoning. This step is vital for achieving that crispy exterior when baked.
- Use a Wire Rack: Baking the wings on a wire rack allows hot air to circulate around them, promoting even cooking and crispiness on all sides.
- Monitor the Cheese: Keep an eye on the Parmesan cheese during the last few minutes of baking to prevent it from burning, ensuring a perfect melt and golden color.
- Flavor Variations: Experiment with different spices or marinades before baking to customize the flavor of your wings. Try adding lemon zest or different herbs for a unique twist.
Variations
Spicy Garlic Parmesan Wings
Want to spice things up? Add red pepper flakes to your seasoning mix. Red pepper flakes give the wings a nice kick. You can choose how spicy you want them. Start with half a teaspoon and adjust to taste. Mix the flakes with garlic, oil, and other seasonings. This will give your wings a bold flavor that is sure to impress.
Other Cheese Options
Parmesan is great, but you can try other cheeses too. Grated Pecorino Romano adds a salty twist. A mix of cheddar and mozzarella creates a gooey texture. You can even use a spicy cheese like pepper jack for more heat. Experiment with your favorite cheeses to find the best combo. Each cheese will bring a unique flavor to the wings.
Alternative Seasoning Blends
Get creative with your seasoning! You can make a BBQ version by adding your favorite BBQ rub. For an herb mix, try Italian seasoning or fresh herbs. If you love lemon, include lemon zest and a bit of dill. Each blend will change the taste and make your wings unique. Don’t be afraid to mix and match for new flavors.
Storage Information
Proper Storage Techniques
To keep your Baked Garlic Parmesan Chicken Wings fresh, store them in an airtight container. Let the wings cool down to room temperature first. Once cooled, place them in the container, separating layers with parchment paper. This prevents sticking and keeps them crispy. If you have extra sauce, store it in a separate container to avoid sogginess.
Reheating Instructions
When you want to enjoy the wings again, preheat your oven to 375°F (190°C). Place the wings on a baking sheet. Bake for about 10-15 minutes. This keeps them crispy and warm. You can also reheat them in an air fryer for about 5-7 minutes at 360°F (182°C). This method works great for restoring that crunchy texture.
Shelf Life Tips
These chicken wings can last in the fridge for up to 3 days. If you want to keep them longer, freeze them. They can last up to 3 months in the freezer. Make sure to wrap them tightly in plastic wrap or foil before freezing. When you’re ready to eat them, thaw in the fridge overnight before reheating.
FAQs
Can I use frozen chicken wings?
Yes, you can use frozen chicken wings. Just remember to thaw them first. Place them in the fridge overnight or soak them in cold water for an hour. This step is key for even cooking. Once thawed, follow the same steps as fresh wings. The flavors will still shine through.
How can I make these wings healthier?
To make these wings healthier, try these swaps:
- Use skinless chicken wings for less fat.
- Substitute olive oil with a lighter option, like spray oil.
- Cut down on cheese. Use half the Parmesan, or try a lower-fat version.
- Serve with a fresh veggie dip instead of creamy sauces. This adds crunch and nutrients.
What dipping sauces pair well with garlic parmesan wings?
A few great dipping sauces include:
- Ranch dressing for a creamy contrast.
- Blue cheese dressing for a bold flavor.
- Honey mustard for sweetness.
- A spicy buffalo sauce for a kick.
Experiment with these to find your favorite pairing!
In this blog post, we explored how to make delicious garlic parmesan chicken wings. We covered the ingredients needed, step-by-step baking instructions, and tips for maximum crispiness. You learned about tasty variations and proper storage. To enjoy these wings, remember to choose your seasonings wisely and try different cheese types. Whether for a party or a quiet night in, these wings are sure to please. Get ready to impress everyone with your cooking skills! Enjoy your tasty creatio

Baked Garlic Parmesan Chicken Wings
Ingredients
- 2 lbs chicken wings
- 4 tablespoons extra virgin olive oil
- 6 cloves garlic, finely minced
- 1 teaspoon garlic powder
- 1 teaspoon onion powder
- 1 teaspoon smoked paprika
- 0.5 teaspoon freshly cracked black pepper
- 0.5 teaspoon sea salt
- 0.75 cup finely grated Parmesan cheese
- 2 tablespoons fresh parsley, finely chopped (for garnish)
- 1 optional red pepper flakes for an extra kick
Instructions
- Preheat your oven to 400°F (200°C) and line a baking sheet with aluminum foil. Place a wire rack on top.
- Pat the chicken wings dry thoroughly with paper towels.
- Drizzle the olive oil over the wings and add the minced garlic, garlic powder, onion powder, smoked paprika, black pepper, and salt. Toss to coat evenly.
- Arrange the wings in a single layer on the wire rack and bake for 40-45 minutes, flipping halfway through.
- Five minutes before baking time is up, sprinkle the grated Parmesan cheese over each wing and return to the oven for 5 minutes.
- Remove the wings from the oven, let them rest for 2 minutes, and garnish with fresh parsley and red pepper flakes if desired.


![- 4 cups fresh spinach - 1 cup mixed berries - 1/2 cup feta cheese - 1/4 cup sliced almonds or walnuts - 1/4 red onion - 1 tablespoon honey - 2 tablespoons balsamic vinegar - 2 tablespoons extra virgin olive oil - Salt and pepper to taste The heart of a great Summer Berry Spinach Salad lies in its fresh ingredients. Start with 4 cups of fresh spinach. Choose vibrant, crisp leaves for the best flavor. Next, add 1 cup of mixed berries. I love using strawberries, blueberries, and raspberries together. They add sweetness and color. For creaminess, include 1/2 cup of feta cheese. Crumble it into small pieces for easy mixing. You can also try goat cheese if you prefer. Then, toss in 1/4 cup of sliced almonds or walnuts for crunch. Toasting them adds extra flavor. Finally, slice 1/4 of a red onion. Its sharpness balances the sweetness of the berries. Now, let’s move to the dressing. Combine 1 tablespoon of honey with 2 tablespoons of balsamic vinegar. This mix gives a sweet and tangy kick. Add 2 tablespoons of extra virgin olive oil for richness. Season with salt and pepper to taste. This dressing brings all the flavors together. For the full recipe, check the details above. Each ingredient plays a role in making this salad a fresh and tasty delight! - First, wash and dry the spinach. Make sure it's clean and free of dirt. - Next, add the spinach to a large mixing bowl. This is your fresh salad base. - Rinse the mixed berries under cool water. This helps keep them fresh and tasty. - Slice the strawberries if needed. Halve or quarter them to match other berries. - Gently add the berries to the bowl with the spinach. - Finely slice the red onion. Sprinkle it over the salad for a nice crunch. - In a small bowl, combine honey, balsamic vinegar, olive oil, salt, and pepper. - Whisk until the mixture is smooth. This dressing will bring the salad to life. - Carefully drizzle the dressing over the salad. Make sure every part gets a light coat. - Top with crumbled feta cheese and toasted sliced almonds or walnuts. This adds creaminess and crunch. - Gently toss the salad. Be careful not to mush the berries; you want them whole. For the full recipe, check out the vibrant Summer Berry Spinach Salad. Enjoy every bite! For this salad, I love using strawberries, blueberries, and raspberries. They add sweet flavors and vibrant colors. Choose berries that are firm and bright. Avoid any that feel squishy or have dark spots. In summer, you’ll find these berries at their best. They are fresh and full of flavor. If you can, buy them locally for the best taste. To make your salad stand out, serve it in a wide, shallow bowl. This lets the colors shine. Arrange the spinach first, then place the berries artistically on top. A sprinkle of feta cheese adds a touch of white. You can even drizzle a bit of extra dressing on top for a glossy finish. This makes the dish look fancy and appetizing. When mixing the salad, be gentle. You don’t want to squish the berries. Use your hands or two large spoons. Lift the spinach from the bottom and turn it over. This way, all the ingredients blend well. Toss just enough to coat everything with the dressing. It should look fresh and colorful, not mushy. Enjoy the beautiful mix of flavors! {{image_4}} You can change the nuts or cheese in this salad to suit your taste. If you want a creamier texture, try goat cheese instead of feta. For nuts, walnuts add a rich flavor, while pecans give a sweet crunch. You can also skip the nuts if you have a nut allergy. If you prefer different greens, kale or arugula work well. Kale adds a hearty bite, while arugula brings a peppery flavor. Both options will keep your salad fresh and exciting. While the balsamic dressing is tasty, many other dressings pair well. A lemon vinaigrette adds brightness. A poppy seed dressing can bring a sweet touch. You can also try a yogurt-based dressing for creaminess without the extra calories. You can make your dressing at home or buy it from the store. Homemade dressings let you control the flavor. Store-bought options save time and still taste great. Always check the labels for added sugars or preservatives. You can adapt this salad for fall or winter by changing the ingredients. In the fall, swap out berries for roasted apples or pears. Add some crumbled blue cheese for a bold taste. For winter, add sliced citrus fruits like oranges or grapefruits. They add a lovely color and refreshing taste during cold months. For a heartier salad, consider adding roasted butternut squash or cooked quinoa. This gives you a filling meal while keeping it seasonal and delicious. For the full recipe, click [Full Recipe]. To store leftovers, place the salad in an airtight container. This keeps it fresh and crisp. Avoid mixing the dressing in if you plan to eat it later. The dressing can make the salad soggy. Instead, store the dressing in a separate small jar. Use glass or BPA-free plastic containers. They help keep flavors intact and prevent leaks. If you have extra berries or nuts, store them in separate bags. This way, they stay fresh for longer. Serve the salad within two hours after making it. This keeps the greens bright and the berries juicy. If you need to hold it longer, store it in the fridge. Just remember to add the dressing right before serving. To keep ingredients fresh, cover the salad tightly. Use plastic wrap or a lid. You can also place a damp paper towel on top. This helps maintain moisture without making everything soggy. You cannot freeze the entire salad. Freezing will ruin the texture of the spinach and berries. However, you can freeze some components. For example, freeze extra berries for smoothies later. To freeze components separately, wash and dry the berries first. Spread them out on a baking sheet and freeze until solid. After that, transfer them to a freezer bag. This way, you can enjoy them later without losing flavor. You can easily add protein to your salad. Here are some great ideas: - Grilled chicken, sliced thin - Shrimp, cooked and peeled - Quinoa, cooked and cooled - Chickpeas, drained and rinsed - Hard-boiled eggs, sliced or quartered These additions make the salad heartier. They also give you extra nutrients. Adding protein turns a light dish into a full meal. Yes, you can prepare this salad ahead of time. Here are some tips for meal planning: - Wash and dry the spinach one day before serving. - Store it in a sealed bag with a paper towel to absorb moisture. - Prepare the berries and onion. Keep them separate in the fridge. - Make the dressing a day ahead and store it in a jar. Just mix everything together when you're ready to eat. This keeps the salad fresh and crunchy. This salad is packed with nutrition. Here are some key benefits: - Spinach is rich in vitamins A, C, and K. - Berries are full of antioxidants, which help fight free radicals. - Feta cheese adds calcium and protein. - Nuts provide healthy fats and fiber. Eating this salad supports good health. It boosts your energy and keeps you feeling full. Get creative with your toppings! Here are some fun ideas: - Croutons for added crunch - Avocado slices for creaminess - Sunflower seeds for a nutty flavor - Fresh herbs like basil or mint for a fresh twist - Dried fruits like cranberries or apricots for sweetness Feel free to mix and match. You can make each salad unique! This salad is best when fresh. Here’s how to store it: - Keep it in the fridge for up to two days. - Store the dressing separately to prevent sogginess. - Use an airtight container for the salad. If you want to keep it longer, avoid adding wet ingredients. This helps maintain freshness. This blog post covers how to make a delicious Summer Berry Spinach Salad. We explored the fresh ingredients, simple steps, and helpful tips for making it special. You learned how to pick the best berries, create an easy dressing, and suggest variations. Remember, this salad is not just tasty; it's also packed with nutrients. Whether you serve it fresh or store leftovers, it's a dish you can enjoy many ways. Try it out and make it your own!](https://dishtreats.com/wp-content/uploads/2025/07/5f6f3c08-a552-4e10-ab55-3c96ca32b52c-768x768.webp)


![- 1 can (15 oz) black beans, rinsed and well-drained - 1 cup corn kernels (fresh, frozen, or canned) - 1 red bell pepper, diced - 1/2 cup red onion, finely chopped - 1 jalapeño pepper, deseeded and minced - 1 ripe avocado, diced - 1/4 cup fresh cilantro, chopped - Juice of 2 limes - 3 tablespoons extra-virgin olive oil - 1 teaspoon ground cumin - 1 teaspoon smoked paprika - Salt and freshly ground pepper to taste I love using black beans in this salad. They add protein and fiber. They also make the dish filling. Corn brings a sweet crunch. It pairs well with the beans. The red bell pepper adds color and a slight sweetness. Red onion gives a sharp taste that balances the flavors. For spice, I use jalapeño. It adds heat without being too strong. If you want less spice, remove the seeds or skip the jalapeño. The ripe avocado adds creaminess. It makes every bite smooth and rich. Fresh cilantro brings a bright, fresh taste. The lime juice adds acidity. It brightens the salad and keeps it fresh. Olive oil adds healthy fats. The ground cumin and smoked paprika give depth. These spices add warmth and a hint of smokiness. This salad is not just tasty; it's also nutritious. The black beans are high in protein and fiber. They support digestion and keep you full longer. The corn, bell pepper, and avocado provide key vitamins. They help keep your body healthy. You can find the Full Recipe for this salad at the end. Enjoy making this colorful dish and feel good about what you eat! Start by mixing the base ingredients in a large bowl. Add the black beans, corn, diced red bell pepper, chopped red onion, and minced jalapeño. Stir gently to combine everything without mashing the beans. This keeps the texture nice. Next, gently fold in the diced avocado and chopped cilantro. Be careful here! You want those avocado pieces to stay whole. They add a creamy texture to the salad, which is delightful. Now, let’s make the dressing. In a small bowl, whisk together the lime juice, olive oil, ground cumin, and smoked paprika. Add salt and pepper to taste. This dressing adds zing and flavor to the salad. To achieve the ideal consistency, ensure that you mix well. You want it to be smooth but not too runny. If it seems thick, add a bit more olive oil or lime juice. Drizzle the dressing over your salad mixture. Gently toss everything together until it’s evenly coated. This step is important! It ensures every bite is full of flavor. Allow the salad to rest for about 10-15 minutes at room temperature. This helps the flavors meld beautifully. Trust me, the wait is worth it! You can check the [Full Recipe] for more details. To make your Southwest Black Bean Salad pop, add more spices or herbs. You can try adding a pinch of cayenne pepper or a dash of chili powder for heat. Fresh herbs like parsley or oregano can also bring a nice twist. If you want to switch things up, use different beans, like pinto or kidney beans. Each type adds its own flavor and texture, making your salad unique. When serving this salad, think about how it looks. A large, colorful bowl makes for a great centerpiece. You can also layer the salad in clear jars for a fun and stylish option. This way, guests can see all the vibrant colors. It’s perfect for parties or picnics. Plus, it’s easy for guests to grab their own jar! One mistake to watch out for is overmixing the salad. This can mash the beans and ruin the texture. Gently fold the ingredients instead. Another common issue is using overly ripe ingredients, especially the avocado. If the avocado is too soft, it can break apart and make the salad mushy. Pick firm, ripe avocados for the best results. {{image_4}} You can change the base of your Southwest black bean salad. Adding grilled chicken or tofu makes it heartier. Both protein options give you energy. You can also include more veggies. Cucumbers add crunch, while tomatoes bring sweetness. These changes keep the salad fresh and exciting. The dressing can change the whole taste of your salad. You can try different vinaigrettes, like balsamic or honey mustard. Each adds its own twist. If you prefer a creamier texture, go for a yogurt-based dressing. This will make the salad rich and smooth. This salad pairs well with many dishes. You can serve it with tacos or burritos for a complete meal. It also works great as a side with grilled meats. The bright flavors complement spicy foods nicely. For a fun touch, scoop the salad into taco shells. It’s a delicious way to enjoy this recipe and impress your guests. For the Full Recipe, check here: [Full Recipe]. To keep your Southwest black bean salad fresh, store it in an airtight container. This helps to lock in flavors and keep ingredients crisp. The salad lasts about 3 to 5 days in the fridge. It’s best to eat it within the first few days for optimal taste. You can freeze this salad, but it’s best to freeze the ingredients separately. Black beans and corn freeze well, but the avocado and fresh herbs do not. If you want to enjoy the salad later, freeze black beans and corn in one bag. Store diced avocado and herbs in another. This way, you can mix them fresh when you’re ready to eat. To reheat the salad, gently warm the beans and corn in a pan over low heat. Avoid using high heat, as it can mush the beans. After reheating, check the flavors. You might need to add more lime juice or salt to bring back the taste. Enjoy your meal ready and full of flavor! Yes, you can make this salad ahead of time. It tastes even better after resting. To prep in advance, chop all your veggies and store them in a bowl. Keep the dressing in a separate container. When you are ready to eat, mix everything together. This keeps the salad fresh and crunchy. This salad works great for meal prepping! Portion the salad into containers. You can add the dressing just before eating. This way, the salad stays fresh throughout the week. Use airtight containers to keep everything crisp. Black beans are packed with nutrients. They are high in protein and fiber. This helps you feel full longer and aids digestion. They also contain vitamins and minerals like iron, magnesium, and folate. Adding black beans to your diet can support heart health and help maintain stable blood sugar levels. To add heat, increase the amount of jalapeño. You can also add diced serrano peppers for extra spice. A dash of hot sauce or cayenne pepper can kick it up, too. Taste as you go to find your perfect spice level. Fresh ingredients often taste brighter and have better texture. They can add more crunch to your salad. Canned ingredients are convenient and save time. They’re also usually less expensive. Be sure to rinse canned beans to remove extra salt. Choose what's best for your schedule and taste. For the complete recipe, check out the [Full Recipe]. This blog post covered how to make a delicious Southwest Black Bean Salad. We discussed the key ingredients, nutritional facts, and tasty variations. You learned the step-by-step process, from mixing to serving. We also shared tips for storage and answered common questions. Enjoy making this salad for your next meal or gathering. Remember, it’s easy to customize to suit your taste. With the right ingredients and a few tweaks, you'll have a healthy dish that everyone loves. Get cooking and enjoy!](https://dishtreats.com/wp-content/uploads/2025/07/9afc72a8-6225-467a-bc64-ad0cd532be46-768x768.webp)

