Baked Cinnamon Apple Chips Crunchy and Delicious Snack
. First, preheat your oven to 225°F (110°C). This low heat helps the apples dry out slowly. Next, line two baking sheets with parchment paper. This step keeps the chips from sticking. Now it’s time to wash and core the apples. Rinse them well under cold water. Use a sharp knife or a corer to remove the seeds and the core. The best apples for this recipe are Fuji or Honeycrisp. They have a perfect balance of sweet and tart. Slice the apples into thin rounds. Aim for about 1/8 inch thick. A mandoline slicer makes this easy, but a sharp knife works too. Consistent thickness ensures even baking and crispiness. To keep your apple slices from browning, you will need lemon juice. Toss the apple slices in a bowl with one teaspoon of lemon juice. This step adds flavor and helps maintain their color. In a separate bowl, combine one tablespoon of ground cinnamon, one tablespoon of sugar (if you want it sweeter), and a pinch of salt. Mix this well. Now, sprinkle this cinnamon-sugar mixture evenly over the coated apple slices. Toss gently, ensuring each slice is coated without breaking them. Arrange the apple slices in a single layer on your prepared baking sheets. Make sure the slices do not overlap. This spacing allows them to bake evenly and become crispy. Place the baking sheets in the preheated oven. Bake the apple slices for about 1.5 to 2 hours. Halfway through baking, turn the slices. This will help them cook evenly. Keep an eye on them towards the end. You want them to be golden and crisp, not burnt. Once done, remove the sheets from the oven. Let the apple chips cool completely on the sheets. They will get even crispier as they cool. For the full recipe, check out the earlier sections. Enjoy making these tasty baked cinnamon apple chips! To get that perfect crunch in your baked cinnamon apple chips, thickness matters. Slice your apples about 1/8 inch thick. If they're too thick, they won’t crisp well. If they’re too thin, they might burn. Use a sharp knife or a mandoline for even slices. When it comes to baking, spacing is key. Place the apple slices on your baking sheets in a single layer. Make sure they don’t touch or overlap. This allows hot air to circulate and helps them bake evenly. To keep your baked apple chips fresh, store them in an airtight container. A glass jar or a resealable bag works great. Keep them in a cool, dry place. Storing them this way can help them last up to two weeks. Look for signs of freshness. If your chips are still crisp and fragrant, they’re good to snack on. If they start to feel soft or lose their crunch, it's time to toss them. Baked cinnamon apple chips make a great snack on their own. You can also serve them with dips like peanut butter or yogurt. They add a nice crunch to salads or granola bowls too. For a fun twist, try pairing them with cheese. The sweet and savory mix is delightful. You can also serve them alongside other snacks like popcorn or nuts for a tasty snack platter. Whether you enjoy them solo or with friends, these chips never fail to please! {{image_4}} You can have fun with flavors! Try different spices like vanilla or ginger. They add a unique twist to your apple chips. You can also adjust the sweetness. If you want a sweeter chip, add more sugar. For less sweetness, skip the sugar. You can even use honey or maple syrup instead. This way, you create a snack that fits your taste perfectly. Different apples give varied tastes and textures. Fuji and Honeycrisp work great, but don’t stop there! You can try Granny Smith for a tart flavor. Gala apples are sweeter and softer. Each type changes the final result. Experimenting with apple varieties keeps it exciting and tasty. Want a different texture? Dehydrating apples is a great choice. You can use a food dehydrator for an even, dry result. It takes longer, but the crunch is worth it. If you don’t have a dehydrator, your oven works too! Just lower the temperature and keep an eye on them. By adjusting the method, you can find your favorite way to enjoy these apple chips. For the full recipe, check the section above. Apples are a great snack. They are full of vitamins and fiber. One medium apple has about 95 calories and 4 grams of fiber. This helps keep your heart healthy. When you bake apple chips, you keep many of these benefits. Baked apple chips are better than store-bought snacks. Many snacks are full of added sugars and fats. Baked apple chips have no preservatives and you control the ingredients. This makes them a healthier choice for your family. A serving of baked apple chips has about 50-60 calories. This is much lower than many processed snacks. In fact, chips and cookies can have more than double that amount. You can enjoy a tasty snack without feeling guilty. Making your own snacks at home is better. You avoid unhealthy ingredients. You also save money. Homemade baked apple chips cost less than store-bought options. Plus, they taste fresher and crispier. Baked cinnamon apple chips are gluten-free and vegan. This makes them a great choice for many diets. You can enjoy them without worry. If you need to cut sugar, you can skip the optional sugar. You can also use natural sweeteners like honey or agave syrup if you want a sweet touch. Adjusting the recipe is easy to fit your needs. Enjoy these healthy chips any time! To make your apple chips crispy, focus on a few key factors. First, slice the apples very thin, about 1/8 inch thick. This helps them bake evenly. Second, arrange the slices in a single layer on your baking sheet. Avoid overlapping them to allow hot air to circulate. Lastly, bake at a low temperature of 225°F (110°C). This slow baking helps remove moisture, resulting in a perfect crispy texture. Yes, you can use other fruits to make chips. Pears and peaches work well and have great flavors. Bananas can also make tasty chips but will need a bit more care. Slice them thin and watch closely while they bake. You can even mix fruits for a fun variety! Baked apple chips can last up to a week when stored properly. Keep them in an airtight container at room temperature. If you notice any signs of softness, they may not be fresh anymore. For the best crunch, enjoy them sooner rather than later. Using sugar is not necessary for this recipe. If you prefer, you can leave it out. The cinnamon and apple flavors are sweet enough on their own. You might also try alternatives like honey or maple syrup for a different taste. Just remember, these can change the texture a bit. Yes, you can freeze baked apple chips! Place them in a freezer-safe bag or container. When you're ready to eat them, let them thaw at room temperature. You can also re-crisp them in the oven for a few minutes. Enjoy these tasty snacks later without losing their flavor! For the full recipe, check out the previous sections. Baked cinnamon apple chips are easy to make and taste great. You need just a few ingredients, like apples and spices. The step-by-step guide ensures perfect results every time. Don’t forget the tips for storage and serving. You can even try different flavors and apple types. These homemade snacks are healthier than store-bought options. Enjoy them anytime as a delicious treat. Get ready to impress yourself and others with your apple chips! Happy baking!](https://dishtreats.com/wp-content/uploads/2025/07/23051670-7243-464d-be8c-81eac2c3effc.webp)
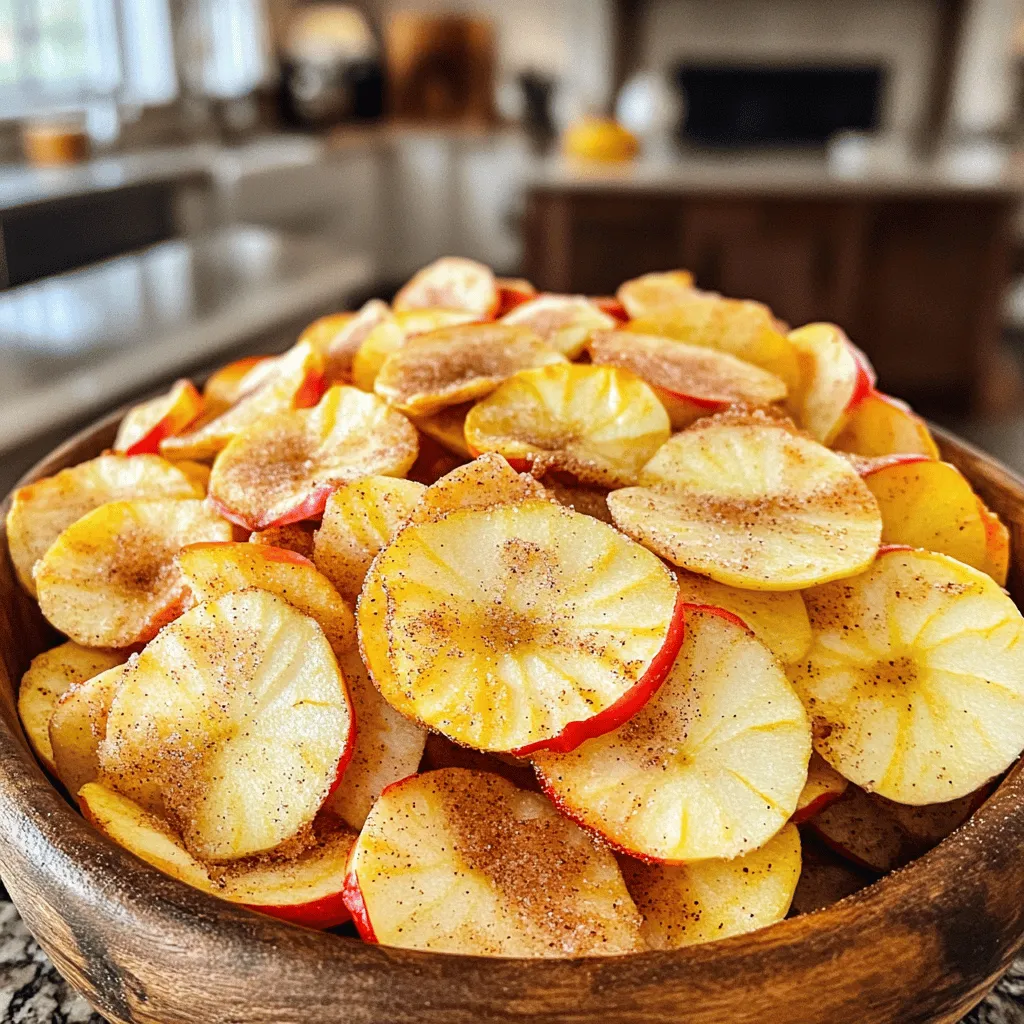
Looking for a tasty snack that’s easy to make and good for you? Baked cinnamon apple chips are a perfect choice! They’re crunchy, sweet, and fill your home with a warm aroma. Plus, you only need a few simple ingredients to whip them up. Read on to discover how to create this delicious treat, along with tips, tricks, and health benefits that make them a must-try!
Ingredients
Main Ingredients
- 3 medium-sized apples (Fuji or Honeycrisp)
- 1 tablespoon ground cinnamon
- 1 tablespoon sugar (optional)
- 1 teaspoon lemon juice
- A pinch of salt
The base of this recipe is simple but key. I love using Fuji or Honeycrisp apples because they have the right mix of sweetness and crunch. You can also add a bit of lemon juice to keep the apples bright and fresh. If you want more sweetness, sugar is an option, but you can skip it if you prefer less sugar. Just a pinch of salt brings out the apple flavor.
Optional Ingredients
- Other spices (like nutmeg or allspice)
- Alternative sweeteners (like honey or maple syrup)
Feel free to get creative! You can add other spices like nutmeg or allspice for extra flavor. If you want a different sweetener, honey or maple syrup works well too. These choices let you customize your apple chips to match your taste.
Step-by-Step Instructions
Preparation
First, preheat your oven to 225°F (110°C). This low heat helps the apples dry out slowly. Next, line two baking sheets with parchment paper. This step keeps the chips from sticking.
Now it’s time to wash and core the apples. Rinse them well under cold water. Use a sharp knife or a corer to remove the seeds and the core. The best apples for this recipe are Fuji or Honeycrisp. They have a perfect balance of sweet and tart.
Slice the apples into thin rounds. Aim for about 1/8 inch thick. A mandoline slicer makes this easy, but a sharp knife works too. Consistent thickness ensures even baking and crispiness.
Mixing and Coating
To keep your apple slices from browning, you will need lemon juice. Toss the apple slices in a bowl with one teaspoon of lemon juice. This step adds flavor and helps maintain their color.
In a separate bowl, combine one tablespoon of ground cinnamon, one tablespoon of sugar (if you want it sweeter), and a pinch of salt. Mix this well. Now, sprinkle this cinnamon-sugar mixture evenly over the coated apple slices. Toss gently, ensuring each slice is coated without breaking them.
Baking
Arrange the apple slices in a single layer on your prepared baking sheets. Make sure the slices do not overlap. This spacing allows them to bake evenly and become crispy.
Place the baking sheets in the preheated oven. Bake the apple slices for about 1.5 to 2 hours. Halfway through baking, turn the slices. This will help them cook evenly.
Keep an eye on them towards the end. You want them to be golden and crisp, not burnt. Once done, remove the sheets from the oven. Let the apple chips cool completely on the sheets. They will get even crispier as they cool.Enjoy making these tasty baked cinnamon apple chips!
Tips & Tricks
Achieving Perfect Crispiness
To get that perfect crunch in your baked cinnamon apple chips, thickness matters. Slice your apples about 1/8 inch thick. If they’re too thick, they won’t crisp well. If they’re too thin, they might burn. Use a sharp knife or a mandoline for even slices.
When it comes to baking, spacing is key. Place the apple slices on your baking sheets in a single layer. Make sure they don’t touch or overlap. This allows hot air to circulate and helps them bake evenly.
Storage Tips
To keep your baked apple chips fresh, store them in an airtight container. A glass jar or a resealable bag works great. Keep them in a cool, dry place. Storing them this way can help them last up to two weeks.
Look for signs of freshness. If your chips are still crisp and fragrant, they’re good to snack on. If they start to feel soft or lose their crunch, it’s time to toss them.
Serving Suggestions
Baked cinnamon apple chips make a great snack on their own. You can also serve them with dips like peanut butter or yogurt. They add a nice crunch to salads or granola bowls too.
For a fun twist, try pairing them with cheese. The sweet and savory mix is delightful. You can also serve them alongside other snacks like popcorn or nuts for a tasty snack platter. Whether you enjoy them solo or with friends, these chips never fail to please!

Variations
Flavor Variations
You can have fun with flavors! Try different spices like vanilla or ginger. They add a unique twist to your apple chips. You can also adjust the sweetness. If you want a sweeter chip, add more sugar. For less sweetness, skip the sugar. You can even use honey or maple syrup instead. This way, you create a snack that fits your taste perfectly.
Using Different Types of Apples
Different apples give varied tastes and textures. Fuji and Honeycrisp work great, but don’t stop there! You can try Granny Smith for a tart flavor. Gala apples are sweeter and softer. Each type changes the final result. Experimenting with apple varieties keeps it exciting and tasty.
Dehydrating Options
Want a different texture? Dehydrating apples is a great choice. You can use a food dehydrator for an even, dry result. It takes longer, but the crunch is worth it. If you don’t have a dehydrator, your oven works too! Just lower the temperature and keep an eye on them. By adjusting the method, you can find your favorite way to enjoy these apple chips.
Health Benefits
Nutritional Value of Apple Chips
Apples are a great snack. They are full of vitamins and fiber. One medium apple has about 95 calories and 4 grams of fiber. This helps keep your heart healthy. When you bake apple chips, you keep many of these benefits.
Baked apple chips are better than store-bought snacks. Many snacks are full of added sugars and fats. Baked apple chips have no preservatives and you control the ingredients. This makes them a healthier choice for your family.
Caloric Information
A serving of baked apple chips has about 50-60 calories. This is much lower than many processed snacks. In fact, chips and cookies can have more than double that amount. You can enjoy a tasty snack without feeling guilty.
Making your own snacks at home is better. You avoid unhealthy ingredients. You also save money. Homemade baked apple chips cost less than store-bought options. Plus, they taste fresher and crispier.
Dietary Considerations
Baked cinnamon apple chips are gluten-free and vegan. This makes them a great choice for many diets. You can enjoy them without worry.
If you need to cut sugar, you can skip the optional sugar. You can also use natural sweeteners like honey or agave syrup if you want a sweet touch. Adjusting the recipe is easy to fit your needs. Enjoy these healthy chips any time!
FAQs
How do I make apple chips crispy?
To make your apple chips crispy, focus on a few key factors. First, slice the apples very thin, about 1/8 inch thick. This helps them bake evenly. Second, arrange the slices in a single layer on your baking sheet. Avoid overlapping them to allow hot air to circulate. Lastly, bake at a low temperature of 225°F (110°C). This slow baking helps remove moisture, resulting in a perfect crispy texture.
Can I use other fruits for this recipe?
Yes, you can use other fruits to make chips. Pears and peaches work well and have great flavors. Bananas can also make tasty chips but will need a bit more care. Slice them thin and watch closely while they bake. You can even mix fruits for a fun variety!
How long do baked apple chips last?
Baked apple chips can last up to a week when stored properly. Keep them in an airtight container at room temperature. If you notice any signs of softness, they may not be fresh anymore. For the best crunch, enjoy them sooner rather than later.
Is it necessary to use sugar?
Using sugar is not necessary for this recipe. If you prefer, you can leave it out. The cinnamon and apple flavors are sweet enough on their own. You might also try alternatives like honey or maple syrup for a different taste. Just remember, these can change the texture a bit.
Can I freeze baked apple chips?
Yes, you can freeze baked apple chips! Place them in a freezer-safe bag or container. When you’re ready to eat them, let them thaw at room temperature. You can also re-crisp them in the oven for a few minutes. Enjoy these tasty snacks later without losing their flavor!
Baked cinnamon apple chips are easy to make and taste great. You need just a few ingredients, like apples and spices. The step-by-step guide ensures perfect results every time. Don’t forget the tips for storage and serving. You can even try different flavors and apple types.
These homemade snacks are healthier than store-bought options. Enjoy them anytime as a delicious treat. Get ready to impress yourself and others with your apple chips! Happy baking!
. First, preheat your oven to 225°F (110°C). This low heat helps the apples dry out slowly. Next, line two baking sheets with parchment paper. This step keeps the chips from sticking. Now it’s time to wash and core the apples. Rinse them well under cold water. Use a sharp knife or a corer to remove the seeds and the core. The best apples for this recipe are Fuji or Honeycrisp. They have a perfect balance of sweet and tart. Slice the apples into thin rounds. Aim for about 1/8 inch thick. A mandoline slicer makes this easy, but a sharp knife works too. Consistent thickness ensures even baking and crispiness. To keep your apple slices from browning, you will need lemon juice. Toss the apple slices in a bowl with one teaspoon of lemon juice. This step adds flavor and helps maintain their color. In a separate bowl, combine one tablespoon of ground cinnamon, one tablespoon of sugar (if you want it sweeter), and a pinch of salt. Mix this well. Now, sprinkle this cinnamon-sugar mixture evenly over the coated apple slices. Toss gently, ensuring each slice is coated without breaking them. Arrange the apple slices in a single layer on your prepared baking sheets. Make sure the slices do not overlap. This spacing allows them to bake evenly and become crispy. Place the baking sheets in the preheated oven. Bake the apple slices for about 1.5 to 2 hours. Halfway through baking, turn the slices. This will help them cook evenly. Keep an eye on them towards the end. You want them to be golden and crisp, not burnt. Once done, remove the sheets from the oven. Let the apple chips cool completely on the sheets. They will get even crispier as they cool. For the full recipe, check out the earlier sections. Enjoy making these tasty baked cinnamon apple chips! To get that perfect crunch in your baked cinnamon apple chips, thickness matters. Slice your apples about 1/8 inch thick. If they're too thick, they won’t crisp well. If they’re too thin, they might burn. Use a sharp knife or a mandoline for even slices. When it comes to baking, spacing is key. Place the apple slices on your baking sheets in a single layer. Make sure they don’t touch or overlap. This allows hot air to circulate and helps them bake evenly. To keep your baked apple chips fresh, store them in an airtight container. A glass jar or a resealable bag works great. Keep them in a cool, dry place. Storing them this way can help them last up to two weeks. Look for signs of freshness. If your chips are still crisp and fragrant, they’re good to snack on. If they start to feel soft or lose their crunch, it's time to toss them. Baked cinnamon apple chips make a great snack on their own. You can also serve them with dips like peanut butter or yogurt. They add a nice crunch to salads or granola bowls too. For a fun twist, try pairing them with cheese. The sweet and savory mix is delightful. You can also serve them alongside other snacks like popcorn or nuts for a tasty snack platter. Whether you enjoy them solo or with friends, these chips never fail to please! {{image_4}} You can have fun with flavors! Try different spices like vanilla or ginger. They add a unique twist to your apple chips. You can also adjust the sweetness. If you want a sweeter chip, add more sugar. For less sweetness, skip the sugar. You can even use honey or maple syrup instead. This way, you create a snack that fits your taste perfectly. Different apples give varied tastes and textures. Fuji and Honeycrisp work great, but don’t stop there! You can try Granny Smith for a tart flavor. Gala apples are sweeter and softer. Each type changes the final result. Experimenting with apple varieties keeps it exciting and tasty. Want a different texture? Dehydrating apples is a great choice. You can use a food dehydrator for an even, dry result. It takes longer, but the crunch is worth it. If you don’t have a dehydrator, your oven works too! Just lower the temperature and keep an eye on them. By adjusting the method, you can find your favorite way to enjoy these apple chips. For the full recipe, check the section above. Apples are a great snack. They are full of vitamins and fiber. One medium apple has about 95 calories and 4 grams of fiber. This helps keep your heart healthy. When you bake apple chips, you keep many of these benefits. Baked apple chips are better than store-bought snacks. Many snacks are full of added sugars and fats. Baked apple chips have no preservatives and you control the ingredients. This makes them a healthier choice for your family. A serving of baked apple chips has about 50-60 calories. This is much lower than many processed snacks. In fact, chips and cookies can have more than double that amount. You can enjoy a tasty snack without feeling guilty. Making your own snacks at home is better. You avoid unhealthy ingredients. You also save money. Homemade baked apple chips cost less than store-bought options. Plus, they taste fresher and crispier. Baked cinnamon apple chips are gluten-free and vegan. This makes them a great choice for many diets. You can enjoy them without worry. If you need to cut sugar, you can skip the optional sugar. You can also use natural sweeteners like honey or agave syrup if you want a sweet touch. Adjusting the recipe is easy to fit your needs. Enjoy these healthy chips any time! To make your apple chips crispy, focus on a few key factors. First, slice the apples very thin, about 1/8 inch thick. This helps them bake evenly. Second, arrange the slices in a single layer on your baking sheet. Avoid overlapping them to allow hot air to circulate. Lastly, bake at a low temperature of 225°F (110°C). This slow baking helps remove moisture, resulting in a perfect crispy texture. Yes, you can use other fruits to make chips. Pears and peaches work well and have great flavors. Bananas can also make tasty chips but will need a bit more care. Slice them thin and watch closely while they bake. You can even mix fruits for a fun variety! Baked apple chips can last up to a week when stored properly. Keep them in an airtight container at room temperature. If you notice any signs of softness, they may not be fresh anymore. For the best crunch, enjoy them sooner rather than later. Using sugar is not necessary for this recipe. If you prefer, you can leave it out. The cinnamon and apple flavors are sweet enough on their own. You might also try alternatives like honey or maple syrup for a different taste. Just remember, these can change the texture a bit. Yes, you can freeze baked apple chips! Place them in a freezer-safe bag or container. When you're ready to eat them, let them thaw at room temperature. You can also re-crisp them in the oven for a few minutes. Enjoy these tasty snacks later without losing their flavor! For the full recipe, check out the previous sections. Baked cinnamon apple chips are easy to make and taste great. You need just a few ingredients, like apples and spices. The step-by-step guide ensures perfect results every time. Don’t forget the tips for storage and serving. You can even try different flavors and apple types. These homemade snacks are healthier than store-bought options. Enjoy them anytime as a delicious treat. Get ready to impress yourself and others with your apple chips! Happy baking!](https://dishtreats.com/wp-content/uploads/2025/07/23051670-7243-464d-be8c-81eac2c3effc-300x300.webp)


![- 2 grilled chicken breasts, shredded - 1 cup BBQ sauce (choice of homemade or your favorite store-bought) - 4 cups mixed greens (combination of spinach, arugula, and romaine) - 1 cup cherry tomatoes, halved - 1 cup corn (freshly cooked, canned, or frozen) - 1 ripe avocado, diced - ½ cup red onion, finely sliced - ½ cup shredded cheddar cheese - ¼ cup fresh cilantro, chopped (optional for garnish) - Salt and freshly ground black pepper, to taste - Tortilla chips, for serving on the side Gather these ingredients before you start cooking. Grilled chicken gives a great flavor. You can use any BBQ sauce you like. If you want homemade sauce, that works too! The salad greens add crunch and freshness. Cherry tomatoes and corn give sweetness. Avocado adds creaminess. Red onion gives a nice bite. Shredded cheese makes everything richer. The cilantro is optional, but it adds a nice touch. Finally, don’t forget the tortilla chips for a fun crunch on the side. This combination makes for a bright, colorful, and tasty BBQ chicken salad bowl. For the complete recipe, follow the steps provided in the article. First, shred your grilled chicken breasts. Place the chicken in a medium bowl. Next, pour in your BBQ sauce. You can use homemade sauce or your favorite store-bought kind. Mix it well. Make sure every piece of chicken gets coated with the sauce. This step is key to getting great flavor. After mixing, set the chicken aside. Let it sit for a few minutes. This allows the flavors to meld together. Grab a large salad bowl for this part. Start by adding your mixed greens, which can include spinach, arugula, and romaine. Next, toss in the halved cherry tomatoes, corn, and sliced red onion. Use salad tongs or your hands to mix the greens and veggies. You want everything to be evenly distributed. Now, gently add the diced avocado. Take care to fold it in without mashing it. This keeps the avocado pieces intact and adds a creamy texture. Now it’s time for the fun part! Divide your colorful salad mixture into individual serving bowls. This makes for a beautiful display. On top of each bowl, add a generous scoop of the BBQ chicken. Finish each bowl with a sprinkle of shredded cheddar cheese. This adds richness and flavor. If you like, you can also garnish with fresh cilantro. This step gives a nice touch. Serve your bowls with tortilla chips on the side. They add a satisfying crunch to the meal. For the full recipe, check out the earlier section. Grilling chicken gives it a smoky flavor. This method adds a nice char. Baking chicken is easier and keeps it juicy. Choose what fits your time and setup. For great BBQ flavor, marinate the chicken overnight. This helps the sauce soak in well. Boost your BBQ sauce with spices. Try adding garlic powder, onion powder, or smoked paprika. Fresh herbs like oregano or thyme can also work wonders. If you want cheese alternatives, try feta or goat cheese. Both add a tangy kick to your salad. Layer your salad ingredients for a beautiful look. Start with greens, then add the chicken. Place colorful toppings like tomatoes and corn on top. Use bright bowls to make the meal pop. Vibrant tortilla chips add a fun touch and great crunch. For the full recipe, check back to the beginning! {{image_4}} You can make BBQ chicken salad bowls even more fun by swapping ingredients. Instead of grilled chicken, try using pulled pork or even tofu for a vegetarian option. These proteins still soak up that yummy BBQ flavor. For salad greens, don't feel stuck with just one type. You can mix in kale, romaine, or even baby spinach. Each green adds a new taste and texture. You might also consider adding different vegetables like bell peppers or cucumbers. They can add a nice crunch and freshness to your bowls. While BBQ sauce is a star, you can explore other dressings too. Ranch dressing gives a creamy twist. A tangy vinaigrette can make the salad lighter. Try mixing BBQ sauce with ranch for a unique blend. Don't hesitate to play with BBQ sauce flavors. You could use a spicy version for a kick or a honey BBQ for sweetness. Each type creates a new experience every time you make this dish. When serving your BBQ chicken salad bowls, think about sides that go well. Cornbread or sweet potato fries are great options. They can balance the salad's freshness with some warmth. Get creative with your bowls. Use large lettuce leaves as edible bowls or even hollowed-out bell peppers. This makes your meal fun and different. Plus, it adds color and excitement to your table. For more ideas, check out the Full Recipe to get inspired on how to mix things up! To keep your BBQ chicken salad fresh, store it in the fridge. Use airtight containers. This helps keep the flavors and textures intact. You can also separate the chicken from the salad if you prefer. For reheating BBQ chicken, place it in a microwave-safe dish. Heat it for short intervals, about 30 seconds at a time. Stir it in between to ensure even heating. You want it warm, not hot, to keep the chicken juicy. You can safely eat your prepared salad for up to three days. After that, the greens may wilt and lose their crunch. If you want to keep it longer, consider freezing some components. You can freeze the BBQ chicken for up to three months. Just make sure to package it well in freezer bags. The salad greens and toppings should stay in the fridge, as freezing changes their texture. For a full recipe on how to make this delicious dish, check the [Full Recipe]. It takes about 15 minutes to prep and 15 minutes to cook. So, in total, you’ll need around 30 minutes. This quick time makes it perfect for busy days. Yes, you can prepare this salad ahead of time! Just keep the salad and chicken separate until you’re ready to eat. This way, the greens stay fresh and crisp. You can store the chicken in the fridge for up to three days. When you are ready, mix them together for a tasty meal. If you want to swap out BBQ sauce, you can try teriyaki sauce for a sweet twist. Ranch dressing also works well if you prefer something creamy. Each option gives a different flavor, making your salad fun and unique. To make this recipe gluten-free, choose a gluten-free BBQ sauce. Many brands offer tasty options. Also, ensure your tortilla chips are gluten-free. This way, you can enjoy this dish without worry! This blog post detailed how to create tasty BBQ chicken salad bowls. You learned about key ingredients, from grilled chicken to colorful salad greens. We discussed step-by-step instructions for preparing and assembling the salad, along with cool tips for flavor and presentation. You also discovered variations for ingredients, sauces, and serving suggestions. Now, you can enjoy these bowls at home. Try new flavors and enjoy your meals. With simple swaps, your salad will always be fresh and fun.](https://dishtreats.com/wp-content/uploads/2025/06/ab007e5c-1328-4456-8678-35604ca2185e-768x768.webp)
![The Sun-Dried Tomato Chickpea Salad is simple to make and full of flavor. Here’s what you need: - 1 can (15 oz) chickpeas, thoroughly drained and rinsed - 1/2 cup sun-dried tomatoes, roughly chopped - 1/4 cup red onion, finely diced - 1/2 cucumber, peeled and diced - 1/4 cup feta cheese, crumbled into small pieces - 2 tablespoons fresh parsley, finely chopped - 2 tablespoons extra virgin olive oil - 1 tablespoon freshly squeezed lemon juice - 1 teaspoon dried oregano - Salt and freshly ground black pepper, to taste This mix of ingredients creates a bright, fresh dish. Chickpeas add protein and fiber. Sun-dried tomatoes give a sweet and tangy taste. The red onion adds a sharp bite, while cucumber brings crunch. Feta cheese adds creaminess to the salad. Fresh parsley brightens the flavors. Make sure to use high-quality extra virgin olive oil for the best taste. Fresh lemon juice adds a zesty kick. Dried oregano brings an earthy flavor that ties everything together. Adjust salt and pepper to your liking for a perfect balance. For the full recipe, follow the steps to enjoy this delightful salad. It's quick to prepare and great for lunch or dinner! To make this salad, start with a large mixing bowl. Combine the following ingredients: - 1 can (15 oz) chickpeas, thoroughly drained and rinsed - 1/2 cup sun-dried tomatoes, roughly chopped - 1/4 cup red onion, finely diced - 1/2 cucumber, peeled and diced - 1/4 cup feta cheese, crumbled into small pieces Gently stir the ingredients together. This ensures an even distribution of flavors and textures. In a separate small bowl, whisk together the dressing ingredients: - 2 tablespoons extra virgin olive oil - 1 tablespoon freshly squeezed lemon juice - 1 teaspoon dried oregano - Salt and freshly ground black pepper, to taste Mix until well combined. You want the oil and lemon juice to emulsify, meaning they blend into a smooth mixture. Drizzle the dressing over the salad base. Toss gently to coat everything evenly. Be careful not to break the chickpeas or feta cheese. After mixing, sprinkle the freshly chopped parsley on top. Give it one last gentle toss. Cover the salad and let it rest for at least 15 minutes. This time allows the flavors to meld together, enhancing the taste. You can serve it chilled or at room temperature for the best experience. For the full recipe, check the ingredients and instructions above. To make your Sun-Dried Tomato Chickpea Salad stand out, choose a nice serving bowl. A colorful bowl can catch the eye and add to the meal. You can layer the salad to show off its colors. Start with chickpeas at the bottom, then add layers of sun-dried tomatoes, cucumbers, and red onions. For garnishing, sprinkle extra parsley leaves on top. This adds a fresh touch. You can also add a few crumbles of feta cheese over the top. This gives a nice contrast to the vibrant colors of the salad. If you want to impress, serve it with crusty bread or pita on the side. You can make this salad ahead of time. Store it in the fridge for a quick meal later. After you mix it, cover the salad well. It stays fresh for 2 to 3 days. The flavors will deepen as it sits. For meal prepping, divide the salad into single-serving containers. This makes it easy to grab and go. Keep the dressing separate until you are ready to eat. This keeps the salad crisp and fresh. Enjoy your meal! For the full recipe, check out the details above. {{image_4}} You can switch out chickpeas for other beans. Black beans or kidney beans work well. They add a different taste and texture. If you want to try lentils, they can also be good. For a dairy-free option, use a vegan feta cheese. There are many brands available. You can also skip the cheese and add more vegetables. This keeps the salad fresh and tasty. To boost the flavor, add spices like cumin or paprika. These spices can take your salad to a new level. You could also add bell peppers or corn for a nice crunch. If you want more protein, add grilled chicken or tofu. These options make the salad heartier. You can even mix in some nuts or seeds for added texture. For the full recipe, check out the details above and create your own delicious twist! To keep your Sun-Dried Tomato Chickpea Salad fresh, use these tips: - Store in an airtight container. - Layer ingredients to prevent sogginess. - Keep dressing separate until serving. - Use glass containers for better preservation. Glass keeps the salad fresh longer. It also helps you see the colorful layers. Your salad lasts up to three days in the fridge. After that, it may lose its crunch. Watch for these signs of spoilage: - Change in smell or color. - Soft or mushy chickpeas. - Feta cheese that appears slimy. If you notice these signs, it's best to throw it away. Enjoy the salad while it's fresh for the best taste! For the full recipe, click [Full Recipe]. To make this salad, start by gathering your ingredients. You need chickpeas, sun-dried tomatoes, red onion, cucumber, feta cheese, parsley, olive oil, lemon juice, oregano, salt, and pepper. 1. In a large bowl, mix the chickpeas, sun-dried tomatoes, cucumber, onion, and feta. 2. In a small bowl, whisk olive oil, lemon juice, oregano, salt, and pepper together. 3. Pour the dressing over the salad and toss gently. 4. Add the parsley and mix lightly. 5. Let the salad rest for 15 minutes. This helps the flavors blend well. You can find the full recipe above for detailed steps. Yes! This salad is perfect for meal prep. You can prepare it a day in advance. Just store it in an airtight container in the fridge. The flavors will deepen, making it taste even better. Make sure to keep the salad covered to keep it fresh. This salad pairs well with many dishes. Here are some ideas: - Grilled chicken or fish for added protein. - Crusty bread or pita to scoop up the salad. - A light soup like tomato basil for a cozy meal. - Roasted vegetables for a colorful plate. These options will enhance your meal and make it even more enjoyable! This blog post detailed how to create a refreshing Sun-Dried Tomato Chickpea Salad. We covered the necessary ingredients, simple steps to prepare, and tips for presentation. You can enhance this salad with various substitutes or flavors. Proper storage ensures freshness and keeps meals tasty longer. Remember, this salad is not just easy to make—it's also adaptable. Enjoy making it your own, and delight your taste buds with every bite. Your next meal can be both fun and healthy!](https://dishtreats.com/wp-content/uploads/2025/07/f0fe0f85-1842-4358-ad7f-ac591425fdaf-768x768.webp)
![To make avocado chocolate chip cookies, gather these simple items: - 1 ripe avocado, thoroughly mashed - 1/2 cup packed brown sugar - 1/4 cup granulated sugar - 1/4 cup unsalted butter, melted and slightly cooled - 1 teaspoon pure vanilla extract - 1 large egg, room temperature - 1 cup all-purpose flour - 1/2 teaspoon baking soda - 1/4 teaspoon fine sea salt - 1 cup semisweet chocolate chips These ingredients create a tasty cookie with a twist. If you don’t have some items, here are good swaps: - Avocado: Use 1/2 cup unsweetened applesauce. This keeps it moist. - Butter: Coconut oil works well. It adds a hint of flavor. - Brown Sugar: Use coconut sugar for a lower glycemic option. - All-purpose flour: Try oat flour for a gluten-free choice. These substitutes can change the flavor and texture but still taste great. These cookies are not just yummy; they also pack some nutrition. Here’s a quick look: - Calories: About 120 per cookie - Fat: 6g (mostly healthy fats from avocado) - Carbohydrates: 16g - Protein: 1g - Fiber: 1g Using avocado adds healthy fats and fiber. You can enjoy a treat without feeling guilty. For the full recipe, check out my detailed guide. 1. Preheat your oven to 350°F (175°C). This is key for even baking. 2. Line a baking sheet with parchment paper. This makes cleanup easy and prevents sticking. 3. In a large bowl, mash one ripe avocado until smooth. It should be creamy. 4. Add 1/2 cup brown sugar, 1/4 cup granulated sugar, 1/4 cup melted butter, and 1 teaspoon vanilla extract. Mix until smooth and creamy. 5. Crack one large egg into the bowl. Whisk until the mix is fluffy and well combined. 6. In another bowl, mix 1 cup flour, 1/2 teaspoon baking soda, and 1/4 teaspoon salt. This helps the cookies rise. 7. Slowly add the dry mix to the wet mix. Stir gently until combined. A few lumps are fine. 8. Fold in 1 cup of chocolate chips with a spatula. Make sure they spread evenly in the dough. 1. Use a tablespoon or cookie scoop to place rounded dough on the baking sheet. Space them about 2 inches apart. 2. Bake in the preheated oven for 10-12 minutes. Look for golden edges and soft centers. 3. Once done, take the cookies out of the oven. Let them sit on the sheet for about 5 minutes. This helps them firm up. 1. Transfer the cookies to a wire rack to cool completely. 2. Serve the cookies in a jar or on a decorative plate. 3. For a special touch, sprinkle them with sea salt before serving. This enhances the chocolate flavor. Follow the [Full Recipe] to make these tasty avocado chocolate chip cookies! - Use a ripe avocado. It should feel soft to the touch. - Measure your ingredients accurately for the best results. - Mix the wet ingredients until creamy for a smooth dough. - Don’t overmix when adding dry ingredients; a few lumps are okay. - Space cookies at least 2 inches apart on the baking sheet. - Using unripe avocados can lead to a gritty texture. - Overbaking makes cookies hard instead of soft and chewy. - Forgetting to let the melted butter cool can change the dough. - Not cooling cookies on a wire rack can make them soggy. - Store cookies in an airtight container to keep them fresh. - For longer storage, freeze the cookies in a freezer bag. - To reheat, warm cookies in the oven at 300°F (150°C) for 5-7 minutes. - Enjoy them warm for that fresh-baked taste! For the full recipe, check out the details above. {{image_4}} You can make vegan avocado chocolate chip cookies easily. Replace the egg with a flax egg. To make a flax egg, mix 1 tablespoon of ground flaxseed with 2.5 tablespoons of water. Let it sit for 5 minutes until it thickens. Use the same method as the original recipe. The cookies will still be soft and tasty. If you want gluten-free cookies, swap all-purpose flour for almond or oat flour. Both options work well. Just ensure they are finely ground. Adjust the amount slightly, as these flours absorb moisture differently. The taste will change, but the cookies will remain delicious. Get creative with your cookies! You can add nuts like walnuts or pecans for crunch. Dried fruit, like cranberries or raisins, adds a sweet touch. For a fun twist, try adding a teaspoon of instant coffee or a pinch of cinnamon. Each choice adds a unique flavor to your cookies. To keep your avocado chocolate chip cookies fresh, use an airtight container. Place parchment paper between layers to prevent sticking. Store them at room temperature for up to three days. If you want to keep them longer, consider refrigerating them. Just let them warm up to room temp before eating. You can freeze the cookie dough for later use. Scoop the dough onto a baking sheet and freeze until firm. Once solid, transfer the dough balls to a zip-top bag. They will last in the freezer for up to three months. When you’re ready to bake, just take them out and let them thaw for about 30 minutes before baking. Baked cookies can last about a week in an airtight container at room temperature. If you notice them getting hard, pop them in the microwave for a few seconds. This will soften them up again. For the best taste, try to eat them within a few days. Enjoy your delicious treats from the Full Recipe! Yes, you can use ripe avocados for this recipe. Ripe avocados add a smooth texture and rich taste. Look for avocados that yield slightly when you press them. This softness means they are ready to mash. The ripeness helps make the cookies moist and flavorful. You can also mash the avocado with a fork or a blender for a creamy mix. To know when the cookies are done, check the edges. They should be golden brown. The centers may look soft and slightly undercooked. This is perfect! They will firm up as they cool. For best results, set a timer for 10-12 minutes. Keep an eye on them to avoid burning. If your cookies turn hard, you can soften them easily. Place a slice of bread in the container with the cookies. The moisture from the bread will help them soften. You can also microwave cookies for a few seconds. This will warm them up and make them soft again. Store leftover cookies in an airtight container to keep them fresh longer. This blog post covered key ingredients, step-by-step instructions, and tips for making cookies. You learned about ingredient substitutes and nutrition too. I shared variations like vegan and gluten-free options. Storing and reheating cookies is essential to enjoy them longer. Remember the common mistakes to avoid for perfect cookies every time. Use the FAQ section for quick answers. Try these tips and recipes to create delicious cookies that everyone loves. Enjoy your baking adventure and happy eating!](https://dishtreats.com/wp-content/uploads/2025/07/2a4aa59d-42b3-40d6-b422-d0063b121310-768x768.webp)