If you love creamy dips that pack a punch, you’re in for a treat. My Avocado Lime Ranch Dip combines ripe avocados, tangy lime, and rich Greek yogurt for a smooth and zesty delight. Perfect for parties or as a snack, it’s simple to make and loaded with flavor. Let me guide you through each step and help you impress your friends with this tasty dip!
Ingredients
Main Ingredients
– 2 ripe avocados
– 1 cup creamy Greek yogurt
– 1/2 cup buttermilk
– 1 tablespoon ranch seasoning mix
Flavor Enhancers
– 2 tablespoons freshly squeezed lime juice
– 2 cloves garlic, finely minced
– 1/4 teaspoon cayenne pepper (optional)
Seasoning and Garnish
– Salt and freshly cracked black pepper to taste
– Chopped fresh cilantro for garnish
To create this creamy and flavorful dip, start with ripe avocados. They should feel slightly soft when you press them gently. The Greek yogurt adds a rich texture, while the buttermilk gives a nice tang. The ranch seasoning mix provides that classic flavor we all love.
The lime juice brightens the dip and adds a zesty kick. Minced garlic gives it a bold taste, and cayenne pepper adds a hint of heat if you like spice. You can adjust this based on your taste.
Finally, season with salt and black pepper to balance the flavors. Fresh cilantro not only looks great but also enhances the taste. All these ingredients come together to make a dip that is perfect for any gathering!
Step-by-Step Instructions
Preparing the Avocados
– Slice the avocados in half and remove the pit.
– Use a spoon to scoop out the creamy flesh.
Getting the avocados right is key. Make sure they are ripe. A ripe avocado feels slightly soft but not mushy. This ensures a rich, creamy base for our dip.
Mixing Ingredients
– Add Greek yogurt, buttermilk, ranch seasoning, lime juice, garlic, and cayenne.
– Blend until creamy, leaving chunks for texture.
In a mixing bowl, combine the avocados with other ingredients. The Greek yogurt and buttermilk add creaminess and tang. Ranch seasoning brings a burst of flavor. Lime juice adds brightness, while garlic and cayenne give it a nice kick. Use a fork or whisk to blend everything together. Leave some avocado chunks for texture.
Final Touches
– Season with salt and pepper.
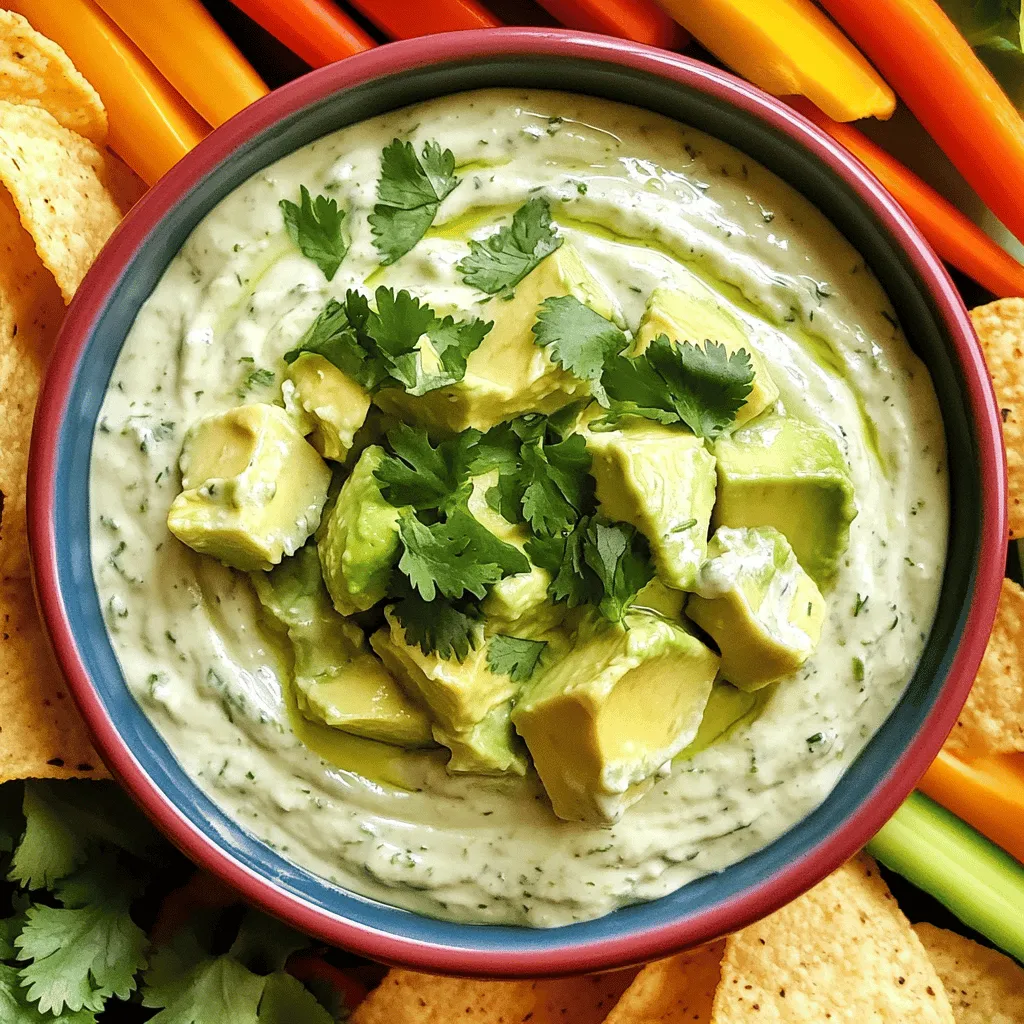
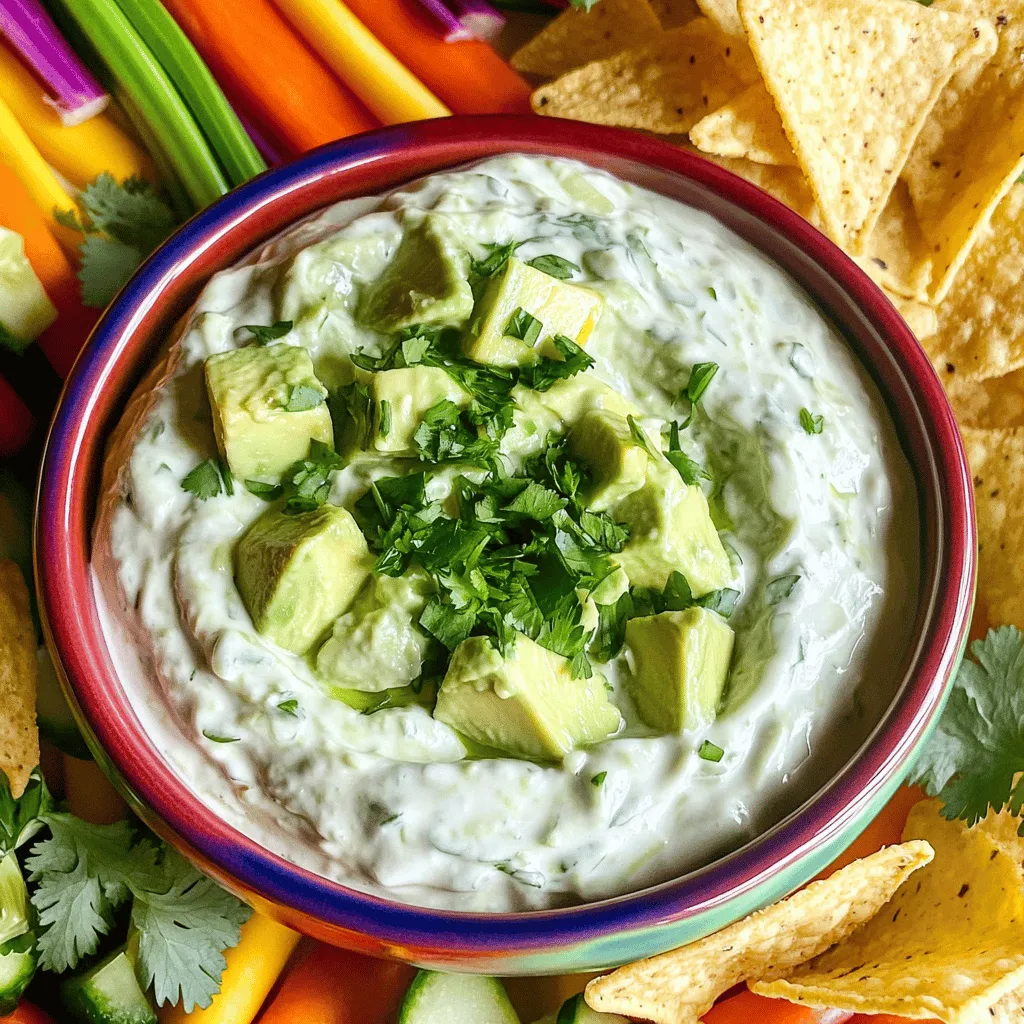
– Transfer to a serving bowl and garnish with cilantro.
Taste your dip and add salt and pepper to suit your palate. This enhances all the flavors. Then, carefully scoop the dip into a serving bowl. Top it with freshly chopped cilantro for color and flavor.
Now, you have a creamy and flavorful dip ready to enjoy! Serve it with crispy tortilla chips or fresh veggie sticks. It’s a hit at any gathering!
Tips & Tricks
Consistency Suggestions
To get the right creaminess, change the amount of yogurt and buttermilk. If you want a thicker dip, use more yogurt. For a lighter texture, add extra buttermilk. I also love leaving some avocado chunks in the dip. This adds a nice texture and makes it more fun to eat.
Flavor Enhancements
You can boost the flavor by trying new herbs or spices. Fresh dill or chives can give your dip a fresh twist. If you like heat, sprinkle in some cayenne pepper. Start with a small amount and taste. You can always add more if you want it spicier.
Presentation Tips
For a beautiful display, serve your dip in a rustic bowl. Surround it with colorful tortilla chips for a pop of color. You can also use vegetable sticks like carrots and cucumbers. They add a great look and are perfect for dipping.
Variations
Flavor Variations
You can make this dip even more exciting. Try adding diced tomatoes or jalapeños for a spicy kick. This will give your dip a fresh burst of flavor. You can also add feta cheese for a tangy twist. Feta adds a nice saltiness that balances the creaminess of the avocados.
Dietary Alternatives
If you want a dairy-free option, use lactose-free yogurt instead of Greek yogurt. This keeps the dip creamy without the dairy. You can also swap out the avocado for other creamy bases like silken tofu. This still gives you that smooth texture while keeping it light.
Serving Suggestions
This dip shines when paired with tortilla chips, pita bread, or fresh veggies like carrots and cucumbers. You can even use it as a spread for sandwiches or wraps. It adds a burst of flavor to any meal and keeps things fun and tasty.
Storage Info
Short-term Storage
You can keep your avocado lime ranch dip fresh by storing it in an airtight container. It will stay good in the fridge for up to 2 days. After that, the dip may lose its creamy texture and flavor.
Long-term Storage
For longer storage, freeze your dip. Portion it into small containers. This way, you can grab just what you need. Defrost it in the fridge overnight before serving.
Preventing Browning
To keep your dip looking fresh, squeeze additional lime juice on top before storing. This helps reduce oxidation and prevents browning. A little extra lime adds a nice zing too!
FAQs
How long does avocado lime ranch dip last in the fridge?
Typically, avocado lime ranch dip lasts 2 days if stored properly. To keep it fresh, place it in an airtight container. This helps slow down spoilage.
Can I make this dip ahead of time?
Yes, you can make this dip a few hours before serving. This lets the flavors mix well. Just store it in the fridge until you’re ready to serve.
Can I substitute Greek yogurt with another ingredient?
Yes, you can use other ingredients. Sour cream or silken tofu work well as substitutes. Both will keep the dip creamy and tasty.
What can I serve with avocado lime ranch dip?
Avocado lime ranch dip pairs well with tortilla chips and fresh vegetables. Carrot and cucumber sticks are great choices. You can also use it as a spread on sandwiches.
This blog post showed you how to create a creamy avocado lime ranch dip. You learned about the key ingredients, step-by-step instructions, and ways to enhance flavor. I shared tips for texture, presentation, and even storage advice. This dip is simple, tasty, and perfect for many occasions. Experiment with spices or add your own twist to make it special. Enjoy sharing this delightful dip with friends and family!


