Avocado Chocolate Chip Cookies Delightful and Simple
![To make avocado chocolate chip cookies, gather these simple items: - 1 ripe avocado, thoroughly mashed - 1/2 cup packed brown sugar - 1/4 cup granulated sugar - 1/4 cup unsalted butter, melted and slightly cooled - 1 teaspoon pure vanilla extract - 1 large egg, room temperature - 1 cup all-purpose flour - 1/2 teaspoon baking soda - 1/4 teaspoon fine sea salt - 1 cup semisweet chocolate chips These ingredients create a tasty cookie with a twist. If you don’t have some items, here are good swaps: - Avocado: Use 1/2 cup unsweetened applesauce. This keeps it moist. - Butter: Coconut oil works well. It adds a hint of flavor. - Brown Sugar: Use coconut sugar for a lower glycemic option. - All-purpose flour: Try oat flour for a gluten-free choice. These substitutes can change the flavor and texture but still taste great. These cookies are not just yummy; they also pack some nutrition. Here’s a quick look: - Calories: About 120 per cookie - Fat: 6g (mostly healthy fats from avocado) - Carbohydrates: 16g - Protein: 1g - Fiber: 1g Using avocado adds healthy fats and fiber. You can enjoy a treat without feeling guilty. For the full recipe, check out my detailed guide. 1. Preheat your oven to 350°F (175°C). This is key for even baking. 2. Line a baking sheet with parchment paper. This makes cleanup easy and prevents sticking. 3. In a large bowl, mash one ripe avocado until smooth. It should be creamy. 4. Add 1/2 cup brown sugar, 1/4 cup granulated sugar, 1/4 cup melted butter, and 1 teaspoon vanilla extract. Mix until smooth and creamy. 5. Crack one large egg into the bowl. Whisk until the mix is fluffy and well combined. 6. In another bowl, mix 1 cup flour, 1/2 teaspoon baking soda, and 1/4 teaspoon salt. This helps the cookies rise. 7. Slowly add the dry mix to the wet mix. Stir gently until combined. A few lumps are fine. 8. Fold in 1 cup of chocolate chips with a spatula. Make sure they spread evenly in the dough. 1. Use a tablespoon or cookie scoop to place rounded dough on the baking sheet. Space them about 2 inches apart. 2. Bake in the preheated oven for 10-12 minutes. Look for golden edges and soft centers. 3. Once done, take the cookies out of the oven. Let them sit on the sheet for about 5 minutes. This helps them firm up. 1. Transfer the cookies to a wire rack to cool completely. 2. Serve the cookies in a jar or on a decorative plate. 3. For a special touch, sprinkle them with sea salt before serving. This enhances the chocolate flavor. Follow the [Full Recipe] to make these tasty avocado chocolate chip cookies! - Use a ripe avocado. It should feel soft to the touch. - Measure your ingredients accurately for the best results. - Mix the wet ingredients until creamy for a smooth dough. - Don’t overmix when adding dry ingredients; a few lumps are okay. - Space cookies at least 2 inches apart on the baking sheet. - Using unripe avocados can lead to a gritty texture. - Overbaking makes cookies hard instead of soft and chewy. - Forgetting to let the melted butter cool can change the dough. - Not cooling cookies on a wire rack can make them soggy. - Store cookies in an airtight container to keep them fresh. - For longer storage, freeze the cookies in a freezer bag. - To reheat, warm cookies in the oven at 300°F (150°C) for 5-7 minutes. - Enjoy them warm for that fresh-baked taste! For the full recipe, check out the details above. {{image_4}} You can make vegan avocado chocolate chip cookies easily. Replace the egg with a flax egg. To make a flax egg, mix 1 tablespoon of ground flaxseed with 2.5 tablespoons of water. Let it sit for 5 minutes until it thickens. Use the same method as the original recipe. The cookies will still be soft and tasty. If you want gluten-free cookies, swap all-purpose flour for almond or oat flour. Both options work well. Just ensure they are finely ground. Adjust the amount slightly, as these flours absorb moisture differently. The taste will change, but the cookies will remain delicious. Get creative with your cookies! You can add nuts like walnuts or pecans for crunch. Dried fruit, like cranberries or raisins, adds a sweet touch. For a fun twist, try adding a teaspoon of instant coffee or a pinch of cinnamon. Each choice adds a unique flavor to your cookies. To keep your avocado chocolate chip cookies fresh, use an airtight container. Place parchment paper between layers to prevent sticking. Store them at room temperature for up to three days. If you want to keep them longer, consider refrigerating them. Just let them warm up to room temp before eating. You can freeze the cookie dough for later use. Scoop the dough onto a baking sheet and freeze until firm. Once solid, transfer the dough balls to a zip-top bag. They will last in the freezer for up to three months. When you’re ready to bake, just take them out and let them thaw for about 30 minutes before baking. Baked cookies can last about a week in an airtight container at room temperature. If you notice them getting hard, pop them in the microwave for a few seconds. This will soften them up again. For the best taste, try to eat them within a few days. Enjoy your delicious treats from the Full Recipe! Yes, you can use ripe avocados for this recipe. Ripe avocados add a smooth texture and rich taste. Look for avocados that yield slightly when you press them. This softness means they are ready to mash. The ripeness helps make the cookies moist and flavorful. You can also mash the avocado with a fork or a blender for a creamy mix. To know when the cookies are done, check the edges. They should be golden brown. The centers may look soft and slightly undercooked. This is perfect! They will firm up as they cool. For best results, set a timer for 10-12 minutes. Keep an eye on them to avoid burning. If your cookies turn hard, you can soften them easily. Place a slice of bread in the container with the cookies. The moisture from the bread will help them soften. You can also microwave cookies for a few seconds. This will warm them up and make them soft again. Store leftover cookies in an airtight container to keep them fresh longer. This blog post covered key ingredients, step-by-step instructions, and tips for making cookies. You learned about ingredient substitutes and nutrition too. I shared variations like vegan and gluten-free options. Storing and reheating cookies is essential to enjoy them longer. Remember the common mistakes to avoid for perfect cookies every time. Use the FAQ section for quick answers. Try these tips and recipes to create delicious cookies that everyone loves. Enjoy your baking adventure and happy eating!](https://dishtreats.com/wp-content/uploads/2025/07/2a4aa59d-42b3-40d6-b422-d0063b121310.webp)
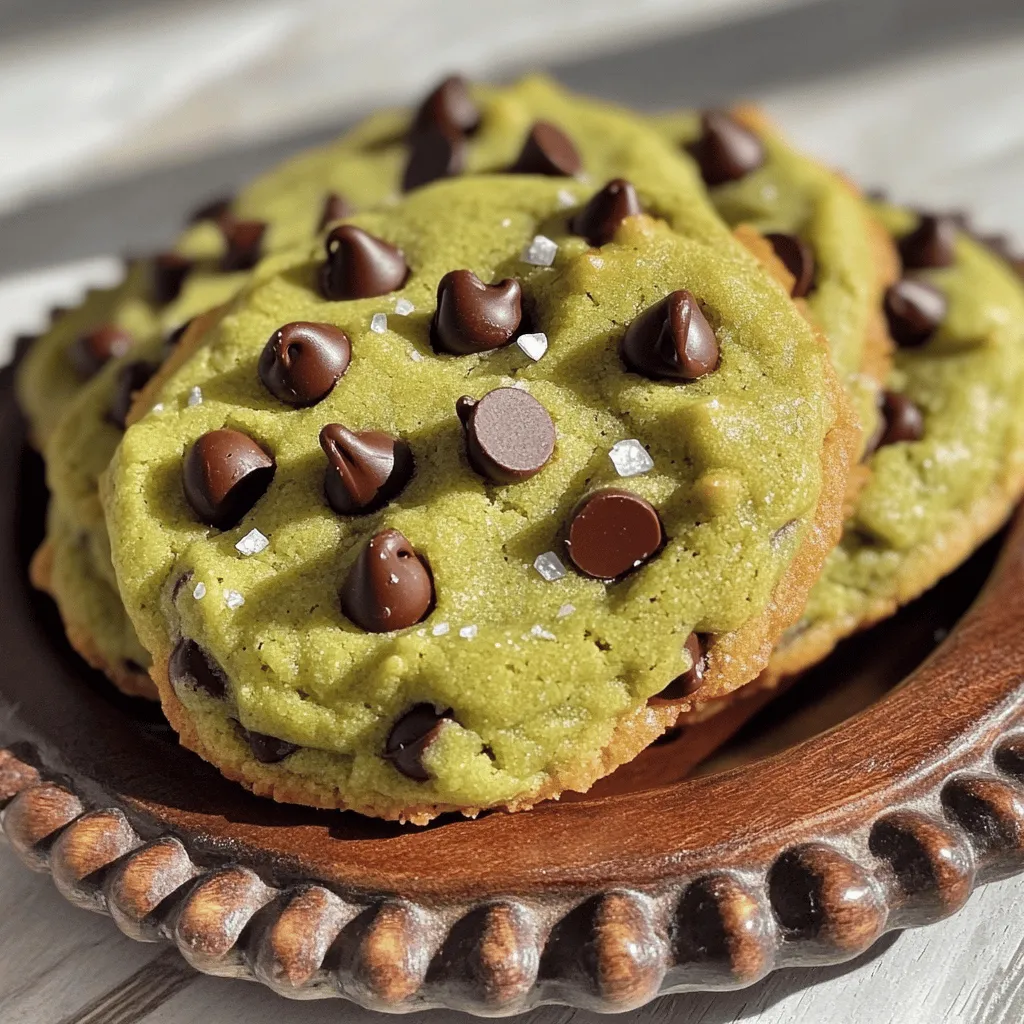
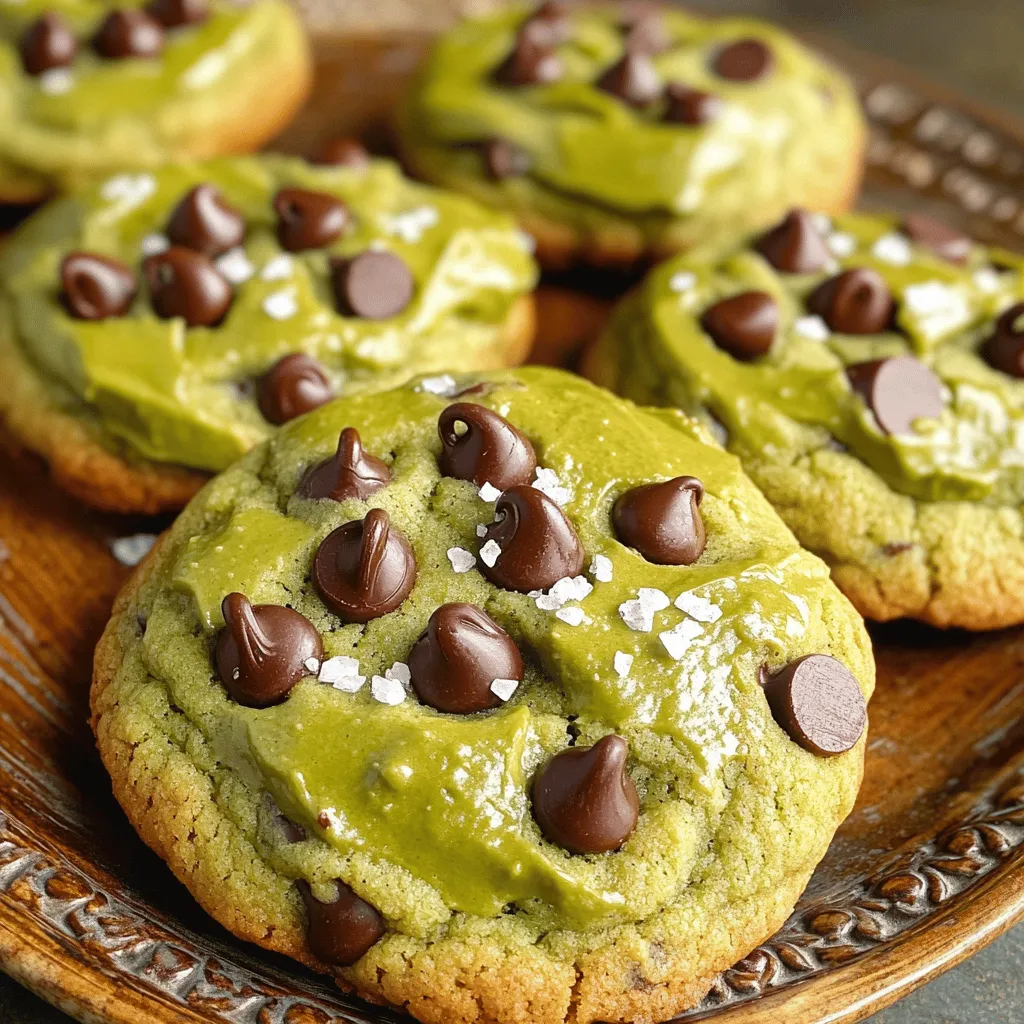
Are you ready to change your cookie game? These Avocado Chocolate Chip Cookies are not just tasty; they’re simple to make! By adding creamy avocados, you get soft, rich cookies that are better for you. In this article, I’ll share easy steps, helpful tips, and delicious variations. You’ll wonder why you didn’t try this sooner! Let’s dive into the fun world of baking these yummy treats!
Ingredients
List of Ingredients
To make avocado chocolate chip cookies, gather these simple items:
- 1 ripe avocado, thoroughly mashed
- 1/2 cup packed brown sugar
- 1/4 cup granulated sugar
- 1/4 cup unsalted butter, melted and slightly cooled
- 1 teaspoon pure vanilla extract
- 1 large egg, room temperature
- 1 cup all-purpose flour
- 1/2 teaspoon baking soda
- 1/4 teaspoon fine sea salt
- 1 cup semisweet chocolate chips
These ingredients create a tasty cookie with a twist.
Substitutes for Key Ingredients
If you don’t have some items, here are good swaps:
- Avocado: Use 1/2 cup unsweetened applesauce. This keeps it moist.
- Butter: Coconut oil works well. It adds a hint of flavor.
- Brown Sugar: Use coconut sugar for a lower glycemic option.
- All-purpose flour: Try oat flour for a gluten-free choice.
These substitutes can change the flavor and texture but still taste great.
Nutritional Information
These cookies are not just yummy; they also pack some nutrition. Here’s a quick look:
- Calories: About 120 per cookie
- Fat: 6g (mostly healthy fats from avocado)
- Carbohydrates: 16g
- Protein: 1g
- Fiber: 1g
Using avocado adds healthy fats and fiber. You can enjoy a treat without feeling guilty.
Step-by-Step Instructions
Preparation Steps
1. Preheat your oven to 350°F (175°C). This is key for even baking.
2. Line a baking sheet with parchment paper. This makes cleanup easy and prevents sticking.
3. In a large bowl, mash one ripe avocado until smooth. It should be creamy.
4. Add 1/2 cup brown sugar, 1/4 cup granulated sugar, 1/4 cup melted butter, and 1 teaspoon vanilla extract. Mix until smooth and creamy.
5. Crack one large egg into the bowl. Whisk until the mix is fluffy and well combined.
6. In another bowl, mix 1 cup flour, 1/2 teaspoon baking soda, and 1/4 teaspoon salt. This helps the cookies rise.
7. Slowly add the dry mix to the wet mix. Stir gently until combined. A few lumps are fine.
8. Fold in 1 cup of chocolate chips with a spatula. Make sure they spread evenly in the dough.
Baking Instructions
1. Use a tablespoon or cookie scoop to place rounded dough on the baking sheet. Space them about 2 inches apart.
2. Bake in the preheated oven for 10-12 minutes. Look for golden edges and soft centers.
3. Once done, take the cookies out of the oven. Let them sit on the sheet for about 5 minutes. This helps them firm up.
Cooling and Serving Suggestions
1. Transfer the cookies to a wire rack to cool completely.
2. Serve the cookies in a jar or on a decorative plate.
3. For a special touch, sprinkle them with sea salt before serving. This enhances the chocolate flavor.
Tips & Tricks
Tips for Perfect Cookies
- Use a ripe avocado. It should feel soft to the touch.
- Measure your ingredients accurately for the best results.
- Mix the wet ingredients until creamy for a smooth dough.
- Don’t overmix when adding dry ingredients; a few lumps are okay.
- Space cookies at least 2 inches apart on the baking sheet.
Common Mistakes to Avoid
- Using unripe avocados can lead to a gritty texture.
- Overbaking makes cookies hard instead of soft and chewy.
- Forgetting to let the melted butter cool can change the dough.
- Not cooling cookies on a wire rack can make them soggy.
How to Store and Reheat
- Store cookies in an airtight container to keep them fresh.
- For longer storage, freeze the cookies in a freezer bag.
- To reheat, warm cookies in the oven at 300°F (150°C) for 5-7 minutes.
- Enjoy them warm for that fresh-baked taste!

Variations
Vegan Avocado Chocolate Chip Cookies
You can make vegan avocado chocolate chip cookies easily. Replace the egg with a flax egg. To make a flax egg, mix 1 tablespoon of ground flaxseed with 2.5 tablespoons of water. Let it sit for 5 minutes until it thickens. Use the same method as the original recipe. The cookies will still be soft and tasty.
Gluten-Free Options
If you want gluten-free cookies, swap all-purpose flour for almond or oat flour. Both options work well. Just ensure they are finely ground. Adjust the amount slightly, as these flours absorb moisture differently. The taste will change, but the cookies will remain delicious.
Add-ins and Flavor Variations
Get creative with your cookies! You can add nuts like walnuts or pecans for crunch. Dried fruit, like cranberries or raisins, adds a sweet touch. For a fun twist, try adding a teaspoon of instant coffee or a pinch of cinnamon. Each choice adds a unique flavor to your cookies.
Storage Info
Best Storage Practices
To keep your avocado chocolate chip cookies fresh, use an airtight container. Place parchment paper between layers to prevent sticking. Store them at room temperature for up to three days. If you want to keep them longer, consider refrigerating them. Just let them warm up to room temp before eating.
Freezing Cookie Dough
You can freeze the cookie dough for later use. Scoop the dough onto a baking sheet and freeze until firm. Once solid, transfer the dough balls to a zip-top bag. They will last in the freezer for up to three months. When you’re ready to bake, just take them out and let them thaw for about 30 minutes before baking.
Shelf Life of Baked Cookies
Baked cookies can last about a week in an airtight container at room temperature. If you notice them getting hard, pop them in the microwave for a few seconds. This will soften them up again. For the best taste, try to eat them within a few days.
FAQs
Can I use ripe avocados for this recipe?
Yes, you can use ripe avocados for this recipe. Ripe avocados add a smooth texture and rich taste. Look for avocados that yield slightly when you press them. This softness means they are ready to mash. The ripeness helps make the cookies moist and flavorful. You can also mash the avocado with a fork or a blender for a creamy mix.
How do I know when the cookies are done?
To know when the cookies are done, check the edges. They should be golden brown. The centers may look soft and slightly undercooked. This is perfect! They will firm up as they cool. For best results, set a timer for 10-12 minutes. Keep an eye on them to avoid burning.
What is the best way to soften hard cookies?
If your cookies turn hard, you can soften them easily. Place a slice of bread in the container with the cookies. The moisture from the bread will help them soften. You can also microwave cookies for a few seconds. This will warm them up and make them soft again. Store leftover cookies in an airtight container to keep them fresh longer.
This blog post covered key ingredients, step-by-step instructions, and tips for making cookies. You learned about ingredient substitutes and nutrition too. I shared variations like vegan and gluten-free options. Storing and reheating cookies is essential to enjoy them longer. Remember the common mistakes to avoid for perfect cookies every time. Use the FAQ section for quick answers. Try these tips and recipes to create delicious cookies that everyone loves. Enjoy your baking adventure and happy eating!
![To make avocado chocolate chip cookies, gather these simple items: - 1 ripe avocado, thoroughly mashed - 1/2 cup packed brown sugar - 1/4 cup granulated sugar - 1/4 cup unsalted butter, melted and slightly cooled - 1 teaspoon pure vanilla extract - 1 large egg, room temperature - 1 cup all-purpose flour - 1/2 teaspoon baking soda - 1/4 teaspoon fine sea salt - 1 cup semisweet chocolate chips These ingredients create a tasty cookie with a twist. If you don’t have some items, here are good swaps: - Avocado: Use 1/2 cup unsweetened applesauce. This keeps it moist. - Butter: Coconut oil works well. It adds a hint of flavor. - Brown Sugar: Use coconut sugar for a lower glycemic option. - All-purpose flour: Try oat flour for a gluten-free choice. These substitutes can change the flavor and texture but still taste great. These cookies are not just yummy; they also pack some nutrition. Here’s a quick look: - Calories: About 120 per cookie - Fat: 6g (mostly healthy fats from avocado) - Carbohydrates: 16g - Protein: 1g - Fiber: 1g Using avocado adds healthy fats and fiber. You can enjoy a treat without feeling guilty. For the full recipe, check out my detailed guide. 1. Preheat your oven to 350°F (175°C). This is key for even baking. 2. Line a baking sheet with parchment paper. This makes cleanup easy and prevents sticking. 3. In a large bowl, mash one ripe avocado until smooth. It should be creamy. 4. Add 1/2 cup brown sugar, 1/4 cup granulated sugar, 1/4 cup melted butter, and 1 teaspoon vanilla extract. Mix until smooth and creamy. 5. Crack one large egg into the bowl. Whisk until the mix is fluffy and well combined. 6. In another bowl, mix 1 cup flour, 1/2 teaspoon baking soda, and 1/4 teaspoon salt. This helps the cookies rise. 7. Slowly add the dry mix to the wet mix. Stir gently until combined. A few lumps are fine. 8. Fold in 1 cup of chocolate chips with a spatula. Make sure they spread evenly in the dough. 1. Use a tablespoon or cookie scoop to place rounded dough on the baking sheet. Space them about 2 inches apart. 2. Bake in the preheated oven for 10-12 minutes. Look for golden edges and soft centers. 3. Once done, take the cookies out of the oven. Let them sit on the sheet for about 5 minutes. This helps them firm up. 1. Transfer the cookies to a wire rack to cool completely. 2. Serve the cookies in a jar or on a decorative plate. 3. For a special touch, sprinkle them with sea salt before serving. This enhances the chocolate flavor. Follow the [Full Recipe] to make these tasty avocado chocolate chip cookies! - Use a ripe avocado. It should feel soft to the touch. - Measure your ingredients accurately for the best results. - Mix the wet ingredients until creamy for a smooth dough. - Don’t overmix when adding dry ingredients; a few lumps are okay. - Space cookies at least 2 inches apart on the baking sheet. - Using unripe avocados can lead to a gritty texture. - Overbaking makes cookies hard instead of soft and chewy. - Forgetting to let the melted butter cool can change the dough. - Not cooling cookies on a wire rack can make them soggy. - Store cookies in an airtight container to keep them fresh. - For longer storage, freeze the cookies in a freezer bag. - To reheat, warm cookies in the oven at 300°F (150°C) for 5-7 minutes. - Enjoy them warm for that fresh-baked taste! For the full recipe, check out the details above. {{image_4}} You can make vegan avocado chocolate chip cookies easily. Replace the egg with a flax egg. To make a flax egg, mix 1 tablespoon of ground flaxseed with 2.5 tablespoons of water. Let it sit for 5 minutes until it thickens. Use the same method as the original recipe. The cookies will still be soft and tasty. If you want gluten-free cookies, swap all-purpose flour for almond or oat flour. Both options work well. Just ensure they are finely ground. Adjust the amount slightly, as these flours absorb moisture differently. The taste will change, but the cookies will remain delicious. Get creative with your cookies! You can add nuts like walnuts or pecans for crunch. Dried fruit, like cranberries or raisins, adds a sweet touch. For a fun twist, try adding a teaspoon of instant coffee or a pinch of cinnamon. Each choice adds a unique flavor to your cookies. To keep your avocado chocolate chip cookies fresh, use an airtight container. Place parchment paper between layers to prevent sticking. Store them at room temperature for up to three days. If you want to keep them longer, consider refrigerating them. Just let them warm up to room temp before eating. You can freeze the cookie dough for later use. Scoop the dough onto a baking sheet and freeze until firm. Once solid, transfer the dough balls to a zip-top bag. They will last in the freezer for up to three months. When you’re ready to bake, just take them out and let them thaw for about 30 minutes before baking. Baked cookies can last about a week in an airtight container at room temperature. If you notice them getting hard, pop them in the microwave for a few seconds. This will soften them up again. For the best taste, try to eat them within a few days. Enjoy your delicious treats from the Full Recipe! Yes, you can use ripe avocados for this recipe. Ripe avocados add a smooth texture and rich taste. Look for avocados that yield slightly when you press them. This softness means they are ready to mash. The ripeness helps make the cookies moist and flavorful. You can also mash the avocado with a fork or a blender for a creamy mix. To know when the cookies are done, check the edges. They should be golden brown. The centers may look soft and slightly undercooked. This is perfect! They will firm up as they cool. For best results, set a timer for 10-12 minutes. Keep an eye on them to avoid burning. If your cookies turn hard, you can soften them easily. Place a slice of bread in the container with the cookies. The moisture from the bread will help them soften. You can also microwave cookies for a few seconds. This will warm them up and make them soft again. Store leftover cookies in an airtight container to keep them fresh longer. This blog post covered key ingredients, step-by-step instructions, and tips for making cookies. You learned about ingredient substitutes and nutrition too. I shared variations like vegan and gluten-free options. Storing and reheating cookies is essential to enjoy them longer. Remember the common mistakes to avoid for perfect cookies every time. Use the FAQ section for quick answers. Try these tips and recipes to create delicious cookies that everyone loves. Enjoy your baking adventure and happy eating!](https://dishtreats.com/wp-content/uploads/2025/07/2a4aa59d-42b3-40d6-b422-d0063b121310-300x300.webp)


![To make a tasty avocado corn salad, gather these ingredients: - 2 ripe avocados, diced into bite-sized cubes - 1 cup sweet corn (freshly grilled or canned, drained) - 1 cup cherry tomatoes, halved for a juicy burst - 1 red bell pepper, diced finely for crunch - 1/4 cup red onion, finely chopped for sharpness - 1/4 cup fresh cilantro, chopped for herbal freshness - Juice of 2 limes for tanginess - 2 tablespoons extra virgin olive oil for richness - 1 teaspoon ground cumin for warmth - Salt and freshly cracked pepper to taste Using good-quality ingredients makes a big difference. Choose ripe avocados that yield slightly when pressed. This means they are soft and ready to eat. Fresh corn adds a sweet touch. If you use canned corn, drain it well to keep the salad fresh. Opt for vibrant cherry tomatoes and a crunchy red bell pepper, both of which enhance the salad's look and taste. Fresh cilantro can elevate the flavor, so use it if you like its taste. If you have allergies or preferences, you can easily swap some ingredients. Try using lime juice from one lemon instead. For those with onion allergies, you can skip the red onion or use green onions. If you are not a fan of cilantro, parsley works well too. For a creamier texture, consider adding a bit of Greek yogurt. This makes the salad rich while keeping it fresh. For the complete recipe, check out the [Full Recipe]. To make the avocado corn salad, start by gathering all your ingredients. You need ripe avocados, sweet corn, cherry tomatoes, red bell pepper, red onion, cilantro, lime juice, olive oil, cumin, salt, and pepper. First, take a large bowl. Add the diced avocados and the corn. If you use canned corn, drain it well. Mix these two gently to spread the sweetness of the corn. Next, add the halved cherry tomatoes, diced red bell pepper, and finely chopped red onion. These ingredients give your salad a bright look and a tasty crunch. After that, sprinkle the chopped cilantro over everything. This adds a fresh flavor that brightens the dish. Now, grab a small bowl. Whisk the lime juice, olive oil, cumin, and a pinch of salt and pepper together. This dressing will tie all the flavors in the salad. Pour the dressing over the salad mixture. Use a spatula or wooden spoon to mix everything gently. Be careful not to mash the avocados. Finally, taste your salad. You might want to add more salt or lime juice based on your taste. When mixing, go slow. You want to keep the avocados intact. Over-mixing can turn them mushy. Use a light hand and fold the ingredients together. This keeps your salad looking fresh and colorful. If you notice some pieces are not coated well, you can add a bit more dressing. Just drizzle it slowly and mix again. This helps every bite to burst with flavor. For the best taste, let your salad sit for about 10 minutes at room temperature. This allows the flavors to blend. If you serve it right away, the tastes might not be as strong. After resting, your salad will be ready to eat. Enjoy it fresh for lunch or as a side with dinner. For the full recipe, click here. To select ripe avocados, look for a dark green color. Gently squeeze the avocado; it should feel firm but yield slightly. Avoid any that feel mushy. A ripe avocado should have a smooth skin without dark spots. If you find unripe avocados, leave them at room temperature for a few days. Once ripe, use them within a day or two for best taste. Grilling fresh corn adds a smoky flavor that enhances your salad. Start by husking the corn and removing all silk. Brush the kernels with oil to prevent sticking. Place the corn directly on a hot grill for about 10 minutes. Turn it every few minutes until it’s tender and has grill marks. This method caramelizes the sugars, making the corn sweeter and more delicious. To enhance your salad's flavor, adjust the seasonings to your taste. Start with lime juice and olive oil, then add cumin for warmth. If you prefer a kick, include a pinch of chili powder or chopped jalapeños. Fresh herbs can also brighten the dish. Always taste and adjust as you go. Remember, a little salt can go a long way in bringing out flavors. For more detailed instructions, check the Full Recipe. {{image_4}} You can boost the protein in your avocado corn salad easily. Adding chicken or shrimp makes it more filling. Grilled chicken breast works well; just chop it into bite-sized pieces. For shrimp, try sautéing or grilling them until they are pink. Both options blend nicely with the salad's flavors. You can also use canned chickpeas for a plant-based choice. Just rinse and add them directly for a hearty twist. The dressing can change the whole taste of your salad. A simple lime vinaigrette adds a refreshing zing. Just whisk lime juice, olive oil, salt, and pepper together. For a creamy dressing, mix yogurt with lime juice and cumin. This gives a nice tang and creaminess. You could also try a cilantro-lime dressing for extra flavor. Feel free to experiment with different dressings to find your favorite. Using seasonal ingredients makes your salad even better. In summer, fresh peaches or strawberries add a sweet touch. In fall, diced apples or pears give crunch and sweetness. You can also swap the corn for roasted butternut squash in winter. This keeps your salad fresh and exciting all year. Think about what’s in season for tasty swaps that match the flavors of your dish. For the complete recipe, check out the [Full Recipe]. To store leftover avocado corn salad, use an airtight container. This keeps the air out and helps avoid spoilage. Place the salad in the fridge right after serving. It tastes better cold and stays fresh longer. If you have extra dressing, store it separately to keep the salad crisp. The salad will last about 2 days in the fridge. The avocados may brown, but the taste remains good. Corn and tomatoes hold well for a bit longer. If you used canned corn, it can stay fresh for 3 to 4 days. Always check for any off smells before eating leftovers. To keep avocados fresh, store them whole until you're ready to use them. If you've cut an avocado, squeeze some lime juice on it. The acid helps slow browning. Cover it tightly with plastic wrap or place it in an airtight container. This way, you can enjoy your avocado longer without losing its bright color. To stop avocados from browning, use lime juice. The acid slows down oxidation. You can also store cut avocados with the pit in. Cover them tightly with plastic wrap. This keeps air out and helps maintain their color. Yes, you can prepare the salad in advance. However, add the avocados right before serving. This keeps them fresh and green. If you store it for later, put plastic wrap directly on the surface. This minimizes air exposure and keeps the salad tasty. Look for fresh corn with bright green husks. The kernels should feel plump and firm. If using canned corn, choose a brand with low sodium. Drain and rinse it well to remove extra salt. This will help the corn taste fresh and sweet in your salad. Enjoy the crunch and sweetness! For the complete recipe, check out the Avocado Corn Salad Delight. In this blog post, we covered how to make a delicious avocado corn salad. We explored the best ingredients, tips for preparation, and ways to enhance flavor. You can mix and match based on your taste and needs. Remember to store leftovers properly to keep them fresh. With easy swaps and answers to common questions, you’ll create a great dish every time. Now, you have everything you need to impress your family and friends with your new salad skills. Enjoy making your own special version!](https://dishtreats.com/wp-content/uploads/2025/07/333f1f81-7d50-4cc6-bd3d-a33e08904fb9-768x768.webp)
![- 2 cups cooked chicken, shredded - 1 cup shredded cheddar cheese - 1 cup shredded Monterey Jack cheese - 4 large flour tortillas - 1 small onion, diced - 1 bell pepper, diced - 2 tablespoons olive oil - 1 teaspoon ground cumin - 1 teaspoon smoked paprika - ½ teaspoon garlic powder - Salt and black pepper to taste - Fresh cilantro, chopped - Sour cream - Salsa To make the Chicken and Cheese Quesadilla Skillet, gather these simple ingredients. The chicken gives it a hearty base. Cheese adds that melty goodness we all love. Using flour tortillas helps hold everything together. You can pick your favorite bell pepper color to add a pop of brightness. The spices elevate the flavor. Ground cumin offers a warm, earthy taste. Smoked paprika adds a hint of smokiness. Garlic powder gives a nice kick. Don’t forget the salt and black pepper to enhance all the flavors. Finally, for garnishes, fresh cilantro provides a burst of freshness. Serving it with sour cream and salsa makes each bite even better. You can find the full recipe at the beginning of this article. Enjoy your cooking! - Heat the skillet with olive oil - Add diced onion and bell pepper First, grab a large skillet and set it over medium heat. Pour in two tablespoons of olive oil and let it warm up. You want the oil to shimmer, which shows it's ready. Next, toss in the diced onion and bell pepper. Sauté them for about five minutes. Stir occasionally until they are soft and fragrant. This step builds a great flavor base for your quesadilla. - Mix in shredded chicken - Season with spices and cook until heated Now it's time to add the star of our dish: shredded chicken. Stir it in with the veggies. Sprinkle in one teaspoon of ground cumin, one teaspoon of smoked paprika, and half a teaspoon of garlic powder. Add salt and black pepper to taste. This mix brings out all the flavors. Cook everything for another three to five minutes. You want the chicken to heat up and soak in those tasty spices. - Distribute cheese and layer tortillas - Cover and cook until golden brown, flipping carefully Next, lower the heat to a gentle simmer. Grab half of your shredded cheddar and Monterey Jack cheese. Spread it evenly over the chicken and veggies. Place two tortillas on top, pushing them down gently. Now, add the rest of the cheese, followed by the other two tortillas. Cover the skillet with a lid and let it cook for four to five minutes. This will make the bottom crispy and let the cheese melt. When the bottom turns golden brown, carefully flip the quesadilla with a spatula. Cook for another four to five minutes until the second side is also golden and the cheese is gooey. For the complete recipe, check out the Full Recipe section! To get crispy tortillas, heat your skillet well. Use medium heat and add enough olive oil. Let the oil shimmer before adding your tortillas. Cook until golden brown on each side, about 4-5 minutes. For gooey cheese, use a mix of cheddar and Monterey Jack. These cheeses melt nicely together. Layer the cheese between tortillas and cover the skillet. This helps the cheese melt evenly and creates a delicious pull when you slice. To boost flavors, add spices like chili powder or cayenne pepper. These spices add a nice kick. You can also mix in fresh herbs, such as cilantro or parsley, for freshness. Pair your quesadilla with sides like guacamole or pico de gallo. These add extra flavor and texture. A squeeze of lime juice brightens up the dish too. For the best results, use a non-stick skillet. This helps avoid sticking and makes flipping easier. Cast iron skillets are also great for even heat. Use a wide spatula for flipping the quesadilla. This helps keep it intact. A pizza cutter is perfect for slicing your quesadilla into wedges. For the full recipe, check out the detailed instructions above. {{image_4}} You can easily change up the protein in your quesadilla. If you want beef, use ground beef or steak strips. For a seafood twist, shrimp works great too. If you're feeling vegetarian, try black beans or mushrooms. These options keep the dish fresh and fun. Want more heat? Add sliced jalapeños or diced green chilies to bring spice. You can also change the cheese for different flavors. Try pepper jack for a kick or gouda for a smokier taste. Mixing cheeses adds depth and makes every bite exciting. You can serve quesadillas in stacks or as traditional wedges. Stacking them makes a fun dinner party dish. For dips, consider guacamole, ranch, or a zesty salsa. These enhance the meal and let everyone personalize their bites. Enjoy exploring these variations while making your own Chicken and Cheese Quesadilla Skillet Delight! For the full recipe, check out the [Full Recipe]. To store leftovers, let your quesadilla cool first. Then, wrap each piece tightly in plastic wrap. This keeps them fresh. Place the wrapped quesadillas in an airtight container. I recommend using glass or BPA-free plastic containers for safety. They can last in the fridge for about three days. For reheating quesadillas, the best method is using a skillet. Heat your skillet over medium heat. Place the quesadilla in the skillet and cover it with a lid. This will help the cheese melt evenly. You can also use an oven at 350°F (175°C) for about 10 minutes. This keeps the tortilla crispy. Avoid using a microwave, as it can make the quesadilla soggy. To freeze leftovers, wrap each quesadilla in plastic wrap. Then, place them in a freezer-safe bag or container. Make sure to remove as much air as possible. They can stay frozen for up to three months. When you are ready to eat, thaw them in the fridge overnight. Reheat as mentioned before to enjoy a tasty meal again. Making a Chicken and Cheese Quesadilla Skillet is quick and easy. It takes about 10 minutes to prep and around 20 minutes to cook. In total, you can enjoy this dish in about 30 minutes. Yes, you can make this dish gluten-free. Simply swap the flour tortillas for corn tortillas or gluten-free tortillas. Both options work well and keep the flavors intact. For sides, I suggest fresh guacamole, a light salad, or refried beans. These add a nice touch to your meal. For drinks, a cold lemonade or a light beer works well with the flavors. You could also try a refreshing iced tea. This blog post covered everything you need for a tasty Chicken and Cheese Quesadilla Skillet. I shared the key ingredients, step-by-step cooking tips, and even fun variations. Remember to store leftovers well and try reheating them for that crunch. With these tips, you can enjoy a delicious meal anytime. Experiment and make it your own! Make cooking fun and tasty with these simple ideas. Enjoy your next quesadilla adventure!](https://dishtreats.com/wp-content/uploads/2025/06/644c33a7-6eb8-49b0-b6be-df01f2332de8-768x768.webp)


