Avocado Chickpea Salad Fresh and Flavorful Meal

Looking for a quick, fresh meal? This Avocado Chickpea Salad is the answer! Packed with creamy avocados and hearty chickpeas, it’s both satisfying and nutritious. This salad is easy to make and perfect for lunch or dinner. With just a few simple ingredients, you can whip up a colorful dish bursting with flavor. Let’s dive into how you can create this delightful salad in no time!
Ingredients
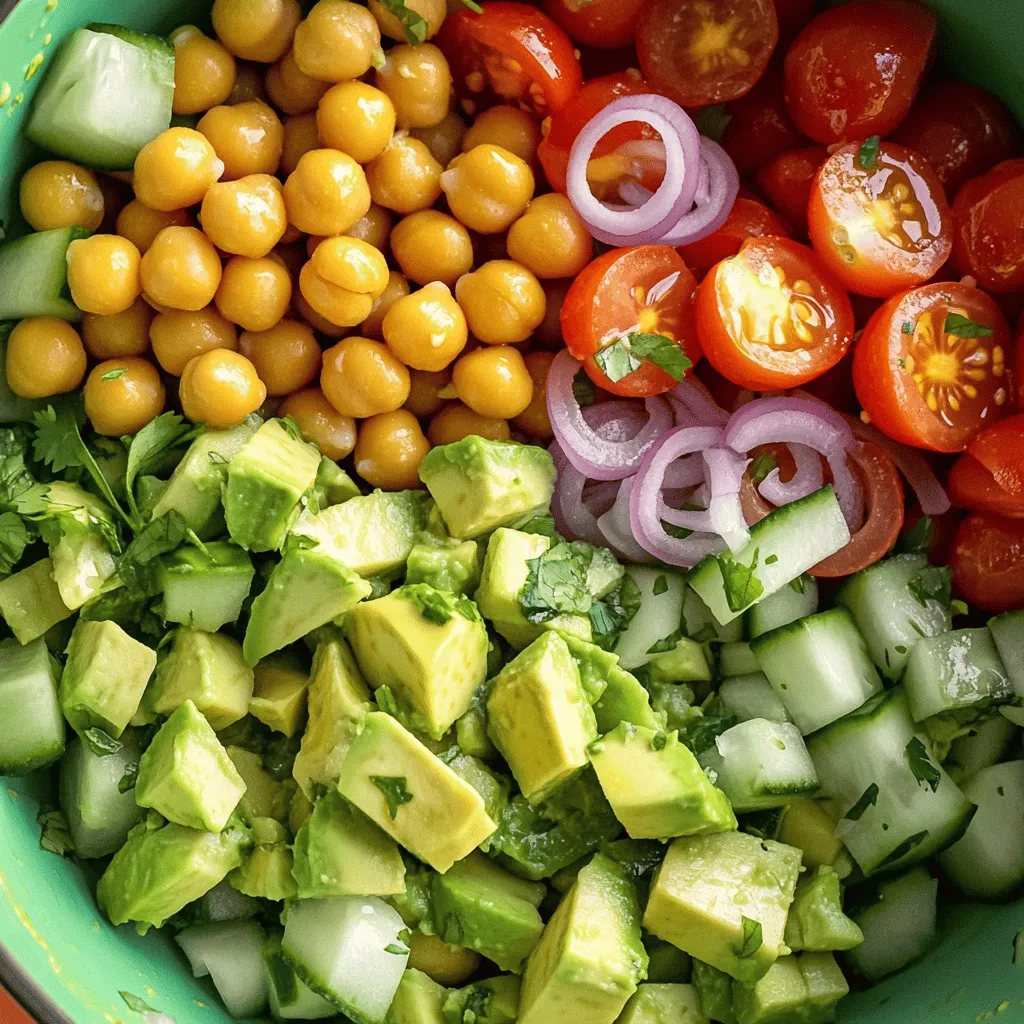
Main Ingredients for Avocado Chickpea Salad
- 1 can (15 oz) chickpeas
- 2 ripe avocados
- 1 cup cherry tomatoes
- ½ medium red onion
- ½ cucumber
- ¼ cup fresh cilantro
- 2 tablespoons extra virgin olive oil
- 1 tablespoon lime juice
- 1 teaspoon ground cumin
- Salt and pepper to taste
The base of this salad starts with chickpeas. They add protein and fiber. I always drain and rinse them well to remove extra salt. Next, avocados bring creaminess that makes every bite smooth. I look for ripe ones, as they provide the best flavor.
Cherry tomatoes add a burst of sweetness. I like to halve them to make them easier to eat. Red onion gives a sharp taste that wakes up the dish. Cutting it finely helps blend its flavor without being too strong.
Cucumbers are key for crunch. I dice them small to balance the softer textures. Fresh cilantro adds a lovely herby touch. I chop it finely so it spreads out nicely.
The dressing is simple but powerful. Extra virgin olive oil adds richness. Lime juice brightens the salad and makes the flavors pop. Ground cumin brings warmth and earthiness to the mix. I finish with salt and pepper for just the right touch.
Optional Add-ins
- Feta cheese for a creamy texture
- Red pepper flakes for added heat
- Mixed greens as a salad base
If you want to mix it up, try some add-ins! Feta cheese gives a nice creamy bite. Red pepper flakes can add heat if you like spice. For a base, serve it on mixed greens for extra crunch and freshness.
Step-by-Step Instructions
Preparing the Ingredients
- Rinse and drain the chickpeas.
- Dice avocados into bite-sized pieces.
- Chop the cherry tomatoes, cucumber, and red onion.
- Finely chop the cilantro for a fresh taste.
To start, you need to rinse the chickpeas. This step removes any canning liquid and keeps your salad fresh. After draining, place them in a large mixing bowl. Next, take your ripe avocados. Cut them in half, remove the pit, and dice them. Keep the pieces large for a nice texture.
Now it’s time for the vegetables. Chop the cherry tomatoes in half for sweetness. Dice the cucumber for a refreshing crunch. Finely chop the red onion for a burst of flavor. Don’t forget the cilantro! It adds a herby kick that brightens the salad.
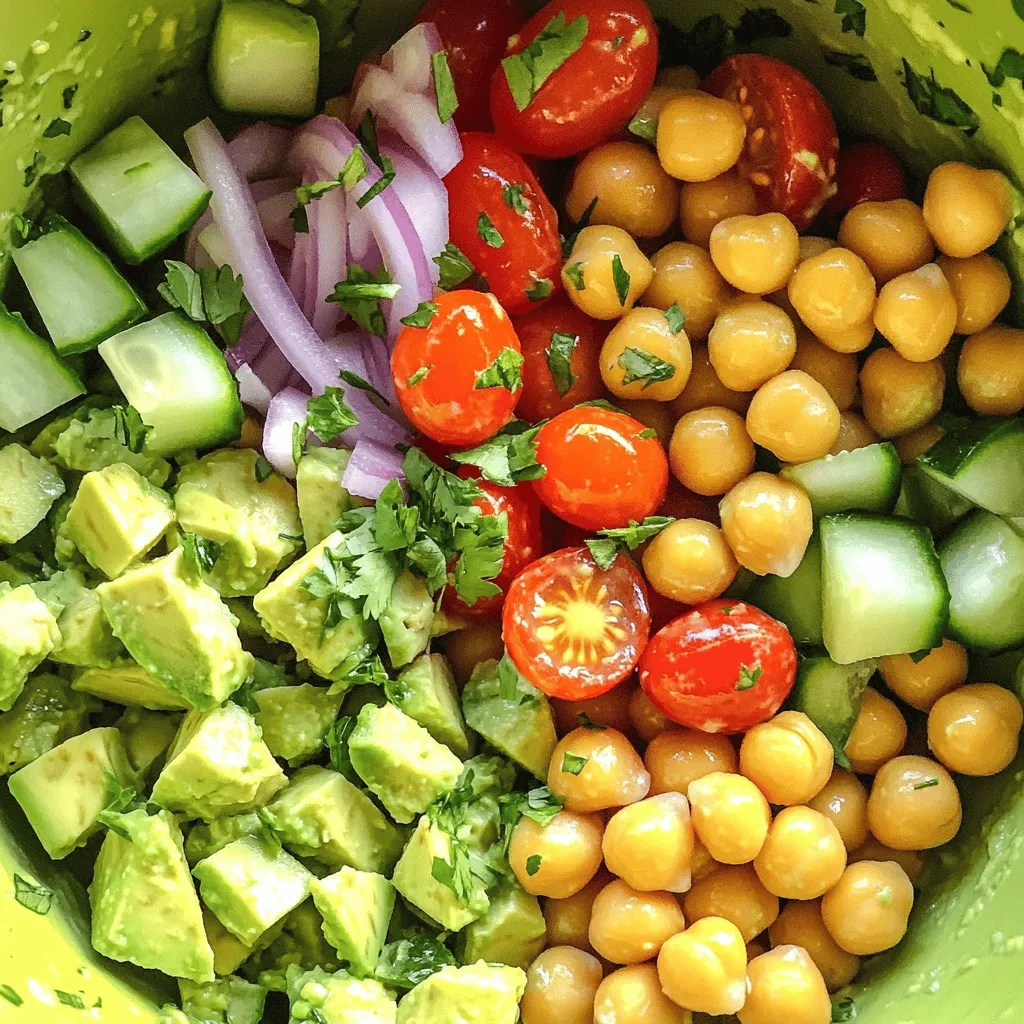
Mixing the Salad
- Combine all ingredients in a bowl.
- Gently toss to combine without mashing.
Once all your ingredients are prepared, it’s time to mix. Add the chickpeas, diced avocados, cherry tomatoes, cucumber, red onion, and cilantro into your bowl. This mix creates a colorful and tasty salad.
Next, drizzle in the extra virgin olive oil and freshly squeezed lime juice. These add richness and brightness. Sprinkle the ground cumin, and season with salt and pepper. Now, gently toss everything together. Be careful not to mash the avocados. You want them to stay creamy and intact.
Final Touches
- Taste and adjust seasoning.
- Serve with pita chips or over greens.
After mixing, it’s essential to taste your salad. This step lets you adjust the seasoning. If it needs more lime juice, salt, or pepper, add it. Every bite should burst with flavor.
When you’re happy with the taste, think about how to serve it. I love pairing this salad with toasted pita chips. They add a nice crunch. You can also serve it over a bed of greens. This way, you get a light and fresh meal. Enjoy your delightful creation!
Tips & Tricks
Keeping Avocados Fresh
To keep your avocados from turning brown, use lime juice. Lime juice adds flavor and keeps them fresh. After cutting, store them in an airtight container. This helps keep air out and prevents browning.
Enhancing Flavor
Want to boost the taste? Add minced garlic for a bold kick. Garlic gives the salad a great depth. You can also marinate the chickpeas and veggies. Letting them sit for a bit lets the flavors mix and deepen.
Serving Suggestions
This salad pairs well with grilled chicken or fish. The freshness of the salad complements the rich flavors of the meat. You can also use it as a filling in wraps or sandwiches. It adds creaminess and crunch to your meal.

Variations
Mediterranean Twist
You can give your avocado chickpea salad a Mediterranean twist. First, add some green olives and colorful bell peppers. These ingredients will bring a bright flavor. You can also include cooked quinoa for extra protein. This makes the salad heartier and even more filling.
Spicy Avocado Chickpea Salad
If you love heat, try a spicy version! Incorporate diced jalapeños or a drizzle of sriracha. Both add a nice kick to the dish. Finish with a topping of creamy avocado dressing. This adds both spice and smoothness, making each bite exciting.
Creamy Avocado Version
For a creamy take, blend ripe avocado with yogurt or sour cream. This creates a rich dressing for your salad. Pour it over the mix to coat everything nicely. The creaminess balances the crunch of the veggies, making each bite delightful.Enjoy experimenting with these variations!
Storage Info
Storing Leftovers
To keep your avocado chickpea salad fresh, refrigerate it in an airtight container. This helps prevent air from spoiling it. It tastes best when consumed within 1-2 days. After that, the avocados may brown, and the flavors can fade.
Freezing Options
If you want to save some for later, consider freezing the avocados before mixing. This way, they keep their texture better. You can also freeze the dressing separately. Just remember to thaw it before using. This method allows you to enjoy this tasty salad even when fresh ingredients are not available.
FAQs
Can I make this salad in advance?
Yes, but add avocados right before serving to maintain freshness. If you mix in the avocados too early, they can turn brown. To keep the salad bright and inviting, store the other ingredients in the fridge. Just toss in the diced avocados last for a creamy and colorful touch.
Is this salad vegan?
Yes, the ingredients are entirely plant-based. This makes it a great choice for anyone following a vegan diet. Enjoy the blend of flavors and textures without any animal products. It’s a healthy meal that everyone can enjoy.
What can I use instead of chickpeas?
Substitutes include black beans or lentils for variation. Both options add a good source of protein and fiber. You can also try edamame for a fun twist. Each substitute brings its own flavor, so feel free to experiment.
How can I make this salad higher in protein?
Add cooked quinoa or diced grilled chicken. Quinoa is a great plant-based protein. It also adds a nutty flavor. If you prefer meat, go for grilled chicken. It complements the other ingredients well and boosts the protein content.
This blog post covered how to make a tasty Avocado Chickpea Salad. We explored the main ingredients and step-by-step instructions to create a fresh dish. You learned tips for keeping avocados fresh and ways to boost flavor. Variations offer even more choices, and we touched on storage for leftovers. Overall, this salad is healthy, easy, and versatile. Enjoy making it your own!


![- Rice paper wrappers - 1 ripe mango, peeled and cut into thin julienne strips - 2 ripe avocados, halved, pitted, and sliced into thin wedges - 1/2 cucumber, peeled and julienned - 1 cup shredded carrots - 1/4 cup fresh mint leaves, torn if large - 1/4 cup fresh cilantro leaves - 1 tablespoon sesame seeds (optional) - 3 tablespoons soy sauce - 1 tablespoon freshly squeezed lime juice - 1 teaspoon honey or agave syrup - 1/2 teaspoon freshly grated ginger Mango avocado summer rolls shine with fresh ingredients. You need rice paper wrappers to hold all this goodness. The key fresh items are ripe mango and creamy avocado. Their flavors blend perfectly. Crunchy cucumber and colorful carrots add texture and fun. Fresh herbs like mint and cilantro brighten the rolls. For a twist, sprinkle sesame seeds for extra crunch. Now, let's talk about the dipping sauce. It's easy to make and enhances the taste. Just mix soy sauce, lime juice, honey, and ginger. This sauce adds a tangy, sweet kick that pairs well with the rolls. You can find the full recipe with all these details. Enjoy creating your mango avocado summer rolls today! To start, you need to make the dipping sauce. In a small mixing bowl, add the soy sauce, lime juice, honey or agave syrup, and grated ginger. Whisk these ingredients together well. This sauce adds a bright, tangy flavor that pairs nicely with the fresh summer rolls. Set it aside for the flavors to blend. Next, grab a shallow dish or a large plate. Fill it with warm water. Take one rice paper wrapper and dip it in the warm water for about 10 seconds. You want it to be soft but not too mushy. Carefully lift it out and lay it flat on a damp kitchen towel or a clean surface. This makes it easier to work with. Now it’s time to layer your ingredients. In the center of the rice paper wrapper, place a few strips of mango, a couple of avocado slices, sticks of cucumber, and a handful of shredded carrots. Don’t forget the fresh mint and cilantro leaves! They add a burst of flavor. You can also sprinkle sesame seeds on top for extra crunch if you like. To roll up the summer rolls, fold the sides of the wrapper over the filling. Then, gently roll the wrapper away from you while tucking in the filling tightly. This helps keep everything secure inside. Repeat this for the rest of the wrappers and filling. You’ll soon have a beautiful platter of summer rolls! After rolling, place the summer rolls on a serving plate. Cover them with a damp cloth. This keeps them fresh and prevents them from drying out while you finish the rest. Make sure they stay moist for the best taste. When you are ready to serve, present the summer rolls with the dipping sauce on the side. This makes it fun for everyone to dip their rolls as they wish. Enjoy the fresh flavors and the crisp textures of your homemade Mango Avocado Summer Rolls! For the full recipe, check out the complete instructions above. To avoid tearing the rice paper wrappers, keep these tips in mind: - Soak each wrapper just until soft, about 10 seconds in warm water. - Work on a damp surface to prevent sticking. - Don't overfill the wrapper; less is more! - When rolling, tuck in the sides gently, but firmly. Choosing ripe ingredients makes a big difference. Here are my best practices: - Look for mangoes that yield slightly to gentle pressure. - Choose avocados that are firm but not hard. - Select cucumbers that are crisp and have a smooth skin. - Fresh herbs should be vibrant and fragrant; avoid wilting. Want to make your rolls even better? Try these ideas: - Add cooked shrimp or chicken for extra protein. - Include bell peppers or radishes for a crunchier bite. - Swap in different herbs like basil or parsley for a unique flavor. - Use quinoa or rice noodles for a heartier filling. For the complete recipe, check out the [Full Recipe]. Enjoy making your summer rolls! {{image_4}} If you want a fully plant-based dish, there are many fun swaps. You can use tofu instead of fish or shrimp. Try adding bean sprouts for a nice crunch. You can also toss in sliced bell peppers for a splash of color. These swaps keep the rolls fresh and tasty. To give your summer rolls an Asian twist, add fresh herbs like basil or dill. You can also use hoisin sauce or peanut sauce instead of the soy sauce. A drizzle of sriracha can bring some heat. These changes will make your rolls pop with flavor. For easy assembly, prep your ingredients ahead of time. Cut your mango, avocado, and cucumber in advance. Store them in airtight containers in the fridge. This way, you can whip up these rolls in just a few minutes. It makes summer roll night so much easier! For the full recipe, check out the detailed instructions provided. To keep your summer rolls fresh, wrap them in a damp cloth. Place them on a plate and cover with plastic wrap. This method helps prevent the rice paper from drying out. Store the rolls in the fridge if you plan to eat them later. Try to consume them within 24 hours for the best taste and texture. If you want to freeze unassembled summer rolls, first prepare the ingredients. Gather your mango, avocados, and veggies. Then, make the rolls but do not roll them up yet. Lay each rice paper wrapper flat on a parchment-lined tray. Fill the wrappers but leave them open. Freeze the tray for about one hour. Once frozen, place the rolls in a freezer bag. This helps you save space and keeps them fresh. When you’re ready to enjoy your summer rolls, take them out of the freezer. Place them in the fridge for a few hours or overnight to thaw. For a faster option, you can run them under warm water for a few seconds. Never use a microwave, as it can make the rice paper tough. After thawing, assemble the rolls with your favorite sauce, and enjoy a fresh and tasty meal! To make Mango Avocado Summer Rolls, follow these steps: 1. First, prepare the dipping sauce by mixing soy sauce, lime juice, honey, and ginger. 2. Next, soak rice paper wrappers in warm water for about 10 seconds. 3. Lay the softened wrapper on a damp surface. 4. Place mango strips, avocado slices, cucumber sticks, shredded carrots, and herbs in the center. 5. Optionally, add sesame seeds for crunch. 6. Fold the sides over the filling and roll tightly. 7. Repeat until all ingredients are used. Serve with dipping sauce. This process is easy and fun, perfect for summer gatherings. Yes, you can add meat or seafood to your summer rolls. Here are some great options: - Grilled chicken or shrimp adds protein and flavor. - Thinly sliced beef or pork works well too. - For a tasty twist, try crab or lobster. These additions make your rolls even more filling and delicious. You can try different dipping sauces beyond the suggested one. Here are some ideas: - Peanut sauce for a creamy texture and nutty flavor. - Sweet chili sauce adds a spicy kick. - A simple vinegar and soy sauce mix is also tasty. Feel free to experiment with flavors you love! You now know how to make delicious summer rolls with fresh ingredients and tasty dipping sauce. We covered the necessary components, step-by-step instructions, and tips for success. Remember, you can customize these rolls to fit your tastes. With the right care, you can store or even freeze them for later. Enjoy the fun of making and sharing these tasty treats. Trust me, they’re worth the effort!](https://dishtreats.com/wp-content/uploads/2025/07/e9c41e61-bd63-46cf-9640-b605cd161798-768x768.webp)
![To create the Roasted Beet and Goat Cheese Salad, you will need the following ingredients: - 4 medium beets, scrubbed and trimmed - 2 tablespoons extra virgin olive oil, divided - Sea salt and freshly ground black pepper to taste - 4 cups mixed greens (arugula, spinach, and kale) - 1/2 cup creamy goat cheese, crumbled - 1/4 cup walnuts, toasted and roughly chopped - 1/4 cup dried cranberries - 2 tablespoons balsamic vinegar - 1 tablespoon pure honey - Fresh herbs (basil or parsley) for garnish Each ingredient adds not just flavor, but also nutrition. Beets are rich in vitamins and minerals. They help boost your energy levels. Goat cheese brings a creamy texture and a tangy taste. It pairs well with the sweetness of beets and cranberries. Walnuts add crunch and healthy fats, while mixed greens provide fiber. The dressing of balsamic vinegar and honey ties all the flavors together. You can find the Full Recipe for step-by-step instructions to make this delightful salad. 1. Preheat the oven: Set your oven to 400°F (200°C). This makes sure the beets roast well. 2. Wrap the beets: Take each beet and wrap it in foil. Drizzle 1 tablespoon of olive oil on them. Add sea salt and black pepper for flavor. Seal the foil tightly. 3. Roast the beets: Place the wrapped beets on a baking sheet. Roast them in the oven for 45-60 minutes. They are done when a fork easily pierces them. 1. Peel and slice the beets: Let the beets cool a bit. Then, peel off the skin. I recommend wearing gloves to avoid stains. Cut the beets into wedges for a nice look. 2. Combine salad ingredients: In a large mixing bowl, add the mixed greens, sliced roasted beets, crumbled goat cheese, toasted walnuts, and dried cranberries. Gently mix everything together. 1. Prepare the dressing: In a small bowl, whisk together the balsamic vinegar, the last tablespoon of olive oil, and honey. Stir well until combined. Taste it and add salt and pepper as needed. 2. Dress the salad: Drizzle the dressing over the salad. Toss everything gently to coat the greens and other ingredients. 3. Serve the salad: Plate the salad right away. Garnish with fresh herbs for a pop of color and extra flavor. For the full recipe, check out the Beet the Ordinary: Roasted Beet and Goat Cheese Salad. - Choosing the right beet size for even cooking: I recommend using medium beets. They cook evenly and are easy to handle. If you use larger beets, they may take longer to roast, leading to uneven texture. Smaller beets cook too quickly and may dry out. - How to properly season the beets: Before wrapping the beets in foil, drizzle them with olive oil. Add a generous pinch of sea salt and freshly ground black pepper. This simple seasoning enhances their natural sweetness and flavor during roasting. - Creative ways to plate the salad: For a stunning presentation, use a large, flat platter. Layer mixed greens as a base. Fan out the roasted beet wedges on top and sprinkle crumbled goat cheese and walnuts over the salad. This method creates a colorful and inviting look. - Garnishing tips to elevate the dish: Fresh herbs can add color and flavor. A sprinkle of chopped basil or parsley brightens the dish. You can also use edible flowers for a special touch, making it perfect for gatherings or celebrations. - Best practices for prepping ingredients in advance: You can roast the beets a day ahead. Once cooled, wrap them in plastic to keep fresh. Store the mixed greens and other ingredients separately. This way, you can quickly assemble your salad just before serving, keeping everything crisp and tasty. For the complete recipe, see [Full Recipe]. {{image_4}} You can switch up the greens in your salad to make it special. Try using arugula for a peppery kick or romaine for a crisp bite. Each green offers a different taste and texture, giving your salad a new vibe. If you want to change the cheese, feta or blue cheese can work wonders. Feta adds a salty flavor, while blue cheese brings a bold touch. Both complement the sweetness of the beets nicely. The right dressing can elevate your salad. A citrus vinaigrette adds a bright and zesty flavor. Mix fresh lemon juice with olive oil for a quick option. If you want something creamy, a yogurt dressing is perfect. It pairs well with the tang of goat cheese and makes the salad feel lush. Don’t hesitate to experiment with different dressings to find your favorite. Add protein to make your salad more filling. Grilled chicken is a great choice, giving the salad a hearty feel. For a plant-based option, chickpeas work well. They add protein and texture. You can also sprinkle seeds, like pumpkin or sunflower seeds, for some crunch. Fresh fruit, such as sliced pears or apples, can add a sweet note. Each add-in brings its own charm to the dish, making it unique every time. Don’t forget to check out the Full Recipe for more inspiration! To keep your roasted beet and goat cheese salad fresh, store it in an airtight container. Place any leftovers in the fridge. The salad will stay good for about three days. Make sure to keep the dressing separate until you are ready to eat. This helps keep the greens crisp and fresh. If you want to store beets for longer, you can freeze them. First, roast the beets as in the Full Recipe. Let them cool, then peel and slice them. Place the slices in a freezer-safe bag, removing as much air as possible. Beets can last up to six months in the freezer. However, I do not recommend freezing the prepared salad. The greens won't hold up well after thawing. When it's time to eat your stored salad, you can reheat the beets if you like. Just warm them in the microwave for about 30 seconds. Toss the salad again after reheating. This helps mix the flavors back together. If you stored the salad dressed, consider adding a bit more dressing before serving. This keeps everything tasty and vibrant. How long do roasted beets last in the fridge? Roasted beets can last up to five days in your fridge. Store them in an airtight container. This way, they stay fresh and tasty for your salads. Can I use pre-cooked beets for this recipe? Yes, you can use pre-cooked beets. They are a great time-saver. Just cut them into wedges and add them to your salad. They will still taste delicious! What type of goat cheese is best for salads? A creamy goat cheese works best for this salad. It adds a nice richness and tang. Look for soft, crumbled varieties for easy mixing. Can I substitute goat cheese with a dairy-free option? Absolutely! You can use a dairy-free cheese made from nuts. Look for a creamy cashew cheese or tofu-based option. Both will provide a nice flavor. What are the health benefits of beet and goat cheese salad? This salad is packed with nutrients. Beets are high in fiber and antioxidants. Goat cheese adds protein and calcium. Together, they support heart health and digestion. How many calories are in a serving of this salad? One serving of this salad has about 300 calories. This includes the beets, goat cheese, nuts, and dressing. It’s a great balance of flavors and nutrients without too many calories. For the complete recipe, check out the Full Recipe. This salad combines roasted beets, fresh greens, and tangy goat cheese. You learned how to roast beets and mix vibrant ingredients for a delicious dish. Remember to choose the right beet size and season well for great texture. Don't hesitate to try different greens or dressings to make it your own. Salad prep can be easy, helping you save time. Enjoy this healthy meal that packs flavor and nutrients. Make it today and impress yourself with your cooking skills!](https://dishtreats.com/wp-content/uploads/2025/06/a3a0567a-1f00-4857-8ef4-d1e9b38b024f-768x768.webp)


![To make a tasty and healthy crispy chickpea salad, you need these main ingredients: - 1 can (15 oz) chickpeas, drained and rinsed - 2 tablespoons olive oil - 1 teaspoon smoked paprika - 1/2 teaspoon garlic powder - 1/2 teaspoon ground cumin - Salt and freshly ground pepper to taste - 4 cups mixed greens (spinach, arugula, and lettuce blend) - 1 cup cherry tomatoes, halved - 1/2 cucumber, diced - 1/4 red onion, thinly sliced Add some optional ingredients to enhance the flavor and texture of your salad: - 1/4 cup feta cheese, crumbled (optional) - A handful of fresh parsley, chopped (for garnish) You will also need a few kitchen tools to make this salad: - A medium-sized mixing bowl for the chickpeas - A large bowl for the salad - A baking sheet lined with parchment paper - A whisk for the dressing - A separate small bowl for mixing the tahini dressing Using these ingredients and tools, you can create a delicious crispy chickpea salad. Try the full recipe for a step-by-step guide! First, preheat your oven to 400°F (200°C). This makes sure the chickpeas get crispy. Line a baking sheet with parchment paper. This helps with easy cleanup later. In a bowl, mix the drained chickpeas with olive oil. Add smoked paprika, garlic powder, ground cumin, salt, and pepper. Make sure each chickpea is well coated. This blend gives them a tasty kick. Spread the seasoned chickpeas evenly on the baking sheet. Don’t crowd them; they need space to get crispy. Bake for 25-30 minutes. Shake the pan halfway through to help them cook evenly. They should turn golden and crunchy. While the chickpeas bake, prepare the salad base. In a large bowl, toss together mixed greens, halved cherry tomatoes, diced cucumber, and thinly sliced red onion. Mixing them now lets the flavors combine as you assemble. In a small bowl, whisk tahini, fresh lemon juice, and a pinch of salt and pepper. If you want a thinner dressing, add a splash of water. This dressing ties the salad together, adding a rich flavor. Once the chickpeas are crispy, take them out and let them cool for a minute. Top your salad with these warm chickpeas. Drizzle the tahini dressing over everything. Add crumbled feta cheese for creaminess, if you like. Finish with fresh parsley for color. Enjoy your Crispy Chickpea Delight Salad! For the complete recipe, check the [Full Recipe]. To make your chickpeas extra crispy, dry them well before cooking. Drain and rinse the canned chickpeas, then lay them on a paper towel. Pat them gently to remove excess moisture. The drier the chickpeas, the crunchier they will be. Toss them with olive oil and spices right before baking. Spread them out on your baking sheet. Avoid crowding them; it helps with airflow and crispiness. Bake at 400°F for 25 to 30 minutes, shaking the pan halfway through. This step ensures even cooking and crispiness. If you have leftovers, store the salad and chickpeas separately. Place the salad in an airtight container in the fridge. Keep the chickpeas in another container. This will help prevent sogginess. When you want to eat the leftovers, reheat the chickpeas in the oven for a few minutes. This will revive their crisp texture. The salad will stay fresh for about two days in the fridge. For the best taste, serve the salad immediately after assembling. The warm chickpeas add a nice contrast to the cool greens. Drizzle the tahini dressing right before serving. This way, it coats the ingredients nicely. You can also sprinkle some feta cheese on top for extra creaminess. Fresh herbs like parsley can brighten the dish. Try adding avocado for creaminess or nuts for crunch. Each addition enhances the flavor and texture of your salad. Enjoy experimenting! {{image_4}} You can swap out greens to change the salad's taste. Try using kale for a hearty crunch. Baby spinach offers a soft, mild flavor. You can even mix in some crunchy cabbage for more texture. Each option adds its unique twist while still pairing well with crispy chickpeas. If you want to make the salad more filling, add protein. Grilled chicken works great with the chickpeas. You can also try adding sliced hard-boiled eggs for richness. For a vegetarian option, toss in some quinoa or black beans. These choices will help boost the meal's nutrients. While tahini dressing is fantastic, don’t be afraid to experiment. A lemon vinaigrette adds a bright zing. You could also try a yogurt-based dressing for creaminess. If you like a kick, a spicy harissa dressing works wonders too. Each dressing brings a new flavor that can change your salad experience. For the full recipe, check out the Crispy Chickpea Delight Salad 🥗. To store leftover salad, first, let it cool down. Place it in an airtight container. This keeps the salad fresh. Add the crispy chickpeas on top only when serving. This way, they stay crunchy. If you mix them in, they can get soggy. If you have leftover crispy chickpeas, you can reheat them. Preheat your oven to 350°F (175°C). Spread the chickpeas on a baking sheet. Bake them for about 10 minutes. This brings back their crunch. You can also use an air fryer for a quicker option. The salad can last up to three days in the fridge. Chickpeas stay good for about a week if stored well. Fresh veggies have a shorter shelf life. Use them within three to five days. Always check for freshness before eating. For a detailed recipe, refer to the Full Recipe. Yes, you can use dried chickpeas. They need soaking and cooking first. To prepare, soak them overnight in water. Cook them until they are tender. This can take about 1 to 2 hours. Then, follow the same steps as with canned chickpeas in the recipe. This salad is packed with nutrients. Chickpeas provide protein and fiber. Mixed greens bring vitamins A and C. Tomatoes offer antioxidants, while cucumbers add hydration. Olive oil is a healthy fat. Feta cheese, if used, adds calcium. Overall, it is a well-balanced meal. To make this salad vegan, skip the feta cheese. The rest of the ingredients are already plant-based. You can also add more veggies or nuts for extra flavor and nutrition. Try adding avocado for creaminess or nuts for crunch. Yes, you can prep it ahead of time. Store the crispy chickpeas in an airtight container. Keep the salad ingredients separate until you are ready to eat. This keeps everything fresh and crispy. Just assemble when you want to enjoy your meal. This salad pairs well with many dishes. Serve it alongside grilled chicken or fish for protein. It also goes great with a warm pita or flatbread. If you want a lighter meal, enjoy it as a stand-alone dish. You can find the Full Recipe for more details. In summary, this blog post covered how to make a crispy chickpea salad. We explored the main ingredients and added options to boost flavor. I shared step-by-step cooking instructions and tips for the perfect crunch. You learned about storage methods and how to customize the dish. Enjoy this salad any time for a tasty and healthy meal. With its simple steps, you can make it again and again!](https://dishtreats.com/wp-content/uploads/2025/06/a0161600-1d29-449f-a743-39fb8b2e717a-768x768.webp)
