Asian Chicken Lettuce Wraps Flavorful and Simple Dish
 link for all details! Asian Chicken Lettuce Wraps are fun, tasty, and easy to make. We covered key ingredients, step-by-step cooking, and helpful tips. You can mix things up with different proteins and veggies. Storing leftovers is simple, too. This dish is perfect for quick meals or impressing guests. Use the recipe and ideas to create your own version. Enjoy every bite, and share your creations!](https://dishtreats.com/wp-content/uploads/2025/07/cde1ffe3-32d5-41af-a230-f4c5c520fc8a.webp)
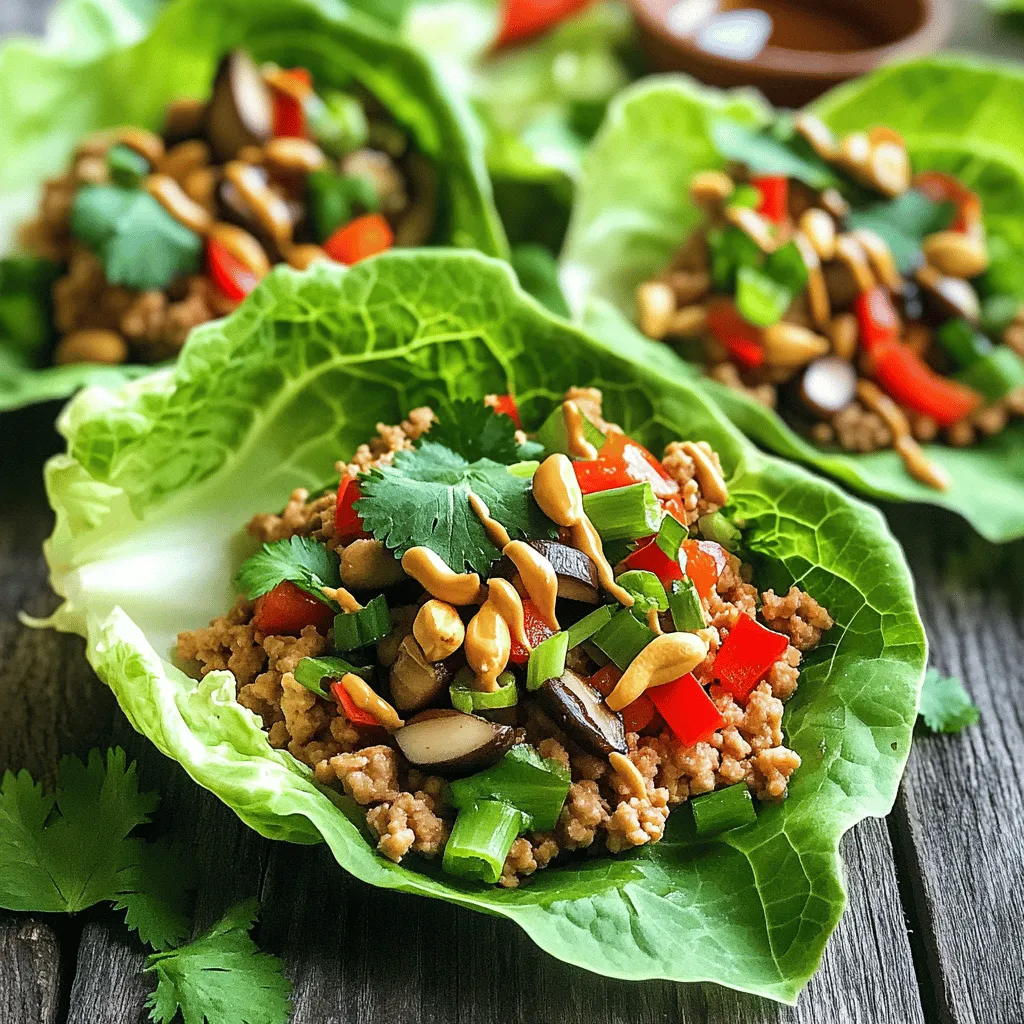
Are you craving a fresh, quick dish that’s packed with flavor? Look no further! Asian Chicken Lettuce Wraps are simple to make and taste amazing. With juicy ground chicken, crunchy vegetables, and tasty sauces, these wraps are perfect for lunch or dinner. Plus, they are fun to assemble! In this article, I’ll guide you through the ingredients, steps, and tips to create your own delicious wraps at home. Let’s get started!
Ingredients
Main Ingredients for Asian Chicken Lettuce Wraps
- 1 lb ground chicken
- 1 cup shiitake mushrooms, finely chopped
- 1 red bell pepper, diced
- 2 green onions, chopped (white and green parts separated)
- 2 cloves garlic, minced
- 1-inch piece of ginger, grated
The main ingredients bring lots of flavor. Ground chicken gives the wraps their base. Shiitake mushrooms add a rich taste. Red bell pepper gives a nice crunch. Green onions add freshness. Garlic and ginger give a punch of flavor.
Sauces and Seasonings
- 3 tablespoons soy sauce
- 1 tablespoon hoisin sauce
- 1 tablespoon sesame oil
- 1 teaspoon rice vinegar
- Salt and pepper to taste
The sauces and seasonings are key to this dish. Soy sauce adds saltiness. Hoisin sauce gives a sweet touch. Sesame oil adds a nutty flavor. Rice vinegar adds a bit of tang. Salt and pepper round out the taste.
Garnishes
- Chopped peanuts or cashews
- Fresh cilantro leaves
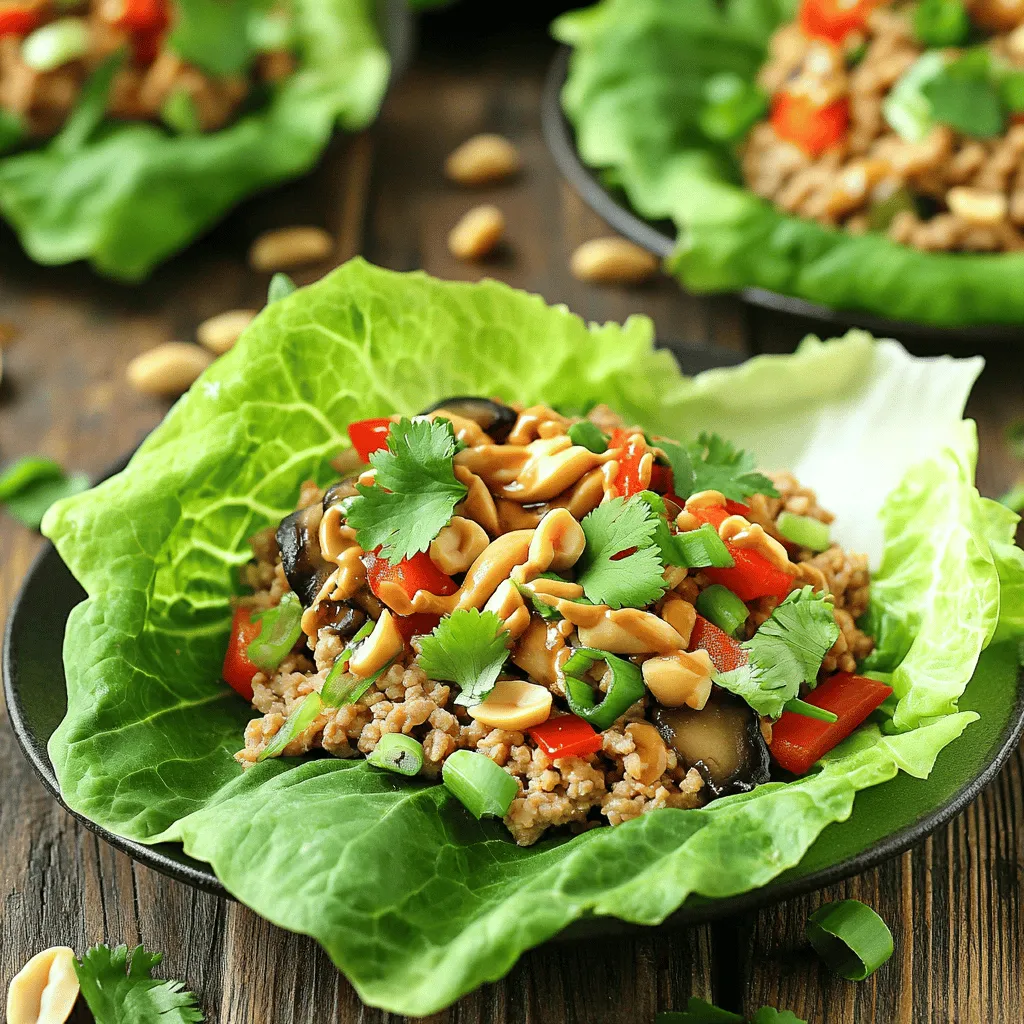
Garnishes make your wraps fun and tasty. Chopped peanuts or cashews add crunch. Fresh cilantro gives a burst of flavor. These toppings enhance each bite.
Step-by-Step Instructions
Preparing the Base
1. Heat sesame oil in a large skillet over medium heat.
2. Add minced garlic and grated ginger. Sauté for about 1 minute until golden.
3. Add the ground chicken. Use a wooden spoon to break it apart.
4. Cook for 5-7 minutes until the chicken is fully browned.
Cooking the Vegetables
1. Stir in the finely chopped shiitake mushrooms and diced red bell pepper.
2. Sauté for an additional 3-4 minutes until the veggies soften and smell great.
Finishing Touches
1. Pour in soy sauce, hoisin sauce, and rice vinegar. Mix everything well.
2. Adjust seasoning with salt and pepper to taste.
3. Remove from heat and gently fold in the chopped green onions (white parts).
Now, you’re ready to serve the mixture in fresh lettuce leaves. Each bite will be full of flavor and crunch!
Tips & Tricks
How to Perfect Your Wraps
Choosing the right lettuce
For the best wraps, choose butter lettuce or romaine. These types are soft yet sturdy. They hold the filling well and add a nice crunch. Rinse the leaves and dry them gently. This keeps them fresh and ready for filling.
Tips for sautéing chicken evenly
To sauté chicken evenly, use medium heat. This prevents burning and ensures even cooking. Break the meat apart as it cooks. Stir often for even browning. Aim for a golden color, which adds flavor.
Enhance Flavor and Texture
Recommended cooking techniques
Sautéing is a great way to cook the chicken. It locks in moisture and flavor. Use a non-stick skillet to prevent sticking. You can also steam the vegetables for a lighter touch. This keeps their bright colors and nutrients.
Adding crunch with nuts
For extra crunch, sprinkle chopped peanuts or cashews on top. They add a delightful texture. Toasting the nuts before adding them makes them even more flavorful. Just watch them closely to prevent burning.
Presentation Ideas
Best ways to serve and display wraps
Arrange the lettuce wraps on a large platter. This makes it easy for guests to grab one. You can also serve with a small bowl of extra sauce for dipping. It adds a fun element to your meal.
Creating a garnish station
Set up a garnish station with cilantro and extra nuts. This allows guests to customize their wraps. Provide small bowls for easy access. It makes your meal interactive and more enjoyable.

Variations
Ingredient Substitutions
You can switch out ground chicken for ground turkey. It gives a leaner taste. If you prefer plant-based options, try using tofu. Just crumble it before adding it to the pan.
Feel free to play with the veggies in your wrap. You can add carrots, water chestnuts, or snap peas. Each vegetable will bring a new crunch and flavor.
Flavor Variations
Want some heat? Add chili sauce or sriracha to the mix. It gives your wraps a spicy kick. You can also toss in some red pepper flakes for extra zest.
Adding herbs can change the flavor too. Try fresh basil or mint for a unique twist. You can mix these into the chicken or use them as a garnish.
Dietary Adjustments
If you need a gluten-free option, use tamari instead of soy sauce. It has a similar taste and works well in this dish.
For a vegan-friendly choice, use crumbled tofu and skip the chicken. You can add more vegetables for a hearty meal. This way, everyone can enjoy the wraps!
Storage Info
Storing Leftovers
To store your Asian chicken lettuce wraps, keep them in an airtight container. Place the chicken mixture separate from the lettuce. This prevents the leaves from wilting. The chicken can last in the fridge for up to three days. Always check for freshness before eating.
Freezing Options
You can freeze the cooked chicken mixture for later use. Make sure to let it cool completely before packing it. Use freezer-safe bags or containers to prevent freezer burn. The chicken mixture can freeze well for up to three months. To reheat, thaw it overnight in the fridge. Warm it in a skillet over low heat until heated through. This keeps the flavor intact.
Preparing Ahead of Time
To prep ahead, chop your vegetables the night before. Store them in the fridge in a sealed bag. You can also cook the chicken mixture beforehand. Just reheat it before serving. For quick assembly, set up a wrap station. Have your lettuce, chicken, and garnishes ready. This way, everyone can make their own wraps quickly.
FAQs
What are the best lettuce types for wraps?
I love using butter lettuce and romaine lettuce for my wraps.
- Butter Lettuce: It is soft and has a nice shape.
- Romaine Lettuce: It is crisp and sturdy, perfect for holding fillings.
These types make the wraps easy to handle. They also add a fresh taste.
Can I make Asian Chicken Lettuce Wraps ahead of time?
Yes, you can prep the ingredients in advance.
- Cook the chicken mix and store it in the fridge.
- Wash and separate the lettuce leaves, ready for serving.
This way, you save time when serving. Just assemble, and you’re good to go!
What should I serve with my lettuce wraps?
I suggest a few tasty side dishes and sauces to go with your wraps.
- Rice: Steamed jasmine or brown rice pairs well.
- Dipping Sauces: Soy sauce, hoisin sauce, or peanut sauce add flavor.
These options enhance the meal and make it more satisfying.
Where does the recipe for Asian Chicken Lettuce Wraps come from?
This dish has roots in Asian cuisine, often served in restaurants.
It became popular in the U.S. for its fresh taste and fun presentation.
You can find it in many cookbooks and online recipes today.
Asian Chicken Lettuce Wraps are fun, tasty, and easy to make. We covered key ingredients, step-by-step cooking, and helpful tips. You can mix things up with different proteins and veggies. Storing leftovers is simple, too. This dish is perfect for quick meals or impressing guests. Use the recipe and ideas to create your own version. Enjoy every bite, and share your creations!
 link for all details! Asian Chicken Lettuce Wraps are fun, tasty, and easy to make. We covered key ingredients, step-by-step cooking, and helpful tips. You can mix things up with different proteins and veggies. Storing leftovers is simple, too. This dish is perfect for quick meals or impressing guests. Use the recipe and ideas to create your own version. Enjoy every bite, and share your creations!](https://dishtreats.com/wp-content/uploads/2025/07/cde1ffe3-32d5-41af-a230-f4c5c520fc8a-300x300.webp)

![To make loaded Greek fries, you need fresh and tasty ingredients. Here’s what you need: - 4 large Russet potatoes - 1/4 cup olive oil - 1 teaspoon garlic powder - 1 teaspoon paprika - Salt and pepper to taste - 1 cup crumbled feta cheese - 1 cup cherry tomatoes, halved - 1/2 cup Kalamata olives, pitted and sliced - 1/2 cucumber, diced - 1/4 red onion, finely chopped - Fresh parsley, chopped for garnish - 1/2 cup tzatziki sauce You can get creative with your fries! Here are some tasty toppings to try: - Sliced jalapeños for heat - Chopped bell peppers for crunch - Grilled chicken or lamb for protein - Avocado for creaminess Season your fries to boost flavor! Here are some ideas: - Oregano adds a nice herbal flavor. - Lemon zest gives a fresh, zesty touch. - Red pepper flakes can spice things up. - Dill pairs well with tzatziki and adds brightness. These ingredients and toppings make loaded Greek fries a fun and easy dish. You can mix and match to fit your taste. Enjoy cooking with this Full Recipe! To start, wash four large Russet potatoes. Make sure to scrub them well. Next, cut the potatoes into thin fries, about 1/4 inch thick. This size helps them cook evenly. Place the cut fries in a large bowl. Drizzle 1/4 cup of olive oil over them. Add 1 teaspoon of garlic powder and 1 teaspoon of paprika. Sprinkle salt and pepper to taste. Toss the fries. Make sure every fry gets coated well. Now it's time to bake. Preheat your oven to 425°F (220°C). Spread the seasoned fries on a baking sheet lined with parchment paper. Try to keep them in one layer. This helps them get crispy. Bake for 25 to 30 minutes. Remember to flip them halfway through. Look for a golden brown color when they are done. While the fries bake, prepare the toppings. In a medium bowl, mix 1 cup of halved cherry tomatoes, 1/2 cup of sliced Kalamata olives, 1/2 diced cucumber, and 1/4 cup of finely chopped red onion. Drizzle a bit of olive oil over this mix. Add salt and pepper to taste, then gently combine. When the fries are ready, pull them out of the oven. Immediately sprinkle 1 cup of crumbled feta cheese on top. Next, add your prepared veggie mix. Finally, add a generous dollop of tzatziki sauce on top. For a nice finish, sprinkle chopped fresh parsley for color. Enjoy your Loaded Greek Fries! You can find the full recipe [here]. To make the best fries, start with the right potatoes. I prefer Russet potatoes for their starchiness. Cut your fries thin, around 1/4 inch thick. This helps them cook evenly and get crispy. Soak the cut fries in cold water for at least 30 minutes. This removes extra starch and aids crispiness. After soaking, dry them well with a towel. Coat the fries with olive oil and seasonings. Bake at 425°F (220°C) for 25-30 minutes. Remember to flip them halfway through for an even crunch. Great flavor makes all the difference. I love using garlic powder and paprika for a warm, savory taste. Add salt and pepper to taste. You can also try adding dried oregano or thyme for a Greek touch. Don't be afraid to experiment! Mix your favorite spices into the oil before coating the fries. This will infuse flavor right into the fries. For an extra kick, add some chili powder or cayenne pepper. Presentation matters when serving Loaded Greek Fries. Serve them on a large platter for a fun look. Drizzle extra Tzatziki sauce over the top for a creamy touch. Use fresh parsley to add color and freshness. You can also add slices of lemon for a pop of brightness. For easy serving, provide toothpicks or small forks. This makes it fun for guests to enjoy! For the full recipe, check out the detailed instructions above. {{image_4}} You can make Loaded Greek Fries vegetarian by skipping the meat toppings. The base is already rich with flavor. Use extra toppings like roasted red peppers or artichoke hearts. You can also add a variety of cheeses, like goat cheese or mozzarella, for a creamy twist. These options keep the dish hearty and satisfying. If you want to add protein, consider grilled chicken or shrimp. Both pair well with the Greek flavors. Gyro meat is another great choice. Cook it until it's crispy and flavorful. You can also try chickpeas for a plant-based protein. They add a nice crunch and boost the nutrition. Different regions of Greece offer unique flavors. From the island of Crete, you can add capers and mint for a fresh taste. In the north, try adding smoked paprika for depth. From the Peloponnese, olives and citrus zest can give a bright flavor. Mix and match these ingredients for your own twist on Loaded Greek Fries. For the full recipe, check out the complete guide on Loaded Greek Fries. To keep your loaded Greek fries fresh, let them cool first. Place them in an airtight container. If you have toppings like tomatoes or cucumbers, store them separately. This keeps everything crisp. When you want to enjoy your leftovers, preheat your oven to 375°F (190°C). Spread the fries on a baking sheet. Heat for about 10-15 minutes until hot and crispy. Avoid microwaving them, as this can make them soggy. These loaded Greek fries last about 2-3 days in the fridge. Make sure they are in an airtight container. If you notice any change in smell or texture, it’s best to toss them. Enjoy them fresh for the best taste! I recommend using Russet potatoes for Loaded Greek Fries. They are starchy and fluffy, which gives you that nice, crispy texture when baked. Their skin adds a great crunch, too. Yukon Gold potatoes also work well. They are creamier, which can add a different taste. Yes, you can prepare the fries ahead of time! Cut the potatoes and soak them in water to keep them fresh. This step removes some starch and helps them crisp up better. When you are ready to cook, just dry them off and season them. Bake them fresh for the best taste. Loaded Greek Fries go well with many dishes. They are great alongside grilled meats like chicken or lamb. You can serve them with a fresh Greek salad for a light meal. They also pair nicely with tzatziki, which adds a cool contrast to the warm fries. Enjoy them as a fun snack at gatherings or parties! For a complete experience, check out the Full Recipe to guide you through making these tasty fries. Loaded Greek fries are a fun dish packed with flavors. We explored key ingredients, optional toppings, and tasty seasonings. I shared step-by-step instructions to prepare and bake your fries, then assemble them perfectly. I offered tips for crispy fries and smart presentation ideas. You can even customize your dish with vegetarian options or protein toppings from various Greek regions. Finally, I outlined storage tips to keep leftovers fresh. Enjoy making these fries; they are sure to impress everyone!](https://dishtreats.com/wp-content/uploads/2025/06/9c6541bd-b31d-423a-b196-3f6ab3dd7c20-768x768.webp)


![To make a true classic key lime pie, you need these key items: - 1 ½ cups graham cracker crumbs - ½ cup unsweetened coconut flakes - ⅓ cup granulated sugar - ½ cup unsalted butter, melted - 4 large egg yolks - 1 (14 oz) can sweetened condensed milk - ½ cup freshly squeezed key lime juice (approx. 12 key limes) - Zest of 2 key limes - 1 cup heavy whipping cream - 2 tablespoons powdered sugar - Lime slices and extra zest for garnish These ingredients work together to create a sweet, tangy pie that sings of sunshine. You can add some optional ingredients to enhance your pie: - Toasted coconut flakes for extra crunch - A pinch of salt to balance sweetness - Lime zest for a stronger lime flavor These add-ons can make your pie even more delightful. If you're missing an ingredient, here are some easy swaps: - Use regular lime juice instead of key lime juice. It will taste different but still good. - Swap graham cracker crumbs with crushed vanilla wafers for a unique flavor. - Replace heavy cream with whipped topping for a lighter version. These substitutions can help you prepare the pie with what you have. For the exact steps, check out the Full Recipe. First, preheat your oven to 350°F (175°C). This step is key for a great crust. In a medium bowl, mix the graham cracker crumbs, coconut flakes, and granulated sugar. Pour in the melted butter and stir until it feels like moist sand. Next, grab a 9-inch pie pan. Press the crumb mixture into the bottom and up the sides of the pan. Make sure it’s firm and even. Bake this crust for 8-10 minutes until the edges are golden. After baking, let it cool completely. Now, let’s make the filling. In a large bowl, whisk the egg yolks until they are pale yellow. Then, add the sweetened condensed milk, key lime juice, and lime zest. Whisk until everything is smooth. You want to have no lumps here! Carefully pour this lime mixture into your cooled crust. Spread it out evenly. Bake the pie for 15 minutes. The filling should be set but still a bit jiggly in the center. After baking, take it out and let it cool at room temperature. Once it’s cool, put the pie in the fridge for at least 2 hours. This chilling time makes it even tastier! For the full recipe, check out the details above! To get the best texture and flavor in your Key Lime Pie, follow a few simple tips: - Use Fresh Key Limes: Fresh key limes give a bright taste. They also add a nice zing. - Whisk Egg Yolks Well: Whisk the yolks until they are pale. This helps create a smooth filling. - Don’t Overbake: Bake the filling until it is just set. It should still jiggle a bit in the middle. - Chill Properly: Let the pie cool at room temp before refrigerating. This step enhances the flavor. Some mistakes can ruin your pie. Here are a few to watch out for: - Skipping the Zest: The zest adds flavor and aroma. Don’t skip it! - Using Cold Ingredients: Let your ingredients reach room temperature. This helps them mix better. - Overmixing the Filling: Whisk just until combined. Overmixing can create bubbles in the filling. - Not Cooling the Crust: Always cool the crust completely before adding the filling. A warm crust can make the filling runny. Having the right tools makes cooking easier and more fun: - 9-inch Pie Pan: This is the perfect size for your Key Lime Pie. - Mixing Bowls: Use medium and large bowls for mixing your crust and filling. - Electric Mixer: This helps you whip the cream to stiff peaks easily. - Zester or Grater: A good zester is key for getting the lime zest just right. These tips and tools will help you create a perfect Key Lime Pie every time. For the full recipe, check out the [Full Recipe]. {{image_4}} You can change up the crust for your Key Lime Pie. Here are some fun ideas: - Graham Cracker Crust: This is the classic choice. It’s sweet and crunchy. - Oreo Crust: Use crushed Oreos instead of graham crackers for a chocolate twist. - Nut Crust: Ground almonds or pecans add a nice nutty flavor. Mix them with butter and a bit of sugar. - Coconut Crust: Use shredded coconut for a tropical feel. It pairs well with the lime. Want to try something different? Here are some tasty twists: - Mango Key Lime Pie: Add pureed mango to the filling for a fruity kick. - Berry Key Lime Pie: Mix in fresh berries like strawberries or blueberries for color and flavor. - Coconut Key Lime Pie: Stir in coconut milk for a creamier texture and tropical taste. - Chocolate Key Lime Pie: Add melted chocolate to the filling for a rich, sweet layer. Making your pie look great can be fun. Here are some ideas: - Whipped Cream Topping: Spread whipped cream on top. Use a spatula to make swirls. - Garnish with Lime: Add lime slices or zest for a pop of color. - Serve in Mason Jars: For a fun twist, serve individual portions in jars. - Add Fresh Berries: Place berries around the pie for extra flair. For the full recipe, check out the Zesty Classic Key Lime Pie . To keep your key lime pie fresh, cover it tightly with plastic wrap or aluminum foil. This prevents the pie from absorbing fridge odors. Store it in the fridge for up to three days. Make sure to slice the pie before storing to make it easier to serve later. You can freeze key lime pie if you want to save some for later. First, let the pie cool completely after baking. Wrap the pie tightly in plastic wrap and then in aluminum foil. This double wrapping helps prevent freezer burn. You can freeze it for up to three months. Just remember to label it with the date. To enjoy your frozen key lime pie, move it from the freezer to the fridge. Let it thaw overnight. If you're in a hurry, you can leave it at room temperature for about two hours. Do not microwave it, as this can change the texture. Once thawed, you can add fresh whipped cream or lime zest for extra flavor before serving. Yes, you can use regular limes. Key limes are smaller and more fragrant. They have a tart flavor that makes the pie special. If you use regular limes, the pie will taste a bit different but still good. You might want to adjust the sugar to balance the flavor. You can keep key lime pie in the fridge for up to three days. Cover it well to prevent it from drying out. If the pie has whipped cream on top, eat it within two days. The cream can lose its texture after that. You can use coconut cream or a dairy-free option. If you need a lighter option, try using yogurt. For a richer flavor, you can also use mascarpone cheese. Each choice will change the taste and texture a bit, but they all work well in this recipe. Check the [Full Recipe] for more details. In this post, we explored the key ingredients for classic Key Lime Pie, from crust to filling. I shared step-by-step instructions for baking. We discussed tips to avoid common mistakes and explored variations for flavor and presentation. Additionally, we covered how to store and reheat leftovers effectively. Key Lime Pie is simple to make and delightful to share. Enjoy creating your version and savor each bite. When you follow these tips, your pie will shine!](https://dishtreats.com/wp-content/uploads/2025/07/bf504450-0d09-4d53-b035-55d87c168019-768x768.webp)

